
The Graco 5-in-1 crib offers versatility, safety, and convenience, converting from a crib to a toddler bed, daybed, and full-size bed with optional storage solutions.
Overview of the Graco 5-in-1 Convertible Crib
The Graco 5-in-1 Convertible Crib is a versatile and adaptive furniture solution designed to grow with your child. Available in multiple non-toxic finishes, it offers a seamless transition from a crib to a toddler bed, daybed, and full-size bed. Additionally, it features a spacious drawer for storage, making it a practical and stylish choice for nurseries. Its reversible headboard and customizable artwork panel add personalization options, ensuring it fits any nursery decor.
Key Features and Benefits
The Graco 5-in-1 crib combines durability and style, adapting to your child’s growth. Made from high-quality materials, it ensures long-lasting use. The crib features a sleek design and a spacious drawer for storage. Its neutral color options blend seamlessly with any nursery decor, making it a practical and elegant choice for parents seeking a versatile furniture solution.

Safety Features of the Graco 5-in-1 Crib
The Graco 5-in-1 crib prioritizes child safety with GREENGUARD Gold Certification, ensuring non-toxic finishes and compliance with JPMA standards for a secure environment.
GREENGUARD Gold Certification
The Graco 5-in-1 crib holds GREENGUARD Gold Certification, ensuring its materials meet rigorous emissions standards for chemical exposure and volatile organic compounds (VOCs). This certification guarantees a safer indoor air quality for your baby, aligning with global health standards and providing peace of mind for parents seeking non-toxic nursery solutions.
Non-Toxic Finishes and Materials
The Graco 5-in-1 crib features non-toxic finishes and materials, ensuring a safe environment for your baby. Constructed from high-quality, durable woods like solid reclaimed New Zealand Pine, the crib undergoes rigorous testing to meet or exceed global safety standards. The non-toxic finishes are baby-safe and available in multiple styles to complement any nursery decor, providing both functionality and aesthetic appeal.
Compliance with JPMA Standards
The Graco 5-in-1 crib adheres to JPMA (Juvenile Products Manufacturers Association) standards, ensuring it meets rigorous safety and quality requirements. This certification guarantees that the crib passes tests for structural integrity, mattress support, and hazard prevention, providing parents with confidence in its reliability and safety for their child’s well-being and development.
Assembly Instructions for the Graco 5-in-1 Crib
The Graco 5-in-1 crib includes detailed instructions for easy assembly. A QR code links to the BILT app for 3D interactive guidance, ensuring a smooth setup process with all necessary tools and hardware provided.
Step-by-Step Assembly Process
Begin by carefully unpacking and organizing all components. Read the instruction manual thoroughly. Identify and sort hardware by type. Use the BILT app via the QR code for 3D guidance. Start with the crib frame, attaching legs and side rails securely. Next, assemble the drawer and attach it to the base. Finally, place the mattress support and ensure all connections are tight. Double-check for stability and safety compliance before use.
Required Tools and Hardware
The Graco 5-in-1 crib requires an Allen wrench (provided) and a screwdriver for assembly. Ensure all bolts, screws, and cam locks are included in the hardware package. Additional tools like a rubber mallet may aid in tightening without stripping screws. The BILT app, accessible via the QR code, offers 3D interactive guidance to simplify the process. Organize all parts before starting to ensure efficiency and accuracy.
QR Code and BILT App for 3D Interactive Instructions
The Graco 5-in-1 crib includes a QR code linking to the BILT app, providing 3D interactive assembly guidance. This feature allows users to visualize each step, ensuring accurate and efficient installation. The app is free, user-friendly, and accessible via smartphone or tablet, making complex instructions straightforward and reducing assembly time significantly for a stress-free experience.

Choosing the Right Mattress for the Graco 5-in-1 Crib
Ensure a safe and comfortable sleep environment by selecting a mattress that fits snugly, is breathable, and meets safety standards for your baby’s well-being.
Recommended Mattress Size and Thickness
A mattress measuring 52″ x 27.95″ and 5-6 inches thick is ideal for the Graco 5-in-1 crib, ensuring a snug fit. This size accommodates all configurations, from crib to full-size bed, while maintaining safety and comfort. The thickness provides adequate firmness and support, crucial for a baby’s growing needs. Always check manufacturer guidelines for specific recommendations.
Breathable and Safe Mattress Options
Choose a breathable mattress with non-toxic materials and moisture-wicking fabrics to ensure airflow and temperature regulation. Opt for GREENGUARD Gold Certified mattresses, which meet strict emissions standards. A firm, snug-fitting mattress is essential for safety, preventing gaps that could trap your baby. Look for eco-friendly options made from organic cotton or plant-based foam for a healthier sleep environment.

Converting the Crib to Different Configurations
The Graco 5-in-1 crib adapts to your child’s growth, converting seamlessly from a crib to a toddler bed, daybed, and full-size bed.

Transitioning to a Toddler Bed
Transitioning the Graco 5-in-1 crib to a toddler bed is straightforward. Remove one side panel and attach the toddler rail, ensuring safety and accessibility. This conversion allows your child to climb in and out independently, making it a smooth transition to toddlerhood while maintaining the crib’s sturdy design and non-toxic finishes.
Converting to a Daybed
Converting the Graco 5-in-1 crib to a daybed involves removing the front rail and replacing it with the daybed conversion panel. This creates a comfortable seating option for lounging or napping while maintaining the crib’s original stability and style. The process is simple, requiring minimal tools, and ensures a seamless transition to meet your child’s growing needs.
Setting Up a Full-Size Bed
Converting the Graco 5-in-1 crib to a full-size bed involves attaching the headboard and footboard using conversion rails. Ensure all bolts are securely tightened for stability. The mattress should fit snugly within the frame. Follow the provided instructions for precise assembly, and double-check all connections to ensure safety and durability for long-term use.
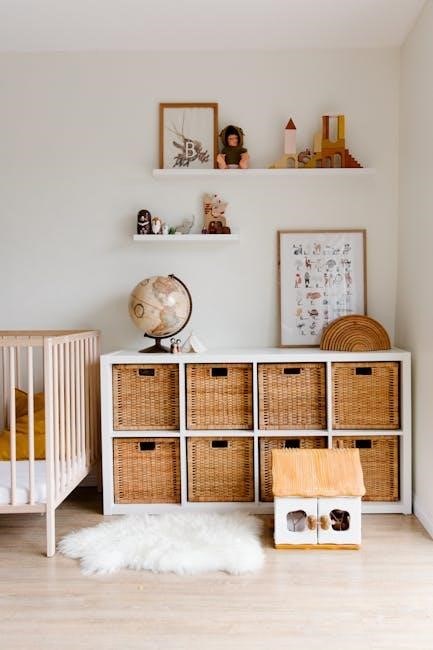
Storage Solutions with the Graco 5-in-1 Crib
The Graco 5-in-1 crib offers ample storage with a spacious drawer, perfect for nursery essentials like diapers, clothes, and toys, keeping everything organized and within reach.
Spacious Drawer for Nursery Essentials
The Graco 5-in-1 crib features a generously sized drawer, ideal for storing diapers, baby clothes, and nursery supplies. Its smooth-gliding mechanism ensures easy access, while the large capacity keeps essentials organized and within reach. This convenient storage solution helps maintain a clutter-free nursery, making daily tasks more efficient for parents. The drawer is designed to complement the crib’s overall style and functionality, ensuring a seamless integration into any nursery decor.
Additional Storage Ideas
Beyond the built-in drawer, consider adding storage bins, baskets, or shelves nearby to keep toys, clothes, and accessories organized. Utilize wall-mounted storage units or under-bed containers to maximize space. These additions complement the crib’s functionality, ensuring a clutter-free nursery while maintaining a stylish and efficient environment for your baby’s essentials.

Maintenance and Cleaning Tips
Regularly clean the crib with a mild detergent and soft cloth. Avoid harsh chemicals to preserve the finish. Inspect hardware and tighten loose parts as needed.
Cleaning the Crib and Drawer

Use a mild detergent and soft cloth to clean the crib and drawer. Avoid harsh chemicals to maintain the non-toxic finish. Wipe down all surfaces gently, ensuring no moisture seeps into gaps. For stubborn stains, lightly scrub with a damp cloth. Allow the crib to air dry thoroughly before reuse. Regular cleaning ensures a safe and hygienic environment for your baby.
Maintaining the Finish and Hardware
Regularly inspect the crib’s hardware for tightness and lubricate moving parts with silicone spray. Dust with a soft cloth and avoid abrasive cleaners or polishes. For the finish, gently wipe with a damp cloth and dry immediately. Avoid exposure to direct sunlight to prevent fading. Follow manufacturer guidelines for maintaining the non-toxic, GREENGUARD Gold Certified finish, ensuring durability and safety for years.
Customization Options
Personalize your Graco 5-in-1 crib with a reversible headboard and customizable artwork panel, allowing you to match it with other nursery furniture for a cohesive look.
Reversible Headboard and Customizable Artwork Panel
The Graco 5-in-1 crib features a reversible headboard, offering two distinct styles in one design, and a customizable artwork panel. This allows parents to personalize the crib’s appearance, creating a unique and cohesive nursery theme. The reversible headboard provides flexibility for changing decor preferences, while the artwork panel adds a personal touch without additional costs or complexity.
Matching with Other Nursery Furniture
The Graco 5-in-1 crib seamlessly integrates with other nursery furniture, offering a cohesive look. It pairs perfectly with the Graco Story Changing Table and customizable chest, creating a harmonious design. Available in multiple finishes, it matches various nursery styles, ensuring a unified aesthetic. This compatibility allows parents to build a coordinated nursery, enhancing both functionality and visual appeal effortlessly.
Troubleshooting Common Issues
The Graco 5-in-1 crib may face assembly or hardware issues. Refer to the manual or BILT app for guidance. Contact customer support if issues remain unresolved.
Addressing Assembly Challenges
Common assembly issues include hardware misalignment or missing parts. Use the QR code and BILT app for 3D guidance. Ensure all pieces are identified before starting. If stuck, refer to the downloadable manual or contact Graco support for assistance. Double-check instructions to avoid errors and ensure a secure, stable structure for your child’s safety.

Resolving Hardware or Part Issues
If hardware or parts are missing or damaged, refer to the model number on the product sticker to identify and order replacements. Use the BILT app or downloadable manual for part identification. Contact Graco customer support for assistance with faulty components. Ensure all parts are correctly matched to avoid assembly errors and maintain safety standards for your child’s crib.
The Graco 5-in-1 crib stands out for its safety, versatility, and durability, offering a reliable solution for parents seeking a long-lasting, adaptable crib for their child’s growth.
Final Thoughts on the Graco 5-in-1 Crib
The Graco 5-in-1 crib is a standout choice for parents, offering unmatched versatility, safety, and style. Its ability to adapt to different growth stages ensures long-term value, while its non-toxic finishes and GREENGUARD certification provide peace of mind. With customizable options and ample storage, it seamlessly integrates into any nursery, making it a practical and elegant investment for years to come.
Customer Satisfaction and Recommendations
Customers praise the Graco 5-in-1 crib for its durability, easy assembly, and stylish design. Many recommend it for its versatility and value, noting it grows seamlessly with their child. The spacious drawer and customizable features are particularly highlighted, making it a top choice for nurseries. Parents appreciate the clear instructions and eco-friendly materials, ensuring safety and satisfaction.
Additional Resources
Find downloadable manuals, assembly videos, and interactive guides for the Graco 5-in-1 crib, ensuring a smooth setup and optimal use of its features and configurations.
Downloadable Instruction Manuals
Graco provides comprehensive downloadable manuals for the 5-in-1 crib, offering detailed step-by-step assembly guides, safety tips, and configuration instructions. Visit the official Graco website or scan the QR code in the product packaging to access these resources. The manuals are available in PDF format, ensuring easy access and printing for convenient reference during setup and use.
Assembly Videos and Tutorials
Graco offers assembly videos and tutorials to guide you through the setup process of the 5-in-1 crib. These resources are available on platforms like YouTube and the official Graco website. Additionally, the BILT app provides 3D interactive instructions for a more immersive assembly experience. These tools ensure clarity and confidence when assembling your crib, making the process straightforward and stress-free.