utility pole guide wire

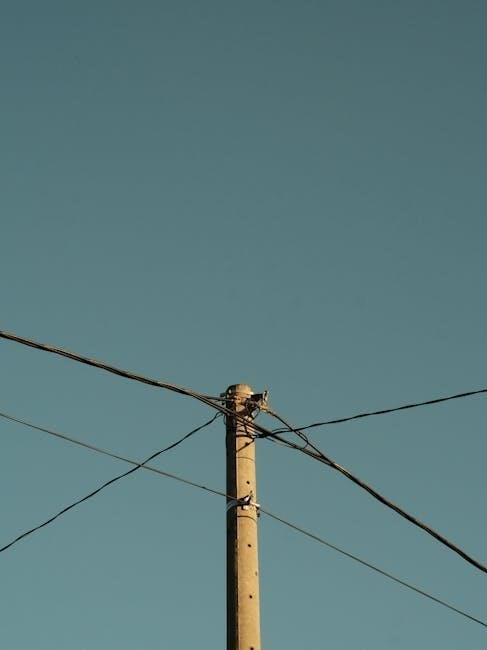
Utility Pole Guide Wire: A Comprehensive Guide

Utility pole guide wires are crucial for stabilizing poles‚ ensuring reliable power delivery and communication networks‚ utilizing materials like galvanized steel and adhering to ASTM A475 standards.

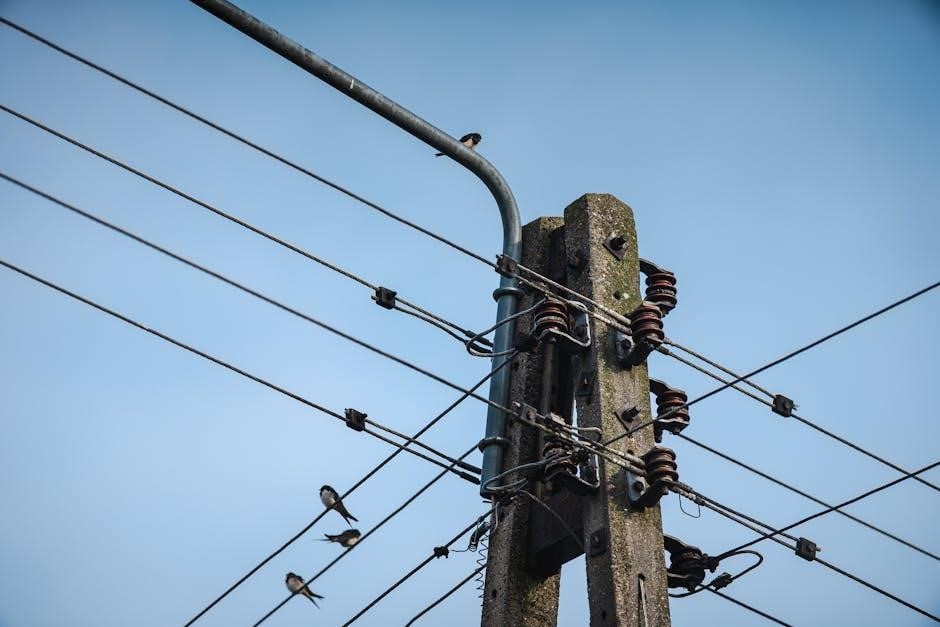
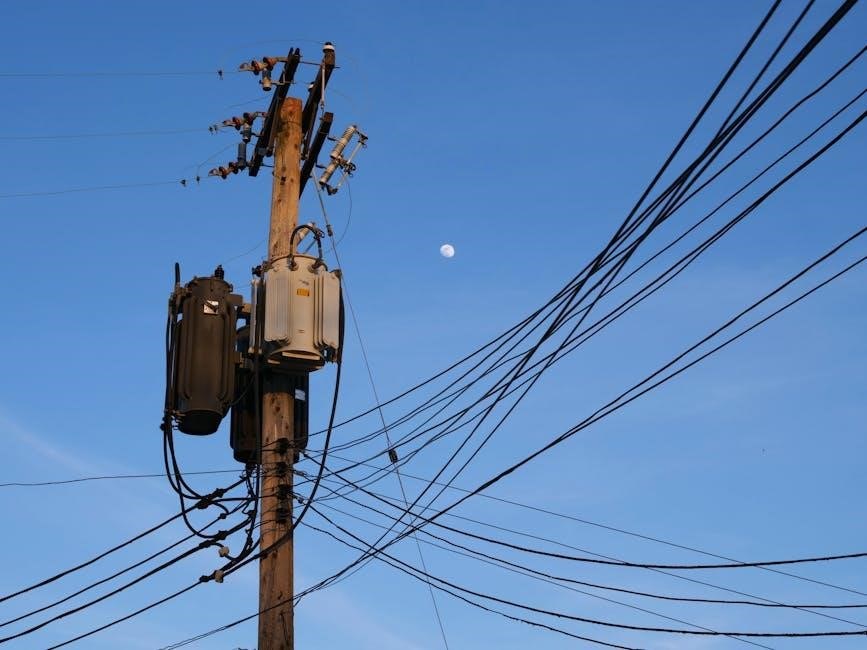
Utility pole guide wires‚ often referred to as guy wires‚ represent a fundamental component in the structural integrity of utility pole installations. These wires provide essential support‚ counteracting forces from wind‚ ice‚ and the weight of attached equipment – conductors‚ transformers‚ and communication lines. Constructed from materials like galvanized steel‚ stainless steel‚ or composite-coated steel‚ they are designed for durability and strength‚ frequently meeting ASTM A475 standards for extra high strength (EHS) wire.

Their primary function is to stabilize poles‚ preventing leaning or collapse‚ and ensuring the continuous and safe delivery of vital services. Proper installation‚ adhering to regulations like NESC Rule 234B2 regarding clearances‚ is paramount for public safety and reliable infrastructure performance. Understanding these wires is key to maintaining a robust and dependable utility network.

Purpose of Guide Wires

The core purpose of guide wires is to provide structural support to utility poles‚ enhancing their stability against various external forces. These forces include wind loads‚ the accumulation of ice and snow‚ and the inherent weight of the equipment mounted on the pole – such as conductors‚ transformers‚ and communication cables. By strategically anchoring the pole with tensioned wires‚ guide wires prevent leaning‚ twisting‚ and potential collapse.

This stabilization is critical for maintaining the continuous and safe operation of power and communication networks. Furthermore‚ guide wires contribute to the overall reliability of the infrastructure‚ minimizing service disruptions. Proper installation‚ adhering to safety clearances like those outlined in NESC Rule 234B2‚ is essential to prevent hazards and ensure long-term performance.

Types of Guide Wire Materials

Guide wires are manufactured from several materials‚ each offering distinct advantages depending on the application and environmental conditions. Galvanized steel guide wire is a common and cost-effective choice‚ providing good strength and corrosion resistance. Stainless steel guide wire offers superior corrosion protection‚ making it ideal for harsh environments‚ though it’s typically more expensive.

A third option‚ composite coated steel guide wire‚ combines the strength of steel with an added layer of protection against the elements. Ultra-high strength steel‚ meeting ASTM A475 standards‚ is frequently used where maximum tensile strength is required. The selection depends on factors like budget‚ expected lifespan‚ and the level of environmental exposure.

Galvanized Steel Guide Wire

Galvanized steel guide wire represents a widely utilized and economically viable solution for supporting utility poles. The galvanization process involves coating steel with a protective layer of zinc‚ significantly enhancing its resistance to corrosion and extending its service life. This makes it suitable for a broad range of environmental conditions‚ though not as robust as stainless steel in extremely harsh climates.

Hebei Crown Wealth specializes in producing high-quality galvanized steel guy wire. It’s a popular choice due to its balance of strength‚ durability‚ and affordability. Proper installation and periodic inspection are crucial to maintain the integrity of galvanized steel‚ ensuring long-term stability and safety for the supported infrastructure.

Stainless Steel Guide Wire

Stainless steel guide wire offers superior corrosion resistance compared to galvanized steel‚ making it ideal for challenging environments – particularly those exposed to saltwater‚ industrial pollutants‚ or harsh weather conditions. While generally more expensive upfront‚ its extended lifespan and reduced maintenance requirements often result in long-term cost savings.

Hebei Crown Wealth also manufactures stainless steel guy wire‚ meeting stringent quality standards. The alloy composition provides exceptional strength and durability. Stainless steel is a preferred choice where minimizing maintenance and maximizing reliability are paramount‚ ensuring the continued safe operation of critical utility infrastructure. Regular inspections‚ however‚ are still recommended to identify any potential issues.

Composite Coated Steel Guide Wire

Composite coated steel guide wire represents a balance between the strength of steel and the corrosion protection of composite materials. Hebei Crown Wealth produces this type‚ applying specialized coatings to galvanized steel to further enhance its resistance to environmental degradation. This coating provides a durable barrier against rust and other forms of corrosion‚ extending the wire’s service life.

This option is often more cost-effective than solid stainless steel while still offering significant improvements in longevity‚ particularly in moderately corrosive environments. The composite layer safeguards the steel core‚ maintaining its tensile strength and ensuring reliable pole stabilization. Proper installation and periodic inspections remain vital for optimal performance.

Guide Wire Standards and Regulations

Guide wire installation must adhere to strict guidelines‚ including ASTM A475 standards for strength and NESC Rule 234B2 for clearances‚ ensuring safety and reliability.

ASTM A475 Standards

ASTM A475 specifies the standards for high-strength steel wire used in guy wires supporting utility poles. This standard details requirements for tensile strength‚ elongation‚ and zinc coating quality when utilizing galvanized steel guide wire.

Meeting ASTM A475 ensures the wire can withstand substantial loads and environmental conditions‚ crucial for maintaining pole stability and preventing failures. Manufacturers like Hebei Crown Wealth utilize ultra-high strength steel that conforms to these rigorous specifications.

Adherence to this standard is paramount for safety and reliability in electrical distribution systems‚ guaranteeing the guide wire possesses the necessary mechanical properties for long-term performance and structural integrity.

NESC Rule 234B2 Clearance Requirements

NESC Rule 234B2 establishes minimum vertical clearance requirements for wires and cables near utility structures. Specifically‚ it mandates a 4.5-foot clearance from any part of a lighting or traffic signal support‚ or another line’s supporting structure.

However‚ an exception exists for effectively grounded guys and messengers‚ alongside insulated communication conductors and cables‚ allowing for reduced clearances. This rule is vital for preventing accidental contact and ensuring public safety around energized equipment.

Proper adherence to NESC Rule 234B2 is a critical component of safe utility pole installations and maintenance‚ minimizing the risk of electrical hazards and maintaining the integrity of the power grid.

Wisconsin Public Service Electric Distribution Standards

Wisconsin Public Service maintains stringent electric distribution standards for guide wire installations‚ prioritizing safety and reliability. These standards detail proper material specifications‚ emphasizing components rated for use with 3/8 inch Extra High Strength (EHS) guy wire.

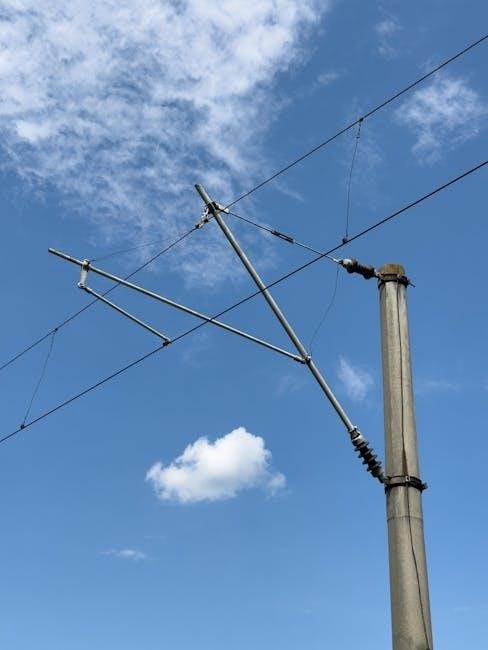
A key aspect of these standards focuses on the correct placement of strain insulators‚ as detailed in Std G80. Proper insulator positioning is crucial for preventing conductor damage and maintaining electrical isolation.

Compliance with these standards ensures that all guide wire installations within Wisconsin Public Service’s service territory meet rigorous quality and safety benchmarks‚ safeguarding both the public and the electrical infrastructure.

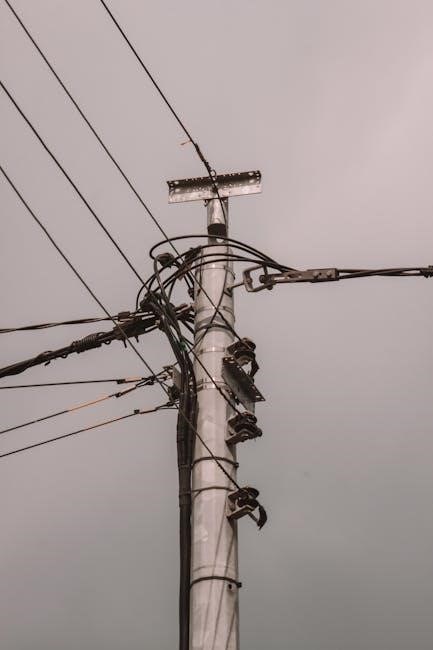
Guide Wire Installation and Considerations

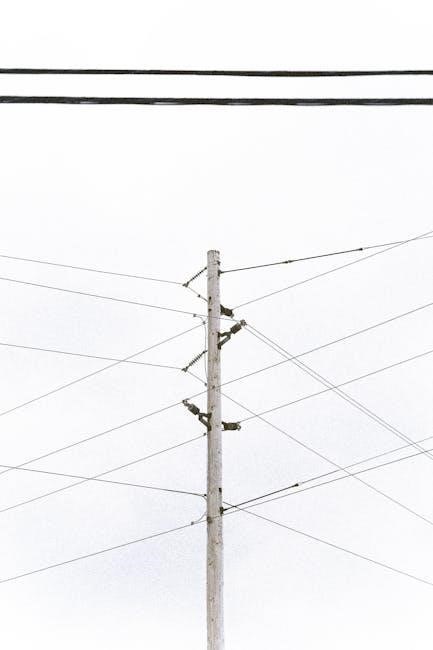
Guide wire length and thickness depend on the pole’s height and load‚ with three-stranded guy wires commonly used for a standard 10-foot utility pole.

Determining Guide Wire Length and Thickness

Calculating the appropriate guide wire length and thickness is paramount for ensuring pole stability and safety. This determination hinges on several factors‚ primarily the pole’s height and the anticipated load it will bear. A standard utility pole is generally considered to be 10 feet in height‚ influencing initial wire estimations.

However‚ simply knowing the height isn’t sufficient. Engineers and linemen must also account for the pole’s weight‚ the weight of attached equipment (transformers‚ conductors‚ etc.)‚ and environmental loads like wind and ice. These factors dictate the necessary tensile strength of the wire. Utilizing three-stranded guy wires is a common practice‚ providing increased strength and redundancy. Precise calculations‚ often employing principles of physics and engineering‚ are essential to prevent pole failure and maintain service reliability.

Standard Pole Height (10 feet) and Wire Requirements

When dealing with a standard 10-foot utility pole‚ specific guide wire requirements come into play to guarantee structural integrity. Typically‚ for poles of this height‚ the industry standard leans towards utilizing 3/8 inch Extra High Strength (EHS) guy wire. This wire gauge provides a robust safety margin for common loading scenarios.

However‚ it’s crucial to remember that even with a standard height‚ variations in load – due to heavier equipment or increased wind exposure – may necessitate a thicker gauge or higher strength wire. All components‚ including strain insulators‚ must be rated for compatibility with this 3/8 inch EHS specification‚ as outlined in Wisconsin Public Service Electric Distribution Standards‚ ensuring a cohesive and reliable support system.

Using Three-Stranded Guy Wires

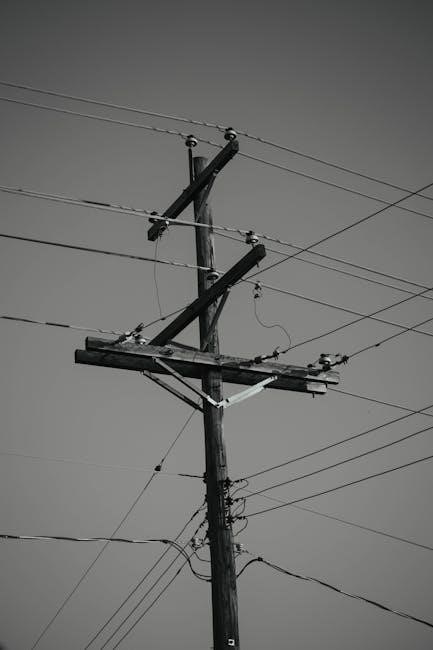
The prevalent practice in securing utility poles involves the utilization of three-stranded guy wires. This configuration isn’t arbitrary; it significantly enhances stability and load distribution compared to single-wire systems. Each strand contributes to the overall tensile strength‚ providing redundancy and mitigating the risk of failure should one strand become compromised.

This method is particularly effective for standard utility poles‚ offering a balanced support network. The three strands are strategically anchored to create a triangular support base‚ resisting forces from multiple directions. Proper tensioning of each strand is vital‚ ensuring even load sharing and preventing undue stress on any single point of the pole or its anchors. This approach is a cornerstone of safe and reliable utility infrastructure.

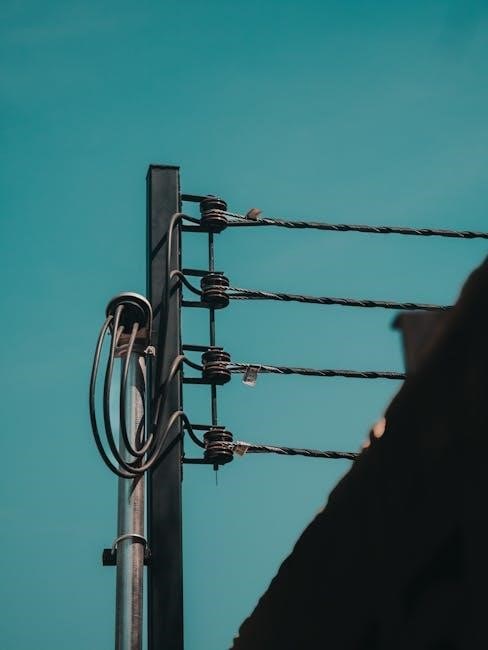
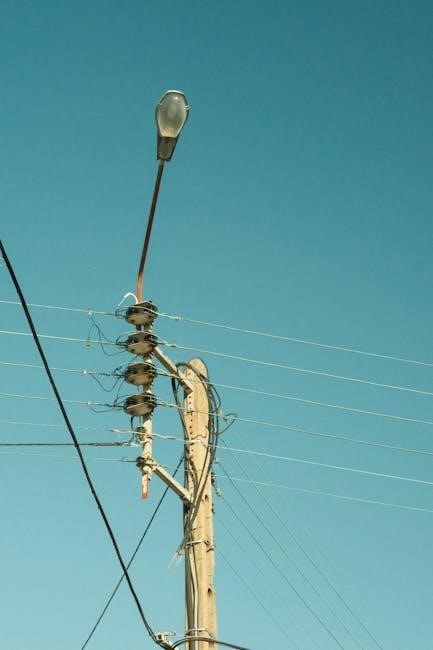
Proper Placement of Strain Insulators

Strain insulators are critical components in guide wire systems‚ serving as vital electrical isolation points. Their correct placement‚ as detailed in Wisconsin Public Service Electric Distribution Standards (Std G80)‚ is paramount for safety and system integrity. These insulators prevent the transfer of electrical current from the pole to the guy wire‚ safeguarding personnel and equipment.

They must be positioned strategically along the guy wire’s length‚ typically near the anchor point‚ to effectively interrupt any potential ground faults. Proper installation involves ensuring a secure mechanical connection and maintaining adequate clearance from grounded structures. Adhering to these standards minimizes the risk of electrocution and ensures the long-term reliability of the utility pole infrastructure.

Safety Concerns and Risks

Electrocution from copper wire theft and potential damage to critical infrastructure pose significant risks associated with utility pole guide wires‚ demanding vigilant security measures.

Electrocution Hazards – Copper Wire Theft

The theft of copper wire from utility pole guide wires presents a deadly electrocution hazard. Individuals attempting to steal this wire often lack the necessary training and safety equipment to work near energized electrical systems. Recent incidents‚ such as the case in Franklin County‚ Missouri‚ tragically demonstrate the fatal consequences of such actions.

Deputies responded to a scene where a man died from electrocution while attempting to steal copper. This highlights the extreme danger involved. Beyond the immediate risk to thieves‚ compromised guide wires can lead to pole instability and potential power outages‚ impacting entire communities. Authorities are actively pursuing charges‚ including abandonment of a corpse and damage to critical infrastructure‚ against those involved in these dangerous activities.

Critical Infrastructure Damage

Compromised utility pole guide wires‚ often due to theft or inadequate maintenance‚ pose a significant threat to critical infrastructure. Damaged or missing guide wires weaken pole stability‚ increasing the risk of pole failure‚ especially during inclement weather. This can result in downed power lines‚ disrupting electricity supply to homes‚ businesses‚ and essential services like hospitals and emergency responders.

Furthermore‚ fallen poles and lines can obstruct roadways‚ creating hazardous conditions for motorists and pedestrians. The Franklin County‚ Missouri incident‚ where a man damaged critical infrastructure during a theft attempt‚ exemplifies this danger. Repairing damaged infrastructure is costly and time-consuming‚ diverting resources from other essential projects and impacting community reliability.

Mathematical Principles in Guide Wire Installation

Linemen rely on basic algebra‚ particularly the Pythagorean Theorem‚ to accurately calculate guide wire lengths and ensure proper pole stabilization during installation and repair.

Applying Basic Algebra (Pythagorean Theorem)

The Pythagorean Theorem (a² + b² = c²) is fundamental in guide wire installation. ‘C’ represents the guide wire length (hypotenuse)‚ ‘a’ is the pole height‚ and ‘b’ is the horizontal distance from the pole to the anchor.

For example‚ if a pole is 10 feet tall (a = 10) and the anchor is 8 feet away (b = 8)‚ then c² = 10² + 8² = 164. Therefore‚ c (the wire length) equals the square root of 164‚ approximately 12.8 feet.

This calculation ensures sufficient wire length for a secure connection. Accurate measurements and calculations are vital for proper tensioning and pole stability‚ preventing failures and maintaining safety. Linemen routinely use this theorem in the field.

Guywire Installation – Part 1: Straightening Leaning Poles

Addressing a leaning power pole requires a systematic approach. Initial assessment determines the severity of the lean and the necessary corrective force. Properly installed guy wires provide this force‚ gradually returning the pole to a vertical position.

This process often involves using three-stranded guy wires‚ anchored securely at appropriate distances. Tensioning must be done incrementally and evenly across all wires to avoid overstressing the pole or anchors.

Monitoring the pole’s movement during tensioning is crucial. Safety is paramount; ensure the work area is clear and appropriate personal protective equipment is used. This initial phase establishes the foundation for a stable and reliable pole.

Guide Wire Size and Strength

3/8 inch Extra High Strength (EHS) guy wire is commonly used‚ with ultra-high strength steel meeting rigorous standards for durability and reliable support.

3/8 Inch Extra High Strength (EHS) Guy Wire

Extra High Strength (EHS) guy wire‚ specifically the 3/8 inch variety‚ represents a common and reliable choice for securing utility poles and ensuring the stability of overhead lines. Wisconsin Public Service Electric Distribution Standards explicitly call for materials rated for use with this specific size.

This wire grade offers a significant strength-to-weight ratio‚ making it ideal for resisting the forces exerted by wind‚ ice‚ and the weight of conductors. Its widespread adoption reflects a balance between cost-effectiveness and performance.

Proper installation‚ coupled with regular inspection‚ is vital to maximize the lifespan and effectiveness of EHS guy wire‚ preventing potential failures and maintaining the integrity of the utility infrastructure. It’s a foundational component in safe and dependable power delivery.

Ultra-High Strength Steel

Ultra-high strength steel represents a premium material option for utility pole guide wires‚ exceeding the capabilities of standard galvanized steel. Hebei Crown Wealth highlights its production of guy wire utilizing this advanced steel‚ ensuring compliance with stringent ASTM A475 standards.

This material delivers exceptional tensile strength‚ allowing for reduced wire diameter while maintaining equivalent or superior load-bearing capacity. This translates to lighter installations and potentially lower costs over the long term.

Its enhanced durability and resistance to corrosion contribute to extended service life and reduced maintenance requirements‚ making it a valuable investment for critical infrastructure projects demanding maximum reliability and longevity.

Maintenance and Inspection

Regular inspection protocols are vital for identifying wire degradation‚ ensuring utility pole stability‚ and preventing failures through proactive maintenance and timely replacements.

Regular Inspection Protocols

Routine visual assessments of guide wires are paramount‚ conducted ideally annually‚ and after significant weather events; Inspectors should meticulously check for signs of corrosion‚ fraying‚ or broken strands‚ particularly at anchor points and strain insulators. Documentation of each inspection‚ including date‚ findings‚ and any corrective actions taken‚ is essential for maintaining a reliable record.

Ground-level observations using binoculars can identify subtle damage. More detailed inspections may require qualified climbers equipped with appropriate safety gear. Clearance requirements‚ as defined by NESC Rule 234B2‚ must be verified during each inspection to ensure safety and compliance. Any compromised wire should be flagged for immediate repair or replacement‚ prioritizing public safety and service continuity.

Identifying and Addressing Wire Degradation

Degradation manifests as corrosion‚ often appearing as rust on galvanized steel or pitting on stainless steel guide wires. Fraying indicates internal strand breakage‚ significantly reducing wire strength. Composite coated steel wires may exhibit coating damage‚ exposing the steel to the elements. Early detection is key; regular inspections are vital.

Addressing degradation requires prompt action. Minor corrosion can sometimes be treated with protective coatings‚ but severely corroded or frayed wires must be replaced with 3/8 inch Extra High Strength (EHS) guy wire or equivalent. Replacement should adhere to established Wisconsin Public Service Electric Distribution Standards‚ ensuring proper tensioning and strain insulator placement. Ignoring degradation risks pole instability and potential critical infrastructure damage.

the crucible act 1 study guide

The Crucible Act 1: A Comprehensive Study Guide

Arthur Miller’s play, set in 1692 Salem, dramatically explores themes of power, reputation, and hypocrisy, initiating a chilling witch hunt fueled by fear and deceit.

Overview of the Historical Context

The Crucible is deeply rooted in the historical events of the Salem witch trials of 1692. These trials occurred within a strict Puritan community in colonial Massachusetts, a society governed by rigid religious beliefs and a fear of the unknown. The initial accusations, often stemming from personal disputes or societal anxieties, quickly spiraled into mass hysteria.

Several factors contributed to the outbreak, including existing tensions with Native Americans, economic hardships, and political instability. Young women, often marginalized within the community, began exhibiting strange behaviors – fits, convulsions, and accusations of being pinched or pricked by invisible forces. These behaviors were quickly attributed to witchcraft, and the accused, primarily women who deviated from societal norms, faced intense scrutiny and persecution.

The trials were characterized by spectral evidence – testimony based on visions and dreams – which was readily accepted by the court. Ultimately, nineteen individuals were hanged as witches, and many more suffered imprisonment and social ostracism. Understanding this historical backdrop is crucial to appreciating the play’s allegorical significance.

The Salem Witch Trials: Background and Causes

The Salem witch trials weren’t spontaneous; they arose from a confluence of pre-existing anxieties. Puritan society, intensely religious and believing in the literal existence of the Devil, was primed for such hysteria. Existing land disputes, political rivalries, and economic hardships within Salem Village fueled underlying tensions.

The initial accusations began with a group of young women, including Reverend Parris’s daughter Betty, exhibiting bizarre behaviors. These fits and convulsions were interpreted as signs of demonic possession, and the girls were pressured to identify the source of their affliction. Tituba, Reverend Parris’s enslaved woman, was among the first accused, likely due to her outsider status and knowledge of Caribbean folklore.

Spectral evidence – testimony about visions and dreams – played a significant role, allowing accusers to condemn individuals based on intangible “proof.” This, combined with the prevailing belief in witchcraft, created a climate of fear where anyone could be accused, and reputations were easily destroyed. The trials demonstrate how easily mass hysteria can take hold in a community gripped by fear and superstition.

Arthur Miller’s Intent: Allegory and McCarthyism

Arthur Miller wrote The Crucible in 1953, during the height of McCarthyism – a period of intense anti-communist suspicion in the United States. The play isn’t a literal retelling of the Salem witch trials, but rather an allegory for the political climate of Miller’s time. The witch hunt in Salem mirrors the relentless pursuit of suspected communists, often based on flimsy evidence and fueled by fear.

Miller used the trials to critique the dangers of mass hysteria, false accusations, and the suppression of dissent. Just as individuals were condemned in Salem based on spectral evidence, people were being blacklisted and persecuted during McCarthyism based on unsubstantiated claims of communist affiliation.

The play serves as a warning about the fragility of individual liberties and the importance of resisting conformity in the face of political pressure. By drawing parallels between the past and the present, Miller aimed to expose the dangers of ideological extremism and the devastating consequences of unchecked power.

Characters Introduced in Act 1

Key figures like Reverend Parris, Abigail Williams, and John Proctor emerge, revealing complex motivations and foreshadowing the escalating conflicts within Salem’s rigid society.

Reverend Parris: Authority and Fear

Reverend Samuel Parris is initially presented as a deeply anxious and self-concerned figure, more worried about his reputation and position within the community than the genuine well-being of his daughter, Betty. His discovery of the girls dancing in the forest, and Betty’s subsequent illness, throws him into a panic, fearing scandal and potential loss of authority.

Parris’s primary motivation throughout Act 1 is self-preservation; he relentlessly seeks to uncover the truth, not for justice, but to shield himself from blame. He readily accepts the suggestion of witchcraft, believing it will explain the inexplicable and deflect attention from his own failings as a minister. This fearfulness makes him susceptible to manipulation by Abigail Williams and others, contributing to the escalating hysteria.

He embodies the rigid, controlling nature of the Puritan theocracy, prioritizing obedience and conformity above all else. His questioning of Abigail and Betty reveals a desperate attempt to maintain control and suppress any information that could damage his standing. Ultimately, Parris represents the dangers of prioritizing personal authority over truth and compassion.

Abigail Williams: Manipulation and Desire

Abigail Williams emerges as a powerfully manipulative and deeply troubled character in Act 1, driven by a potent combination of repressed desire and a ruthless ambition for social control. Her involvement in the forbidden dancing in the forest, and the subsequent illness of Betty Parris, immediately establishes her as a central figure in the unfolding drama.

Abigail skillfully deflects blame and directs suspicion onto others, particularly Tituba, demonstrating a chilling capacity for deceit. She leverages the prevailing atmosphere of fear and superstition to her advantage, exploiting the community’s anxieties to protect herself and gain power. Her confessed attraction to John Proctor fuels her vengeful nature, as she seeks to eliminate Elizabeth Proctor, whom she views as an obstacle.

Abigail’s willingness to accuse innocent individuals highlights her moral corruption and foreshadows the devastating consequences of her actions. She embodies the destructive force of unchecked desire and the dangers of wielding power without conscience.

John Proctor: Integrity and Internal Conflict

John Proctor is presented in Act 1 as a man wrestling with profound internal conflict, striving to maintain his integrity amidst a community consumed by hysteria; He is a respected farmer, yet burdened by the guilt of a past affair with Abigail Williams, a secret that threatens to unravel his life and reputation.

Proctor’s initial reluctance to fully engage in the investigation of the girls’ affliction stems from his desire to conceal his transgression. However, his strong moral compass compels him to question Abigail’s motives and expose her lies, even at great personal risk. He recognizes the dangerous potential for manipulation and the injustice of the accusations.

His interactions with Reverend Hale reveal his skepticism towards the proceedings, while his strained relationship with Elizabeth underscores the damage caused by his infidelity. Proctor embodies the struggle between personal desires and moral responsibility, setting the stage for his pivotal role in the unfolding tragedy.

Key Plot Points of Act 1

Act 1 centers on Betty Parris’s mysterious illness, Abigail’s damaging accusations, and Reverend Hale’s arrival to investigate the potential witchcraft plaguing Salem.

The Mysterious Illness of Betty Parris

The play dramatically opens with Reverend Parris discovering his daughter, Betty, in a coma-like state. This unsettling event immediately establishes a sense of dread and mystery, captivating the audience and setting the stage for the unfolding drama. Parris’s frantic concern stems not only from paternal love but also from fear of scandal and its potential repercussions on his position within the community;

It is quickly revealed that Betty’s condition is linked to a night of forbidden dancing in the forest with her cousin Abigail Williams and other girls. This clandestine activity, involving Tituba and potentially darker practices, fuels speculation about witchcraft and demonic influence. The girls’ behavior is viewed as a grave transgression against the strict Puritanical norms of Salem, intensifying the community’s anxieties and suspicions. Betty’s inability to awaken or explain her affliction further exacerbates the growing panic, making her illness the catalyst for the ensuing witch hunt.

Abigail’s Accusations and the Start of the Witch Hunt

As fear grips Salem regarding Betty’s illness, Abigail Williams strategically begins to accuse individuals of witchcraft, initiating the devastating witch hunt. Initially, she names Tituba, the enslaved woman, exploiting the prevailing prejudices and anxieties surrounding outsiders. This accusation swiftly escalates as Abigail, driven by self-preservation and a desire for power, implicates other women, including Sarah Good and Sarah Osborne, marginalized figures within the community.

Abigail’s accusations are not based on genuine evidence but rather on personal vendettas and a calculated attempt to deflect attention from her own involvement in the forest incident. Her manipulative tactics prove remarkably effective, as the community, already primed for hysteria, readily accepts her claims. This marks a turning point in the play, transforming a personal crisis into a widespread panic and setting in motion a chain of events that will lead to tragic consequences for many innocent individuals.

The Arrival of Reverend Hale: Expert Investigation

Reverend Hale, a highly esteemed expert in witchcraft from Boston, arrives in Salem summoned to assess the situation and determine if supernatural forces are at play. He embodies intellectual authority and initially approaches the case with a firm belief in the reality of witchcraft, intending to employ his knowledge to uncover the truth. Hale’s presence signifies a shift towards a more formalized and “scientific” investigation, though one still deeply rooted in the prevailing superstitions of the time.

He questions the afflicted girls, including Abigail, attempting to discern whether their symptoms are genuine manifestations of witchcraft or products of deception. Hale’s methods, while intended to be objective, are ultimately susceptible to manipulation by Abigail and the other girls, who exploit his reliance on spectral evidence. His arrival, therefore, inadvertently legitimizes the accusations and fuels the escalating hysteria, setting the stage for the trials to come.

Themes Explored in Act 1

Act One introduces critical themes: power dynamics, the fragility of reputation, and the pervasive hypocrisy within Salem’s seemingly pious community, driving the unfolding drama.

Power and Authority: The Dynamics of Salem

In Salem, authority is rigidly structured and deeply intertwined with religious belief. Reverend Parris embodies this, prioritizing his reputation and position within the community above all else, even his daughter’s well-being. His frantic concern over Betty’s illness stems not from paternal love, but from fear of scandal and potential loss of authority.

Abigail Williams quickly demonstrates a different kind of power – the power of manipulation and control over the other girls. She exploits their fear and vulnerability to deflect blame and maintain her own standing. The court, represented by the impending arrival of Reverend Hale, holds ultimate authority, but its legitimacy is questioned by characters like John Proctor, who values individual integrity.

This dynamic reveals a society where power is easily abused and where accusations can swiftly dismantle social order, highlighting the dangers of unchecked authority and the vulnerability of those who challenge it. The play subtly suggests that even morally upright individuals can be corrupted by the allure of power.

Reputation and Social Standing: The Importance of Appearances

In Salem’s tightly-knit community, reputation is paramount, dictating social standing and influencing perceptions of morality. Characters are acutely aware of how their actions are perceived by others, and fear the consequences of scandal or disgrace. Reverend Parris’s anxieties are rooted in protecting his reputation, fearing that any hint of wrongdoing within his family will reflect poorly on him.

The Proctors, though respected, are burdened by the lingering shadow of their past affair, impacting their social standing. Abigail Williams understands the power of reputation and skillfully manipulates it, falsely accusing others to safeguard her own image and exact revenge.

The play demonstrates how easily reputations can be tarnished by false accusations, and how quickly societal judgment can condemn individuals. This emphasis on appearances underscores the hypocrisy prevalent in Salem, where outward piety often masks inner corruption and hidden sins.

Hypocrisy and False Accusations: Unmasking Salem’s Morality

Act 1 powerfully reveals the pervasive hypocrisy at the heart of Salem’s theocratic society. Characters publicly profess piety while concealing personal failings and engaging in deceitful behavior. Abigail Williams, a central figure, embodies this hypocrisy, feigning innocence while orchestrating a web of lies and accusations to protect herself and pursue John Proctor.

The accusations leveled against innocent individuals are demonstrably false, driven by personal vendettas, fear, and a desire for power. This highlights the fragility of justice and the ease with which mass hysteria can override reason and truth. Reverend Parris, concerned with his own standing, contributes to the atmosphere of suspicion and distrust.

Miller uses these instances of hypocrisy and false accusations to expose the moral decay beneath Salem’s veneer of religious righteousness, questioning the very foundations of its societal values.

Dramatic Techniques in Act 1

Miller skillfully employs irony, foreshadowing, and tense dialogue to build suspense and reveal character motivations, creating a gripping and unsettling atmosphere throughout the act.

Irony and Dramatic Tension

Act 1 is rich with dramatic irony, where the audience possesses knowledge the characters lack, heightening the tension. Abigail’s claims of piety sharply contrast with her secret, illicit activities in the forest, creating a powerful sense of hypocrisy. She accuses others of witchcraft while actively engaging in deceptive behavior herself, a central irony of the play.

This irony extends to the community’s fervent belief in divine justice, juxtaposed with the underlying personal vendettas and desires driving the accusations. The villagers seek to purify Salem, yet their actions are often motivated by selfish concerns. Miller masterfully uses dialogue to reveal these contradictions, building suspense as the truth remains obscured.

The escalating accusations and the fear of being falsely accused generate significant dramatic tension. Characters are forced to navigate a precarious situation where honesty can be as dangerous as deceit, leaving both the characters and the audience in a state of uncertainty and dread.

Foreshadowing and Building Suspense

Throughout Act 1, Miller employs subtle foreshadowing to hint at the escalating hysteria and tragic consequences to come. The mysterious illness of Betty Parris, initially presented as a medical anomaly, quickly becomes linked to supernatural causes, foreshadowing the widespread belief in witchcraft that will grip Salem.

Abigail’s manipulative nature and her willingness to accuse others to protect herself foreshadow the chaos and injustice that will unfold. Her initial lies, seemingly small, plant the seeds of distrust and set the stage for larger, more damaging accusations. The mention of Tituba’s Caribbean origins and her conjuring practices subtly introduces the element of the “other” and fuels the community’s anxieties.

The growing tension is skillfully built through the increasingly frantic questioning and the villagers’ desperate search for explanations, creating a palpable sense of dread and anticipation. Miller’s deliberate pacing and ambiguous dialogue contribute to the mounting suspense, leaving the audience questioning the true nature of events.

Dialogue as a Revealing Tool

Arthur Miller masterfully utilizes dialogue in Act 1 to expose the characters’ motivations, hidden desires, and underlying tensions within the Salem community. Conversations aren’t merely exchanges of information; they are carefully constructed revelations of character and societal flaws.

Abigail’s interactions with Parris and the other girls reveal her manipulative and deceitful nature, while her veiled references to her relationship with John Proctor hint at a forbidden passion and a desire for power. Proctor’s sharp exchanges with Reverend Hale demonstrate his skepticism and independent spirit, foreshadowing his conflict with the authority of the court.

The dialogue also highlights the hypocrisy prevalent in Salem. Characters readily accuse others of wrongdoing while concealing their own sins, creating a stark contrast between their public persona and private actions. Through these carefully crafted conversations, Miller unveils the complex web of relationships and the moral decay at the heart of the community.

act 3 macbeth study guide

Macbeth Act 3 Study Guide: Overview

Act 3 delves into Macbeth’s reign, marked by paranoia and violence as he attempts to secure his position, confronting the consequences of ambition and prophecy․

Act 3 marks a pivotal shift in Macbeth, transitioning from the planning and execution of Duncan’s murder to the repercussions of Macbeth’s actions as king․ The initial euphoria of attaining the throne quickly dissolves into a chilling atmosphere of fear and suspicion․

This act explores Macbeth’s descent into tyranny, driven by a desperate need to secure his power and fulfill the witches’ ambiguous prophecies․ Banquo’s growing awareness of Macbeth’s treachery sets the stage for further bloodshed, as Macbeth perceives him as a threat to his reign․

The banquet scene, a centerpiece of Act 3, dramatically illustrates Macbeth’s unraveling mental state and the haunting power of guilt․ Ultimately, Act 3 establishes the play’s central themes of ambition, guilt, and the corrupting influence of power․

Context of Act 3 within the Play

Act 3 represents the climax of Macbeth’s initial rise to power and the beginning of his downfall․ Following the murder of Duncan in Act 2, this act showcases Macbeth actively attempting to solidify his position as king, moving from reactive violence to proactive tyranny․

It serves as a crucial turning point, shifting the focus from the initial crime to its consequences – both internal, in Macbeth’s deteriorating mental state, and external, in the growing opposition to his rule․ The prophecies, initially sources of ambition, now fuel paranoia․

This act bridges the earlier events with the unfolding rebellion and eventual confrontation in the later acts, establishing the play’s tragic trajectory and highlighting the destructive nature of unchecked ambition․

Act 3 Scene 1: Banquo’s Suspicions

Scene 1 reveals Banquo’s growing unease regarding Macbeth’s ascent, fueled by the witches’ prophecies and a sense that Macbeth achieved kingship through foul play․

Banquo’s Soliloquy ― Initial Thoughts

Banquo’s opening soliloquy in Act 3, Scene 1, showcases his internal conflict and burgeoning suspicions about Macbeth’s path to the throne․ He reflects on the witches’ prophecies, acknowledging their accuracy regarding Macbeth’s kingship, but simultaneously questioning the implications for his own lineage․

He wonders if the witches’ prediction that his descendants will be kings will also come to fruition․ This contemplation stirs ambition within him, yet he maintains a moral compass, unlike Macbeth, and recognizes the potentially corrupting influence of such desires․ Banquo’s initial thoughts reveal a cautious optimism tempered by a growing distrust of Macbeth and the supernatural forces at play․

The Witches’ Prophecy and Banquo’s Concerns

The witches’ prophecy – that Macbeth would be king and Banquo’s heirs would reign – fuels Banquo’s anxieties․ He recognizes the fulfillment of the first part, Macbeth’s coronation, and begins to suspect foul play in its achievement․ This realization breeds concern, as he fears Macbeth may have orchestrated events to hasten the prophecy’s completion․

Banquo grapples with the temptation of ambition for his own descendants, yet remains wary of the supernatural’s influence․ He questions whether to trust the witches or to resist their allure, understanding their power to manipulate and deceive․ His concerns highlight the dangerous interplay between fate, free will, and the corrupting nature of ambition․

Macbeth’s Response to Banquo

Macbeth’s encounter with Banquo is veiled in forced cordiality, masking a deep-seated paranoia․ He attempts to appear friendly, inquiring about Banquo’s plans, but his questions are laced with suspicion and a desire to gauge Banquo’s thoughts regarding the witches’ prophecies․ This interaction reveals Macbeth’s growing insecurity and fear that Banquo poses a threat to his newly claimed throne․

He subtly probes Banquo, seeking reassurance that he doesn’t harbor any distrust․ However, Macbeth’s insincere attempts at connection only serve to heighten the tension․ This scene demonstrates Macbeth’s descent into tyranny, where even former allies are viewed with suspicion and become targets of his ruthless ambition․

Foreshadowing of Banquo’s Fate

Throughout Act 3, Scene 1, subtle yet ominous foreshadowing hints at Banquo’s impending doom․ His contemplation of the witches’ prophecies, specifically the line about his descendants becoming kings, immediately marks him as a potential obstacle to Macbeth’s secure reign․ Macbeth’s increasingly pointed questions and veiled threats directed towards Banquo further amplify this sense of foreboding․

The atmosphere of suspicion and Macbeth’s barely concealed anxiety create a palpable tension, signaling that Banquo is in grave danger․ The very fact that Macbeth dwells on Banquo’s lineage suggests a plan to eliminate this threat, making Banquo’s fate tragically predictable․

Act 3 Scene 2: Macbeth’s State of Mind

Macbeth, now king, is consumed by fear and insecurity, plotting Banquo’s murder to eliminate a perceived threat to his power and future․

Macbeth and Lady Macbeth ⎻ A Shifting Dynamic

In Act 3, Scene 2, the relationship between Macbeth and Lady Macbeth undergoes a significant transformation․ Previously, Lady Macbeth was the driving force behind their ambition and the initial murders, actively manipulating Macbeth․ Now, Macbeth takes the initiative, independently planning Banquo’s assassination without consulting her․

This shift indicates Macbeth’s growing confidence – and descent into tyranny – as king․ He no longer needs her prompting, but rather operates from his own paranoia and desire for absolute security․ Lady Macbeth, while still supportive, is relegated to a more passive role, offering counsel but lacking the previous control․

This evolving dynamic foreshadows their eventual estrangement and highlights the corrosive effect of guilt and unchecked ambition on their marriage;

Macbeth’s Plans for Banquo and Fleance

Driven by the witches’ prophecy that Banquo’s descendants will become kings, Macbeth resolves to eliminate both Banquo and his son, Fleance․ He fears Banquo’s noble character and the potential threat his lineage poses to his own reign․ Unlike his impulsive murder of Duncan, Macbeth meticulously plans Banquo’s assassination, hiring murderers to carry out the deed․

Macbeth emphasizes to the murderers that Banquo is responsible for all his troubles, fueling their motivation․ He specifically instructs them to kill Fleance as well, ensuring the prophecy cannot be fulfilled․ This demonstrates Macbeth’s ruthless ambition and willingness to commit further atrocities to maintain power․

The planning reveals Macbeth’s increasing isolation and reliance on hired hands, signifying his moral decay․

The Use of Imagery ⎻ Darkness and Secrecy

Shakespeare masterfully employs imagery of darkness and secrecy throughout Act 3, mirroring Macbeth’s descent into evil and the clandestine nature of his crimes․ The murder of Banquo is orchestrated under the cover of night, symbolizing the hidden and treacherous deeds occurring within the kingdom․ References to shadows, obscurity, and concealed intentions permeate the dialogue․

This imagery isn’t merely atmospheric; it reflects Macbeth’s internal state – a mind shrouded in guilt and fear․ The darkness represents his moral corruption and the secrecy, his attempts to conceal his actions from scrutiny․ The pervasive gloom foreshadows the unraveling of his power and the impending chaos․

Even the banquet scene, ostensibly a celebration, is tainted by this darkness, culminating in the appearance of Banquo’s ghost․

Act 3 Scene 3: The Murder of Banquo

Scene 3 depicts Banquo’s ambush and murder by hired assassins, though Fleance, his son, escapes, frustrating Macbeth’s complete eradication of the prophetic line․

The Assassins and Their Task

Macbeth employs murderers, demonstrating his descent into tyranny and reliance on dark deeds to maintain power․ He provides them with detailed instructions, emphasizing Banquo as the primary target, yet acknowledging the potential difficulty of the task․

The first assassin questions Macbeth’s reasoning, seeking confirmation of his motives, revealing a flicker of conscience․ Macbeth skillfully manipulates him, appealing to his ambition and resentment towards Banquo’s perceived superiority․ He fuels their hatred, suggesting Banquo looks down upon them․

This scene highlights Macbeth’s manipulative nature and willingness to corrupt others to achieve his goals․ The assassins’ task is not merely execution, but a calculated act of removing a threat to his reign, fueled by Macbeth’s paranoia and ambition․

The Murder Scene ― Details and Impact

The murder of Banquo unfolds in darkness, emphasizing the secrecy and brutality of Macbeth’s actions․ While Banquo is successfully killed, Fleance, his son, manages to escape, representing a critical failure in Macbeth’s plan and foreshadowing future complications․

The scene is brief and stark, focusing on the assassins’ report to Macbeth․ The description of Banquo’s death is gruesome, highlighting the violent consequences of Macbeth’s ambition․ The escape of Fleance deeply disturbs Macbeth, as it leaves a potential heir to Banquo’s promised lineage alive․

This failure intensifies Macbeth’s paranoia and sets the stage for further desperate measures, demonstrating the unraveling of his control and the escalating cycle of violence․

Fleance’s Escape ⎻ A Crucial Failure

Fleance’s successful escape is arguably the most significant outcome of the assassination attempt on Banquo․ Despite Macbeth’s meticulous planning and the assassins’ efforts, Fleance evades death, disrupting Macbeth’s attempt to eliminate any potential threats to his reign․

This failure is “crucial” because the witches’ prophecy stated that Banquo’s descendants would become kings․ Fleance represents that lineage, and his survival directly challenges Macbeth’s belief in his own security․ It fuels his growing paranoia and desperation․

The escape signifies that fate, or perhaps a higher power, is actively working against Macbeth, rendering his violent actions incomplete and ultimately futile․ It introduces a lingering threat that will haunt him throughout the play․

Macbeth’s Reaction to the Failed Assassination

Macbeth’s reaction to learning of Banquo’s murder and, crucially, Fleance’s escape, is one of barely contained hysteria․ He attempts to maintain a facade of composure at the banquet, but the news throws him into a state of profound psychological distress․

His carefully constructed sense of security is shattered; the failure to eliminate Fleance confirms that the witches’ prophecies are not entirely under his control․ This realization triggers a descent into paranoia and fear, manifesting in the infamous appearance of Banquo’s ghost;

Macbeth’s outburst at the banquet reveals the depth of his guilt and the fragility of his mental state, showcasing the devastating consequences of his ambition and violent deeds․

Act 3 Scene 4: The Banquet Scene

Macbeth’s banquet is disrupted by Banquo’s ghost, visible only to Macbeth, revealing his guilt and descent into madness before his startled guests․

Macbeth’s Banquet ⎻ A Display of Power

The banquet scene initially functions as a grand display of Macbeth’s power and newfound status as king․ He hosts a lavish feast for his lords, intending to showcase his authority and solidify his position․ This opulent gathering is meant to project an image of stability and confidence, attempting to quell any lingering doubts about his legitimacy․

However, this carefully constructed facade quickly unravels․ Macbeth’s attempts to appear regal and in control are undermined by his internal turmoil and the supernatural intrusion of Banquo’s ghost․ The banquet, therefore, becomes a stage for his unraveling, exposing the fragility of his power and the depth of his guilt․ It’s a performance masking a terrifying reality․

The Appearance of Banquo’s Ghost

The arrival of Banquo’s ghost during Macbeth’s banquet is a pivotal moment, representing the physical manifestation of his guilt and paranoia․ Only Macbeth can see the ghost, highlighting his descent into madness and the isolation caused by his crimes․ The ghost’s presence disrupts the celebratory atmosphere, exposing Macbeth’s inner torment to his assembled guests․

This supernatural intrusion isn’t merely a frightening spectacle; it symbolizes the inescapable consequences of Macbeth’s actions․ Banquo’s ghost serves as a constant reminder of the murder he committed to seize the throne, fueling his growing instability․ Lady Macbeth attempts to manage the situation, attributing his behavior to a temporary illness, but the ghost’s impact is profound․

Macbeth’s Breakdown and Lady Macbeth’s Intervention

Macbeth’s encounter with Banquo’s ghost triggers a dramatic public breakdown during the banquet․ He raves incoherently, questioning the empty air and terrifying his assembled lords․ This display of erratic behavior threatens to expose his guilt and unravel his carefully constructed façade of kingship․ His composure completely shatters, revealing the psychological toll of his deeds․

Lady Macbeth swiftly intervenes, attempting to regain control of the situation and salvage their reputation․ She skillfully deflects attention, claiming Macbeth suffers from a recurring illness and urges the guests to enjoy the feast․ Her intervention, though temporarily effective, underscores the fragility of their power and the extent of Macbeth’s deteriorating mental state․

The Significance of the Ghost ― Guilt and Paranoia

Banquo’s ghost represents Macbeth’s overwhelming guilt and burgeoning paranoia․ The apparition is visible only to Macbeth, signifying that the ghost is a manifestation of his tormented conscience, a psychological projection of his crime․ It embodies the inescapable consequences of his regicide and the haunting weight of his ambition․

The ghost’s presence fuels Macbeth’s descent into madness, highlighting his inability to cope with the moral implications of his actions․ It symbolizes the disruption of the natural order and foreshadows further chaos․ The ghost isn’t merely a supernatural occurrence, but a potent symbol of Macbeth’s internal turmoil and the unraveling of his sanity․

Act 3 Scene 5: Hecate and the Witches

Hecate scolds the witches for involving themselves with Macbeth without her consent, revealing their manipulation and foreshadowing future, darker schemes․

Hecate’s Displeasure with the Witches

Hecate, the goddess of witchcraft, expresses her strong disapproval of the Weird Sisters’ actions in Scene 5․ She berates them for dealing with Macbeth and prophesying without her permission, highlighting a hierarchy within the supernatural realm․

Hecate believes the witches acted rashly, prematurely influencing Macbeth and potentially jeopardizing their overall plans․ She criticizes their methods, stating they should have used more subtle and manipulative tactics․

Her displeasure isn’t about morality, but rather about control and proper procedure․ Hecate intends to craft a more elaborate and deceptive scheme to further ensnare Macbeth, ensuring his ultimate downfall aligns with her own designs․ This scene emphasizes the witches are not autonomous, but tools within a larger, more powerful force․

The Witches’ Future Plans for Macbeth

Following Hecate’s reprimand, the witches unveil their meticulously crafted plans to further manipulate Macbeth․ They intend to conjure deceptive apparitions designed to bolster his confidence while simultaneously leading him to his destruction․ These illusions will offer ambiguous prophecies, exploiting Macbeth’s inherent ambition and paranoia․

The witches plan to present Macbeth with visions of armed heads, a bloody child, and a crowned child, each carrying a veiled threat․ These apparitions will create a false sense of security, convincing Macbeth he is invincible until the prophecy’s true meaning is revealed․

Their ultimate goal is to ensure Macbeth’s continued descent into tyranny, solidifying their power through his ruin and demonstrating the manipulative force of the supernatural․

The Supernatural Element ― Manipulation and Control

Throughout Act 3, the supernatural forces, embodied by the witches and Hecate, demonstrate their profound control over Macbeth’s fate․ They don’t simply predict the future; they actively shape it through deception and manipulation․ Hecate’s presence reveals a deliberate orchestration of events, highlighting that Macbeth is a pawn in a larger, darker game․

The witches’ prophecies aren’t straightforward; they are deliberately ambiguous, allowing Macbeth to misinterpret them to his detriment․ This ambiguity serves to fuel his ambition and paranoia, driving him towards actions that fulfill the witches’ ultimate goals․

The supernatural isn’t a neutral force; it’s a corrupting influence, exploiting Macbeth’s weaknesses and accelerating his downfall․

Act 3 Scene 6: Lennox and Another Lord

Lennox and another Lord discuss the unsettling events—Banquo’s murder and Macbeth’s erratic behavior—hinting at growing discontent and plotting against the king․

Discussion of Suspicious Events

Lennox and another Lord engage in a veiled conversation, carefully avoiding direct accusations against Macbeth, yet openly acknowledging the disturbing occurrences plaguing Scotland․ They discuss the strange omens – violent storms, horses eating each other – mirroring the unnatural state of the kingdom under Macbeth’s rule․

Their dialogue reveals a growing awareness of Macbeth’s tyranny and the suspicious circumstances surrounding Banquo’s murder․ While speaking cautiously, they imply Macbeth is responsible, noting his overreaction at the banquet and the hasty flight of the suspected murderers․ This scene subtly builds tension, showcasing the rising tide of opposition and the spreading fear surrounding the king․

Growing Opposition to Macbeth

The seeds of rebellion are sown as Lennox and the Lord discuss Macduff’s flight to England, revealing his intent to join Malcolm in raising an army against Macbeth․ This signifies a crucial shift, as prominent figures are actively seeking to overthrow the king, demonstrating a widespread discontent with his reign․

They express hope in Malcolm’s virtuous character and the support of the English King, Edward the Confessor, hinting at potential alliances․ This growing opposition isn’t merely based on fear, but on a desire to restore order and justice to Scotland, highlighting Macbeth’s increasingly isolated and tyrannical position․

Plans for Rebellion and Seeking Assistance

Lennox and the Lord detail Macduff’s journey to England, specifically to persuade Malcolm to return to Scotland and lead a rebellion against Macbeth’s tyranny․ They anticipate Malcolm will receive substantial aid from King Edward, bolstering their forces and increasing their chances of success․

This proactive planning demonstrates a coordinated effort to dismantle Macbeth’s power, moving beyond mere suspicion to concrete action․ The hope rests on Malcolm’s perceived goodness and Edward’s willingness to intervene, signifying a reliance on external support to restore legitimate rule․ This foreshadows a larger conflict and the potential downfall of Macbeth․

Themes in Act 3

Act 3 powerfully explores ambition’s corrupting influence, the torment of guilt, the deceptive nature of the supernatural, and power’s destructive consequences․

Ambition and its Consequences

Macbeth’s unchecked ambition fuels the tragic events of Act 3․ Having attained the throne, his desire for security spirals into tyranny, prompting the murders of Banquo and, planned, Fleance․ This demonstrates how ambition, once satisfied, breeds further, insatiable cravings for power․

The play illustrates ambition’s corrosive effect on Macbeth’s character, transforming him from a valiant general into a ruthless dictator․ His actions aren’t driven by a noble purpose, but by a desperate fear of losing what he’s gained․

Banquo’s more measured ambition serves as a foil, highlighting the dangers of unrestrained desire․ Ultimately, Act 3 reveals ambition’s devastating consequences – not only for the ambitious individual, but for the entire kingdom․

Guilt and its Manifestations

Act 3 powerfully portrays the psychological torment of guilt consuming Macbeth․ The murder of Banquo triggers vivid hallucinations, most notably Banquo’s ghost appearing at the banquet, a tangible manifestation of his crime and fractured psyche․ This spectral visit isn’t merely a fright; it’s Macbeth’s guilt externalized․

Lady Macbeth, initially the stronger partner, attempts to manage his unraveling composure, revealing the strain their deeds place on their relationship․ Her interventions highlight the shared burden of their guilt, though she displays it differently․

The play demonstrates how guilt isn’t simply remorse, but a destabilizing force that leads to paranoia, erratic behavior, and ultimately, a descent into madness for Macbeth․

The Supernatural and its Influence

Act 3 continues to emphasize the potent influence of the supernatural on Macbeth’s actions and state of mind․ The witches, though absent in physical form for much of the act, loom large through the lingering effects of their prophecies․ Macbeth’s anxieties stem directly from interpreting and attempting to control his fate as foretold․

The appearance of Banquo’s ghost is a prime example of the supernatural intruding into the natural world, fueled by Macbeth’s guilt and the witches’ initial manipulations․ Hecate’s scene reveals the witches aren’t acting independently, suggesting a larger, darker force at play․

This act reinforces the idea that the supernatural isn’t simply predictive, but actively shapes events and corrupts Macbeth’s judgment․

The Corruption of Power

Act 3 vividly illustrates the corrupting influence of unchecked power on Macbeth․ Newly crowned, he’s consumed by paranoia, fearing Banquo’s lineage will usurp his throne, leading to Banquo’s murder․ This demonstrates how ambition, once fulfilled, doesn’t bring peace but breeds further violence and insecurity․

Macbeth’s descent into tyranny is marked by secrecy and deception, as he orchestrates the assassination in darkness․ The banquet scene, intended as a display of power, devolves into chaos with the appearance of Banquo’s ghost, revealing the psychological toll of his actions․

The act showcases how power isolates Macbeth, eroding his relationship with Lady Macbeth and driving him towards increasingly desperate measures․

memoria press literature guides

Memoria Press Literature Guides: A Comprehensive Overview (Updated February 18, 2026)

Memoria Press offers comprehensive literature study guides, designed for a classical education, spanning Kindergarten through eighth grade. These guides aim to challenge students
with texts slightly above their current reading level, fostering growth and analytical skills.

What are Memoria Press Literature Guides?

Memoria Press Literature Guides are meticulously crafted resources intended to accompany and enhance the study of classic literature within a homeschool or classroom setting. They aren’t simply summaries or plot retellings; instead, they are designed to actively engage students in a deeper understanding of the text, its historical context, and its literary merit.

These guides function as a bridge between reading a story and truly comprehending it. They provide a structured approach to literary analysis, guiding students through key elements like character development, plot structure, themes, and author’s purpose. According to reviews, the guides are available for all grade levels, from Kindergarten through eighth grade, ensuring a continuous and progressive literary education.

The core purpose is to cultivate critical thinking skills and a lifelong love of reading. They aren’t intended to replace the joy of reading, but rather to amplify it by providing tools for thoughtful exploration and discussion. The guides encourage students to move beyond surface-level understanding and delve into the nuances of the text, fostering a more profound appreciation for the art of storytelling.

Core Principles of the Memoria Press Approach

Memoria Press’s approach to literature, as reflected in their guides, is firmly rooted in classical education. This means a strong emphasis on the “trivium” – grammar, logic, and rhetoric – and a belief in the power of great books to shape minds and character.

A key principle is the idea of reading “above level.” The guides intentionally select texts slightly challenging for the student’s grade, encouraging intellectual stretch and vocabulary expansion. This isn’t about frustration, but about fostering growth through manageable difficulty. Another core tenet is the importance of comprehension; the guides aren’t focused on simply finishing a book, but on truly understanding it.

Furthermore, Memoria Press believes in a structured, teacher-led approach. The guides provide a framework for discussion and analysis, but the teacher’s role is crucial in facilitating deeper understanding and critical thinking. The program aims to instill a love of learning and a foundation for lifelong intellectual pursuits, grounded in the wisdom of the past.

Classical Education & Literature Study

Memoria Press Literature Guides are intrinsically linked to the principles of classical education, viewing literature not merely as entertainment, but as a vehicle for moral and intellectual formation. This approach emphasizes the study of great works – classics – that have stood the test of time and offer enduring wisdom.

Within this framework, literature study isn’t about subjective interpretation, but about discovering objective truth and beauty within the text. The guides facilitate this by prompting students to analyze literary elements, understand historical context, and grapple with universal themes. Emphasis is placed on understanding the author’s intent and the work’s place within the broader Western tradition.

The guides support the classical ideal of developing well-rounded individuals capable of articulate expression and reasoned thought. By engaging with challenging texts and participating in thoughtful discussion, students cultivate critical thinking skills and a lifelong appreciation for the power of language and storytelling.

Grade Level Availability: K-8 Coverage

Memoria Press Literature Guides provide a comprehensive curriculum spanning all grade levels from Kindergarten through eighth grade, ensuring a continuous and progressive literary education. This extensive coverage allows parents to maintain consistency in their homeschool approach throughout their child’s formative years.

Each grade level features carefully selected literature and accompanying guides tailored to the developmental stage and reading abilities of students. The program begins with simpler narratives and gradually introduces more complex texts as students advance. This structured progression builds confidence and fosters a love of reading.

The availability of guides for every K-8 grade is a significant strength, offering a complete literature component for a classical homeschool curriculum. This eliminates the need to piece together resources from multiple sources, streamlining the planning process for educators. The guides are designed to complement, not replace, a robust reading schedule.

Guide Components: What’s Included?

Memoria Press Literature Guides are meticulously crafted to provide a complete learning experience. Each guide typically includes a detailed introduction to the author and historical context of the work, setting the stage for deeper understanding.

Core components feature chapter-by-chapter questions designed to assess comprehension and encourage critical thinking. These questions range from simple recall to more complex analytical prompts. Vocabulary exercises are integrated throughout, enriching students’ linguistic abilities.

Furthermore, the guides often contain literary device analysis sections, helping students identify and understand techniques like metaphor and symbolism. Writing assignments, geared towards developing composition skills, are also a standard inclusion.

Supplemental materials, such as character charts and timelines, may be present to aid in organization and retention. The guides are designed to be a holistic resource, supporting both reading and analytical skills.

Student Book vs. Teacher Guide: Key Differences

Memoria Press distinguishes clearly between its Student Books and accompanying Teacher Guides. The Student Book contains the literary work itself – the novel or collection of stories – alongside spaces for student responses to questions. It’s designed for direct student engagement with the text and independent work.

Conversely, the Teacher Guide is a comprehensive resource for the educator. It provides detailed answers to all student questions, offering a benchmark for assessment. It also includes extensive background information, literary analysis notes, and suggestions for supplementary activities.

The Teacher Guide often features guidance on facilitating discussions, extending learning beyond the core text, and adapting the material for diverse learners. It’s essentially a roadmap for effectively implementing the literature study.

Essentially, the Student Book is the active workspace, while the Teacher Guide is the instructor’s detailed companion, ensuring a thorough and well-supported learning experience.

Reading Level & Challenging Students

Memoria Press literature guides intentionally select books slightly above the students’ current grade level. This approach isn’t about overwhelming learners, but rather about fostering growth and expanding their capabilities. The guides are designed to stretch students, encouraging them to grapple with more complex narratives and sophisticated language.

This deliberate challenge is coupled with robust support within the guides themselves. Comprehension questions, vocabulary exercises, and literary analysis prompts help students unpack the text and overcome difficulties. The guides don’t simply present challenging material; they equip students with the tools to succeed.

The program acknowledges that encountering unfamiliar words and concepts is a natural part of the learning process. By consistently presenting material that requires effort, Memoria Press aims to cultivate resilient and confident readers. This strategy builds crucial skills for future academic success.

Focus on Comprehension & Analysis

Memoria Press literature guides prioritize a deep understanding of the text, moving beyond simple plot recall. The core of each guide revolves around carefully crafted questions designed to assess and enhance comprehension. These aren’t merely “what happened?” inquiries, but delve into why events unfolded and how characters developed.

Analysis is equally central. Students are prompted to identify literary devices, explore themes, and consider the author’s purpose. The guides encourage critical thinking, prompting students to form their own interpretations supported by textual evidence. This analytical framework isn’t presented as a rigid formula, but as a set of tools for thoughtful engagement.

Through consistent practice with comprehension and analytical questions, students learn to become active, discerning readers. They develop the ability to not just read words on a page, but to interpret meaning and appreciate the artistry of literature.

Vocabulary Enrichment within the Guides

Memoria Press literature guides actively cultivate a richer vocabulary alongside literary understanding. Rather than isolated word lists, vocabulary instruction is seamlessly integrated within the context of each reading selection. Key words, often challenging for the grade level, are identified and explored as they appear naturally in the text.

The guides don’t simply provide definitions; they encourage students to deduce meaning from context clues. Activities often involve using the new vocabulary in sentences, demonstrating a grasp of both definition and application. This approach fosters a more lasting and organic vocabulary expansion.

Furthermore, the guides frequently connect new vocabulary to Latin or Greek roots, reinforcing etymological understanding. This connection aids retention and provides a framework for deciphering unfamiliar words encountered in future readings. The goal is not rote memorization, but a genuine expansion of linguistic ability.

Grammar Integration with Literary Texts

Memoria Press distinguishes itself by intentionally weaving grammar instruction into the fabric of literature study. Unlike isolated grammar exercises, the guides utilize literary passages as the vehicle for grammatical exploration. Students don’t just learn about grammar; they discover it within authentic writing.

The guides pinpoint specific grammatical structures – such as participles, appositives, or various verb tenses – as they appear in the selected texts. Students analyze how these structures contribute to the author’s style and meaning. This contextualized approach makes grammar less abstract and more relevant.

Diagramming sentences, a hallmark of the classical method, is frequently incorporated. This visual exercise reinforces understanding of sentence construction and the relationships between words. By dissecting the grammar of well-crafted literature, students internalize correct usage and improve their own writing skills. The focus is on understanding why grammar matters, not just memorizing rules.

Discussion Questions: Fostering Critical Thinking

Memoria Press literature guides are renowned for their thoughtfully crafted discussion questions, designed to move beyond simple comprehension and cultivate genuine critical thinking. These aren’t merely recall questions; they prompt students to analyze characters’ motivations, explore themes, and evaluate the author’s craft.

Questions often encourage students to consider the historical and cultural context of the work, deepening their understanding of the story’s significance. They are structured to facilitate lively classroom or family discussions, encouraging students to articulate their ideas and respectfully engage with differing perspectives.

The guides progress in complexity as students advance through the grade levels. Early questions focus on basic plot elements and character identification, while later questions delve into more nuanced topics like symbolism, allegory, and rhetorical devices. This gradual progression ensures students are consistently challenged and develop increasingly sophisticated analytical skills.

Writing Assignments: Developing Composition Skills

Memoria Press literature guides integrate writing assignments strategically, aiming to develop students’ composition skills alongside their literary analysis. These aren’t isolated exercises but are directly tied to the reading material, requiring students to apply their understanding in a creative and analytical manner.

Assignments vary depending on the grade level and text, ranging from simple paragraph responses to more complex essays. Early assignments might focus on summarizing plot points or describing characters, while later assignments delve into argumentative essays, literary analyses, and creative writing prompts inspired by the text.

The guides often provide clear expectations and models for each assignment, helping students understand the desired format and content. Emphasis is placed on proper grammar, sentence structure, and organization, reinforcing fundamental writing principles. These assignments aim to build confidence and proficiency in written communication.

The Role of the Teacher in Utilizing the Guides

Memoria Press literature guides are designed to be teacher-led, requiring active involvement to maximize their effectiveness. The teacher’s role extends beyond simply assigning readings and questions; it involves facilitating discussions, providing individualized support, and ensuring students grasp the core concepts.

Teachers are encouraged to read the literature alongside their students, allowing for richer conversations and deeper analysis. The teacher guide provides valuable insights, background information, and suggested approaches to challenging passages. Adapting the pace and complexity of assignments to suit individual student needs is crucial.

Effective implementation also involves fostering a classroom environment that encourages critical thinking and respectful debate. The teacher acts as a moderator, guiding students to formulate their own interpretations and support them with textual evidence. Ultimately, the teacher’s expertise transforms the guide into a dynamic learning experience.

Comparison to Other Literature Programs

Memoria Press literature guides distinguish themselves through a firm grounding in classical education principles, emphasizing comprehension and analytical skills over solely focusing on modern, thematic approaches. Unlike some programs prioritizing contemporary young adult novels, Memoria Press leans towards classic literature, building a strong foundation in literary history.

Compared to literature programs with extensive digital components, Memoria Press maintains a more traditional, book-based format. While some may find this limiting, it encourages close reading and minimizes screen time. Other programs may offer more scaffolding for struggling readers, whereas Memoria Press often challenges students with texts slightly above their grade level.

Furthermore, the integration of grammar and vocabulary within the literary context sets Memoria Press apart. Many programs treat these as separate subjects, while Memoria Press seamlessly weaves them into the study of literature, reinforcing learning across disciplines.

Strengths of the Memoria Press Literature Guides

Memoria Press Literature Guides excel in their commitment to classical education, fostering a deep understanding and appreciation of classic literature. A significant strength lies in their ability to challenge students, presenting texts slightly above their grade level, promoting intellectual growth and expanding vocabulary.

The guides’ integrated approach – seamlessly blending literature with grammar and vocabulary study – is highly effective. This method reinforces learning across disciplines, solidifying comprehension and analytical skills. The thoughtfully crafted discussion questions encourage critical thinking and articulate expression.

Furthermore, the program’s structure provides a clear and organized path for both students and teachers. The focus on comprehension and analysis, coupled with the development of composition skills through writing assignments, prepares students for advanced literary study. The guides are consistently praised for their rigor and quality, offering a robust curriculum for homeschool and classroom settings.

Potential Weaknesses & Considerations

While highly regarded, Memoria Press Literature Guides aren’t without potential drawbacks. Some users report that the guides can be quite demanding, potentially overwhelming students who struggle with reading comprehension or literary analysis. The rigorous pace and challenging texts may require significant teacher support, particularly for younger learners or those new to classical education.

Another consideration is the program’s reliance on traditional literature. While valuable, this focus might limit exposure to diverse voices and contemporary works. Additionally, the guides necessitate purchasing separate literature books, adding to the overall cost.

Forum discussions suggest some find the guides overly prescriptive, potentially stifling independent thought. Parents should assess their child’s learning style and readiness before committing to the program, ensuring it aligns with their educational philosophy and resources. Careful consideration of these factors will maximize the benefits of the guides.

Cost & Purchasing Options

Memoria Press Literature Guides are available for individual purchase or as complete grade-level sets. Costs vary depending on the grade and whether you opt for physical or digital formats. Generally, individual student books range from $25 to $45, while teacher guides are priced between $40 and $60. Complete grade-level sets, including both student and teacher materials, can range from $150 to $300 or more.

Purchasing options include the official Memoria Press website, which frequently offers sales and discounts. Several online retailers, such as Christianbook.com and Amazon, also carry the guides. Used copies can often be found through homeschool curriculum marketplaces, offering a more budget-friendly alternative.

Remember to factor in the cost of the required literature books, which are sold separately. Bundled options, combining the guide and the novel, are sometimes available, potentially saving money. Careful comparison shopping is recommended to secure the best prices.

User Experiences & Forum Discussions

Memoria Press Literature Guides generate considerable discussion within homeschool communities. Online forums, like the Memoria Press forum itself (as of December 12, 2018), reveal users grappling with differentiating between “literature guide related” work and simply reading the assigned texts. Many appreciate the guides’ structured approach, particularly for parents newer to classical education.

Common feedback highlights the guides’ effectiveness in prompting deeper comprehension and analytical thinking. However, some users suggest adapting the workload to suit individual student needs, as the guides can be demanding. Cathy Duffy Reviews (updated February 18, 2026) notes positive reception, emphasizing the guides’ challenge level.

Discussions often center on the balance between guided analysis and independent thought. Parents share strategies for facilitating discussions and tailoring writing assignments. Overall, the consensus leans towards positive, with users valuing the guides’ contribution to a robust literature education.

Resources & Support for Guide Users

Memoria Press provides several avenues for supporting users of their Literature Guides. The official Memoria Press forum (active as of December 12, 2018) serves as a vibrant community hub where parents and educators can exchange ideas, ask questions, and share experiences. This platform fosters collaborative problem-solving and offers practical advice on implementing the guides effectively.

Additionally, Memoria Press offers direct customer support through their website and email, addressing specific concerns and providing clarification on guide content. Cathy Duffy Reviews (updated February 18, 2026) suggests exploring supplemental resources to enhance the learning experience, though these are not directly provided by Memoria Press.

Users can also benefit from online groups and social media communities dedicated to classical education and Memoria Press curricula. These platforms offer peer support, lesson planning ideas, and access to a wider network of educators utilizing the guides.

all the light we cannot see reading guide

All the Light We Cannot See: A Comprehensive Reading Guide

This guide delves into Anthony Doerr’s Pulitzer Prize-winning novel, exploring its intricate plot, compelling characters, and profound themes․
It examines the significance of radio, blindness, and the enduring human spirit amidst the devastation of World War II․

The narrative intertwines the fates of Marie-Laure and Werner, highlighting how seemingly disparate lives converge during wartime․
The story’s power lies in its exploration of moral ambiguity and the search for hope in the darkest of times․

Discussions will center on the symbolism embedded within the text, such as the model of Saint-Malo and the mysterious numbers broadcasted over the airwaves․
This guide aims to enhance your understanding and appreciation of this remarkable literary work․

Anthony Doerr’s All the Light We Cannot See, published in 2014, is a beautifully rendered and deeply moving historical novel that won the 2015 Pulitzer Prize for Fiction․ The story masterfully weaves together the lives of Marie-Laure LeBlanc, a blind French girl, and Werner Pfennig, a German orphan with a talent for radio technology, during the tumultuous years of World War II․

The novel’s structure is non-linear, shifting between timelines and perspectives, creating a rich tapestry of experiences and emotions․ Doerr’s prose is lyrical and evocative, painting vivid pictures of both the beauty and brutality of war-torn Europe․ The narrative unfolds against the backdrop of the siege of Saint-Malo, a pivotal moment in the war, and explores themes of resilience, hope, and the enduring power of human connection․

At its heart, All the Light We Cannot See is a story about finding light in the darkness, both literally and figuratively․ It examines how individuals navigate moral complexities and maintain their humanity in the face of unimaginable hardship․ The novel’s enduring appeal lies in its ability to resonate with readers on a deeply emotional level, prompting reflection on the nature of war, loss, and the importance of empathy․

II․ Historical Context: World War II in Europe

All the Light We Cannot See is firmly rooted in the historical realities of World War II, specifically the period between 1942 and 1944․ The novel vividly portrays life under Nazi occupation in France, including the pervasive fear, rationing, and the constant threat of denunciation․ The story’s setting, Saint-Malo, a walled port city in Brittany, was strategically important to the Germans and suffered extensive damage during the Allied siege․

The war’s impact on communication technology is central to the narrative, with Werner’s expertise in radio playing a crucial role․ During WWII, radio served as a vital tool for propaganda, intelligence gathering, and resistance movements․ The German military heavily relied on radio signals for coordinating troop movements and intercepting enemy communications․

Furthermore, the novel touches upon the brutal realities faced by civilians, including the displacement of populations and the atrocities committed against those deemed undesirable by the Nazi regime․ Understanding this historical context is essential for appreciating the depth and complexity of Doerr’s portrayal of wartime Europe and the challenges faced by its inhabitants․

The novel’s strength lies in its richly developed characters, each grappling with their own moral dilemmas amidst the chaos of war․ Marie-Laure LeBlanc, a blind French girl, is introduced as she and her father flee Paris with a potentially cursed diamond, seeking refuge with her great-uncle Etienne in Saint-Malo․ Her resilience and resourcefulness define her journey․

Werner Pfennig, a German orphan with a talent for radio repair, is presented as a promising student at Schulpforta, a harsh and disciplined boarding school․ His technical skills are quickly recognized by the Nazi regime, leading him down a path fraught with ethical compromises․

Etienne LeBlanc, Marie-Laure’s reclusive great-uncle, provides a safe haven and a connection to the French Resistance through his clandestine radio broadcasts․ Reinhold von Rumpel, a ruthless German officer obsessed with finding the Sea of Flames diamond, serves as the primary antagonist, driven by greed and a desperate search for immortality․ These characters, and their initial introductions, set the stage for a compelling and emotionally resonant narrative․

A; Marie-Laure LeBlanc

Marie-Laure’s blindness is not a limitation, but a catalyst for heightened senses and inner strength․ Forced to flee Paris with her father, carrying the legendary Sea of Flames diamond, she embodies courage and adaptability․ Her father meticulously crafts a wooden model of Saint-Malo, enabling her to navigate the city and fostering a deep connection to her surroundings․

Throughout the novel, Marie-Laure demonstrates remarkable resilience, learning to rely on her other senses and developing a profound understanding of the world around her․ Her connection with her great-uncle Etienne and his network of Resistance members provides her with purpose and a sense of belonging․

The model of Saint-Malo becomes a symbol of guidance and connection, ultimately linking her fate with Werner Pfennig’s․ Marie-Laure’s character arc showcases the power of the human spirit to overcome adversity and find hope even in the darkest of times, making her a truly unforgettable protagonist․

B․ Werner Pfennig

Werner is a brilliant young man with a natural aptitude for radio technology, initially captivated by the power of the medium for innocent exploration․ However, his skills are exploited by the Nazi regime, leading him down a path of moral compromise and internal conflict․ His time at Schulpforta shapes him, instilling both discipline and a growing awareness of the brutality surrounding him․

Throughout his journey, Werner grapples with the ethical implications of his work, tasked with tracking Resistance activity using his radio expertise․ He experiences firsthand the horrors of war and the suffering it inflicts on innocent civilians․ His internal struggle is central to the novel’s exploration of moral ambiguity․

Ultimately, Werner’s fate becomes intertwined with Marie-Laure’s, leading to a pivotal moment of redemption․ His decision to discard the Sea of Flames symbolizes his rejection of the destructive forces he has been complicit in, showcasing a yearning for a different future․

C․ Etienne LeBlanc

Etienne LeBlanc, Marie-Laure’s great-uncle, is a reclusive and complex character, deeply scarred by his experiences in the First World War and haunted by survivor’s guilt․ He provides a safe haven for Marie-Laure and her father in Saint-Malo, becoming a crucial figure in their survival during the Nazi occupation․

Initially appearing gruff and withdrawn, Etienne gradually reveals a hidden depth of kindness and courage, actively participating in the Resistance movement through subtle acts of defiance․ He utilizes his knowledge of Saint-Malo and his network of contacts to aid Allied forces, demonstrating a quiet heroism․

Etienne’s connection to the past, particularly his wartime trauma, shapes his present actions and his protective instincts towards Marie-Laure․ He embodies resilience and the enduring power of human connection in the face of adversity, offering a beacon of hope amidst the darkness․

D․ Reinhold von Rumpel

Reinhold von Rumpel is the primary antagonist of the novel, a ruthless and determined German gemologist obsessed with finding the “Sea of Flames” diamond․ His relentless pursuit drives much of the plot’s tension and embodies the destructive nature of greed and obsession during wartime․

Von Rumpel’s character is defined by his deteriorating health and his belief that the diamond possesses mystical properties capable of curing his illness․ This desperation fuels his cruelty and willingness to exploit others, including Marie-Laure, in his quest for the gem․

He represents the moral corruption at the heart of the Nazi regime, prioritizing personal gain above all else and demonstrating a complete disregard for human life․ His single-minded focus on the diamond ultimately leads to his downfall, highlighting the futility of material desires in the face of true human connection and resilience․

IV․ Major Themes Explored

“All the Light We Cannot See” masterfully explores several profound themes, most notably the power of human connection amidst the brutality of war․ The novel demonstrates how even in the darkest times, empathy, kindness, and shared experiences can offer solace and hope․

The significance of radio and communication is central, serving as a lifeline for characters like Marie-Laure and Werner, connecting them across geographical and ideological divides․ Radio symbolizes both the potential for propaganda and the possibility of resistance and shared humanity․

Blindness, both literal and metaphorical, is a recurring motif, challenging perceptions of sight and insight․ Marie-Laure’s blindness allows her to perceive the world in unique ways, while other characters are “blinded” by ideology or self-interest․ The novel also grapples with the moral ambiguities of war, presenting a nuanced portrayal of individuals caught in complex circumstances․

A․ The Power of Radio & Communication

Radio serves as a pivotal force throughout “All the Light We Cannot See,” transcending its function as mere technology to become a symbol of connection, resistance, and hope․ For Werner, radio represents an escape from his circumstances and a pathway to intellectual fulfillment, while for Marie-Laure, it provides a vital link to the outside world․

The broadcasts themselves carry significant weight, delivering both propaganda and clandestine messages of defiance․ The Frenchman’s transmissions, in particular, offer a beacon of hope and subtly guide Marie-Laure, demonstrating the power of information and coded communication․

Interestingly, the novel highlights the ironic role of radio in both uniting and dividing characters; Marie-Laure unknowingly aids Werner through her father’s broadcasts, while Werner’s skills are exploited by the Nazi regime․ The numbers transmitted over the airwaves, potentially coordinates for military installations, underscore the dual nature of this technology․

B․ Blindness as a Metaphor

Marie-Laure’s blindness is far more than a physical condition; it functions as a powerful metaphor for perception, understanding, and the limitations of sight in a world shrouded in darkness․ She “sees” the world through touch, sound, and memory, developing a heightened awareness that surpasses conventional vision․

Doerr skillfully uses Marie-Laure’s experience to challenge the reader’s own assumptions about how we perceive reality․ Her reliance on the model of Saint-Malo, for instance, demonstrates how spatial understanding can be constructed through tactile exploration and mental mapping․

Furthermore, blindness can be interpreted as a metaphor for the moral blindness of those who willingly participate in war and oppression․ Many characters, despite possessing physical sight, are unable to “see” the humanity of others or the consequences of their actions․ Marie-Laure’s inner vision ultimately allows her to navigate both the physical and moral complexities of her world․

C․ The Moral Ambiguity of War

“All the Light We Cannot See” avoids simplistic portrayals of good versus evil, instead presenting a nuanced exploration of moral ambiguity within the context of World War II․ Characters are forced to make difficult choices, often with devastating consequences, blurring the lines between right and wrong․

Werner Pfennig’s journey exemplifies this ambiguity․ Initially driven by a desire to escape poverty and utilize his technical skills, he becomes entangled in the Nazi regime’s machinery of war․ His internal conflict highlights the pressures and compromises individuals face during times of conflict․

Even Von Rumpel, the antagonist, is presented with a degree of complexity, driven by a desperate obsession rather than pure malice․ The novel acknowledges the suffering inflicted on all sides, including the civilian population, and the brutal realities faced by women during wartime, as tragically illustrated by the fate of those encountered by the caretaker․

D․ Resilience and Hope in Dark Times

Despite the pervasive darkness of war, “All the Light We Cannot See” powerfully demonstrates the enduring capacity for resilience and hope․ Marie-Laure’s blindness, rather than defining her limitations, becomes a source of strength and adaptability, allowing her to navigate a world thrown into chaos․

The novel showcases how small acts of kindness and connection can sustain the human spirit․ Etienne LeBlanc’s quiet resistance and unwavering support for Marie-Laure exemplify this, offering a beacon of light amidst the destruction․ Jutta’s unwavering belief in her brother, Werner, also embodies this theme․

The symbolic act of Werner ultimately discarding the diamond, returning it to the sea, represents a rejection of greed and a restoration of balance․ The connection forged between Marie-Laure and Jutta through the model of Saint-Malo signifies the enduring power of human connection, even across vast distances and profound loss, offering a glimmer of hope for the future․

V․ Plot Summary & Key Events

The narrative unfolds across occupied France and Germany, centering on two protagonists: Marie-Laure, a blind French girl, and Werner, a German orphan with a talent for radio technology․ The story begins with Marie-Laure and her father fleeing Paris with a potentially cursed diamond, “The Sea of Flames,” sought by the ruthless Sergeant-Major Reinhold von Rumpel․

Key events include Marie-Laure’s refuge in Saint-Malo with her great-uncle Etienne, and Werner’s rigorous training at the brutal Schulpforta academy․ His skills lead him to a unit tasked with locating illegal radio transmissions, unknowingly bringing him closer to Marie-Laure․

The climax occurs during the siege of Saint-Malo, where Marie-Laure’s broadcasts inadvertently aid the Allied forces․ Werner, grappling with his conscience, ultimately chooses to protect Marie-Laure, leading to a poignant and ambiguous resolution․ The diamond’s fate, returned to the sea, symbolizes a release from its destructive power․

A․ The Diamond – The Sea of Flames

“The Sea of Flames” is far more than a mere jewel; it’s a catalyst driving much of the novel’s plot and embodying a potent myth․ Legend dictates the diamond brings misfortune to its owner, a curse repeatedly demonstrated throughout the story, fueling von Rumpel’s obsessive pursuit․

The diamond’s history is shrouded in mystery, passed down through generations and believed to grant immortality – a belief that consumes von Rumpel․ However, the narrative suggests its true power lies in its ability to reveal and exacerbate existing flaws within individuals․

Werner’s ultimate act of discarding the diamond back into the ocean isn’t about its monetary value, but a deliberate attempt to break the cycle of misfortune․ He returns it to its origin, preventing further harm, and demonstrating a moral choice over personal gain․ Its inconspicuousness in the water contrasts with the prominent model house․

B․ Marie-Laure’s Escape from Paris

Marie-Laure’s hurried departure from Paris with her father is a pivotal moment, triggered by the escalating Nazi occupation and the looming threat to their safety․ This escape isn’t simply a physical relocation; it represents a loss of innocence and a forced adaptation to a world consumed by war․

Her father, a master locksmith at the Museum of Natural History, carries with him a significant responsibility – safeguarding the Sea of Flames diamond․ This adds another layer of urgency and danger to their journey, making them targets for those seeking the jewel’s power․

The escape to Saint-Malo, the walled port city, is fraught with peril, requiring careful planning and reliance on the kindness of strangers․ This journey establishes Marie-Laure’s resilience and resourcefulness, qualities she will need to survive the coming years․ The model of Saint-Malo becomes crucial for her navigation․

C․ Werner’s Training at Schulpforta

Werner Pfennig’s acceptance into Schulpforta, an elite Nazi training school, marks a turning point in his life, offering an escape from the coal mines but at a significant moral cost․ The school’s rigorous curriculum focuses on technical skills, particularly radio technology, shaping him into a valuable asset for the German military․

Schulpforta represents the indoctrination of youth, showcasing the Nazi regime’s efforts to mold a generation loyal to its ideology․ Werner’s initial idealism clashes with the brutality and ruthlessness he witnesses, creating internal conflict and foreshadowing his later struggles․

His exceptional talent for radio repair and direction finding quickly sets him apart, attracting the attention of superiors and propelling him towards a dangerous path․ The training emphasizes obedience and suppression of individuality, testing Werner’s conscience and ultimately influencing his decisions throughout the war․

D․ The Siege of Saint-Malo

The siege of Saint-Malo forms the climactic backdrop for the novel’s convergence of fates, transforming the walled city into a brutal battleground․ The German forces, under the command of Von Rumpel, desperately attempt to hold the city against the advancing Allied troops, resulting in widespread destruction and civilian suffering․

Marie-Laure and Etienne find themselves trapped within the city, relying on their resourcefulness and the intricate knowledge of Saint-Malo’s hidden passages to survive․ The model of the city, painstakingly crafted by Marie-Laure’s father, becomes a vital tool for navigation and resistance․

Werner’s role during the siege is pivotal, tasked with locating and eliminating a crucial radio transmitter․ His internal conflict intensifies as he grapples with the consequences of his actions and the moral implications of serving the Nazi regime․ The siege ultimately leads to a fateful encounter with Marie-Laure, altering both their lives forever․

VI․ Symbolism in the Novel

Doerr masterfully employs symbolism throughout All the Light We Cannot See, enriching the narrative with layers of meaning․ The model of Saint-Malo represents not only physical space but also memory, connection, and the preservation of a lost world, linking Marie-Laure to her father’s legacy and ultimately, to Jutta․

The numbers and radio transmissions symbolize both the destructive power of war and the potential for communication and connection․ They initially serve as tools for German military strategy, but ironically, facilitate Marie-Laure and Werner’s eventual meeting, becoming a beacon of hope amidst chaos․

The sea and water imagery recurs throughout the novel, representing both danger and renewal․ The Sea of Flames diamond embodies obsession and destruction, while the ocean itself symbolizes the vastness of fate and the possibility of release, as Werner ultimately returns the jewel to its source․

A․ The Model of Saint-Malo

The intricately crafted model of Saint-Malo serves as a potent symbol throughout Anthony Doerr’s novel, extending far beyond a simple representation of the walled city․ Created by Marie-Laure’s father, Daniel LeBlanc, it embodies his love, ingenuity, and dedication to his daughter’s education and independence, especially given her blindness․

For Marie-Laure, the model is a tactile map, a means of navigating and understanding the world around her, offering a sense of control and familiarity․ It becomes a crucial tool for survival during the siege of Saint-Malo, allowing her to evade capture and maintain a connection to her home․

Significantly, the model also acts as a bridge connecting Marie-Laure and Werner Pfennig, ultimately facilitating their encounter; It represents a shared humanity and a poignant link to the past, becoming one of Marie-Laure’s last tangible connections to her father’s memory and a symbol of enduring hope․

B․ The Numbers & Radio Transmissions

The recurring motif of numbers and radio transmissions is central to the narrative’s structure and thematic concerns in “All the Light We Cannot See․” The numbers, initially appearing as seemingly random sequences, are revealed to be coordinates – specifically, those of German anti-aircraft gun placements, including one atop a motel where Werner is stationed․

These transmissions, delivered by a mysterious Frenchman on the radio, represent a clandestine resistance effort, subtly undermining the German war machine․ Marie-Laure unknowingly plays a pivotal role in this resistance, as she is the runner delivering the coded messages, effectively trapping Werner within the range of the broadcast․

The poetic irony lies in Marie-Laure’s unintentional contribution to Werner’s eventual ability to hear the transmissions that ultimately lead him to save her life․ The numbers and radio waves symbolize both the destructive power of war and the potential for connection and salvation amidst chaos, highlighting the novel’s exploration of fate and unintended consequences․

C․ The Sea & Water Imagery

Throughout “All the Light We Cannot See,” the sea and water imagery functions as a powerful and multifaceted symbol, representing both destruction and renewal, loss and liberation․ The ocean’s vastness mirrors the immensity of the war and the characters’ feelings of isolation and vulnerability․

The Sea of Flames diamond itself originates from the ocean, carrying with it a myth of misfortune, suggesting the destructive potential of obsession and greed․ Werner’s ultimate act of discarding the diamond back into the sea symbolizes a rejection of this destructive force and a return to a natural order․

Water also represents escape and the possibility of a new beginning, as seen in Marie-Laure’s journey and the eventual safety she finds․ The constant presence of the sea serves as a reminder of the cyclical nature of life, death, and rebirth, offering a glimmer of hope amidst the darkness of war and the enduring power of nature․

VII․ Character Analysis: Motivations & Development

A central aspect of the novel lies in the complex motivations driving its characters and their subsequent development throughout the narrative․ Werner Pfennig’s journey is marked by a profound internal conflict, torn between his technical brilliance and the moral compromises demanded by the Nazi regime․ His initial desire for escape through knowledge gradually evolves into a struggle for redemption․

Reinhold von Rumpel’s obsession with the Sea of Flames reveals a desperate attempt to cheat death, fueled by fear and a decaying sense of self․ This obsession consumes him, leading to increasingly ruthless actions and ultimately, his downfall․ His character embodies the destructive power of unchecked ambition․

Both characters undergo significant transformations, shaped by the horrors of war and their individual choices․ Analyzing their motivations provides a deeper understanding of the novel’s exploration of morality, guilt, and the enduring search for meaning in a world consumed by conflict․

A․ Werner’s Internal Conflict

Werner Pfennig’s character is defined by a persistent internal conflict, stemming from his exceptional technical aptitude and the morally compromised world he inhabits․ Initially, his fascination with radio represents an escape from the bleakness of his mining town, a path towards a brighter future․ However, this talent quickly becomes entangled with the Nazi regime’s war machine․

His training at Schulpforta exposes him to the ideology of superiority, yet his inherent decency clashes with the brutality he witnesses․ He grapples with the ethical implications of using his skills to track resistance fighters, particularly when his work inadvertently endangers others․

This internal struggle intensifies as he encounters Marie-Laure, recognizing a shared humanity that transcends national boundaries․ Werner’s conflict culminates in a pivotal decision to defy orders, ultimately choosing compassion over obedience, demonstrating a powerful arc of moral awakening․

B․ Von Rumpel’s Obsession

Reinhold von Rumpel’s relentless pursuit of the “Sea of Flames” diamond embodies a desperate, consuming obsession, fueled by a belief in its power to grant immortality․ A former gemologist, ravaged by cancer, he views the diamond not as a treasure, but as a potential cure, a last-ditch effort to cheat death․

This obsession blinds him to all moral considerations, driving him to ruthless acts and a willingness to endanger innocent lives, including Marie-Laure․ His single-minded focus transforms him into a predatory figure, willing to exploit and destroy anything standing between him and his goal․

Von Rumpel’s character serves as a chilling representation of the destructive nature of unchecked desire, and the lengths to which individuals will go when confronted with their own mortality․ His pursuit ultimately proves futile, highlighting the emptiness of seeking salvation through material possessions․

VIII․ Discussion Questions & Further Exploration

Consider the ethical implications of Werner’s choices within the Nazi regime․ To what extent is he complicit in the atrocities, and can his actions be justified by circumstance? Explore the novel’s portrayal of trauma and its lasting effects on individuals and communities․

Discuss the significance of the radio as a symbol of connection and resistance․ How does it facilitate communication and offer a glimmer of hope amidst the darkness of war? Analyze the role of fate and coincidence in shaping the characters’ destinies․

Further research could delve into the historical accuracy of the novel’s depiction of World War II, particularly the siege of Saint-Malo and the experiences of civilians․ Investigate the real-life stories of resistance movements and the impact of radio technology during the conflict․

cake pricing guide 2023

Cake Pricing Guide 2023: A Comprehensive Overview

Navigating cake pricing in 2023 requires understanding ingredient costs, labor, and overhead. Utilizing spreadsheets and considering regional variations
(HCOL vs. LCOL) are crucial.
Custom designs and serving sizes significantly impact final costs, with averages ranging from $6-$7 per serving.

Understanding the Basics of Cake Pricing

Establishing a solid cake pricing strategy begins with recognizing that it’s far more than simply covering the cost of ingredients. It’s a multifaceted calculation encompassing your time, skill, and business expenses. A fundamental principle is to value your labor; determine a realistic hourly rate reflecting your expertise and experience.

Begin by identifying your “cost of goods sold” – the direct expenses tied to each cake, including flour, sugar, eggs, and decorations. Don’t underestimate the impact of overhead costs like utilities, rent (if applicable), and equipment maintenance. These indirect expenses must be factored into your pricing to ensure profitability.

Different pricing methods exist. Cost-plus pricing involves calculating all costs and adding a desired profit margin. Per-serving pricing, common in wedding cake estimations, assigns a price based on the number of portions the cake yields. Understanding these basics is the foundation for a sustainable and successful cake business.

Cost of Ingredients

Accurately calculating ingredient costs is paramount to profitable cake pricing. This extends beyond the obvious – flour, sugar, butter, and eggs. Consider every component, from vanilla extract and baking powder to specialized decorations and edible glitters. Maintaining a detailed inventory and tracking price fluctuations is essential, as ingredient costs can vary significantly.

Bulk purchasing can yield substantial savings, but requires upfront investment and storage space. Compare prices from different suppliers to identify the most cost-effective options. Don’t forget to factor in potential waste; overbuying perishable items can negate savings.

Create a standardized recipe costing sheet for each cake flavor and size. This sheet should list every ingredient and its corresponding cost per unit. Regularly update this sheet to reflect current prices. Precise ingredient cost tracking forms the bedrock of your pricing structure, ensuring you aren’t undercharging for your creations.

Labor Costs & Hourly Rate

Determining a fair hourly rate is crucial for valuing your time and skills. Don’t undervalue your expertise! Consider your experience level, the complexity of your designs, and the local market rate for cake decorators. A starting point might be $25-$50 per hour, but adjust based on your specific circumstances.

Accurately track the time spent on each cake, from initial consultation and baking to decorating and delivery. Break down the process into stages to get a precise estimate. This includes time spent on shopping for ingredients, cleaning, and administrative tasks related to the order.

Factor labor costs into your pricing formula. For example, if a cake takes 5 hours to complete at an hourly rate of $30, your labor cost is $150. This figure, combined with ingredient and overhead costs, forms the basis of your final price; Remember, your time is valuable!

Overhead Expenses (Utilities, Rent, etc.)

Overhead expenses are the often-overlooked costs of running your cake business. These are the expenses that aren’t directly tied to a specific cake but are necessary for operation. Accurately calculating these costs is vital for profitability.

Common overhead expenses include rent or mortgage for your workspace, utilities (electricity, gas, water), internet, phone, insurance, and business licenses. Don’t forget about equipment depreciation – the gradual loss of value of your mixers, ovens, and decorating tools.

Allocate a portion of these expenses to each cake you create. A simple method is to calculate your total monthly overhead and divide it by the number of cakes you typically bake in a month. This gives you an overhead cost per cake. Including this cost ensures you’re not losing money on each order. Consider a percentage-based allocation for more complex calculations.

Pricing Methods: Cost-Plus Pricing

Cost-plus pricing is a straightforward method for determining your cake prices. It involves calculating the total cost of ingredients, labor, and overhead, then adding a desired profit margin. This ensures you cover all expenses and earn a reasonable income.

First, meticulously track the cost of every ingredient used in a cake. Next, calculate your labor cost based on your hourly rate (discussed elsewhere) and the time spent baking and decorating. Add to this the allocated overhead expenses for that cake.

Finally, determine your desired profit margin – often expressed as a percentage of the total cost. A common starting point is 20-30%, but this can vary based on your experience, market, and cake complexity. Adding this margin to your total cost gives you your final price. Customizable cake pricing guides, like those available on Etsy, can streamline this process.

Pricing Methods: Per-Serving Pricing

Per-serving pricing is a popular method, especially for tiered and wedding cakes. It establishes a fixed price for each portion the cake will yield, simplifying quotes for clients. However, accurate serving size estimations are crucial for profitability.

Begin by determining a base price per serving, considering your costs (ingredients, labor, overhead) and desired profit margin. As noted in Reddit discussions, average starting prices in high-cost-of-living areas can range from $6 to $7 per serving, increasing with complexity.

Providing a cake serving guide is essential. This chart illustrates cake sizes and corresponding serving counts, aiding client understanding and your pan dimension calculations. Remember to adjust the per-serving price based on flavor, filling, and intricate designs. More elaborate cakes naturally command a higher price per serving, reflecting the increased time and skill involved.

Average Cake Prices by Size & Servings

Establishing average cake prices requires considering both size and the number of servings. A simple 6-inch cake, typically serving 8-10 people, might range from $40 to $60, depending on design and ingredients. A 10-inch cake, serving 14-16, could fall between $70 and $120.

For tiered cakes, pricing becomes more nuanced. A two-tiered cake serving 50-75 guests could range from $300 to $600, while a three-tiered cake for 75-100 guests might cost $500 to $800 or more. Remember that these are averages; custom designs and intricate decorations will significantly increase the price.

Per-serving pricing often dictates the final cost. As discussed on Reddit, a baseline of $6-$7 per serving is common in higher cost-of-living areas. Utilizing a cake serving guide ensures accurate portioning and transparent pricing for your customers.

Wedding Cake Pricing: A Detailed Breakdown

Wedding cake pricing is significantly more complex than standard cake orders, demanding a detailed breakdown of costs. Beyond ingredient and labor expenses, consultation time, design sketches, and delivery fees must be factored in. Expect higher prices due to the artistry and time investment involved.

Tiered cakes are the norm for weddings, with pricing escalating based on the number of tiers and complexity of decoration. A basic three-tiered wedding cake serving 75-100 guests can start around $500, but elaborate designs with sugar flowers or intricate piping can easily exceed $800 or even $1200.

Regional pricing plays a crucial role. In high cost-of-living (HCOL) areas, starting prices can be $6-$7 per serving, while lower cost-of-living (LCOL) areas may see prices around $4-$5 per serving. Always provide a detailed quote outlining all costs before commencing work.

Tiered Cake Pricing Considerations

Tiered cakes necessitate a nuanced pricing approach, moving beyond simple per-serving calculations. Structural support – internal dowels and cake boards – adds to material costs and labor time. Each tier requires individual baking, leveling, and frosting, increasing complexity. Consider the weight of each tier; heavier tiers demand stronger support structures.

Intricate designs amplify pricing. Sugar flowers, hand-painting, and detailed piping significantly increase labor hours. Factor in the time spent creating templates and ensuring design consistency across tiers. Transportation also becomes more challenging and costly with tiered cakes, requiring specialized boxes and careful handling.

Pricing should reflect the skill and expertise required. A simple tiered cake with minimal decoration will be less expensive than a complex masterpiece. Clearly communicate the breakdown of costs to the client, including materials, labor, and delivery. A $125 cake can quickly become more expensive with added tiers and details.

Pricing for Custom Cake Designs

Custom cake designs demand a premium price reflecting the unique artistry and time investment. Begin with a base price determined by cake size and flavor, then meticulously add costs for each custom element. Detailed consultations are crucial to understand the client’s vision and accurately estimate the work involved.

Sculpted cakes require significantly more labor than standard designs, justifying a higher hourly rate. Complex sugar work, hand-painting, and intricate piping all contribute to increased costs. Factor in the cost of specialized tools and materials needed for unique techniques. Don’t undervalue your skill – a finished cake costing $125 reflects expertise.

Present a detailed quote outlining all costs, including design time, baking, decorating, and any additional materials. Consider offering tiered pricing options based on complexity, allowing clients to choose a design that fits their budget. Transparent pricing builds trust and ensures fair compensation for your artistry;

Flavor & Filling Price Adjustments

Base cake pricing typically reflects standard flavors like vanilla or chocolate. However, premium flavors and fillings necessitate price adjustments. Real fruit purees, exotic extracts, and gourmet chocolate all increase ingredient costs and should be factored into the final price.

Homemade fillings, such as salted caramel or raspberry coulis, require additional labor and ingredient expense compared to pre-made options. Layered fillings or multiple flavor combinations also add to the complexity and cost. Clearly communicate these adjustments to clients during the quoting process.

Consider a tiered pricing structure for flavors and fillings – a small upcharge for basic upgrades, and a larger increase for more elaborate options. Document your flavor and filling costs to ensure accurate pricing. Remember, clients often value unique flavor profiles and are willing to pay a premium for them. Transparently explaining these costs builds trust and justifies the price.

Frosting & Decoration Costs

Frosting type significantly impacts cake pricing. Basic buttercream is less expensive than Swiss meringue buttercream or ganache, reflecting ingredient and labor differences. Intricate piping work, textured finishes, and sculpted designs all demand more time and skill, justifying higher charges.

Fondant work is generally priced higher due to material cost and the time-intensive smoothing and detailing process. Fresh flowers, edible gold leaf, and hand-painted details represent substantial material expenses and artistic labor. Complex decorations, like sugar flowers or figurines, should be priced individually based on their complexity and time to create.

Develop a pricing list for common decorations to streamline the quoting process. Factor in the cost of decorating tools and supplies. Clearly outline decoration options and associated costs in your cake menu or consultation materials. Remember, decorations are a key element of visual appeal and perceived value.

Cake Serving Guide & Pan Dimensions

Providing a clear cake serving guide is essential for client expectations and accurate pricing. Standard serving sizes typically range from 1×1 to 1×2 inches, influencing the number of portions per cake. Round cakes are common, with dimensions like 6”, 8”, 10”, and 12” corresponding to varying serving counts – 8, 16, 24, and 32 servings respectively.

Square and rectangular cakes offer alternative serving options. A 9×13 inch sheet cake yields approximately 30 servings. Accurate pan dimension knowledge is crucial for ingredient scaling and cost calculation. Utilize a cake serving chart to visually represent serving sizes and corresponding cake dimensions for customers.

Consider cake height when determining servings; taller cakes yield more portions. Clearly communicate serving sizes during consultations to avoid misunderstandings. Having a readily available guide demonstrates professionalism and aids in order accuracy, ultimately impacting profitability.

Bulk Ingredient Purchasing & Cost Savings

Strategic bulk ingredient purchasing is a cornerstone of cost-effective cake pricing. Sourcing staples like flour, sugar, eggs, and butter in larger quantities significantly reduces per-unit costs. Wholesale suppliers and membership-based stores often offer substantial discounts compared to retail prices. Negotiating with suppliers for better rates, especially with consistent high-volume orders, can further enhance savings.

Proper storage is crucial to maintain ingredient quality when buying in bulk. Consider shelf life and storage requirements for each item. Comparing prices from multiple vendors ensures you secure the most competitive deals. Joining baking cooperatives can provide access to group purchasing power and reduced costs.

Carefully track ingredient usage to avoid waste and optimize purchasing decisions. Implementing a first-in, first-out (FIFO) inventory system helps minimize spoilage. Bulk buying isn’t always the answer; assess your storage capacity and demand before committing to large purchases.

Regional Price Variations (HCOL vs. LCOL)

Cake pricing is heavily influenced by geographic location, specifically the distinction between High Cost of Living (HCOL) and Low Cost of Living (LCOL) areas. In HCOL cities, expenses like rent, utilities, and ingredient costs are substantially higher, necessitating increased cake prices to maintain profitability. Reddit discussions reveal starting prices of $6-$7 per serving in HCOL regions for basic wedding cakes, escalating with complexity.

LCOL areas allow for more competitive pricing due to lower overhead. Adjusting pricing based on local market rates is crucial for attracting customers. Researching competitor pricing in your specific region provides valuable insights. Consider transportation costs if serving areas outside your immediate locality.

Factor in local demand and customer expectations when setting prices. A tiered pricing structure can cater to varying budgets. Transparency with customers regarding pricing factors builds trust and justifies costs.

Tools & Spreadsheets for Cake Pricing

Accurate cake pricing relies on utilizing effective tools and spreadsheets to manage costs and calculate profits. Etsy offers customizable cake pricing guides designed to streamline the process, allowing bakers to input ingredient costs, recipe amounts, and time spent to determine optimal pricing.

Spreadsheets are invaluable for tracking expenses, including ingredients, packaging, and labor. Categorizing costs (fixed vs. variable) provides a clear understanding of overhead. Calculating hourly rates ensures fair compensation for your time and expertise. Consider using templates or creating your own tailored to your specific business needs.

Online calculators can assist with portion sizing and ingredient scaling. Inventory management software helps track ingredient usage and minimize waste. Regularly updating your spreadsheets with current costs is essential for maintaining accurate pricing.

Reviewing & Adjusting Your Pricing Strategy

A successful cake business demands consistent review and adjustment of your pricing strategy. Market conditions, ingredient costs, and competitor pricing all necessitate periodic evaluation. Regularly analyze your profit margins to ensure profitability and sustainable growth.

Monitor ingredient price fluctuations and update your spreadsheets accordingly. Consider seasonal price adjustments based on ingredient availability. Evaluate customer feedback regarding perceived value and willingness to pay. Don’t be afraid to increase prices when justified by rising costs or increased demand.

Assess your time and labor costs to ensure you are adequately compensated. Experiment with different pricing methods (cost-plus, per-serving) to find what works best for your business. Stay informed about industry trends and adjust your strategy accordingly. Periodic reviews – quarterly or bi-annually – are highly recommended.

a modern guide to granny squares

Granny squares are a timeless crochet classic, offering versatility and creativity for crafters of all skill levels. Their enduring appeal lies in their simplicity and adaptability, blending tradition with modern style to create unique, eye-catching projects.

What Are Granny Squares?

Granny squares are iconic crochet motifs, typically square-shaped, made from clusters of stitches like single and double crochets. They are highly versatile, serving as building blocks for blankets, clothing, and home decor. These motifs are perfect for crafters of all skill levels, offering endless customization through color, texture, and shape. Modern interpretations expand beyond the classic square, introducing hexagons, triangles, and spirals, while maintaining the timeless charm that has made them a beloved craft staple for generations.

A Brief History of Granny Squares

Granny squares have a rich history, originating as a practical way to create warm blankets using scrap yarn. Traditionally, they were crocheted by grandmothers, hence the name, and passed down through generations. These motifs gained popularity in the mid-20th century for their simplicity and versatility. Over time, they evolved from basic blankets to modern, intricate designs, incorporating new techniques and materials. Their enduring appeal lies in their adaptability, making them a beloved craft for crocheters of all skill levels, from traditionalists to modern makers.

The Enduring Popularity of Granny Squares

Granny squares remain a beloved crochet staple due to their versatility and timeless appeal. Their simplicity makes them accessible to all skill levels, while their customization options allow for endless creativity. From traditional blankets to modern clothing and home decor, granny squares adapt seamlessly to any project. Their portability and quick completion time also contribute to their enduring popularity. With modern twists like bold colors, unexpected shapes, and intricate textures, granny squares continue to inspire crocheters, ensuring their relevance in contemporary crafting.

Modern Twists on Classic Granny Squares

Modern granny squares blend tradition with fresh ideas, featuring bold colors, unexpected shapes like hexagons, and creative textures. These innovations keep the classic design vibrant and contemporary.

Contemporary Color Combinations

Modern granny squares embrace bold, vibrant palettes and fresh colorwork, moving beyond traditional pastels. Designers now favor bright, contrasting hues and monochromatic schemes for a sleek, modern aesthetic. Gradient effects and ombre techniques add depth, while neutral tones with pops of color create a balanced look. These contemporary color combinations breathe new life into the classic design, making granny squares feel fresh and trendy for today’s projects, from home decor to fashion accessories.

Unexpected Shapes: Hexagons, Triangles, and More

Modern granny square crochet pushes boundaries with unconventional shapes like hexagons and triangles, offering fresh geometric possibilities. Hexagon granny squares create dynamic honeycomb patterns, while triangular designs add angular elegance. These shapes allow for innovative layouts and modern, free-form compositions. Spiral granny squares, featuring continuous rounds that swirl into colorful spirals, further enhance creativity. These unexpected shapes redefine traditional granny square motifs, enabling crafters to explore new visual dimensions and create unique, contemporary projects that stand out from the classic square designs.

Intricate Textures and Playful Embellishments

Modern granny squares are elevated by intricate textures and playful embellishments, adding depth and visual interest. Techniques like the Brick Stitch and Spike Stitch create dimensional effects, while yarn choices and colorwork enhance texture. Playful elements such as appliques, buttons, or tassels add a whimsical touch, making each square unique. These creative additions allow crafters to experiment with modern aesthetics, blending tradition with contemporary flair for dynamic, eye-catching designs that captivate and inspire.

Essential Materials and Tools

Essential materials include worsted-weight yarn, crochet hooks, tapestry needles, scissors, and stitch markers; These tools enable crafters to create versatile, modern granny square designs with ease.

Choosing the Right Yarn

Selecting the right yarn is crucial for granny squares, as it impacts texture, drape, and visual appeal. Worsted-weight yarns, like Caron Cakes, are popular for their vibrant colors and stitch definition. Acrylic, cotton, or blends are ideal for durability and softness. Consider seasonal preferences: cotton for summer, acrylic for warmth. Consider color palettes to match modern aesthetics, from bold brights to neutral tones. Swatching ensures the yarn behaves as expected, ensuring your granny squares look their best. Choose wisely to elevate your project’s style and functionality.

Crochet Hooks: Sizes and Materials

Crochet hooks come in various sizes and materials, each suited for specific projects. Aluminum and steel hooks are durable and provide consistent tension, while ergonomic grips reduce hand strain. Hook sizes are measured in millimeters and inches, with smaller hooks for finer yarns and larger ones for bulkier textures. Choosing the right hook ensures proper stitch tension and project quality. Consider the yarn weight and your personal comfort when selecting a hook. The right tool elevates your granny square crochet experience, making it both enjoyable and precise.

Other Necessary Tools for Granny Square Crochet

Beyond hooks and yarn, essential tools enhance your granny square crochet experience. A tapestry needle is crucial for weaving in ends neatly. Scissors are handy for cutting yarn, while stitch markers help track patterns. A yarn needle simplifies sewing squares together. Optional tools like stitch counters or crochet gauges ensure consistency. These accessories streamline your workflow, making the process efficient and enjoyable for crafters of all levels. They are small investments that make a big difference in your crochet journey.

Basic Crochet Stitches for Granny Squares

Mastering essential stitches like single crochet, double crochet, and chain stitch is key to creating classic granny squares. These foundational techniques form the basis of every design.

Single Crochet (SC)

The single crochet (SC) is a fundamental stitch in granny square crochet, known for its simplicity and versatility. It creates a smooth, dense fabric, making it ideal for intricate patterns and modern designs. To work an SC, insert the hook into the stitch, yarn over, draw up a loop, yarn over again, and pull through both loops. This stitch is perfect for adding texture and detail, ensuring a polished finish in any granny square project.

Double Crochet (DC)

The double crochet (DC) is a popular stitch in granny square patterns, creating a taller and more textured fabric than the single crochet. To work a DC, yarn over, insert the hook into the stitch, yarn over again, draw up a loop, yarn over, and pull through both loops on the hook. This stitch adds depth and visual interest, making it a cornerstone of modern granny square designs. Its versatility allows for intricate details and layered patterns, appealing to crocheters of all skill levels.

Chain Stitch (CH)

The chain stitch (CH) is a fundamental crochet stitch, serving as the foundation for most granny square patterns. It is created by yarning over and pulling through to form a series of connected loops. The chain stitch is essential for starting projects, joining squares, and creating spaces between stitches. Its simplicity makes it a great starting point for beginners, while its versatility allows it to blend seamlessly into intricate modern designs. Mastering the chain stitch is key to building a solid base for any granny square project, traditional or contemporary.

Step-by-Step Guide to Making a Modern Granny Square

Start with a foundation round, then build rounds with modern twists like color blocking or textured stitches, finishing with a sleek border for a contemporary look.

Starting the Square: Foundation Round

Begin your modern granny square with a foundation round that sets the tone for your project. Use a magic ring or chain stitches to create the initial circle. For a clean, modern look, start with a single crochet (SC) or chain stitch (CH) to form the base. Choose a worsted-weight yarn like Caron Cakes in a vibrant colorway to add contemporary flair. This round is crucial as it establishes the square’s structure and symmetry, ensuring a solid base for the subsequent rounds.

Building the Rounds: A Modern Approach

Modern granny squares often incorporate fresh techniques like the Brick Stitch or Spiral Granny Square for a contemporary twist. The Spiral Granny Square features continuous rounds that swirl into a vibrant, modern design, perfect for bold projects. Updated methods, such as the single crochet round for cleaner corners, add a sleek finish. These approaches allow for dynamic color play and texture, making each square unique. Use worsted-weight yarns and fresh color combinations to keep your project stylish and aligned with modern tastes. These techniques are perfect for all skill levels, ensuring a fresh, modern look.

Finishing Touches: Borders and Edging

Finishing your granny square with a polished border or edging elevates its appearance. Modern techniques emphasize tight edges and minimal gaps for a clean look. The spike stitch is a popular choice for adding texture and visual interest. Simple single crochet or half double crochet borders provide a sleek finish, while decorative edgings like shells or picots add a touch of elegance. Properly sealing the rounds ensures a professional result, making your granny square stand out as a modern, cohesive piece.

Tips for Perfecting Your Granny Squares

Mastery begins with consistency. Essential tips include maintaining even tension, ensuring accurate stitch counts, and embracing modern techniques to enhance both functionality and visual appeal.

Achieving Tight Edges

Tight edges are essential for a polished granny square. Use the modern spike stitch technique to minimize gaps and create a clean, contemporary look. Maintain consistent tension while crocheting to avoid loose stitches. Ensure each round is evenly spaced, and count stitches meticulously to prevent misalignment. For a sleek finish, opt for a smaller hook size or slightly firmer yarn weight. These tips will help you achieve crisp, professional-looking edges that elevate your granny square projects to the next level of sophistication and style.

Minimizing Gaps Between Stitches

Consistent stitch tension is key to avoiding gaps in granny squares. Use the spike stitch technique to create tight, even stitches. Ensure each stitch is worked firmly but not overly tight, maintaining uniformity across rounds. To prevent gaps, count stitches regularly and avoid skipping stitches. Using a stitch marker to track your place can help maintain accuracy. For a modern look, slightly tighten your tension or try a smaller hook size. These methods ensure a seamless, polished finish, keeping your granny square projects looking crisp and professional.

Modern Spike Stitch Techniques

The spike stitch adds a modern twist to granny squares, creating a sleek, textured look. By working stitches into previous rounds, it eliminates gaps and enhances visual interest. This technique is perfect for achieving tight edges and a contemporary aesthetic. Use a smaller hook size to maintain stitch definition and ensure a clean finish. Spike stitches are versatile, working well in both traditional and modern color schemes. They add depth and dimension, making your granny squares stand out in projects like blankets, cushions, or clothing. This technique is a must-try for crafters aiming for a fresh, polished look.

Joining Granny Squares

Joining granny squares is an essential step, offering versatility in creating cohesive designs. Traditional methods like whipstitch and modern techniques ensure seamless looks, enhancing your projects’ appeal.

Traditional Joining Methods

Traditional joining methods for granny squares include the whipstitch, single crochet, and slip stitch techniques. These time-tested approaches ensure a secure and nearly invisible seam. The whipstitch is the most common, sewing squares together with a needle and yarn. The single crochet method creates a subtle ridge, while the slip stitch offers a clean finish. These techniques have been passed down through generations, providing a reliable way to connect squares into blankets, afghans, or other projects. They remain popular for their simplicity and effectiveness.

Modern Joining Techniques for Seamless Looks

Modern joining techniques offer sleek, contemporary ways to connect granny squares. The “join-as-you-go” method eliminates sewing, while invisible seams using slip stitches or whipstitches create a clean finish. These techniques ensure a seamless look, perfect for modern designs. They allow for minimal visibility of joins, making projects appear more cohesive. Ideal for blankets, home decor, or clothing, these methods blend tradition with innovation, offering a fresh twist on classic granny square crochet. They cater to modern aesthetics while maintaining the timeless charm of the granny square.

Projects Beyond the Classic Blanket

Granny squares inspire modern creations like stylish cardigans, home decor items, and accessories. They can be transformed into cushions, bags, wall hangings, hats, scarves, and even jewelry.

Granny Square Clothing: Cardigans and More

Granny squares are not just for blankets! They can be transformed into stylish cardigans, offering a modern twist on traditional crochet. With vibrant colors and unique patterns, these cardigans are perfect for casual wear. The versatility of granny squares allows for customization, making each piece truly personal. Whether you prefer bold designs or subtle textures, granny square clothing adds a touch of handmade charm to your wardrobe. Explore patterns that blend classic techniques with contemporary fashion for a fresh, eye-catching look;

Home Decor: Cushions, Bags, and Wall Hangings

Granny squares bring a charming, handmade touch to home decor. Transform them into vibrant cushions, sturdy bags, or striking wall hangings to add personality to any room. Use bold color combinations and intricate textures to create modern, eye-catching pieces. These projects are perfect for crafters of all levels, offering a creative way to repurpose granny squares into functional and decorative items. Whether it’s a cozy cushion or a bohemian-inspired wall hanging, granny squares elevate home decor with timeless charm and contemporary flair.

Accessories: Hats, Scarves, and Jewelry

Granny squares are not just for blankets! They can be transformed into stylish accessories like hats, scarves, and jewelry, adding a modern, handmade touch to your wardrobe. Use vibrant colors and bold patterns to create unique pieces that stand out. The Spiral Granny Square or Hexagon Granny Square patterns work beautifully for hats and scarves, while smaller squares can be adapted into earrings or pendants. These projects are perfect for crafters of all levels, offering a fun way to personalize your style with granny square charm.

Inspiration and Resources

Discover endless inspiration and resources for modern granny square crochet, including free patterns, tutorials, communities, and books to enhance your creative journey.

Free Patterns and Tutorials Online

Explore a wealth of free granny square patterns and tutorials online, offering modern twists and classic designs. Websites like Ravelry, YouTube, and crochet blogs provide step-by-step guides, diagrams, and videos. From spiral granny squares to flower-themed motifs, these resources cater to all skill levels. Many creators share updated methods, such as new corner techniques, to enhance your projects. Whether you’re a beginner or an experienced crocheter, these free resources inspire creativity and help you master the granny square technique with ease and confidence.

Crochet Communities and Forums

Crochet communities and forums are vibrant spaces where crafters share ideas, patterns, and tips. Platforms like Ravelry, crochet forums, and social media groups offer extensive libraries of granny square inspiration. These communities foster collaboration, with members showcasing their projects and providing feedback. Whether you’re seeking advice or motivation, joining these groups connects you with fellow enthusiasts, helping you stay updated on trends and techniques. Engage with others, learn from their experiences, and grow your crochet skills in a supportive and creative environment.

Modern Granny Square Crochet Books

Modern granny square crochet books offer fresh twists on the classic technique, blending traditional methods with contemporary designs. Titles like Modern Granny Square Crochet and More provide over 35 patterns, including themed squares and innovative shapes. These books cater to all skill levels, featuring detailed tutorials, diagrams, and vibrant color combinations. They inspire creativity, from hexagon grannies to spiral designs, making them essential resources for crafters seeking to elevate their projects with modern flair while honoring the timeless granny square legacy.

Granny squares continue to evolve, blending tradition with modern creativity. Their timeless appeal invites crafters to experiment, ensuring their legacy endures through innovative designs and personal expression.

The Future of Granny Square Crochet

Granny square crochet is poised for a vibrant future, blending tradition with modern creativity. Contemporary designs now feature geometric shapes, vibrant color palettes, and innovative textures, appealing to all skill levels. Sustainability is also shaping the craft, with eco-friendly yarns gaining popularity. Digital tools and tutorials are making patterns more accessible, inspiring a new generation of crocheters. As crafters continue to experiment, granny squares will remain a cornerstone of crochet, evolving into fresh, dynamic projects that honor their heritage while embracing modern aesthetics and techniques.

Encouragement to Experiment and Create

Embrace creativity and push the boundaries of traditional granny square crochet. Experiment with bold color combinations, unexpected shapes, and unique textures to create one-of-a-kind projects. Don’t be afraid to try new stitches or techniques—every mistake is an opportunity to learn and grow. Join granny squares in innovative ways to craft modern blankets, clothing, or home decor. With endless possibilities, granny squares invite you to express your personal style and bring your vision to life. Happy crocheting!

crappie water temperature guide

Understanding water temperature is key to predicting crappie behavior, as it influences spawning, feeding, and habitat preferences. This guide explores how temperature affects crappie activity, helping anglers maximize their fishing success.

1.1 Understanding the Importance of Water Temperature for Crappie

Water temperature plays a critical role in determining crappie behavior, metabolism, and overall activity levels. Crappie are ectothermic, meaning their body temperature is regulated by their environment, making them highly sensitive to changes in water conditions. Temperature influences spawning patterns, feeding habits, and energy expenditure. For instance, crappie typically spawn when water temperatures reach 55-68°F, with specific variations between black and white crappie. Feeding activity also fluctuates with temperature, as warmer waters increase metabolism, while cooler temperatures slow it down. Understanding these temperature-driven behaviors helps anglers predict where crappie will be and how active they will be. This knowledge is essential for selecting the right lures, presentations, and fishing locations. By monitoring water temperature, anglers can better align their strategies with crappie behavior, enhancing their chances of a successful fishing experience. Temperature is a cornerstone factor in crappie ecology and angling success.

1.2 Overview of Crappie Behavior and Habitat

Crappie are highly adaptable fish, thriving in various aquatic environments, including lakes, ponds, and slow-moving rivers. They prefer areas with abundant cover, such as submerged vegetation, brush piles, or structural elements like docks and bridge pylons. Crappie behavior is influenced by seasonal changes, with distinct patterns in movement and activity. During warmer months, they often inhabit shallower waters near vegetation, feeding on small baitfish, insects, and crustaceans. In colder conditions, they tend to congregate in deeper, more stable environments. Their habitat preferences vary by species, with black crappie favoring clearer waters and white crappie tolerating murkier conditions. Understanding their habitat and behavioral patterns is crucial for effective fishing strategies, as crappie are often found near specific structures or transitions in water depth and vegetation.

Crappie Seasonal Patterns and Water Temperature

Crappie behavior shifts with seasonal water temperature changes, influencing their spawning, feeding, and habitat preferences. Understanding these patterns helps anglers predict movements and optimize fishing strategies year-round.

2.1 Spring Crappie Behavior and Water Temperature

During spring, crappie behavior is significantly influenced by rising water temperatures. As temperatures increase from the 50s into the 60s Fahrenheit, crappie begin migrating from deeper wintering areas to shallower zones. They congregate near structures like creek channels, rocks, and submerged vegetation, preparing for the spawn. Males typically start building nests in water 2-8 feet deep when temperatures stabilize around 60°F. Feeding activity increases as they replenish energy reserves post-winter. Crappie are most active in water temperatures between 55°F and 65°F during this season. Anglers often find success targeting areas with abundant cover and stable temperatures, as crappie are more predictable in their movements during this time. Understanding these patterns is crucial for optimizing spring fishing strategies;

2.2 Summer Crappie Behavior and Water Temperature

During summer, crappie behavior adapts to warmer water temperatures, typically ranging from 70°F to 85°F. As temperatures rise, crappie often seek deeper, cooler waters, especially in structures like submerged trees or rock formations. They may suspend in the thermocline, where oxygen levels and temperature create a comfortable zone. Feeding activity peaks during early morning or late evening when temperatures are cooler. Crappie tend to be less active in the heat of the day, seeking shade and cooler pockets. Anglers should focus on deeper areas, using jigs or spoons that mimic baitfish. Retrieval speeds should be slower, as crappie metabolism slows in warmer water. Despite the heat, summer offers opportunities to target crappie in predictable patterns, especially around structural elements and thermal breaks.

2.3 Fall Crappie Behavior and Water Temperature

In the fall, as water temperatures gradually cool from the 70s to the 50s (°F), crappie behavior shifts to prepare for winter. They begin migrating from deeper summer habitats to shallower areas, often congregating around creek channels and structural elements like submerged trees. Feeding activity increases as crappie bulk up for the colder months, targeting baitfish and smaller aquatic organisms. During this transition, they may suspend in mid-water or near the bottom, depending on the thermocline. Anglers should focus on areas with abundant cover, such as submerged vegetation or sunken logs. Cooler water temperatures make crappie more active during midday, unlike their summer nocturnal tendencies. Using jigs or minnows near these transition zones can be highly effective. As temperatures drop below 50°F, crappie will start to move to deeper, more stable environments, signaling the end of their fall feeding frenzy.

2.4 Winter Crappie Behavior and Water Temperature

During winter, crappie behavior is significantly influenced by colder water temperatures, typically ranging from 38°F to 45°F. As temperatures drop, crappie become less active and tend to congregate in deeper, more stable environments, often 15–30 feet below the surface. They form tight schools near structural elements like drop-offs, submerged humps, or standing timber. Feeding activity slows, but crappie will still eat smaller prey like jigs or spoons if presented slowly and precisely. Anglers should focus on deeper pools and channels, using vertical presentations to target these lethargic fish. Water temperature stability is crucial during winter, as rapid changes can further reduce activity. Despite the cold, winter can offer excellent crappie fishing opportunities for those willing to adapt to their slower metabolism and deeper habitats. Patience and precise presentations are key to success during this season.

Optimal Water Temperatures for Crappie Activities

Crappie thrive in specific temperature ranges for spawning (55°F–68°F), feeding (50°F–70°F), and comfort (60°F–75°F), with white crappie slightly warmer than black crappie.

3.1 Spawning Temperature Range for Crappie

The crappie spawning process typically occurs when water temperatures reach a specific range, generally between 55°F and 68°F. During this period, crappie move to shallow areas with suitable structures like vegetation or submerged logs to lay eggs. White crappie tend to spawn at slightly warmer temperatures than black crappie, with white crappie spawning in waters as warm as 60°F to 65°F and black crappie spawning in 55°F to 62°F. The exact temperature range can vary depending on geographic location and water clarity. Stable water temperatures are crucial for successful spawning, as fluctuations can disrupt the process. Understanding these temperature thresholds is essential for anglers aiming to target crappie during their spawn, as it helps in identifying the best locations and timing for fishing.

  • White crappie: 60°F–65°F
  • Black crappie: 55°F–62°F

Optimal spawning conditions are further influenced by factors such as water depth and cover.

3.2 Feeding Temperature Range for Crappie

Crappie are most active feeders in water temperatures ranging from 50°F to 80°F, with their feeding intensity peaking during specific temperature ranges. In cooler waters, below 60°F, crappie tend to feed more aggressively as they prepare for colder months. As temperatures rise above 65°F, they may seek deeper, cooler waters or shaded areas to avoid overheating. During the summer months, when temperatures exceed 75°F, crappie often feed during early morning or late evening hours when water temperatures are slightly cooler. In the fall, as temperatures drop below 70°F, crappie become highly active again, feeding on baitfish and insects in preparation for winter. Understanding these feeding temperature ranges helps anglers choose the best times and locations to target crappie effectively.

  • Peak feeding temperatures: 50°F–70°F
  • Summer feeding: 65°F–75°F (early morning/late evening)
  • Fall feeding: 60°F–70°F

Temperature plays a critical role in determining crappie feeding behavior and activity levels.

3.3 Comfort Zone Water Temperatures for Crappie

Crappie thrive in water temperatures between 65°F and 75°F, which is considered their comfort zone. Within this range, they exhibit heightened activity, feeding, and movement. Temperatures above 75°F can stress crappie, forcing them to seek deeper, cooler waters or shaded areas. Conversely, when temperatures drop below 60°F, crappie become less active and may retreat to deeper, warmer areas. During summer, they often stay in 15–20 feet of water, while in winter, they may descend to 30–40 feet to find stable temperatures. Understanding their comfort zone helps anglers identify the most productive fishing spots based on seasonal temperature changes.

  • Optimal comfort range: 65°F–75°F
  • Summer depth: 15–20 feet
  • Winter depth: 30–40 feet

Temperature stability is key to Crappie comfort and activity levels.

Locating Crappie Based on Water Temperature

Crappie locations vary with water temperature fluctuations, moving to deeper waters in summer and shallower areas during spring spawning, often near submerged structures and cover.

4.1 Using Thermoclines to Find Crappie

Thermoclines, layers where water temperature changes rapidly, are crucial for locating crappie. During summer, crappie often gather near these layers, where oxygen levels are stable. Anglers can use depth finders to identify thermoclines, typically found between 10-30 feet deep. Once located, crappie tend to suspend near the thermocline, feeding on baitfish. Jigs and minnows are effective lures here. Understanding thermocline dynamics helps anglers target crappie more effectively, especially in warm weather when fish seek comfort zones. This strategy is particularly useful in deep lakes and reservoirs where thermoclines are more pronounced.

4.2 Identifying Structures and Cover at Specific Temperatures

Crappie often relate to specific structures and cover based on water temperature. In spring, when temperatures rise into the 50s and 60s, crappie move to shallow areas with abundant vegetation or submerged structures like logs or rocks. During summer, as temperatures climb above 70 degrees, they seek deeper cover such as drop-offs, bridge pylons, or sunken trees. In fall, cooling water drives crappie to mid-depth structures like creek channels or submerged grass beds. In winter, they gravitate toward deeper, more stable environments like humps or ledges. Understanding these patterns helps anglers pinpoint crappie locations. For example, in early spring, focus on shallow cover near spawning areas, while in summer, target deeper structures where fish escape the heat. This approach maximizes fishing success by aligning tactics with crappie behavior.

Adjusting Fishing Strategies Based on Water Temperature

Adapt lures, retrieval speeds, and presentation to match crappie behavior at different temperatures. In warmer waters, use faster-moving lures, while slower, subtler presentations work best in cooler conditions.

5.1 Choosing the Right Lures for Different Temperature Ranges

In warmer water (above 70°F), crappie are more active, making them susceptible to vibrant jigs and spinners. Use bright colors to attract their attention in these conditions. During cooler temperatures (50°F to 70°F), opt for smaller, more subtle lures like minnows or soft plastics, which mimic their natural prey. In cold water (below 50°F), crappie metabolism slows, so use slow-moving baits like live bait or small spoons to entice strikes. Always consider the forage base and water clarity when selecting lures, as these factors influence visibility and appeal. Matching the lure to the temperature ensures a higher likelihood of success, as crappie behavior and preferences change with the seasons.

5.2 Adjusting Retrieval Speed and Presentation

Water temperature significantly influences the optimal retrieval speed and presentation when targeting crappie. In warmer water (above 70°F), crappie are more aggressive, so faster retrieves with jigs or spinnerbaits can be effective. However, in cooler temperatures (50°F to 70°F), slower, more deliberate presentations are often better, as crappie metabolism slows. During the cold winter months (below 50°F), use extremely slow, subtle movements, such as hopping a jig or dragging a lure along the bottom, to entice strikes. Additionally, water clarity plays a role: in clear water, natural presentations are key, while in stained water, brighter colors and slightly faster action may work. Adjusting your retrieve speed and presentation to match the temperature and conditions ensures you meet crappie where they are most active and receptive to feeding.

5.3 Time of Day Considerations for Crappie Fishing

The time of day plays a crucial role in crappie fishing, as their activity often peaks during specific periods. Early morning and late evening are typically the best times, as crappie tend to feed more actively during these low-light conditions. In warmer water temperatures, crappie may move deeper during the midday heat, making them less accessible. However, in cooler water, they may remain active throughout the day. During summer, focus on dawn and dusk when crappie are more likely to move into shallower areas to feed. In winter, midday can be productive as the sun warms the water slightly. Understanding these patterns helps anglers optimize their fishing efforts by targeting crappie during their most active feeding times, increasing the chances of a successful catch.

Understanding crappie behavior through water temperature is crucial for successful fishing. Adapt strategies based on seasonal changes and use the right techniques for optimal results.

6.1 Summarizing Key Points

Water temperature significantly influences crappie behavior, dictating their spawning, feeding, and habitat preferences. Crappie typically spawn when temperatures range between 62°F and 68°F, moving to shallower areas with suitable cover. In spring, they migrate to nearshore zones, while summer and winter push them to deeper, cooler waters. Feeding activity peaks at specific temperature ranges, with crappie seeking structures like submerged vegetation or drop-offs. Understanding these patterns allows anglers to adjust strategies, such as lure selection and retrieval speed, enhancing fishing success. By monitoring water temperature, anglers can better predict crappie movements and behaviors, ultimately improving their chances of landing these elusive fish.

6.2 Final Tips for Successful Crappie Fishing

To maximize your crappie fishing success, always monitor water temperature to predict behavior and movements. Use jigs or minnows during spawning seasons when temperatures are between 62°F and 68°F. In warmer months, try crankbaits or spinnerbaits in deeper waters. During colder periods, slow down your presentation and target structures like submerged vegetation or drop-offs. Pay attention to time of day, as crappie are often most active during early morning or late evening; Experiment with different depths and covers, as crappie may shift locations based on temperature fluctuations. Finally, stay patient and adaptable, as crappie behavior can change rapidly with environmental conditions. By combining these strategies, you’ll increase your chances of landing more crappie throughout the year.

tv guide plano tx

Welcome to the Plano, TX TV Guide, your ultimate resource for local television listings. Discover a wide range of channels, shows, and programming options available in Plano, catering to diverse viewer preferences.

1.1 Overview of TV Viewing Options in Plano

Plano, TX offers a diverse range of TV viewing options to suit every household’s needs. Residents can choose from cable providers like AT&T U-Verse, Spectrum, and Frontier FiOS, each offering extensive channel lineups. Satellite TV options, including DIRECTV and DISH Network, provide additional choices for viewers. Streaming services like Netflix and Hulu are also widely popular. Additionally, over-the-air channels and free digital broadcasts ensure access to local news, sports, and entertainment. With HDTV and digital broadcasts available, Plano viewers enjoy high-quality programming. This variety makes it easy for residents to find their favorite shows and stay entertained.

1.2 Importance of a Comprehensive TV Guide

A comprehensive TV guide is essential for Plano residents to navigate the numerous viewing options efficiently. It helps users quickly find their favorite shows, movies, and sports events across various channels. With detailed listings by time and provider, viewers can plan their schedule and avoid missing out on popular programs. The guide also highlights local content, such as news and community events, ensuring residents stay informed. Moreover, it simplifies the process of filtering listings by provider, making it easier to explore both cable and streaming services. This resource enhances the overall viewing experience, ensuring convenience and accessibility for all TV enthusiasts in Plano.

Local TV Channels in Plano, TX

Plano, TX offers a diverse range of local TV channels, including major networks like ABC, CBS, NBC, and FOX, as well as local news, sports, and community-focused stations.

2.1 Major Broadcast Channels

Plano, TX residents enjoy access to major broadcast channels, including ABC, CBS, NBC, FOX, and PBS. These channels provide a wide range of programming, from national news and primetime series to sports and entertainment. Local affiliates like KTVT (CBS 11) and KTXA (21) offer regional content. Viewers can tune into popular shows, live events, and breaking news. With options to watch via antenna, cable, or satellite, Plano’s major broadcast channels ensure diverse and high-quality entertainment for all audiences. This variety makes them a cornerstone of the local TV viewing experience.

2.2 Local News and Sports Channels

Plano residents can stay informed with local news channels like KTVT (CBS 11) and KTXA (21), offering updated coverage of community events, weather, and regional news. For sports enthusiasts, channels such as TXA 21 and Spectrum’s digital channel 15.101 provide live broadcasts of local games and events. These channels ensure viewers never miss out on Dallas-area sports, including high school athletics and professional teams. Whether it’s breaking news or live sports, Plano’s local channels deliver timely and relevant content to keep audiences engaged and informed.

2.3 Community and Public Access Channels

Plano’s community and public access channels offer a platform for local programming, fostering community engagement. Channels like Plano TV provide coverage of city council meetings, community events, and educational programs. Public access channels also feature locally produced content, such as cultural showcases and neighborhood spotlights. These channels are available through providers like Spectrum (channel 15.101), AT&T U-Verse (channel 99), and Frontier FiOS (channels 30 and 31). They serve as vital resources for residents, promoting transparency and connectivity within the Plano community.

Cable TV Providers in Plano, TX

Plano offers several cable TV providers, including AT&T U-Verse, Spectrum, and Frontier FiOS. These providers deliver a wide range of channels, HD options, and on-demand content.

3.1 AT&T U-Verse TV Listings

AT&T U-Verse offers a diverse channel lineup in Plano, TX, with options for every viewer. Subscribers can access popular networks, sports, movies, and family-friendly content. The service also includes on-demand titles and DVR capabilities. Local channels such as CBS11 and FOX4 are available, ensuring residents stay updated on news and events. U-Verse TV listings can be browsed by channel, time, or show title, making it easy to plan your viewing schedule. Additionally, users can filter listings to find specific genres or programs, enhancing their entertainment experience in Plano.

3.2 Spectrum TV Channel Lineup

Spectrum TV offers a robust channel lineup in Plano, TX, catering to diverse viewing preferences. Residents can enjoy a wide range of networks, including local affiliates, sports, and entertainment channels. Popular options like ABC, CBS, FOX, and NBC are available in high definition. Spectrum also provides access to premium channels such as HBO and Showtime for movie enthusiasts. The lineup includes family-friendly content, news networks, and international programming. With Spectrum, viewers can browse listings by channel or time, ensuring they never miss their favorite shows. Additionally, on-demand content and the Spectrum TV app enhance the viewing experience, offering flexibility and convenience.

3.3 Frontier FiOS TV Listings

Frontier FiOS TV offers a comprehensive channel lineup for Plano, TX residents. With FiOS, viewers can access a variety of channels, including local networks, sports, and entertainment options. FiOS TV listings are available online, allowing users to browse by channel or time. The service includes popular channels like ESPN, CNN, and HGTV, as well as premium options for movies and sports. Frontier FiOS also provides on-demand content and a user-friendly guide, ensuring a seamless viewing experience. Whether you’re a fan of live sports or binge-watching your favorite series, Frontier FiOS TV has something for everyone in Plano, TX.

Satellite TV Options

Explore satellite TV options in Plano, TX, with providers like DIRECTV and DISH Network. Enjoy extensive channel lineups, HD programming, and premium content for sports and movies for entertainment.

4.1 DIRECTV Channel Guide

DIRECTV offers an extensive channel lineup for Plano, TX, featuring live sports, movies, and HD content. The guide allows users to search by time or channel, ensuring easy access to favorite shows. With options like NFL Sunday Ticket and premium networks, DIRECTV caters to sports fans and entertainment enthusiasts. Viewers in Plano can enjoy local programming, including Dallas-based channels, alongside national broadcasts. The guide also supports streaming through the DIRECTV app, making it versatile for modern viewers. This comprehensive service ensures a seamless TV experience, whether you’re watching at home or on the go.

4.2 DISH Network Listings

DISH Network provides a robust channel lineup for Plano, TX, offering a mix of entertainment, sports, and news. Users can customize their viewing experience with add-ons like NFL RedZone and premium movie channels. The guide features live and on-demand content, allowing viewers to plan their schedule. DISH’s Hopper DVR integrates seamlessly, enabling recording and streaming across devices. With flexible packages and competitive pricing, DISH Network is a popular choice for residents in Plano seeking diverse and accessible TV options.

Streaming Services in Plano, TX

Streaming services like Netflix, Hulu, and Amazon Prime Video are popular in Plano, offering a wide range of on-demand content, including original series and movies. Free options like Pluto TV and Tubi also provide access to various shows and channels, catering to diverse viewer preferences. These platforms allow users to stream live TV, sports, and entertainment, making them a convenient alternative to traditional cable and satellite services.

5.1 Popular Streaming Platforms

Streaming platforms like Netflix, Hulu, and Amazon Prime Video dominate Plano’s digital entertainment landscape, offering a vast library of original series, movies, and on-demand content. Disney+, HBO Max, and Apple TV+ are also widely popular, providing exclusive shows and films. These platforms cater to diverse audiences, ensuring there’s something for everyone. With the ability to stream live TV, sports, and entertainment, they offer flexibility and convenience. Additionally, free options like Pluto TV and Tubi provide cost-effective alternatives, making streaming a preferred choice for many viewers in Plano, Texas.

5.2 Free Streaming Options

Plano residents can enjoy free streaming options like Pluto TV, Tubi, and Yahoo Finance, offering a variety of live and on-demand content. Pluto TV provides free access to popular TV shows, movies, and original programming, while Tubi features a wide library of films and series. Yahoo Finance offers live streams of financial news and market updates. These platforms require no subscription, making them ideal for budget-conscious viewers. They also include a range of channels catering to different interests, from entertainment to sports, ensuring a diverse viewing experience without any cost.

HDTV and Digital Broadcasts

Plano, TX offers high-quality HDTV and digital broadcasts, providing crystal-clear viewing experiences. Residents can access various HD channels for news, sports, and entertainment, enhancing their TV enjoyment.

6.1 High-Definition TV Channels

In Plano, TX, viewers can enjoy a wide range of High-Definition TV (HDTV) channels, offering crystal-clear visuals and immersive sound. Major networks like ABC, CBS, FOX, and NBC broadcast in HD, ensuring sharp and vibrant imagery. Local news, sports, and entertainment programs are also available in HD, enhancing the viewing experience. With HDTV, residents can watch their favorite shows, live events, and movies with superior quality. Popular channels such as ESPN, HBO, and Showtime further complement the HD lineup, providing diverse content options. Plano’s digital broadcasts ensure minimal interference and optimal signal strength for uninterrupted HD viewing pleasure.

6.2 Digital Antenna Requirements

To enjoy free over-the-air HD TV channels in Plano, TX, a reliable digital antenna is essential. Ensure your antenna is designed for HD signals and compatible with ATSC standards. Indoor antennas work for strong signals, while outdoor antennas provide better range and reception. Position the antenna near a window or elevated area to minimize interference. Use a signal amplifier if necessary, especially for weaker channels. Always scan for channels after setup to optimize your viewing experience. Regularly check and adjust the antenna for optimal signal strength and clarity. This ensures access to Plano’s diverse free HD programming.

TV Guide Listings by Time and Channel

Explore Plano’s TV listings organized by time and channel for easy navigation. Search prime-time schedules, weekend specials, and live events, ensuring you never miss your favorite shows. Real-time updates included.

7.1 Prime-Time TV Schedule

Plano’s prime-time TV schedule offers a diverse lineup of popular shows and live events. Major networks like CBS feature programs such as FBI at 6:00 PM and Texas Country Reporter at 6:30 PM. Viewers can enjoy a mix of drama, comedy, and local news. Listings are organized by time and channel, making it easy to plan your evening. Real-time updates ensure accuracy, so you never miss your favorite shows. Whether you’re tuning in for entertainment or staying informed with local updates, Plano’s prime-time TV schedule has something for everyone.

7.2 Weekend Specials and Movies

Plano’s weekend TV specials and movie listings offer an exciting lineup for all audiences. Catch the latest blockbusters, classic films, and family-friendly movies across various channels. Major networks feature special programming, including Marvel movie marathons and Oscar-winning films. Local channels like KTVT-DT and KTXA-DT showcase regional specials, while cable providers offer premium movie channels. Streaming services in Plano also provide on-demand access to new releases. Check your TV Guide for detailed schedules, ensuring you don’t miss out on weekend entertainment tailored to every interest and preference.

Sports and Entertainment

Plano’s TV Guide features live sports broadcasts on channels like CBS11 and FOX, alongside popular entertainment shows such as FBI and movies on DABL and START TV.

8.1 Live Sports Broadcasts

Plano, TX offers extensive live sports coverage, catering to all enthusiasts. Catch local and national events on channels like CBS11, FOX, and NBC. Don’t miss NBA Finals, MLB games, or the U.S. Open Golf Championship. For football fans, NFL games are a staple, while hockey lovers can enjoy NHL matchups. Local teams, like the Dallas Cowboys and Texas Rangers, feature prominently. Additionally, ESPN and FOX Sports bring exclusive coverage of tennis, basketball, and soccer. With real-time updates and high-definition broadcasts, Plano’s TV Guide ensures you never miss a moment of your favorite sports action.

8.2 Popular Entertainment Shows

Plano, TX residents enjoy access to a variety of popular entertainment shows. From scripted dramas like FBI and Family Feud to reality TV hits like Survivor and The Voice, there’s something for everyone. Comedy fans can tune into The Big Bang Theory and Young Sheldon, while movie enthusiasts can catch the latest films on premium channels. Local networks like CBS11, ABC, and FOX feature a mix of primetime series and syndicated favorites. With streaming platforms like Hulu and Netflix also available, Plano’s TV Guide ensures you never miss your favorite shows, whether live or on-demand.

Technical Information and Troubleshooting

Resolve common issues like poor signal strength or channel interference with our guide. Learn about antenna TV setup and troubleshooting tips for optimal viewing in Plano, TX.

9.1 Antenna TV Setup Guide

Setting up an antenna for optimal TV reception in Plano, TX is straightforward. Choose the right antenna based on your location and signal strength. Indoor antennas are ideal for urban areas, while outdoor antennas offer better range. Position the antenna near a window or outside for clearer reception. Use a signal finder tool to identify the best direction for maximum channels. Finally, scan for channels on your TV to ensure you receive all available broadcasts. Regularly check and adjust the antenna to maintain optimal signal quality.

9.2 Common Issues and Solutions

Common issues with TV reception in Plano, TX include poor signal strength, lost channels, and connectivity problems. Poor reception can be resolved by adjusting antenna placement or upgrading to a higher-quality model. Lost channels often require re-scanning for available signals. For cable or satellite issues, check for outages or loose connections. Ensure your equipment is up-to-date and properly installed. Refer to your provider’s troubleshooting guide for specific solutions; Regularly updating your TV’s software and checking for interference from nearby devices can also improve viewing experiences. Always verify signal strength using online tools for optimal results.

How to Use the TV Guide Effectively

Navigate the Plano TV Guide by filtering listings by provider, time, or channel. Search for specific shows, plan your viewing schedule, and explore features like favorites and reminders.

10.1 Searching for Specific Shows

Efficiently find your favorite programs using the Plano TV Guide. Utilize the search bar to look up shows by title, genre, or channel. Filter results by time slots or providers like AT&T U-Verse, Spectrum, or Frontier FiOS. For streaming services, search within platforms like Netflix or Hulu. Save shows to a favorites list for quick access. Set reminders for upcoming episodes and explore options to record or stream content. This feature ensures you never miss your preferred programs, making your viewing experience seamless and enjoyable in Plano, TX.

10.2 Filtering Listings by Provider

Customize your viewing experience by filtering Plano TV Guide listings by provider. Select from options like AT&T U-Verse, Spectrum, or Frontier FiOS to view only the channels available through your subscription. This feature simplifies navigation, ensuring you only see content accessible to you. Additionally, streaming services like Netflix or Hulu can be filtered to explore their exclusive offerings. By narrowing down listings to your specific provider, you save time and easily discover new shows or movies tailored to your subscription plan in Plano, TX.

The Plano, TX TV Guide helps viewers find favorite shows and channels with ease, catering to diverse preferences and enhancing their viewing experience in Plano, TX.

11.1 Benefits of a Comprehensive TV Guide

A comprehensive TV guide for Plano, TX, offers numerous benefits, including easy access to show listings, channel lineups, and programming schedules. It helps viewers discover new shows, track favorites, and plan their viewing experience efficiently. With features like search filters and provider-specific listings, users can quickly find content tailored to their preferences. The guide also highlights HDTV options, sports broadcasts, and local news, ensuring residents stay informed and entertained. By providing detailed and organized information, a TV guide enhances the overall viewing experience, making it a valuable resource for Plano’s diverse audience.

11.2 Final Tips for Maximizing Your Viewing Experience

To maximize your viewing experience in Plano, TX, plan your schedule using the TV guide to catch favorite shows and discover new ones. Utilize filters to narrow down listings by provider, genre, or time. Explore streaming platforms for on-demand content and check HDTV listings for superior quality. Set reminders for live sports and special events to never miss a moment. Regularly consult the guide to stay updated on channel lineups and programming changes. By leveraging these tips, you can enhance your entertainment experience and make the most of your television options in Plano.

crappie water temperature guide

Understanding water temperature is key to successful crappie fishing. This guide explores how temperature influences crappie behavior, migration patterns, and feeding habits, helping anglers maximize their fishing success year-round.

Overview of Crappie Behavior and Water Temperature

Crappie behavior is heavily influenced by water temperature, which dictates their activity levels, feeding patterns, and habitat preferences. In early spring, as temperatures rise above 50°F, crappie begin moving from deep wintering areas to shallower waters, becoming more active. When temperatures reach the mid-50s, they start feeding more aggressively, preparing for the spawn. During the spawning season, typically between 55°F and 65°F, crappie move into very shallow water (1-6 feet deep) with abundant cover like brush or submerged trees. In summer, when temperatures exceed 85°F, they retreat to deeper, cooler waters. In fall, as temperatures drop, crappie migrate back to deeper structures, feeding heavily to build energy reserves for winter. In winter, when temperatures fall below 50°F, crappie are less active, often holding in deep holes. Understanding these temperature-driven behaviors is essential for predicting crappie movements and optimizing fishing strategies.

Importance of Understanding Water Temperature for Crappie Fishing

Understanding water temperature is crucial for successful crappie fishing, as it directly impacts their behavior, feeding patterns, and habitat preferences. Crappie are highly temperature-sensitive, and their activity levels fluctuate significantly with changing water conditions. By recognizing how temperature influences their movements, anglers can better predict where to find crappie and when they are most likely to bite. For instance, during specific temperature ranges, crappie transition between deep and shallow waters, making their locations more predictable. Knowing these patterns allows anglers to select the right tactics, such as choosing appropriate lures or bait and adjusting fishing depth. Additionally, understanding temperature-driven behaviors helps anglers identify prime feeding windows and spawning periods, maximizing their chances of a successful fishing trip. This knowledge is essential for both novice and experienced anglers aiming to improve their skills and adapt to seasonal changes.

Seasonal Water Temperature Guide for Crappie Fishing

Water temperature significantly influences crappie behavior and location throughout the year. This guide details seasonal patterns, from spring migration to shallow waters and fall return to deeper areas, offering tactical insights for each phase.

Early Spring (35-50°F)

During early spring, crappie transition from deep winter habitats to shallower areas as water temperatures gradually rise. Once temperatures reach around 50°F, crappie become more active, feeding on baitfish and insects in 10-20 feet of water. They often gather near submerged structures like brush piles or sunken logs. Anglers should focus on slow trolling with minnows or small jigs near creek channels and river bends. As the water warms, crappie start moving towards spawning areas, making them more accessible in shallow coves and bays. Patience is key, as early spring crappie can be sluggish but responsive to the right presentations. This period offers prime opportunities for anglers to target pre-spawn crappie effectively.

Prespawn Migration (50-60°F)

As water temperatures rise to 50-60°F, crappie begin their prespawn migration, moving from deep wintering areas into shallower tributary arms and creek channels. Males typically lead the way, seeking out spawning sites in areas with submerged wood or vegetation. During this phase, crappie are highly active, feeding aggressively to build energy reserves before spawning. Anglers should target depths of 6-12 feet, focusing on brush piles, sunken logs, and channel bends. Effective tactics include casting curly-tail grubs, minnows, or small jigs near cover. As the water temperature approaches 60°F, crappie become even more predictable, often staging in shallow ditches and coves before moving onto spawning beds. This period is critical for anglers, offering excellent opportunities to catch large pre-spawn crappie in transitional areas.

Spawning Season (55-65°F)

During the spawning season, when water temperatures reach 55-65°F, crappie move into shallow areas to spawn. Males construct nests in sandy or gravelly bottoms, typically in 1-6 feet of water, while females hover nearby. This period offers prime fishing opportunities, as crappie are concentrated and active. Anglers should target shallow coves, protected bays, and areas with submerged vegetation or brush. Using minnows, small jigs, or spinnerbaits can be effective. As the spawn progresses, males remain near nests, making them easier to locate. However, females may retreat to slightly deeper waters after spawning. Patience and precise casting are key, as crappie can be finicky during this time. Understanding their spawning habits and habitat preferences is crucial for a successful fishing trip during this critical phase.

Post-Spawn Behavior (65-75°F)

As water temperatures rise to 65-75°F, crappie transition into post-spawn behavior. Following the spawn, they often seek deeper, cooler waters to recover. During this phase, crappie may be less aggressive, but they can still be caught using the right tactics. Anglers should target the edges of flats, drop-offs, and submerged structures like rocks or trees. Crappie tend to suspend in mid-water, feeding on baitfish schools. Trolling with small crankbaits or vertical jigging near structure can be effective. Additionally, casting soft plastics or minnows around shaded areas can yield results. Post-spawn crappie often seek refuge in deeper pools or near vegetation, where the water is cooler. Patience and a steady presentation are key, as they may be sluggish during recovery. Understanding their post-spawn movements and feeding patterns can help anglers capitalize on this transitional period and land more fish.

Summer Water Temperature Patterns

During summer, crappie seek deeper waters as surface temperatures rise. Anglers must adjust tactics to target these areas effectively, focusing on structure and cooler zones where crappie congregate.

Warm Water Tactics (75-85°F)

During the summer months when water temperatures range from 75°F to 85°F, crappie tend to seek deeper, cooler waters. Anglers should focus on structures like submerged logs, rocks, and drop-offs, where crappie congregate to escape the heat. Trolling with small crankbaits or jigs near these structures can be effective. Using live minnows or soft plastic lures on a Kentucky rig is also a proven strategy. Fish often suspend in 10-20 feet of water, so adjusting your presentation to match their depth is crucial. Pay attention to shaded areas, such as under overhanging trees or near aquatic vegetation, as these spots can provide cooler microhabitats. Early morning and late evening are prime times for crappie activity during this period. Patience and precise presentations are key to success in these warmer conditions.

Deep Water Strategies (85°F and Above)

When water temperatures exceed 85°F, crappie typically retreat to deeper, cooler waters. Targeting depths of 18-30 feet near structural elements like channel points, humps, and submerged timber is essential. Schools of crappie often suspend around baitfish, making vertical presentations with small jigs or spoons highly effective. A Kentucky rig bounced slowly along the bottom can also entice bites. In clear water, using lighter tackle and natural-colored lures mimics baitfish, increasing the chances of success. Focus on areas where the bottom drops sharply into deeper water, as these transitions attract crappie. During extreme heat, consider fishing near shaded areas like lily pads or overhanging trees, where water temperatures may be slightly cooler. Deep water tactics require precision and patience, as crappie may be sluggish, but they are still catchable with the right approach.

Fall Water Temperature Transition

As water temperatures cool, crappie migrate from deep summer haunts to shallower feeding areas, preparing for winter. Target transitional zones, such as creek channels and submerged structures, with minnows or jigs effectively.

Early Fall Migration (70-80°F)

As water temperatures begin to cool in early fall, crappie start their migration from deep summer haunts to shallower feeding areas. During this period, they are actively chasing baitfish and preparing for winter. Anglers should target transitional zones, such as creek channels, submerged wood, and near structure. Crappie often suspend in the 10-20 foot range, feeding on schools of shad or minnows. This is a prime time to use minnows, small jigs, or crankbaits that mimic baitfish. Focus on areas with abundant cover, such as sunken logs or brush piles, as crappie tend to congregate near these structures. The cooling water invigorates their metabolism, making them more aggressive and responsive to lures. Key locations include creek bends, drop-offs, and the edges of flats. By targeting these areas with the right presentation, anglers can capitalize on the early fall migration and enjoy consistent catches.

Late Fall Feeding Patterns (60-70°F)

As water temperatures cool to the 60-70°F range, crappie enter a feeding frenzy to build fat reserves for winter. They move to deeper areas, often 15-25 feet deep, and congregate around structure like submerged wood or drop-offs. During this period, crappie actively feed on baitfish, making them more aggressive and easier to target. Key locations include creek channels, submerged humps, and the edges of flats where baitfish schools are present. Anglers should use slow-trolled jigs, crankbaits, or minnows to mimic the natural prey. Vertical jigging near structure or casting to suspended schools can be highly effective. The cooling water triggers intense feeding activity, making this a prime time for consistent catches. Focus on transition zones where shallow areas meet deeper waters, as these are often hotspots for crappie activity during late fall.

Winter Water Temperature Considerations

In winter, crappie gather in deeper waters (30-50 feet), holding near structure. The bite is sluggish, but they can be caught with slow-moving jigs or minnows near submerged humps and channels.

Cold Water Crappie Behavior (Below 50°F)

When water temperatures drop below 50°F, crappie become less active and seek deeper waters, typically between 30-50 feet. They hold close to bottom structures like humps, ledges, and submerged timber. Their metabolism slows, making them more sluggish, but they still need to feed. Anglers should focus on deep, structured areas near main lake channels or tributaries. Vertical presentations, such as small minnows or spoons, worked slowly near the bottom, are effective. Schools may suspend above baitfish, requiring precise depth control. Slow trolling with crankbaits or jigs can also yield results. Patience is key, as crappie in cold water often bite softly. Targeting these areas with the right presentation can still produce quality catches, even in frigid conditions.

Targeting Deep Holes and Structure (40-50°F)

At water temperatures between 40-50°F, crappie seek refuge in deep holes and structured areas. These locations provide stability and protection from harsh conditions. Key spots include river channels, submerged humps, and deep creek bends; Anglers should use vertical presentations, such as minnows or small spoons, jigged slowly near the bottom. Kentucky rigs with minnows or tube baits can also be effective. Schools often suspend near baitfish, so locating these areas is crucial. Slow trolling with crankbaits or Road Runners near deep structures can attract bites. Focus on isolated wood cover and channel drop-offs, as crappie tend to congregate there. Patience and precise depth control are essential for success in these cold conditions. Understanding these patterns helps anglers target crappie effectively during the late fall and early winter months.

Optimal Water Temperature Ranges

Crappie thrive in water temperatures between 55°F and 85°F. During this range, they display varied activity levels, moving between shallow and deep waters, making it crucial for anglers to adapt their strategies accordingly.

Best Temperatures for Crappie Activity (55-75°F)

Crappie are most active in water temperatures between 55°F and 75°F. During this range, they transition from deeper wintering areas to shallower zones, making them more accessible to anglers. As temperatures rise, crappie move into spawning areas, often near submerged structures like brush piles or vegetation. Feeding activity peaks during this period, with crappie aggressively pursuing baitfish and jigs. Anglers should target areas with ample cover, such as sunken logs or shallow coves, where crappie tend to congregate. The warmer end of this range (65-75°F) typically coincides with the spawning season, where both male and female crappie are actively feeding and defending nests. Using minnows, small jigs, or crankbaits can be highly effective during this time. However, as temperatures approach the upper limit, crappie may seek deeper, cooler waters, requiring anglers to adjust their tactics accordingly.

Prime Feeding Times and Temperatures

Crappie feeding activity is strongly influenced by water temperature and time of day. During early spring, when temperatures range from 50°F to 60°F, crappie tend to feed during late morning and early afternoon as the water warms. In summer, when temperatures exceed 75°F, crappie often feed at dawn or dusk when the water is cooler. During the fall, as temperatures drop to the 60-70°F range, crappie are more active during midday. In winter, when temperatures are below 50°F, feeding occurs sporadically, usually during the warmest part of the day. Understanding these patterns helps anglers time their fishing trips effectively. Using live bait like minnows or jigs that mimic natural prey can increase success during prime feeding times. Additionally, targeting areas with abundant baitfish, such as near submerged structures or drop-offs, can further enhance catching crappie during their most active feeding periods.

Techniques and Gear for Different Temperature Ranges

Crappie fishing success varies with water temperature, requiring adaptable techniques and gear. Use jigs and minnows in colder months, switching to crankbaits and spinnerbaits in warmer temperatures for optimal results.

Spring and Prespawn Tactics

During the spring, crappie migrate to shallower waters as temperatures rise, making them more accessible to anglers. Target areas like submerged wood, channel bends, and protected coves, where crappie often congregate. Use jigs, minnows, or vibrating tail lures to entice bites. In the prespawn phase, crappie tend to gather near tributary arms and creek channels. Focus on depths of 10-20 feet, casting soft plastics or live bait near structure. As water temperatures approach 55°F, crappie become more aggressive, feeding heavily to build energy reserves. Males typically move shallower than females, preparing spawning areas. Use slow, steady presentations, allowing lures to sink near cover before retrieving. This period offers prime opportunities to catch large crappie, so adapt tactics to match their shifting behavior and locations.

Summer and Post-Spawn Strategies

During summer, crappie seek cooler, deeper waters as surface temperatures rise above 85°F. Target structural elements like submerged humps, drop-offs, or standing timber in depths of 15-30 feet. Troll with crankbaits or use a Kentucky rig with live minnows to cover large areas effectively. Post-spawn, crappie remain near spawning sites but gradually move to deeper, shaded areas. Focus on isolated cover such as sunken brush or logs, where they tend to suspend. Use jigs or small spoons to entice bites, as crappie may be less active in the heat. Be patient, as their metabolism slows, requiring slower presentations. Summer fishing often involves adapting to their deep-water habits, but consistent effort can yield rewarding results. Adjust tactics to match their seasonal behavior and habitat preferences for success during this period.

By understanding water temperature patterns, anglers can better locate and catch crappie. Adapt tactics seasonally, remain patient, and practice precise presentations to maximize fishing success throughout the year.

Maximizing Your Crappie Fishing Success

To maximize crappie fishing success, anglers must align their strategies with water temperature changes. During early spring, target shallow areas as crappie move in to spawn. Use minnows or jigs near submerged structures like brush piles or sunken logs, where crappie tend to congregate. As temperatures rise into the prespawn phase, focus on creek channels and tributary arms, where crappie migrate. Utilize curly-tail grubs or tube baits to attract actively feeding fish. During the spawn, concentrate on shallow coves with gravel or sandy bottoms, employing tight-line techniques with live bait for optimal results. In summer, when temperatures exceed 85°F, crappie seek deeper waters. Use Kentucky rigs or deep-diving crankbaits to reach them. In fall, as temperatures drop, crappie return to feeding aggressively before winter. Target baitfish schools in tributaries and use shad-colored crankbaits or spoons for effective catches. During winter, when temperatures are below 50°F, focus on deep holes and structure, presenting small lures or live minnows slowly and precisely; By tailoring your approach to these temperature-driven patterns, you can significantly enhance your crappie fishing success throughout the year.

Additional Resources for Crappie Fishing

For anglers seeking to refine their crappie fishing skills, numerous resources are available to enhance knowledge and success. Online forums like Crappie.com offer detailed discussions, expert advice, and real-time updates on water temperature impacts. Expert guides, such as Bobby Belmonte, provide insights into seasonal patterns and tactics. Additionally, instructional videos and tutorials on platforms like YouTube cover topics like rigging techniques, lure selection, and depth strategies. Local fishing reports and state wildlife agency websites often include region-specific crappie behavior insights tied to temperature changes. Books and eBooks dedicated to crappie fishing delve into advanced strategies and historical data. Finally, attending fishing seminars or joining local fishing clubs can connect anglers with experienced mentors. By leveraging these resources, anglers can stay informed and adapt their strategies to varying conditions, ensuring a more productive and enjoyable fishing experience.