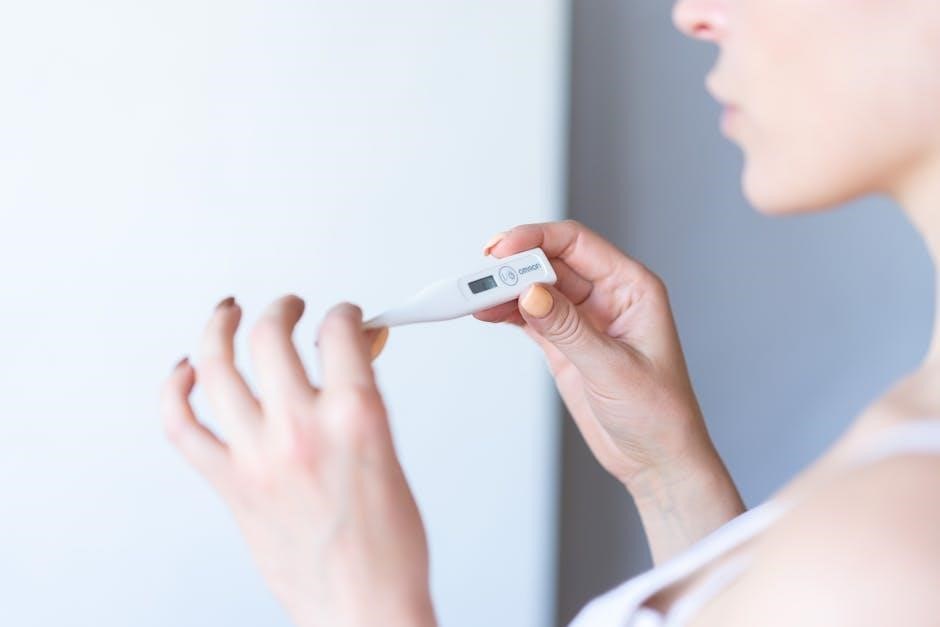
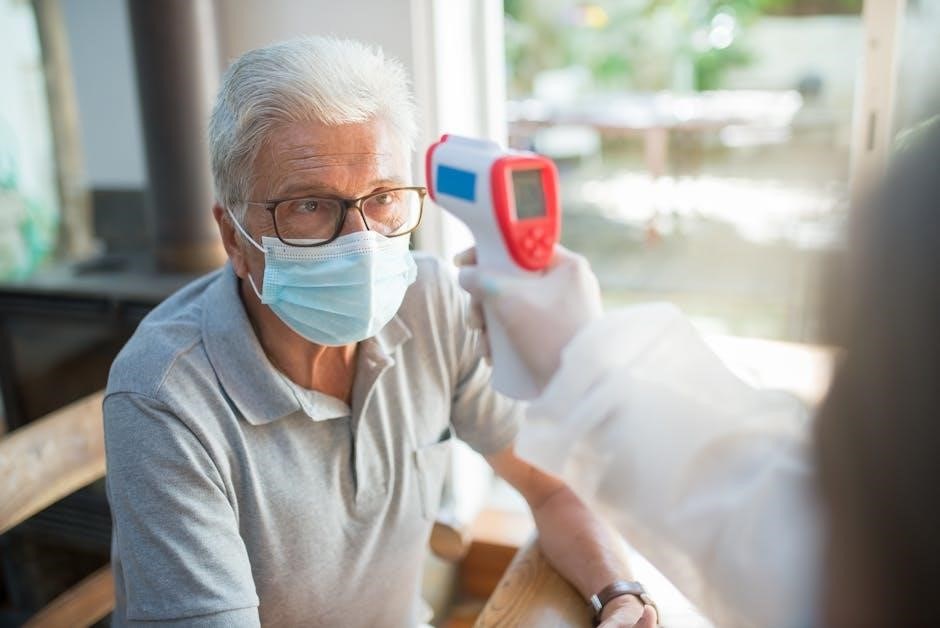
godzilla the ultimate illustrated guide

This comprehensive guide offers an in-depth exploration of Godzilla’s universe, featuring detailed illustrations, behind-the-scenes insights, and a thorough history of the iconic monster’s cinematic journey.

1.1 Overview of the Guide’s Purpose and Structure

This guide serves as a definitive resource for Godzilla enthusiasts, offering a detailed journey through the monster’s history, design evolution, and cultural impact. Structured into key sections, it explores historical origins, cinematic milestones, and the science behind Godzilla. The guide also delves into iconic allies and enemies, collectibles, and the enduring fan community. With rich illustrations and insightful commentary, it provides a comprehensive understanding of Godzilla’s legacy, making it an essential companion for both newcomers and dedicated fans.

1.2 Historical Context of Godzilla’s Creation

Godzilla emerged in 1954, born from post-WWII anxieties in Japan, symbolizing the trauma of atomic bombings. Created by Tomoyuki Tanaka, the monster reflected fears of nuclear destruction. The original film blended science fiction with societal concerns, capturing the nation’s psyche. Eiji Tsuburaya’s special effects and Akira Ifukube’s iconic score brought Godzilla to life, cementing its legacy as a cultural symbol of resilience and caution, resonating globally while deeply rooted in Japan’s historical experience.

The Evolution of Godzilla’s Design

Godzilla’s design has transformed over decades, from the 1954 suitmation to modern CGI, reflecting technological advancements while maintaining the monster’s iconic, terrifying presence and cultural significance.

2.1 Early Concept Art and Design Changes

Godzilla’s original 1954 design was heavily influenced by classic monster movies and real-world fears of nuclear devastation. Early concept art explored various forms, from a more humanoid figure to the final, iconic reptilian design. The creature’s size, texture, and facial features underwent significant changes to create a terrifying yet sympathetic character. These early iterations laid the foundation for Godzilla’s enduring appeal, blending horror and tragedy to captivate global audiences.

2.2 Iconic Monsters and Their Influence

Godzilla’s design and legacy were influenced by iconic monsters like King Kong and classic Universal creatures. The introduction of foes such as King Ghidorah and Mothra expanded Godzilla’s universe, creating a rich tapestry of battles and alliances. These monsters not only shaped Godzilla’s character but also inspired countless imitators, cementing Godzilla’s status as a cultural icon. Their designs and roles continue to influence modern media, ensuring Godzilla’s enduring relevance in pop culture and cinematic history.

Godzilla’s Cinematic Universe

Godzilla’s cinematic universe spans decades, featuring iconic battles, evolving storylines, and the introduction of legendary allies and foes, creating a rich, immersive world of monster lore and spectacle.

3.1 Key Films in the Godzilla Franchise

The Godzilla franchise boasts a diverse array of films, from the 1954 original to modern blockbusters like Shin Godzilla and Godzilla vs. Kong. These films showcase Godzilla’s evolution, blending spectacle with themes of humanity and nature. The 1999 American remake introduced Godzilla to a new audience, while Godzilla: King of the Monsters expanded the MonsterVerse, featuring iconic creatures like Mothra and King Ghidorah. Each film contributes to the franchise’s enduring legacy, captivating fans worldwide with epic battles and emotional depth.

3.2 Japanese vs. Western Interpretations

Godzilla’s portrayal varies significantly between Japanese and Western films. The 1954 original symbolized Japan’s post-war trauma, while Western adaptations often emphasize action over deeper themes. Japanese films frequently explore existential and environmental concerns, whereas Western interpretations lean into spectacle and monster battles. This dichotomy reflects cultural storytelling differences, yet both approaches have captivated global audiences, shaping Godzilla’s enduring appeal as a versatile cinematic icon. Recent films blend these styles, offering nuanced narratives that honor the monster’s legacy.

The Science of Godzilla

This section explores the theoretical biology and physics behind Godzilla’s existence, examining the nuclear energy origins and the monster’s enduring scientific intrigue and cultural legend.

4.1 Theoretical Biology and Physics Behind Godzilla

Godzilla’s existence sparks curiosity into theoretical biology and physics. Scientists speculate about his immense size, radiation resistance, and energy sources. The nuclear origin ties to real-world atomic testing, making him a symbol of nature’s resilience. His ability to survive extreme conditions challenges biological norms, while his iconic roar defies acoustic physics. These theories blend science with folklore, making Godzilla a fascinating subject for both scientists and fans.

  • Biology: Godzilla’s rapid growth and regeneration suggest fictional evolutionary adaptations.
  • Physics: His size and strength push the boundaries of physical laws, sparking debates about thermoregulation and energy sources.

4.2 The Role of Nuclear Energy in Godzilla’s Origin

Nuclear energy is central to Godzilla’s creation, emerging from atomic testing in the Pacific. This origin reflects post-war fears of nuclear devastation. Godzilla’s mutation from nuclear exposure symbolizes nature’s response to human recklessness. His iconic roar and fiery breath underscore the destructive power of nuclear energy. This narrative serves as a cautionary tale, blending science fiction with real-world anxieties about nuclear warfare and environmental impact.

  • Nuclear Origins: Godzilla’s birth from atomic testing highlights humanity’s destructive potential.
  • Symbolism: He embodies the terrifying consequences of nuclear energy and its misuse.

Godzilla’s Allies and Enemies

Godzilla’s battles feature iconic allies like Mothra and enemies like King Ghidorah. These creatures shape his complex alliances and rivalries, defining his legacy.

5.1 Legendary Monsters: King Ghidorah and Mothra

King Ghidorah and Mothra are central to Godzilla’s mythos. As Godzilla’s archenemy, King Ghidorah embodies destruction, with his towering size and fiery breath. Mothra, a divine protector, contrasts with her benevolent nature and ethereal beauty. Their epic battles with Godzilla define the franchise’s legacy, blending spectacle with symbolic depth. These iconic creatures have captivated fans, becoming cultural symbols in their own right, and their stories are vividly chronicled in the guide;

5.2 Human Characters and Their Roles

Human characters in Godzilla’s universe are pivotal, driving narratives through their struggles, choices, and interactions with the monster. Scientists, military leaders, and civilians each play unique roles, often symbolizing humanity’s resilience and ingenuity. These characters’ stories intertwine with Godzilla’s, creating emotional depth and relatability. The guide explores their development, highlighting how they shape the franchise’s themes of survival, sacrifice, and coexistence with monstrous forces, making them as integral to the legend as Godzilla itself.

Cultural Impact and Legacy

Godzilla has become a cultural icon, symbolizing both destruction and resilience. His influence spans films, TV, and pop culture, cementing his status as a timeless symbol of human fascination and fear.

6.1 Godzilla as a Cultural Icon

Godzilla has transcended cinema to become a global cultural phenomenon, symbolizing both awe-inspiring power and existential fear. As a metaphor for humanity’s struggles, Godzilla embodies resilience and destruction, resonating universally. His enduring appeal lies in his ability to evolve, reflecting societal anxieties and hopes. From films to merchandise, Godzilla’s image has permeated pop culture, inspiring countless adaptations and tributes, solidifying his status as a timeless icon in modern media and collective consciousness.

6.2 Influence on Pop Culture and Media

Godzilla’s influence extends far beyond cinema, shaping pop culture and media globally. From inspiring countless monster movies to appearing in music, literature, and merchandise, Godzilla has become a recognizable symbol. His iconic roar and imagery are frequently parodied and homaged in TV shows, films, and advertising. Godzilla’s legacy is evident in video games, anime, and even fashion, cementing his status as a cultural touchstone. His enduring appeal continues to inspire new generations, ensuring his impact remains unparalleled in modern entertainment.

Collectibles and Merchandise

Godzilla’s popularity has spawned a vast array of collectibles, including rare toys, models, and art books, catering to fans and collectors worldwide, showcasing his enduring cultural impact.

7.1 Rare Toys and Models

Godzilla’s iconic status has inspired a wide range of rare and unique toys and models, from vintage vinyl figures to meticulously detailed resin kits. These collectibles often feature intricate designs, capturing the monster’s evolution across films. Limited editions and exclusive releases, such as those from Japanese toy lines, have become highly sought after by collectors. Rare models, including dioramas and scaled replicas, showcase Godzilla’s cinematic glory. These items not only reflect the monster’s legacy but also serve as cherished possessions for fans worldwide, blending art and nostalgia.

7.2 Art Books and Illustrated Guides

Art books and illustrated guides dedicated to Godzilla offer a visual journey through the monster’s history, featuring concept art, behind-the-scenes sketches, and detailed illustrations. These publications highlight the creative process behind Godzilla’s design evolution, showcasing iconic moments from the franchise. They serve as both artistic tributes and comprehensive resources for fans and collectors, providing insights into the craftsmanship that brought the King of Monsters to life across decades of cinema.

Fan Community and Fandom

Godzilla’s fan community spans globally, with enthusiasts creating art, attending conventions, and engaging in passionate discussions. The illustrated guide celebrates their creativity and dedication.

8.1 Fan Art and Creations

Fan art and creations are a vibrant part of Godzilla’s fandom, showcasing imaginative interpretations of the monster. From intricate paintings to sculptures, fans express their love for Godzilla through diverse mediums. Digital art platforms host a wide range of styles, from realistic depictions to whimsical designs. These creations often reflect personal connections to the character, highlighting why Godzilla resonates deeply with audiences. The guide celebrates this creativity, offering inspiration and a sense of community among enthusiasts worldwide.

8.2 Conventions and Events

Godzilla conventions and events bring fans together to celebrate the King of Monsters. From screenings to panel discussions, these gatherings showcase the franchise’s legacy. Events like G-Fest and Comic-Con feature exclusive merchandise, cosplays, and meet-and-greets with industry experts. Fans share their passion, creating a vibrant community that honors Godzilla’s enduring impact on pop culture. These events are a testament to the monster’s timeless appeal and its ability to unite enthusiasts worldwide in shared excitement and nostalgia.

The Future of Godzilla

Godzilla’s future promises exciting new films, expanded universes, and innovative storytelling. Technological advancements will bring the monster to life in unprecedented ways, ensuring its legacy endures for generations.

9.1 Upcoming Films and Projects

Godzilla’s cinematic future is promising, with several high-profile films and projects in development. These include sequels to recent blockbusters and new collaborations with renowned directors. Fans can expect more thrilling monster battles, deeper storytelling, and cutting-edge visual effects. Additionally, there are rumors of spin-offs and expanded universe content, further exploring the MonsterVerse. These projects aim to captivate both long-time fans and new audiences, ensuring Godzilla’s legacy continues to roar.

9.2 Godzilla in Modern Media

Godzilla’s enduring appeal in modern media is evident through blockbuster films, merchandise, and digital content. Recent movies like Godzilla (2014) and Godzilla: King of the Monsters (2019) have revitalized the franchise, blending cutting-edge visual effects with epic storytelling. The MonsterVerse has expanded Godzilla’s universe, introducing iconic creatures like King Ghidorah and Mothra. Additionally, Godzilla’s cultural impact is celebrated through art, toys, and collaborations, ensuring the King of Monsters remains a global icon in contemporary pop culture.

tribesigns assembly instructions

Tribesigns furniture offers modern, cost-effective solutions for home and office spaces․ Their products are designed for self-assembly, with detailed guides ensuring a smooth setup process․

Overview of Tribesigns Furniture and Assembly Process

Tribesigns furniture is known for its modern, functional designs, offering a range of home and office solutions․ Their products, such as desks, cabinets, and bookshelves, are crafted with durable materials like metal legs and E1-standard particleboard․ The assembly process is designed to be straightforward, with clear instructions and provided hardware to simplify setup․ Most pieces require basic tools and can be assembled by one or two people․ The process typically starts with the base, followed by attaching shelves and securing the top surface․ Tribesigns emphasizes ease of assembly, ensuring a smooth experience for users․

Importance of Following Assembly Instructions

Following Tribesigns assembly instructions is crucial for ensuring proper assembly, stability, and safety of your furniture․ Misaligned parts or incorrect screw placement can lead to instability or damage․ The instructions provide clear, step-by-step guidance to avoid common pitfalls․ Proper assembly ensures the furniture functions as intended, supporting weight and withstanding daily use․ Additionally, following the instructions helps prevent damage to components, reducing the risk of safety hazards․ Adhering to the guide also aids in troubleshooting and warranty claims, as improper assembly may void coverage․ Accurate assembly ensures a durable, long-lasting product․

Locating Your Assembly Instructions

Your Tribesigns assembly instructions are typically included in the product packaging or accessible via a QR code․ Check the box for a booklet or visit their website․

Where to Find Assembly Manuals for Tribesigns Products

Your Tribesigns assembly manual is usually included in the product packaging as a booklet or accessible via a QR code․ If not found, visit the Tribesigns website and search for your product model number (e․g․, XK00140, JW0622) to download the PDF manual․ Check all packaging compartments, as instructions may be tucked away or secured with tape․ If unable to locate online, contact Tribesigns customer support for assistance․ Ensure to have your model number ready for quick access to the correct guide․

Downloading Instructions from the Tribesigns Website

To download assembly manuals for Tribesigns products, visit their official website and navigate to the customer support or product section․ Use the search bar to enter your product model number (e․g․, XK00140 or JW0622) to find the corresponding PDF manual․ Ensure your internet connection is stable for a smooth download․ Once downloaded, save the file for easy access during assembly․ If you encounter issues, contact Tribesigns customer support via their website or call 1-424-220-6888 for assistance․ Always verify the model number to ensure you download the correct guide․

Essential Tools and Materials Needed

Tribesigns provides necessary hardware and tools like Allen wrenches․ Additional items such as screwdrivers, hammers, and levels may aid in smoother assembly․ Ensure all materials are accounted for․

Hardware and Tools Provided by Tribesigns

Tribesigns typically includes all necessary hardware like screws, bolts, and cam locks in the packaging․ Essential tools such as Allen wrenches are also provided to simplify assembly․ These items are specifically selected to match the product’s requirements, ensuring compatibility and ease of use․ While additional tools like screwdrivers or hammers may be helpful, they are not always required․ The hardware and tools provided are designed to cover the entire assembly process, making it convenient for users to complete the setup without needing external resources․ Tribesigns aims to make assembly straightforward and efficient․

Additional Tools Recommended for Assembly

While Tribesigns provides essential hardware and tools, having a Phillips head screwdriver, hammer, and level can enhance efficiency․ A screwdriver aids with screws not covered by the Allen wrench, while a hammer gently taps parts into place․ A level ensures surfaces are even, preventing wobbling․ These tools are not provided but can simplify the process, especially for larger or complex items․ A clean, spacious workspace is also crucial for organizing parts and avoiding damage, ensuring a smoother assembly experience with Tribesigns furniture․

Step-by-Step Assembly Process

Tribesigns furniture assembly follows a logical sequence, starting with the base or frame․ Instructions guide you through attaching shelves and components, ensuring secure connections․ Final checks ensure stability and alignment․

Starting with the Base or Legs

Begin by assembling the base or legs of your Tribesigns furniture, as this forms the foundation for stability․ Use the provided bolts, cam locks, or dowels to secure the legs to the frame․ Ensure the base is placed on a level surface to avoid misalignment․ Partially tighten the screws initially, allowing for adjustments before final tightening․ Refer to the diagrams for correct orientation and alignment․ For larger pieces, consider enlisting a second person to hold the base steady while attaching․ Double-check the parts list to confirm all components are included and properly fitted before moving to the next step․

Attaching Shelves and Supporting Structures

After securing the base, proceed to attach shelves and supporting structures using the provided cam locks, dowels, or bolts․ Align the shelves with the pre-drilled holes on the frame, ensuring proper fitment․ Refer to the diagrams for accurate placement․ Use a level to ensure the shelves are even and stable․ Partially tighten the screws first to allow for adjustments, then fully secure them once alignment is confirmed․ Double-check the orientation of each component, as some shelves may have specific sides for correct installation․ This step ensures the structural integrity of your Tribesigns furniture․

Securing the Top or Main Surface

Place the main surface on the assembled frame, ensuring it aligns with the pre-drilled holes․ Use the provided bolts or screws to secure it tightly․ Double-check alignment using a level to ensure evenness․ Partially tighten the fasteners first, allowing for minor adjustments, then fully secure them․ Ensure the surface is stable and evenly supported․ Refer to the diagrams for correct orientation and placement․ If the surface is heavy or large, consider enlisting a second person for support․ Once secured, verify stability by gently rocking the surface to ensure no movement or wobble․

Troubleshooting Common Assembly Issues

Address misaligned parts by rechecking diagrams and tightening screws firmly․ Contact customer support for missing or damaged components to ensure a smooth assembly process․

Misaligned Parts and Loose Screws

Misaligned parts and loose screws are common issues during assembly․ To fix misalignment, recheck the diagrams and ensure correct orientation․ Tighten screws firmly but avoid over-tightening, which may damage the material․ If screws feel loose, double-check the connection points and verify that all parts are securely attached․ Partially tighten screws first, then fully secure once alignment is confirmed․ For persistent misalignment, gently adjust the pieces without forcing them․ If issues persist, consult the troubleshooting section or contact Tribesigns support for assistance․ Proper alignment ensures stability and longevity of the furniture․

Missing or Damaged Components

If components are missing or damaged, stop assembly immediately․ Compare the parts list with the contents to identify discrepancies․ For missing items, contact Tribesigns customer support via their website or phone number, providing your order number and product model․ Include clear photos of the issue for a faster resolution․ For damaged parts, check the packaging for replacements․ Tribesigns typically offers quick replacements to ensure your assembly process continues smoothly; Keep all packaging and documentation until the issue is resolved, as they may be required for warranty claims or support requests․

Contact Information and Customer Support

Visit tribesigns․com or call 1-424-220-6888 for assistance․ Email support@tribesigns․com with your order number and issue details for prompt resolution․ Keep packaging and documentation for reference․

How to Reach Tribesigns Customer Service

To contact Tribesigns customer service, visit their official website at tribesigns․com and navigate to the support section․ You can submit inquiries via the contact form or email support@tribesigns․com․ For immediate assistance, call their customer service hotline at 1-424-220-6888․ Be prepared to provide your order number, product model, and a detailed description of your issue․ Including clear photos or videos of any problems can expedite the resolution process․ Their team is known for being responsive and helpful in addressing customer concerns promptly․

Warranty Details and Claims Process

Tribesigns products are backed by a warranty, typically ranging from 18 months, covering defects in materials and workmanship․ Damage from misuse, improper assembly, or normal wear is excluded․ To file a claim, contact customer support via email or phone, providing proof of purchase and detailed defect descriptions․ Include clear photos or videos for faster resolution․ The team may request additional information or troubleshooting steps․ Resolutions may include repairs, replacements, or refunds, depending on the issue’s severity․ Retain all documentation, including assembly instructions, for warranty claims․

nj saltwater fishing regulations 2024 pdf

The 2024 NJ Saltwater Fishing Regulations provide essential guidelines for recreational anglers, ensuring sustainable fishing practices and conservation of marine resources. Updated annually, these rules help maintain healthy fish populations and promote responsible fishing. Anglers must familiarize themselves with seasonal changes, size limits, and gear restrictions to comply with state and federal laws. NJ Fish and Wildlife enforces these regulations to preserve the marine ecosystem for future generations. Always check the latest updates before planning your fishing trips.

Overview of the Importance of Fishing Regulations

Fishing regulations are crucial for conserving marine ecosystems and ensuring sustainable fish populations. They help protect habitats, prevent overfishing, and maintain biodiversity. By setting size limits, bag restrictions, and seasonal closures, regulations promote responsible angling practices. Compliance with these rules ensures fair access to resources and supports the long-term health of marine life. Regulations also protect vulnerable species and adapt to environmental changes, safeguarding New Jersey’s saltwater fisheries for future generations. Adhering to these guidelines fosters a balanced relationship between recreation and conservation.

Key Changes in the 2024 Regulations

The 2024 NJ Saltwater Fishing Regulations introduce several important updates to ensure sustainability. Size limits for certain species have been adjusted, and bag limits have been modified to reflect population trends. Seasonal closures for key species like summer flounder and black sea bass have been updated to protect spawning periods. Additionally, gear restrictions now include prohibitions on certain types of fishing equipment to reduce bycatch. These changes aim to balance recreational and commercial fishing interests while preserving marine biodiversity for future generations.

Licensing and Registration Requirements

Registration is required for all saltwater anglers in New Jersey. The NJ Saltwater Fishing Registry is free, easy, and mandatory for recreational fishing activities. Ensure compliance before fishing.

NJ Saltwater Fishing Registry Program

The NJ Saltwater Fishing Registry Program is a free and required registration for all recreational anglers. It helps track fishing activities and manage marine resources effectively. Registration is mandatory for both residents and non-residents engaging in saltwater fishing. This program is part of federal and state efforts to monitor fish populations and ensure sustainability. By registering, anglers contribute to the conservation of New Jersey’s marine ecosystems. Visit SaltwaterRegistry.nj.gov to complete your registration before your next fishing trip.

Obtaining a Recreational Fishing License

To engage in saltwater fishing in New Jersey, anglers must obtain a recreational fishing license. Licenses can be purchased online through the NJ Fish and Wildlife website or at authorized sellers. A resident license costs $22.50, while non-resident licenses are $35.50. Seniors (65+) and children under 16 are exempt. Ensure you carry your license while fishing, as it is required by law. This license helps fund conservation efforts and promotes sustainable fishing practices in New Jersey’s marine waters.

Fishing Seasons and Dates

NJ saltwater fishing seasons vary by species, ensuring sustainable fish populations. Key dates include Black Sea Bass (May 17–Jun 19) and Blowfish (no closed season). Always check NJ Fish and Wildlife for updates to comply with regulations and enjoy a successful fishing experience.

2024 Seasonal Variations for Popular Species

The 2024 NJ Saltwater Fishing Regulations outline specific seasonal variations for popular species to ensure sustainable fishing. Black Sea Bass is open from May 17 to June 19, with a minimum size of 12.5 inches and a bag limit of 10 per person. Blowfish have no closed season, while Hard Clams are limited to 150 per person with no harvest on Sundays. These variations aim to balance recreational fishing with conservation efforts, ensuring healthy fish populations and ecosystem balance. Always refer to the NJ Fish and Wildlife updates for precise details.

Opening and Closing Dates for Key Fish Species

The 2024 NJ Saltwater Fishing Regulations specify opening and closing dates for key species to manage fish populations effectively. Black Sea Bass season runs from May 17 to June 19, while Summer Flounder (Fluke) varies by location, with Delaware Bay allowing fishing from April 1 to October 31. Striped Bass fishing is open year-round but includes a slot limit of 28 to 43 inches for coastal waters. These dates ensure sustainable fishing practices and help conserve marine resources for future generations. Always verify the latest updates before your fishing trip.

Size and Bag Limits

The 2024 NJ Saltwater Fishing Regulations establish minimum size limits and bag restrictions to protect marine resources. Anglers must adhere to these rules to ensure sustainability and compliance.

Minimum Size Limits for Recreational Fishing

The 2024 NJ Saltwater Fishing Regulations outline specific minimum size limits to protect juvenile fish and ensure sustainable populations. For example, Summer Flounder (Fluke) have varying limits depending on the fishing location, with 18 inches in most marine waters, while Delaware Bay and Tributaries allow 17 inches, and Island Beach State Park requires 16 inches. Hard Clams must measure at least 1.5 inches, and no filleting or cleaning of fish with size limits is permitted at sea. These rules are enforced to maintain ecological balance and must be strictly followed to avoid penalties.

Bag Limits and Possession Restrictions

Bag limits vary by species to ensure sustainable fishing practices. For Black Sea Bass, the 2024 regulations set a 10 per person limit with a 12.5-inch minimum size during the open season. Tautog (Blackfish) limits differ by region, with stricter restrictions in certain areas. Recreational anglers must adhere to these possession limits to avoid penalties. Exceeding bag limits can harm fish populations and result in enforcement actions. Anglers are encouraged to check the latest updates before each fishing trip to comply with all regulations.

Species-Specific Regulations

The 2024 NJ Saltwater Fishing Regulations include specific rules for various species to protect marine ecosystems. Anglers must know these rules to comply with local fishing laws.

Summer Flounder (Fluke) Regulations

For 2024, the recreational harvest of Summer Flounder (Fluke) in New Jersey marine waters is regulated by specific size and bag limits. In most marine waters, anglers are allowed a daily bag limit of 3 fish with a minimum size of 18 inches. However, in Delaware Bay and its tributaries, the limit is 3 fish at 17 inches, and in Island Beach State Park, the limit is 2 fish at 16 inches. The season is closed from December 1 to April 30. Anglers must ensure they comply with these regulations to avoid penalties.

Black Sea Bass and Tautog (Blackfish) Limits

For the 2024 fishing season, Black Sea Bass regulations include a minimum size limit of 12.5 inches and a daily bag limit of 10 fish per person. The season is open from May 17 to June 19. Tautog (Blackfish) regulations vary by location, with an 18-inch minimum size limit in most areas and a 4-fish bag limit during the open season. Anglers must check specific regional restrictions to ensure compliance with these limits, as they are essential for maintaining sustainable fish populations and adhering to marine conservation efforts.

Other Species: Scup, Bluefish, and Striped Bass

Scup regulations include a minimum size limit of 10 inches and a daily possession limit of 20 fish. Bluefish has no closed season or minimum size limit but is subject to a daily bag limit of 3 fish. Striped Bass regulations vary by location, with a 28-inch minimum size in certain areas and a 1 fish bag limit. These limits are designed to balance recreational fishing with conservation efforts, ensuring the sustainability of these species in New Jersey’s marine waters. Always verify local restrictions before fishing.

Gear Restrictions and Prohibited Practices

Recreational anglers must use permitted fishing gear such as circle hooks and non-stainless steel hooks. Prohibited practices include dynamiting, electrofishing, and using nets in closed areas. Gillnets are restricted, and traps require special permits. Chumming is allowed but regulated to prevent overfishing. Always check gear specifications to ensure compliance with NJ marine regulations and avoid harming the environment. Proper gear use helps preserve marine ecosystems and fish populations for sustainable fishing.

Permitted Fishing Gear and Equipment

The 2024 NJ Saltwater Fishing Regulations outline specific gear permitted for recreational fishing. Circle hooks are required when fishing for species like striped bass and bluefish to reduce bycatch. Non-stainless steel hooks are mandated to prevent long-term harm to marine life. Gillnets and traps are restricted, with permits required for their use. Chumming is allowed but regulated to avoid overfishing. Anglers must ensure all gear complies with NJ Fish and Wildlife guidelines to promote sustainable fishing practices and protect the marine ecosystem. Always verify gear specifications before use.

Prohibited Fishing Methods and Gear

Certain fishing methods and gear are prohibited under the 2024 NJ Saltwater Fishing Regulations to protect marine life and ecosystems. Gillnets and traps are restricted, requiring special permits for use. Longlines and spears are prohibited in most coastal waters to minimize bycatch and habitat damage. Chumming is allowed but regulated to prevent overfishing. These restrictions ensure sustainable fishing practices and help maintain balanced marine populations. Always refer to the NJ Fish and Wildlife guidelines for detailed information on prohibited gear and methods before engaging in fishing activities.

Marine Conservation and Sustainability

The 2024 NJ Saltwater Fishing Regulations emphasize sustainable practices to protect marine ecosystems. Conservation efforts focus on balancing recreational and commercial fishing while preserving fish populations for future generations.

Importance of Sustainable Fishing Practices

Sustainable fishing practices are crucial for maintaining healthy marine ecosystems and ensuring the long-term viability of fish populations. The 2024 NJ Saltwater Fishing Regulations emphasize responsible fishing methods to prevent overfishing and protect habitats. By adhering to size limits, bag restrictions, and seasonal closures, anglers help conserve key species and support biodiversity. These practices also promote the recovery of depleted stocks and ensure that marine resources remain abundant for future generations. Sustainable fishing fosters a balance between recreation, commerce, and environmental stewardship.

Marine Ecosystem Management and Fish Populations

The 2024 NJ Saltwater Fishing Regulations play a vital role in managing marine ecosystems and maintaining healthy fish populations. By enforcing size limits, bag restrictions, and seasonal closures, these rules help prevent overfishing and protect critical habitats. Monitoring programs track species abundance, ensuring sustainable harvests and enabling the recovery of depleted stocks. The regulations also focus on reducing bycatch and preserving biodiversity. These efforts foster a balanced ecosystem, supporting both recreational and commercial fisheries while safeguarding marine life for future generations.

Enforcement and Penalties

Violations of the 2024 NJ Saltwater Fishing Regulations can result in fines, license suspensions, or revocations. Enforcement is conducted by NJ Fish and Wildlife through inspections and patrols.

Monitoring and Enforcement of Regulations

Monitoring and enforcement of the 2024 NJ Saltwater Fishing Regulations are carried out by the NJ Fish and Wildlife Conservation Officers. They conduct inspections and patrols to ensure compliance with size, bag limits, and gear restrictions. Anglers are required to provide proof of registration and licenses upon request. Digital reporting systems and dockside inspections help track catches and prevent overfishing. Enforcement efforts focus on protecting vulnerable species and habitats, ensuring sustainable fishing practices for future generations.

Penalties for Non-Compliance

Violations of the 2024 NJ Saltwater Fishing Regulations can result in fines, license suspensions, or even criminal charges. Non-compliance with size limits, bag limits, or gear restrictions may lead to penalties ranging from $50 to $500 or more, depending on the offense. Repeat offenses can result in higher fines and potential revocation of fishing privileges. Commercial fishing violations may incur additional penalties, including confiscation of catch and gear. Compliance is crucial to avoid legal consequences and support conservation efforts.

Additional Resources and References

For detailed information, visit the NJ Fish and Wildlife website or download the 2024 NJ Saltwater Fishing Regulations PDF. Stay updated for the latest guidelines and changes.

NJ Fish and Wildlife Website and Publications

The NJ Fish and Wildlife website is a primary source for accessing the 2024 NJ Saltwater Fishing Regulations. It provides detailed information on seasonal variations, size limits, and gear restrictions. The website also offers downloadable PDF guides for easy reference. Additionally, the Marine Digest and other publications are available, summarizing key regulations and updates. Anglers are encouraged to visit the site regularly for the most accurate and up-to-date information to ensure compliance with all fishing rules and conservation efforts.

Downloadable PDF Guides and Updates

The 2024 NJ Saltwater Fishing Regulations PDF is available for download, offering a comprehensive guide to seasonal variations, size limits, and gear restrictions. This quick reference document ensures anglers can easily access essential information. Regular updates are posted on the NJ Fish and Wildlife website, so anglers should check back for any changes. The PDF serves as a convenient resource for planning fishing trips and staying compliant with the latest regulations. It’s a must-have for both experienced and new anglers in New Jersey.

monkey pdf

Monkey PDF is a versatile tool enabling dynamic PDF creation, offering template customization, and seamless integration with popular platforms for various professional, creative, and educational applications.

1.1 What is Monkey PDF?

Monkey PDF is a dynamic platform designed for generating and managing PDF files effortlessly. It offers robust features like template customization, integration with popular tools such as Zapier, and automation capabilities. Known for its reliability and efficiency, Monkey PDF simplifies document creation, saving users significant time. The platform caters to diverse needs, from professional workflows to creative projects like crochet patterns and coloring pages, making it a versatile tool for both businesses and individuals.

1.2 Importance of Monkey PDF in Digital Document Creation

Monkey PDF stands out as a crucial tool in digital document creation due to its ability to automate and streamline workflows. By eliminating manual processes, it enhances productivity and consistency, ensuring high-quality PDFs. Its integration with platforms like Zapier further amplifies its utility, allowing seamless automation across various applications. This makes Monkey PDF indispensable for businesses aiming to optimize efficiency and reduce operational costs in their document management processes.

Features of PDFMonkey

PDFMonkey offers dynamic PDF generation, customizable templates, and seamless integration with platforms like Zapier, making it a versatile and efficient tool for creating professional-grade documents effortlessly.

2.1 Dynamic PDF Generation

PDFMonkey excels in dynamic PDF generation, allowing users to create customized documents on-the-fly using templates and data integration. This feature is ideal for invoices, reports, and certificates, ensuring each PDF is tailored to specific needs. With dynamic generation, businesses can automate document creation, saving time and reducing manual effort. The tool supports seamless integration with platforms like Zapier, enabling automated workflows and enhancing efficiency. Whether for professional or creative projects, PDFMonkey delivers pixel-perfect, professionally formatted PDFs effortlessly.

2.2 Template Design and Customization

2.3 Integration with Popular Platforms

PDFMonkey seamlessly integrates with popular platforms like Zapier, Bubble, and Tally Forms, enabling efficient automation of PDF workflows. Users can connect their apps in just a few clicks, allowing dynamic PDF generation directly within their existing tools. This integration simplifies processes, saving time and enhancing productivity. Whether it’s automating document creation or embedding PDF generation into custom software, PDFMonkey provides a versatile solution for businesses and creators, ensuring smooth workflow efficiency across various applications.

How to Generate PDFs with Monkey PDF

Create professional PDFs effortlessly with Monkey PDF using dynamic templates and seamless platform integrations, ensuring a streamlined document creation process for all your needs.

3.1 Step-by-Step Guide to Creating Your First PDF

To create your first PDF with Monkey PDF, start by selecting a template or designing one from scratch. Add dynamic data fields and customize the layout to suit your needs. Next, integrate your data source, whether it’s a spreadsheet or an API, ensuring all information flows seamlessly. Finally, preview your document and generate the PDF. This straightforward process ensures professional results with minimal effort, making it ideal for beginners and experts alike.

3.2 Using Templates for Efficient PDF Creation

Monkey PDF simplifies document creation with pre-designed templates, allowing users to save time and maintain consistency. Choose from a variety of layouts tailored to different needs, such as invoices, reports, or certificates. Customize templates by inserting dynamic fields and branding elements to align with your requirements. This feature ensures efficiency, enabling quick production of professional-quality PDFs without starting from scratch. Templates are particularly useful for repetitive tasks, streamlining workflows and enhancing productivity.

Monkey PDF in Literature and Pop Culture

Monkey PDF reflects the cultural significance of monkeys in literature and pop culture, from classic tales like the Monkey King to modern digital interpretations and creative designs.

4.1 The Legend of the Monkey King

The Monkey King, a iconic figure in East Asian literature, embodies mischief and wisdom, inspiring countless adaptations in PDF formats. His journey, blending satire and allegory, is preserved digitally through platforms like Monkey PDF, enabling modern audiences to engage with this timeless tale dynamically and creatively.

4.2 Modern Interpretations of Monkey Stories in PDF Formats

Monkey PDF has revolutionized the way classic tales are presented, offering dynamic and interactive storytelling. Modern interpretations of monkey stories are now accessible in PDF formats, blending tradition with technology. These digital adaptations feature vibrant visuals, interactive elements, and customizable templates, making them engaging for both children and adults. Monkey PDF’s versatility allows creators to craft immersive experiences, ensuring timeless stories remain relevant in the digital age.

Monkey PDF for Creative Projects

Monkey PDF is a handy tool for creative projects, enabling users to design unique documents and customize templates for various artistic needs, from crochet patterns to coloring pages.

5.1 Crochet Monkey Patterns in PDF

Monkey PDF offers a convenient way to create and share crochet monkey patterns. Users can generate customizable PDF templates, complete with step-by-step guides and high-quality images. These patterns are perfect for crafters, allowing them to download and print detailed instructions effortlessly. The platform supports dynamic content, making it easy to adjust designs or add new features. Whether it’s a cowboy-themed monkey or a cuddly stuffed animal, Monkey PDF streamlines the creation process, ensuring pixel-perfect results every time. This tool is ideal for both hobbyists and professionals seeking efficient, visually appealing crochet patterns.

5.2 Monkey Coloring Pages and Worksheets

Monkey PDF offers a variety of monkey-themed coloring pages and worksheets, perfect for educational and creative activities. These resources are ideal for classrooms or homeschooling, featuring engaging designs that cater to different age groups. The PDF format allows for easy downloading and printing, ensuring high-quality visuals. With options for customization, teachers and parents can tailor content to specific learning needs. These materials not only entertain but also help develop motor skills and creativity in children, making them a valuable tool for both fun and education.

Automating PDF Creation with Monkey PDF

Monkey PDF simplifies automation, enabling efficient PDF generation through integrations like Zapier, reducing manual effort and streamlining workflows for optimal productivity and accuracy.

6.1 Integration with Zapier for Automated Workflows

Monkey PDF seamlessly integrates with Zapier, enabling automated workflows that streamline PDF generation. By connecting Monkey PDF with other apps, users can trigger PDF creation without manual intervention, saving time and effort. This integration allows for dynamic data insertion and template-based document generation, ensuring consistency and accuracy. With Zapier, workflows become efficient, reducing the need for manual PDF generation and enabling focus on more critical tasks. This automation enhances productivity and simplifies document management processes significantly.

6.2 Time-Saving Benefits of Automation

Automation with Monkey PDF significantly reduces manual effort, saving valuable time. By integrating with tools like Zapier, users can automate repetitive tasks such as dynamic data insertion and template-based PDF generation. This eliminates the need for manual document creation, enabling businesses to focus on core activities. Automated workflows ensure consistency, accuracy, and scalability, making document management more efficient. The time saved can be reinvested in strategic initiatives, driving productivity and growth.

Monkey PDF Alternatives

7.1 Comparison with Other PDF Generation Tools

7.2 Choosing the Right Tool for Your Needs

Tutorials and Guides for Monkey PDF

Explore comprehensive tutorials and guides to master Monkey PDF, from beginner-friendly lessons to advanced workflows, ensuring efficient and effective PDF creation tailored to your expertise level.

8.1 Beginner-Friendly Tutorials

Monkey PDF offers step-by-step guides designed for newcomers, covering basic functions like template setup and dynamic data insertion. These tutorials are structured to help users create their first PDF without prior experience. With clear instructions and visual aids, beginners can quickly grasp the essential features, making PDF generation intuitive and accessible. Start with simple projects and gradually explore more advanced capabilities as confidence grows. The tutorials ensure a smooth learning curve, helping users unlock Monkey PDF’s full potential.

8.2 Advanced Features for Professional Users

Monkey PDF offers advanced features tailored for professional users, including dynamic PDF generation, API integration, and custom template design. Professionals can streamline workflows with bulk operations, advanced data merging, and secure sharing options. The platform also supports collaboration, allowing teams to work seamlessly on complex projects. With robust customization and integration capabilities, Monkey PDF empowers users to create sophisticated, pixel-perfect documents efficiently, making it an ideal solution for businesses and developers seeking scalable and reliable PDF generation tools.

Monkey PDF in Education

Monkey PDF provides educational resources, such as customizable templates for classroom materials, engaging coloring pages, and interactive worksheets, aiding teachers and students in creative learning.

9.1 Educational Resources Featuring Monkeys

Monkey PDF offers a variety of educational resources, including customizable templates for worksheets, coloring pages, and interactive materials. These tools feature playful monkey characters, making learning engaging for students. Teachers can create tailored classroom materials with dynamic content, while crochet patterns and activity sheets provide hands-on learning experiences. The platform supports the creation of visually appealing, monkey-themed resources, fostering creativity and interaction in educational settings.

9.2 Using PDFMonkey for Classroom Materials

PDFMonkey is a powerful tool for creating engaging classroom materials. Teachers can design custom worksheets, lesson plans, and activity sheets featuring monkey themes. The platform allows dynamic content insertion, enabling personalized learning experiences. With its user-friendly interface, educators can save time while generating visually appealing materials. PDFMonkey supports the integration of images, fonts, and templates, making it ideal for crafting interactive and educational resources that captivate students and enhance their learning journey.

Monkey PDF is a reliable and versatile tool for dynamic PDF generation, offering significant time-saving benefits and empowering users to create professional, customizable documents effortlessly.

10.1 The Future of Monkey PDF

The future of Monkey PDF is promising, with advancements in automation and integration capabilities. As technology evolves, Monkey PDF is expected to enhance its dynamic generation features, offering even more seamless integration with platforms like Zapier. This will further streamline workflows, making it an indispensable tool for businesses and creators alike. Its ability to adapt to user needs ensures it remains a leader in the PDF generation market, driving efficiency and innovation.

10.2 Final Thoughts on Its Versatility

Monkey PDF’s versatility shines through its adaptability across industries, from professional document creation to creative projects. Its ability to generate dynamic PDFs, customize templates, and integrate with popular platforms makes it a go-to tool for diverse needs. Whether crafting crochet patterns, educational worksheets, or automating workflows, Monkey PDF’s flexibility and reliability ensure it remains a valuable asset for both casual users and professionals, catering to a wide range of applications with ease and efficiency.

citizen blue angels watch manual pdf

The Citizen Blue Angels watch combines precision engineering with aviation-inspired design, offering advanced features like Eco-Drive technology and water resistance, perfect for enthusiasts seeking durability and style.

1.1 Overview of the Citizen Blue Angels Watch

The Citizen Blue Angels Watch is a high-performance timepiece designed for aviation enthusiasts, featuring Eco-Drive technology, water resistance, and a durable sapphire crystal. Inspired by the Blue Angels, it combines sleek design with advanced functionality, including chronograph and altimeter functions. This watch is built for precision and reliability, making it a favorite among pilots and watch collectors alike.

1.2 Importance of the User Manual for Proper Functionality

The user manual is essential for unlocking the full potential of the Citizen Blue Angels Watch. It provides detailed guidance on setting the time, using advanced features like the chronograph and altimeter, and troubleshooting common issues; Referencing the manual ensures optimal performance and longevity of the watch, helping users navigate its intricate functions with confidence and precision.

Key Features of the Citizen Blue Angels Watch

The Citizen Blue Angels Watch boasts Eco-Drive technology, water resistance, and advanced functions like chronograph and altimeter. Its aviation-inspired design enhances durability and style for enthusiasts.

2.1 Eco-Drive Technology

The Citizen Blue Angels Watch features Eco-Drive technology, a proprietary innovation that powers the timepiece using light energy. This eliminates the need for battery replacements, offering a sustainable and maintenance-free solution. The watch efficiently converts light into electrical energy, ensuring continuous operation even in low-light conditions. This eco-friendly technology enhances the watch’s reliability and longevity, making it a practical choice for everyday wear and outdoor adventures alike.

2.2 Water Resistance and Durability

The Citizen Blue Angels Watch is designed with exceptional water resistance, ensuring reliability in wet environments. Its robust construction and scratch-resistant sapphire crystal protect the dial, while the Eco-Drive system maintains functionality without battery maintenance. This durability makes the watch ideal for active lifestyles, providing peace of mind during water-based activities or harsh weather conditions. Its rugged design ensures long-lasting performance and precision timekeeping in various settings.

2.3 Chronograph and Altimeter Functions

The Citizen Blue Angels Watch features a multifunctional chronograph, enabling precise timekeeping for events and sports. The altimeter function, while not detailed in basic operations, supports high-altitude activities. Together, these tools enhance the watch’s versatility, making it ideal for aviation enthusiasts and adventurers seeking advanced timekeeping and navigation capabilities in a single, durable timepiece.

How to Access the Citizen Blue Angels Watch Manual

Access the Citizen Blue Angels Watch manual by visiting the official Citizen website, searching for your model number, and downloading the PDF guide for detailed instructions.

3.1 Downloading the PDF Manual from Official Sources

To obtain the Citizen Blue Angels Watch manual, visit the official Citizen website. Navigate to the support or downloads section, enter your watch’s model number, and download the PDF guide. Ensure authenticity by using official sources to avoid third-party risks. This method provides a free, reliable way to access instructions for optimal watch functionality and troubleshooting.

3.2 Finding the Model Number for Manual Search

To locate the model number for your Citizen Blue Angels Watch, check the back of the watch case or the packaging it came in. The model number is typically engraved or printed on these surfaces. Once identified, visit the official Citizen website and enter this number in the search bar to find the corresponding PDF manual. This ensures you access the correct guide for your specific timepiece.

Basic Operations of the Citizen Blue Angels Watch

The Citizen Blue Angels Watch displays time in hours, minutes, and seconds, with a date display. It features a perpetual calendar for precise datekeeping and easy operation.

4.1 Timekeeping and Date Setting

The Citizen Blue Angels Watch features precise timekeeping, displaying hours, minutes, and seconds. Setting the time and date is straightforward: pull the crown to set the time, then adjust the date using the crown or designated buttons. The watch includes a perpetual calendar for accurate datekeeping. Refer to the manual for detailed step-by-step instructions to ensure proper functionality and synchronization of timekeeping and date settings.

4.2 Using the Chronograph Function

The chronograph function on the Citizen Blue Angels Watch allows precise time measurement. To activate, press the upper button to start and stop the timer. The lower button resets the stopwatch. Use the crown to set lap times or split times. Refer to the manual for detailed instructions on operating the chronograph, ensuring accurate and efficient use of this advanced feature.

Advanced Features and Settings

The Citizen Blue Angels Watch offers advanced features like radio-controlled timekeeping and altimeter adjustments, enhancing accuracy and versatility for users seeking precision and functionality in their timepiece.

5.1 Radio-Controlled Timekeeping

RADIO-CONTROLLED TIMEKEEPING ensures the Citizen Blue Angels watch automatically synchronizes with atomic clocks for precise time accuracy. This feature operates seamlessly across multiple time zones, reducing manual adjustments. The watch receives signals from transmission stations, updating its time and date effortlessly. This advanced functionality is especially useful for travelers and professionals who require reliable timekeeping without constant manual interference. The Eco-Drive technology supports this feature, ensuring continuous operation with minimal light exposure.

5.2 Adjusting the Altimeter and Compass

THE CITIZEN BLUE ANGELS WATCH features an integrated altimeter and compass for outdoor enthusiasts. To adjust the altimeter, calibrate it at a known elevation using the provided instructions. The compass ensures accurate directional readings and can be fine-tuned for precision. Regular calibration is essential for maintaining accuracy. Refer to the user manual for detailed steps on optimizing these functions for reliable performance during activities like hiking or aviation. Proper adjustment ensures accurate data for adventurers and professionals alike.

Maintenance and Care Tips

Regularly clean the watch with a soft cloth to prevent dirt buildup. Store it in a cool, dry place away from direct sunlight to maintain functionality and appearance. Recharge the Eco-Drive battery by exposing the watch to light when the power reserve is low. Proper care ensures optimal performance and longevity of your Citizen Blue Angels watch.

6.1 Cleaning and Storage Recommendations

Use a soft, dry cloth to wipe the case and bracelet, avoiding harsh chemicals. For stubborn marks, dilute mild soap with warm water and gently scrub. Store the watch in a cool, dry place, away from direct sunlight, to protect the Eco-Drive battery. Avoid extreme temperatures and humidity. Use the original box or a padded case to prevent scratches. Proper cleaning and storage ensure long-term functionality and preserve the watch’s aesthetic appeal.

6.2 Recharging the Eco-Drive Battery

To recharge the Eco-Drive battery, expose the watch to light. Natural sunlight is most effective, but indoor lighting also works. Charge for 6-8 hours in sunlight or 30-60 hours under artificial light for a full power reserve. Avoid overcharging, as it doesn’t extend battery life. If the battery is low, the watch will enter power-saving mode, reducing functionality. Proper charging ensures optimal performance and extends the lifespan of your Citizen Blue Angels watch.

Troubleshooting Common Issues

The Citizen Blue Angels watch manual provides solutions for common issues like timekeeping errors and power reserve problems, ensuring optimal functionality and user satisfaction.

7.1 Solving Timekeeping Errors

For timekeeping issues, ensure the watch is exposed to light to recharge the Eco-Drive battery. Check the time zone settings and ensure the watch receives a radio signal. If errors persist, consult the manual for calibration instructions. Common causes include incorrect date settings or insufficient power reserve. Resetting the watch or manual adjustments may resolve discrepancies, ensuring accurate timekeeping performance. Always refer to the user manual for detailed troubleshooting steps.

7.2 Fixing Power Reserve Problems

If the watch’s power reserve is low, expose it to direct light for at least 24 hours. Avoid overcharging, as this can reduce battery efficiency. If issues persist, ensure proper Eco-Drive functionality by checking for blockages or damage to the solar panel. Resetting the watch may also resolve power-related issues. Refer to the manual for detailed instructions to restore optimal performance and extend battery life effectively.

Frequently Asked Questions (FAQs)

Common queries include understanding the charge level indicator and setting the perpetual calendar. Refer to the manual for detailed guidance on these and other functionalities.

8.1 How to Set the Perpetual Calendar

To set the perpetual calendar on your Citizen Blue Angels watch, pull the crown to position A and rotate it to select the correct date. Use the B button to adjust the month. Ensure the time is set accurately in either 12-hour or 24-hour format. The watch automatically updates the date, leap years, and month lengths. Refer to the manual for detailed step-by-step instructions to ensure proper functionality.

8.2 Understanding the Charge Level Indicator

The Citizen Blue Angels watch features a charge level indicator that shows the remaining power reserve of its Eco-Drive battery. The indicator is divided into segments, with each segment representing a portion of the battery life. When the battery is fully charged, all segments light up. As the power depletes, the segments gradually turn off. To recharge, expose the watch to light; Refer to the manual for detailed guidance on monitoring and maintaining the charge level.

The Citizen Blue Angels Collaboration

The Citizen Blue Angels collaboration celebrates the iconic U.S. Navy flight demonstration squadron, inspiring watch designs with aviation-themed elements and precise engineering, reflecting their aerodynamic spirit and legacy.

9.1 History of the Blue Angels Partnership

The Citizen Blue Angels partnership began in 2007, celebrating the U.S. Navy’s iconic flight squadron. Inspired by their precision and innovation, Citizen crafted watches reflecting the Blue Angels’ legacy, with designs mimicking their jets. This collaboration highlights shared values of performance and style, creating timepieces that honor aviation excellence and appeal to enthusiasts worldwide.

9.2 Design Elements Inspired by the Blue Angels

The Citizen Blue Angels watch features a bold, aviation-inspired design, with elements like a vibrant blue dial resembling the squadron’s jets. The watch incorporates motifs from the Blue Angels’ aircraft, including stripes and angular lines, reflecting their aerodynamic precision. The rugged construction and sporty aesthetic cater to both aviation enthusiasts and everyday wearers, embodying the spirit of performance and style synonymous with the Blue Angels.

The Citizen Blue Angels watch is a blend of innovative technology and aviation-inspired design, offering reliability and style. Referencing the manual ensures optimal functionality and user satisfaction.

10.1 Final Thoughts on the Citizen Blue Angels Watch

The Citizen Blue Angels watch is a standout timepiece, combining Eco-Drive technology with aviation-inspired design. Its water resistance, durability, and advanced features make it ideal for both enthusiasts and everyday wear. The collaboration with the Blue Angels adds a unique touch, while the perpetual calendar ensures convenience. Referencing the user manual is key to unlocking its full potential, making it a testament to Citizen’s commitment to quality and innovation.

10.2 Encouraging Users to Refer to the Manual for Optimal Use

Referencing the user manual is essential for maximizing the potential of the Citizen Blue Angels watch. It provides detailed guidance on Eco-Drive technology, water resistance, and advanced features like the chronograph. Troubleshooting common issues and maintaining optimal performance are also covered. By following the manual, users can ensure their watch functions perfectly, making it a vital resource for both new and experienced owners.

examen de cosmetología pdf

The cosmetology exam is a critical step in becoming a licensed professional‚ ensuring expertise in beauty treatments and safety protocols. It covers skin anatomy‚ cosmetic procedures‚ and practical skills‚ with resources like PDF guides available for preparation.

1.1 Overview of the Cosmetology Licensing Exam

The cosmetology licensing exam evaluates theoretical and practical knowledge‚ ensuring professionals meet industry standards. It includes multiple-choice questions and hands-on tasks‚ covering skin anatomy‚ cosmetic procedures‚ and safety protocols. Resources like PDF guides and sample questions aid preparation‚ while organizations like the NIC develop and administer the exam to certify competency in cosmetology practices.

1.2 Importance of the Exam for Cosmetology Professionals

The exam ensures professionals have the necessary skills and knowledge to provide safe and effective beauty services. Passing it validates expertise‚ boosts career opportunities‚ and builds client trust. It also demonstrates adherence to industry standards and legal requirements‚ making it a crucial step for cosmetologists to achieve licensure and successfully enter the beauty industry.

Structure and Content of the Cosmetology Exam

The exam combines theoretical and practical assessments‚ covering skin science‚ cosmetic procedures‚ and hands-on techniques. It evaluates both knowledge and application skills‚ ensuring comprehensive expertise in cosmetology.

2.1 Theoretical Components of the Exam

The theoretical portion tests knowledge of skin anatomy‚ physiology‚ and cosmetic science. It includes multiple-choice questions on topics like peeling procedures‚ emulsions‚ and safety protocols. Candidates must demonstrate understanding of product formulation‚ chemical interactions‚ and professional standards. This section ensures a strong foundation in the scientific principles behind cosmetology practices‚ preparing professionals for real-world applications and maintaining high industry standards.

2.2 Practical Components of the Exam

The practical exam evaluates hands-on skills in cosmetology‚ requiring candidates to demonstrate expertise in haircutting‚ coloring‚ chemical treatments‚ and nail care. Tasks are performed on mannequins or live models‚ assessing precision‚ technique‚ and safety. Proper use of tools and adherence to sanitation protocols are critical. This section ensures practical competence‚ reflecting real-world scenarios and state licensing standards for professional cosmetologists.

2.3 Types of Questions and Time Management

The cosmetology exam includes multiple-choice‚ true/false‚ and identification questions‚ testing both theoretical and practical knowledge. Candidates have 90 minutes to complete the theoretical section‚ with practical exams requiring demonstration of specific skills. Effective time management is crucial‚ as each question must be answered within the allotted timeframe to ensure completion. Prioritizing questions and skimming through the exam can help optimize time usage.

Preparation Strategies for the Cosmetology Exam

Effective preparation involves using study guides‚ practice exams‚ and online resources. Focus on understanding key concepts‚ managing time‚ and mastering practical skills to ensure exam success.

3.1 Study Materials and Resources

Utilize comprehensive study guides‚ such as PDF materials‚ to prepare for the exam. These resources cover theoretical and practical aspects‚ including skin anatomy‚ cosmetic procedures‚ and safety protocols. Additionally‚ textbooks like Milady’s Standard Course for Cosmetologists provide detailed information to help candidates master key concepts and ensure exam readiness. Online platforms also offer practice exams and sample questions to simulate test conditions effectively.

3.2 Practice Exams and Sample Questions

Practicing with sample questions and mock exams is essential for exam success. These resources help familiarize candidates with the exam format‚ timing‚ and content. Many study guides‚ including PDF materials‚ offer realistic practice exams covering topics like skin anatomy‚ cosmetic procedures‚ and safety protocols. Regularly reviewing sample questions improves time management and reduces anxiety‚ ensuring a stronger performance on the actual exam day.

3.3 Effective Study Techniques for Success

Effective study techniques involve active learning‚ such as using flashcards for key terms and participating in group discussions. Creating a structured study schedule ensures consistent preparation. Prioritize understanding over memorization by breaking down complex topics into simpler concepts. Utilize visual aids like diagrams and videos to enhance learning. Regularly review and practice theoretical and practical components to build confidence and mastery for the exam.

Key Topics Covered in the Exam

The exam covers essential topics such as skin anatomy‚ cosmetic procedures‚ safety protocols‚ and hair and nail care techniques. It also includes theoretical knowledge of skin layers‚ cell functions‚ and types of skin conditions. Practical skills like cutting‚ coloring‚ and styling are emphasized‚ ensuring a comprehensive understanding of cosmetology practices and safety standards.

4.1 Skin Anatomy and Physiology

The exam covers the structure and function of the skin‚ including the epidermis‚ dermis‚ and hypodermis. It emphasizes the role of melanocytes‚ Langerhans cells‚ and the hydro-lipid mantle. Understanding skin types‚ their characteristics‚ and conditions like dilated pores is crucial. Knowledge of skin layers and cell functions ensures a strong foundation for cosmetology practices‚ enabling professionals to provide safe and effective treatments.

4.2 Cosmetic Procedures and Safety Protocols

The exam covers various cosmetic procedures‚ including chemical peels‚ hair treatments‚ and makeup applications. Emphasis is placed on safety protocols such as proper sanitation‚ disinfection‚ and infection control. Understanding contraindications and reactions is crucial for safe practices. Professionals must master techniques to minimize risks and ensure client safety while performing cosmetic services.

4.3 Hair‚ Nail‚ and Skin Care Techniques

The exam evaluates proficiency in haircutting‚ coloring‚ and styling techniques‚ as well as nail shaping‚ manicuring‚ and pedicuring. Skin care topics include facials‚ extractions‚ and analyzing skin types. Emphasis is placed on sanitation‚ tool safety‚ and product selection. Mastery of these techniques ensures cosmetologists can deliver professional services safely and effectively‚ meeting industry standards for quality and client satisfaction.

Legal and Regulatory Aspects

The exam covers licensing requirements‚ state-specific regulations‚ and legal standards for cosmetology professionals. Understanding these ensures compliance with industry laws and ethical practices.

5.1 Licensing Requirements and Regulations

Licensing requirements for cosmetologists vary by state but generally include completing training hours and passing both theoretical and practical exams. Regulations ensure professionals meet industry standards‚ focusing on safety protocols and ethical practices. These requirements are enforced by state boards‚ with the NIC overseeing national exams to maintain consistency and professional competence across the industry. Proper licensure is essential for legal practice.

5.2 State-Specific Exam Details

Each state may have unique exam requirements‚ such as variations in content‚ format‚ or additional certifications. For example‚ Texas focuses on specific cosmetology practices‚ while Florida emphasizes state laws and regulations. Candidates should consult their state’s cosmetology board for detailed exam outlines and any additional requirements to ensure proper preparation. This ensures compliance with local licensing standards.

Practical Exam Requirements

The practical exam evaluates hands-on skills in areas like haircutting‚ coloring‚ and styling. Candidates must demonstrate competence using specific tools and equipment‚ adhering to safety protocols.

6.1 Demonstration of Skills and Competence

The practical exam requires candidates to showcase their proficiency in cosmetology techniques. Tasks may include haircutting‚ coloring‚ and styling‚ with a focus on precision and safety. Proper use of equipment and adherence to hygiene protocols are assessed. Evaluators ensure that each candidate meets industry standards‚ demonstrating the ability to perform services effectively and professionally in real-world scenarios.

6.2 Tools and Equipment Needed for the Practical Exam

Candidates must bring specific tools and equipment for the practical exam‚ including scissors‚ combs‚ brushes‚ and electrical appliances like curling irons and flat irons. Sanitation and proper organization of tools are essential. Additional items like clipper sets and makeup kits may be required‚ depending on the exam’s scope. Ensuring all equipment is in good condition and ready for use is crucial for a successful evaluation.

Exam Resources and Guides

Various PDF guides and study materials are available online to help prepare for the cosmetology exam‚ including practice questions and detailed study resources to ensure success.

7.1 PDF Guides and Study Materials Available Online

Access Comprehensive Resources

Downloadable PDF guides provide detailed insights into the cosmetology exam‚ covering theoretical and practical components. These resources include sample questions‚ study tips‚ and exam structure overviews. The NIC offers official study materials‚ while Spanish-language PDFs cater to bilingual candidates. Utilize these guides to reinforce knowledge and prepare effectively for the exam‚ ensuring a thorough understanding of all topics.

7.2 Recommended Textbooks and References

Essential textbooks like Milady’s Standard Cosmetology and Cosmetology: Theoretical and Practical provide in-depth knowledge on skin anatomy‚ chemical processes‚ and practical techniques. These resources align with exam topics‚ offering detailed explanations and visual guides. Spanish-language materials‚ such as Guía Completa para el Examen de Cosmetología‚ cater to bilingual candidates‚ ensuring comprehensive preparation for all aspects of the exam.

Maintaining Your Cosmetology License

Maintaining your cosmetology license requires completing continuing education hours‚ adhering to renewal requirements‚ and staying updated on industry standards and state-specific regulations.

8.1 Continuing Education Requirements

Continuing education is essential for maintaining a cosmetology license. Many states require a specific number of hours in areas like safety protocols‚ new techniques‚ and legal updates. These courses ensure professionals stay current with industry advancements and adhere to regulatory standards. Regular training helps in delivering safe and effective services‚ ultimately benefiting both professionals and clients.

8.2 Renewal Process and Professional Development

Licensing renewal involves submitting fees and proof of completed continuing education hours. Professional development opportunities‚ such as workshops and online courses‚ enhance skills and knowledge. Staying updated ensures compliance with industry standards and fosters career growth. Regular renewal maintains credentials‚ allowing cosmetologists to provide high-quality services and adapt to emerging trends in the beauty industry.

Exam Tips and Common Mistakes to Avoid

Stay calm‚ manage time effectively‚ and review questions carefully. Avoid rushing and ensure thorough understanding of each topic. Practice consistently to build confidence and accuracy.

9.1 Time Management During the Exam

Effective time management is crucial for success. Allocate specific minutes to each question‚ ensuring no section is neglected. Skim through the exam first to identify easier questions‚ then return to challenging ones. Avoid spending too long on a single question‚ as it may sacrifice other opportunities to score. Use the remaining time to review answers and make necessary corrections.

9.2 Strategies to Reduce Exam Anxiety

To reduce exam anxiety‚ practice deep breathing exercises to calm your nerves. Visualize success and remind yourself of your preparation. Stay hydrated and ensure a good night’s sleep before the exam. Arrive early to avoid last-minute stress. Focus on one question at a time‚ and maintain a positive mindset. A calm and composed approach will help you perform at your best.

The Role of the National Interstate Council of State Boards of Cosmetology (NIC)

The NIC develops and administers national cosmetology exams‚ ensuring standardized licensing across states. They provide resources like the Candidate Information Bulletin to guide examinees‚ promoting uniformity in professional competency assessments.

10.1 NIC Exam Development and Administration

The NIC develops and administers the national cosmetology exam‚ ensuring it meets industry standards and legal requirements. The exam is divided into theoretical and practical sections‚ with content validated by experts. NIC provides candidate information bulletins‚ study guides‚ and practice materials to help examinees prepare effectively. Their role ensures uniformity and fairness in the licensing process nationwide.

Spanish-Language Exam Resources

Spanish-language resources‚ including PDF guides and study materials‚ are available for cosmetology exam preparation. These resources offer sample questions‚ theoretical content‚ and practical exam guides tailored for Spanish-speaking candidates.

11.1 Exam Preparation Materials in Spanish

Spanish-language exam preparation materials are widely available‚ including PDF guides and study resources. These materials cover theoretical and practical components‚ offering sample questions‚ skin anatomy details‚ and cosmetic procedure explanations. Resources like “Examen de Competencia Cosmetología” provide comprehensive study aids‚ while websites such as uDocz offer downloadable PDFs for exam success. Additionally‚ NIC provides Spanish-language study guides for candidates preparing for the exam.

The Impact of Passing the Cosmetology Exam

Passing the cosmetology exam opens doors to diverse career opportunities in beauty salons‚ spas‚ and specialized clinics. It validates expertise and boosts professional credibility‚ enabling individuals to offer high-quality services in skincare‚ hairstyling‚ and cosmetics‚ while also paving the way for advanced certifications and entrepreneurial ventures in the growing beauty industry.

12.1 Career Opportunities in the Cosmetology Industry

Passing the cosmetology exam unlocks a wide range of career paths‚ including hairstylist‚ esthetician‚ makeup artist‚ nail technician‚ and salon manager. Professionals can work in salons‚ spas‚ or start their own businesses. Specializations in areas like bridal styling or medical aesthetics further expand opportunities. The industry’s continuous growth ensures diverse and rewarding roles‚ allowing individuals to choose paths aligning with their passions and skills.

Passing the cosmetology exam is a milestone‚ unlocking diverse career opportunities and professional growth. Stay updated on industry trends and continuously enhance your skills for long-term success.

13.1 Final Tips for Exam Success

To excel in the cosmetology exam‚ stay calm and manage your time effectively. Thoroughly review practice questions and focus on understanding key concepts. Prioritize practical skills and safety protocols‚ as they are critical components. Utilize study guides and online resources to reinforce your knowledge. Confidence and thorough preparation are essential for achieving success and obtaining your cosmetology license.

  • Stay calm and focused during the exam to ensure clarity of thought.
  • Review practice questions to familiarize yourself with the exam format.
  • Prioritize practical skills and safety protocols in your study plan.
  • Use study guides and online resources to reinforce your knowledge base.

Confidence and preparation are key to securing your cosmetology license and advancing your career in the beauty industry.

13.2 Staying Updated on Industry Standards

Remaining updated on industry standards is crucial for long-term success in cosmetology. Attend workshops‚ follow professional journals‚ and engage with online forums to stay informed. Regularly review updates from organizations like the NIC and state licensing boards. Embrace new techniques and products to provide cutting-edge services. Continuous learning ensures compliance with regulations and enhances your expertise‚ keeping you competitive in the ever-evolving beauty industry.

manual typewriter royal

The Royal Classic Manual Typewriter blends timeless style with modern functionality‚ offering a durable metal frame‚ 44 keys‚ and 88 symbols. Its ribbon selector‚ adjustable line spacing‚ and Pica 87 font make it a versatile tool for writing‚ while its sleek design adds classic charm to any workspace.

1.1 Overview of the Royal Typewriter Brand

The Royal Typewriter Brand‚ established in 1904‚ is renowned for its durable‚ high-quality manual typewriters. Known for their classic design and robust construction‚ Royal typewriters feature die-cast metal frames‚ ribbon selectors‚ and versatile line spacing. Their timeless appeal has made them a favorite among writers and collectors‚ blending functionality with nostalgic charm that endures in the digital age.

1.2 Key Features of the Royal Classic Manual Typewriter

The Royal Classic Manual Typewriter features a sturdy die-cast metal housing‚ 44 keys‚ and 88 symbols. It includes a ribbon selector‚ adjustable line spacing options of 1‚ 1.5‚ and 2‚ and types in Pica 87 font. Additional functionalities like tab settings‚ margin stops‚ and a space bar repeater key enhance its usability. Its wide 11-inch carriage and metal construction ensure durability‚ making it a reliable choice for both practical use and nostalgic appeal.

History of the Royal Typewriter Company

Founded in 1904 by Edward B. Hess and Lewis Myers‚ Royal Typewriter Company gained prominence after Thomas F. Ryan’s investment in 1906. The Royal Standard (1906) and Model 10 (1914) established its reputation. Merging with McBee in 1954‚ it became Royal McBee. Today‚ it operates as Royal Consumer Information Products Inc.

2.1 Founding and Early Years

The Royal Typewriter Company was founded in 1904 by Edward B. Hess and Lewis Myers in Brooklyn‚ New York. Initially struggling financially‚ they secured investment from Thomas F. Ryan in 1906. Relocating to Hartford‚ Connecticut‚ they introduced the Royal Standard‚ their first successful model‚ replacing the less popular Royal Grand. This marked the beginning of their rise in the typewriter industry.

2.2 The Royal Standard and Model 10: Breakthrough Models

The Royal Standard‚ introduced in 1906‚ was the company’s first breakthrough‚ featuring a QWERTY keyboard and flatbed design. The Model 10‚ launched in 1914‚ became iconic‚ offering speed and responsiveness. It set the standard for desktop typewriters‚ solidifying Royal’s reputation and driving global adoption‚ with its upright style and double glass panels symbolizing innovation and reliability in the early 20th century.

Design and Functionality of Royal Manual Typewriters

Royal manual typewriters feature sturdy metal construction‚ 44 keys‚ and 88 symbols. The ribbon selector‚ line spacing options‚ and Pica 87 font enhance functionality‚ combining durability with practicality.

3.1 Durable Construction and Classic Aesthetics

The Royal manual typewriters are renowned for their robust die-cast metal housing and timeless design. The mint green and red models‚ with their wide 11-inch carriage and metal frame‚ embody classic elegance. Their solid construction ensures longevity‚ making them a reliable choice for writers seeking both functionality and aesthetic appeal in a traditional writing experience.

3.2 Advanced Features: Ribbon Selector‚ Line Spacing‚ and Tab Settings

The Royal manual typewriter features a ribbon selector for switching between black and red ink‚ offering versatility in document formatting. Its adjustable line spacing options (1‚ 1.5‚ 2) and precise tab settings provide control over text alignment. These advanced features‚ combined with a magic margin and automatic paper lock‚ enhance typing efficiency and customization‚ making it a practical yet charming tool for writers and creators.

Evolution of Royal Typewriters

Royal typewriters evolved from the 1906 Royal Standard to the breakthrough Model 10 in 1914‚ introducing portables in the 1920s and pioneering the Royal Air Truck marketing campaign.

Royal introduced portable typewriters in the 1920s‚ revolutionizing convenience for writers. These models‚ like the Royal Model P‚ featured lightweight yet durable designs‚ making them ideal for use on the go. The portables quickly gained popularity‚ offering the same reliability as desktop models but with enhanced mobility‚ thus catering to a broader range of users and writing environments.

4.2 The Royal Air Truck Marketing Campaign

In 1926‚ Royal launched the Royal Air Truck campaign‚ showcasing their portable typewriters’ durability. They used a Ford Tri-motor plane to drop 11‚000 typewriters via parachute‚ proving their resilience. Only six machines were damaged‚ demonstrating exceptional build quality. This innovative marketing stunt captivated the public‚ establishing Royal as a leader in portable typewriters and reinforcing their reputation for reliability and innovation.

Notable Royal Typewriter Models

Royal produced iconic models like the Model P‚ the first portable typewriter‚ and the Quiet Deluxe‚ a legendary portable. These designs are cherished by collectors for their historical significance‚ durability‚ and timeless appeal‚ making them standout pieces in the Royal legacy.

5.1 The Royal Model P: A Collector’s Favorite

The Royal Model P‚ introduced in the early 20th century‚ is a highly sought-after collector’s item. Known for its portability and sleek design‚ it was the first truly portable typewriter‚ making it a groundbreaking innovation. Its durability and historical significance contribute to its value‚ with models in good condition often fetching several hundred dollars. Collectors prize it for its blend of functionality and nostalgic charm.

5.2 The Royal Quiet Deluxe: A Legendary Portable Typewriter

The Royal Quiet Deluxe‚ introduced in 1939‚ is a iconic portable typewriter renowned for its sleek design and advanced features. It included innovations like automatic paper lock‚ quick ribbon cover‚ and magic margin. Produced until 1948 and reintroduced in 1955 with vibrant colors‚ it became a favorite among writers. A gold edition even appeared in the James Bond film GoldenEye‚ enhancing its collectible status.

Collectors’ Value and Market Demand

Royal typewriters hold stable value‚ comparable to rivals like Smith-Corona and Remington. Models like the Royal Standard and Model 10‚ in good condition‚ can fetch over $1‚000‚ making them highly sought after by collectors.

6.1 Factors Affecting the Value of Vintage Royal Typewriters

The value of vintage Royal typewriters is influenced by factors such as rarity‚ condition‚ and historical significance. Early models like the Royal Standard and Model 10‚ in excellent working condition‚ command higher prices due to their historical importance. Additionally‚ unique features‚ limited production runs‚ and provenance can significantly increase a typewriter’s worth‚ making certain models highly desirable among collectors.

6.2 Rare and Most Valuable Royal Typewriter Models

The Royal Standard No. 1 and Model 10 are among the rarest and most valuable‚ often fetching hundreds of dollars. The Royal Quiet Deluxe‚ especially the 1947 gold edition‚ is highly sought after‚ as seen in James Bond’s GoldenEye. The Senior Companion‚ while more affordable‚ remains collectible due to its craftsmanship and unique design‚ making these models treasures for enthusiasts and investors alike.

Cultural Impact of Royal Typewriters

Royal typewriters have left an indelible mark on literature and art‚ symbolizing a bygone era of mechanical writing. Their nostalgic appeal endures in the digital age‚ cherished by writers and artists seeking tactile creativity and vintage charm.

7.1 Royal Typewriters in Literature and Art

Royal typewriters have profoundly influenced literature and art‚ with authors like McCullough using a 1940 Royal model for his books. Their tactile nature inspires creativity‚ making them a symbol of artistic craftsmanship. The Royal Quiet Deluxe even appeared in James Bond’s GoldenEye‚ showcasing their enduring cultural relevance and timeless charm in both writing and visual media.

7.2 The Nostalgia of Manual Typewriters in the Digital Age

Manual typewriters evoke nostalgia for a bygone era‚ offering a tactile writing experience lost in digital interfaces. The rhythmic clatter of keys and physical connection to words resonate deeply‚ sparking fond memories. Despite modern tech‚ Royal typewriters endure as symbols of craftsmanship‚ appealing to those seeking authenticity and a sensory connection to their creative process in a fast-paced digital world.

Maintenance and Care Tips

Regular cleaning and lubrication are essential to maintain the Royal typewriter’s performance. Protect it from dust and moisture‚ and use high-quality ribbons for optimal functionality and longevity.

8.1 Cleaning and Lubricating the Typewriter

Regular cleaning and lubrication are crucial for maintaining the Royal typewriter’s functionality. Use a soft cloth to wipe down the exterior and remove dust from the typebars and carriage. Apply a light machine oil to pivot points and bearings to ensure smooth operation. Avoid harsh chemicals‚ as they may damage the finish. Proper care extends the lifespan and performance of your Royal manual typewriter.

8.2 Replacing Ribbons and Common Repair Techniques

Replacing ribbons on a Royal typewriter involves threading a new ribbon through the spools and securing it. Regular cleaning with compressed air or a soft brush prevents dust buildup. Lubricate moving parts with light machine oil for smooth operation. Adjust margins and tab settings using the built-in knobs. For repairs‚ consult a manual or online forums for specific guidance. Seek specialized help for complex issues or rare parts replacement to maintain the typewriter’s functionality and longevity.

Modern Relevance of Royal Manual Typewriters

Royal manual typewriters have seen a resurgence among writers and artists‚ cherished for their tactile experience and vintage charm‚ offering a nostalgic alternative to digital tools.

9.1 The Resurgence of Manual Typewriters Among Writers and Artists

Manual typewriters like the Royal Classic have gained popularity among writers and artists seeking a distraction-free‚ tactile writing experience. The mechanical rhythm and sensory feedback foster creativity‚ making them a preferred tool for drafting novels‚ poetry‚ and scripts. Additionally‚ artists appreciate their nostalgic aesthetic‚ integrating them into minimalist workspaces as both functional and decorative elements.

9.2 Royal Typewriters as a Symbol of Vintage Charm

Royal manual typewriters embody vintage charm‚ cherished for their timeless design and nostalgic appeal. Their sturdy metal construction‚ classic aesthetics‚ and tactile typing experience evoke a bygone era‚ making them sought-after collectibles. The Royal Classic’s Pica 87 font and durable build resonate with enthusiasts‚ symbolizing a connection to history and the art of traditional writing in a digital age.

The Royal manual typewriter remains a timeless symbol of craftsmanship and nostalgia‚ cherished by writers‚ artists‚ and collectors for its durability‚ classic design‚ and enduring charm.

10.1 Final Thoughts on the Royal Manual Typewriter

The Royal manual typewriter stands as a testament to timeless design and craftsmanship‚ evoking nostalgia while offering practicality. Its durable metal construction and intuitive features have made it a favorite among writers and collectors. Whether for creative expression or vintage charm‚ the Royal typewriter continues to inspire‚ bridging the past and present with its enduring appeal and emotional resonance.

10.2 Encouragement to Explore and Collect Royal Typewriters

Exploring and collecting Royal manual typewriters offers a journey through history‚ craftsmanship‚ and creativity. With their durable design and timeless appeal‚ these machines are not only functional but also treasured collectibles. Whether you’re a writer‚ artist‚ or history enthusiast‚ Royal typewriters invite you to embrace the tactile joy of typing while owning a piece of vintage charm that continues to inspire and delight.

poor economics pdf

“Poor Economics” by Abhijit Banerjee and Esther Duflo offers a groundbreaking perspective on global poverty, blending rigorous research with real-world insights to challenge stereotypes and propose innovative solutions.

1.1 Overview of the Book

Poor Economics challenges traditional views on poverty by examining the daily decisions and behaviors of the poor. Through rigorous research and real-world examples, the authors reveal the complexities of poverty, offering insights into why poverty persists and how effective solutions can be designed. The book emphasizes evidence-based approaches to poverty alleviation.

1.2 Authors and Their Contributions

Abhijit Banerjee and Esther Duflo, both MIT professors and Nobel laureates, bring extensive expertise in development economics. Their work challenges traditional poverty narratives, emphasizing evidence-based solutions through randomized trials. Their contributions have reshaped global poverty research, offering practical insights and innovative strategies to address economic disparities effectively.

1.3 Key Themes and Objectives

“Poor Economics” focuses on understanding the economic decisions of the poor, challenging stereotypes, and identifying effective solutions. It emphasizes evidence-based policies, leveraging randomized trials to test interventions. The book aims to redefine poverty alleviation strategies, moving beyond simplistic aid approaches to empower the poor through informed decision-making and sustainable opportunities.

Understanding Poverty Through “Poor Economics”

Exploring the daily decisions of the poor, why poverty persists, and the role of research in uncovering effective solutions to global poverty challenges.

2.1 The Daily Decisions of the Poor

The book highlights how the poor make surprising choices, such as buying TVs or spending on sugar, revealing complex priorities shaped by scarcity and aspiration, not just financial constraints.

2.2 Why Poverty Persists Despite Global Efforts

Poverty persists due to ineffective aid strategies, cultural barriers, and the failure to address the complex daily challenges of the poor. Traditional approaches often overlook the nuanced realities of poverty, emphasizing quick fixes over sustainable solutions, as highlighted in “Poor Economics,” which advocates for evidence-based policies rooted in understanding the poor’s lived experiences.

2.3 The Role of Randomized Control Trials in Research

Randomized control trials (RCTs) are a cornerstone of “Poor Economics,” enabling researchers to rigorously test anti-poverty interventions. By comparing outcomes between treatment and control groups, RCTs provide empirical evidence on what works, ensuring policies are grounded in actual results rather than assumptions, and helping to scale effective solutions for global poverty reduction.

Key Concepts in “Poor Economics”

Poor Economics explores the economic lives of the poor, offering theories that explain their achievements and the need for evidence-based interventions to alleviate poverty effectively through targeted strategies.

3.1 The Poverty Trap: A Cycle of Scarcity

The poverty trap describes how scarcity creates a cycle of deprivation, where limited resources prevent investment in opportunities that could improve living conditions, trapping individuals in a vicious cycle of economic stagnation and vulnerability.

3.2 Behavioral Economics and the Poor

Behavioral economics reveals how psychological biases influence the poor’s financial decisions, such as present bias and mental accounting. These insights explain why low-income individuals often prioritize immediate gratification over long-term benefits, highlighting the need for policies that account for these behavioral patterns to effectively address poverty and improve decision-making.

3.3 The Importance of Empirical Evidence

Empirical evidence is crucial in “Poor Economics” as it relies on data from randomized trials to understand poverty. This approach ensures policies are grounded in real-world outcomes, making them more effective. Banerjee and Duflo emphasize that without solid evidence, strategies remain ineffective and often fail to address actual needs.

Case Studies and Examples

The book highlights real-life examples, such as the Moroccan man who bought a TV despite hunger, revealing how poverty’s complexities challenge traditional economic assumptions.

4.1 The Moroccan Man Who Bought a Television

The Moroccan man’s decision to buy a TV despite struggling with hunger highlights the complexities of poverty. It challenges traditional views, showing how the poor prioritize dignity and hope over immediate needs, revealing deeper psychological and social drivers of economic decisions.

4.2 Why Poor Families in Maharashtra Spend on Sugar

Poor families in Maharashtra spend on sugar due to cultural practices, social status, and immediate energy needs. Sugar is used in religious rituals and celebrations, and its high calorie content provides quick energy for laborers. Despite financial struggles, these factors make sugar a perceived necessity, reflecting complex spending priorities influenced by culture and survival needs.

4.3 Education and Learning in Poor Areas

Educating children in poor areas is challenging due to inadequate resources, poorly trained teachers, and low parental involvement. Despite attending school, learning outcomes remain low, as highlighted in “Poor Economics.” The book emphasizes the need to address these systemic issues through targeted interventions and improved access to quality education to break the poverty cycle effectively.

Policy Implications and Innovations

“Poor Economics” highlights innovative policy solutions, emphasizing evidence-based approaches like microfinance and randomized trials to address poverty effectively, challenging traditional aid strategies and fostering sustainable development.

5.1 Rethinking Traditional Aid Strategies

Rethinking traditional aid strategies, “Poor Economics” emphasizes the need to move beyond merely providing resources; The authors argue that understanding the daily decisions of the poor and tailoring aid to their specific needs leads to more effective and sustainable solutions. This approach challenges conventional methods and promotes evidence-based interventions for poverty alleviation.

5.2 Microfinance and Its Impact

Microfinance, as discussed in “Poor Economics,” offers small loans to entrepreneurs, empowering them to invest in businesses. While it provides access to capital, its impact varies. Banerjee and Duflo highlight cases where microfinance lifts incomes, but also note its limitations in transforming lives. Context matters, and its effectiveness depends on implementation and local conditions.

5.3 Innovations in Poverty Alleviation

Innovations like mobile banking and digital payment systems are transforming poverty alleviation by increasing access to financial services. Conditional cash transfers and targeted subsidies also show promise in improving health and education outcomes. These tools address specific barriers, offering efficient and impactful solutions to break the cycle of poverty. Technology-driven approaches are reshaping traditional aid strategies.

Criticisms and Controversies

Critics argue that “Poor Economics” oversimplifies poverty solutions and relies heavily on randomized trials, potentially ignoring broader structural issues like inequality and systemic oppression.

6.1 Debates on the Effectiveness of Aid

“Poor Economics” sparks debates on aid effectiveness, questioning whether resources reach intended targets. Critics argue that traditional aid strategies often fail to address root causes, while others highlight successes in specific contexts. The book challenges assumptions, urging a more nuanced approach to aid distribution and impact measurement.

6.2 Criticisms of Randomized Control Trials

Some critics argue that randomized control trials (RCTs), while useful, have limitations in capturing complex social dynamics. They may oversimplify poverty issues, focus on short-term outcomes, or fail to generalize across diverse contexts, sparking debates about their role in shaping effective poverty alleviation strategies and policies.

6.3 Cultural and Contextual Limitations

The book highlights that poverty solutions must account for cultural and contextual differences. Local norms, social structures, and individual priorities often influence economic decisions, making universal approaches ineffective. Understanding these nuances is crucial for designing policies that resonate with diverse communities and address their unique challenges effectively.

Availability and Access to “Poor Economics” PDF

“Poor Economics” is widely available in PDF format through various online platforms, including academic databases and eBook stores, ensuring easy access for readers worldwide.

7.1 Sources for Downloading the PDF

The PDF of “Poor Economics” can be downloaded from platforms like ResearchGate, Google Scholar, and eBook stores. Specific links, such as those from paxmongolica.org, offer free access. Additionally, official publisher sites like PublicAffairs and academic databases provide legitimate downloads, ensuring accessibility for readers worldwide, including print-disabled individuals through specialized services.

7.2 Legal and Ethical Considerations

Downloading “Poor Economics” PDF requires respecting copyright laws. Piracy is illegal and unethical. Accessing the book through legitimate sources like publisher websites, academic databases, or authorized eBook platforms ensures compliance with legal standards. Print-disabled readers can use specialized services, balancing accessibility with ethical considerations and copyright respect.

7.3 Accessibility for Print-Disabled Readers

The “Poor Economics” PDF is accessible to print-disabled readers through specialized services like Bookshare, ensuring equal access to knowledge. These platforms provide screen-reader compatibility and customizable text, adhering to legal standards while promoting inclusivity for individuals with visual or reading disabilities.

“Poor Economics” by Abhijit Banerjee and Esther Duflo is a transformative read, offering insights into poverty’s complexities and practical solutions, making it essential for global dialogue on poverty alleviation.

8.1 The Significance of “Poor Economics” in Global Dialogue

“Poor Economics” reshapes global dialogue on poverty by challenging traditional views and offering evidence-based solutions. Its use of randomized control trials provides actionable insights, influencing policymakers and researchers alike. The book’s empirical approach has made it a cornerstone in contemporary discussions on poverty alleviation and development economics.

8.2 The Way Forward in Fighting Poverty

“Poor Economics” advocates for evidence-based solutions, emphasizing the need for targeted interventions and innovative strategies. By understanding the daily decisions of the poor, policymakers can design effective programs. Microfinance, education, and healthcare initiatives are highlighted as key areas for progress, encouraging a multidisciplinary approach to break the cycle of poverty sustainably.

8.3 Encouraging Further Research and Action

“Poor Economics” underscores the importance of continued research and collaborative efforts to address poverty. By leveraging empirical evidence and innovative strategies, policymakers and researchers can develop targeted solutions. Encouraging a culture of experimentation and learning ensures sustainable progress in reducing global poverty effectively.

Future Directions in Poverty Research

Future research should focus on leveraging technology, refining randomized trials, and fostering collaboration between policymakers and researchers to create sustainable solutions for global poverty alleviation.

9.1 Leveraging Technology for Poverty Alleviation

Technology offers transformative potential in poverty alleviation by enabling mobile banking, digital platforms for economic opportunities, and data-driven decision-making. Innovations like AI and machine learning can optimize resource allocation and target interventions more effectively, ensuring sustainable development and enhancing the impact of anti-poverty programs globally.

9.2 Expanding the Scope of Randomized Trials

Randomized control trials (RCTs) have proven vital in evaluating poverty interventions. Expanding their scope ensures broader applicability, enabling researchers to test diverse programs across varied contexts. This approach reduces guesswork in policymaking, fostering evidence-based solutions. By scaling RCTs, we can better understand what works, optimizing aid strategies and enhancing global poverty alleviation efforts effectively.

9.3 Collaborative Efforts Between Policymakers and Researchers

Collaborative efforts between policymakers and researchers are crucial for designing effective poverty solutions. By integrating evidence-based research into policy design, interventions become more impactful and sustainable. This synergy ensures that programs are tailored to real needs, fostering innovation and accountability. Ongoing dialogue between these groups is essential for creating adaptable and responsive policies that address evolving challenges effectively.

honeywell pro 4000 manual

The Honeywell Pro 4000 Series is a programmable digital thermostat designed for energy efficiency and ease of use. It offers 5-2 day scheduling‚ an easy-to-read display‚ and compatibility with various heating/cooling systems. Perfect for homeowners seeking reliable climate control with minimal effort‚ this thermostat is backed by Honeywell’s trusted reputation for quality and performance.

1.1 Overview

The Honeywell Pro 4000 Series is a programmable digital thermostat designed for simplicity and efficiency. It features a 5-2 day scheduling option‚ allowing users to set different temperatures for weekdays and weekends. With an easy-to-read display and basic programming‚ this thermostat is ideal for homeowners seeking energy savings without complex features. Its compatibility with heating and cooling systems ensures reliable performance‚ making it a practical choice for everyday use.

1.2 Design and Build Quality

The Honeywell Pro 4000 Series boasts a sleek and durable design‚ featuring a clear digital display for easy readability. Its compact build ensures seamless integration with any home decor‚ while the robust construction guarantees long-lasting performance. The thermostat is designed with user-friendly controls‚ offering a straightforward interface for temperature adjustments and programming. Backlit display options are also available for enhanced visibility in low-light conditions‚ ensuring convenience and accessibility.

1.3 Key Features

The Honeywell Pro 4000 Series offers a range of features designed for energy efficiency and convenience. Key features include 5-2 day programmability‚ allowing users to set different schedules for weekdays and weekends. The thermostat also includes temporary and permanent overrides‚ enabling quick adjustments without altering the programmed schedule. Adaptive Intelligent Recovery (AIR) ensures the system reaches the desired temperature by the scheduled time‚ optimizing performance and energy savings. This makes it an ideal choice for homeowners seeking a balance between comfort and efficiency.

Installation and Setup

The Honeywell Pro 4000 thermostat is pre-programmed for easy setup. Simply set the time and day‚ and refer to the quick reference guide or online manual for assistance.

2.1 Physical Installation

The Honeywell Pro 4000 thermostat’s physical installation is straightforward. Ensure the system switch is set to Heat or Cool based on your HVAC setup. Turn off power at the circuit breaker before mounting the thermostat. Align the thermostat with the wall plate‚ ensuring secure fastening. Reconnect wires carefully to avoid damage. After installation‚ restore power and test the thermostat by adjusting the temperature to confirm proper function. Refer to the manual or online guide for detailed wiring instructions and safety precautions. Always follow manufacturer guidelines to ensure a successful installation.

2.2 Initial Configuration

After installation‚ configure the Honeywell Pro 4000 by setting the time and day. The thermostat is pre-programmed‚ so simply adjust these settings. Use the SYSTEM switch to select Heat or Cool based on your HVAC system. Press Hold to temporarily override the program schedule‚ maintaining the new temperature until the next scheduled period. Ensure the display shows the correct time and mode to activate your preferred settings. Refer to the manual for additional customization options.

Programming the Thermostat

The Honeywell Pro 4000 allows you to set four time periods daily with separate settings for weekdays and weekends. Use Adaptive Intelligent Recovery to optimize temperature adjustments‚ ensuring your home reaches the desired temperature at scheduled times. Temporary overrides are also available for quick adjustments.

3.1 Setting Up Schedules

Setting up schedules on the Honeywell Pro 4000 is straightforward. The thermostat allows you to program four time periods each day‚ with different settings for weekdays and weekends. To save energy‚ set the temperature lower when you’re asleep or away and higher when you’re home. Use the Wake and Sleep settings to automate your comfort. The Adaptive Intelligent Recovery feature learns your system’s response time‚ ensuring the temperature is reached by the scheduled time. Temporary overrides are also available for quick adjustments without disrupting the overall program. This flexibility helps you maintain comfort while optimizing energy savings.

3.2 Temporary and Permanent Overrides

The Honeywell Pro 4000 allows for both temporary and permanent overrides. A Temporary Override adjusts the temperature until the next scheduled period‚ providing flexibility without altering the overall program. Press the Temporary Set T o button to activate this feature. For a Permanent Override‚ use the Hold function‚ which disables the programmed schedule and maintains the selected temperature indefinitely. This feature is ideal for extended periods when the usual schedule isn’t needed.

Features and Benefits

The Honeywell Pro 4000 Series offers a range of features designed to enhance comfort and efficiency. Key benefits include 5-2 day programming‚ energy-saving capabilities‚ and an easy-to-read display. It also provides temporary and permanent overrides‚ adaptive recovery‚ and compatibility with various HVAC systems. These features make it an excellent choice for homeowners seeking a balance between simplicity and advanced functionality.

4.1 Energy Efficiency

The Honeywell Pro 4000 Series is designed to optimize energy savings‚ helping reduce heating and cooling costs. With 5-2 day programming‚ users can set specific temperatures for weekdays and weekends. This thermostat is Energy Star certified‚ ensuring it meets energy efficiency standards. By programming schedules and using features like adaptive recovery‚ homeowners can achieve up to 33% savings on annual energy bills. Its energy-efficient design makes it a smart choice for eco-conscious users.

4.2 User-Friendly Interface

The Honeywell Pro 4000 Series features an intuitive‚ easy-to-read display with a backlit option for visibility in low-light conditions. Its straightforward navigation and simple controls make it easy for users to set temperatures‚ adjust schedules‚ and access basic functions. The interface is designed to minimize complexity‚ ensuring even first-time users can operate the thermostat with ease. This user-friendly design enhances the overall experience‚ making it a practical choice for homeowners seeking convenience and simplicity.

4.3 Compatibility with Other Systems

The Honeywell Pro 4000 Series is designed to work seamlessly with a variety of heating and cooling systems‚ including conventional forced air‚ heat pumps‚ and dual-fuel setups. Its universal compatibility ensures easy integration with most HVAC configurations‚ making it a versatile choice for different home environments. The thermostat also features a system switch‚ allowing users to toggle between heating and cooling modes effortlessly‚ ensuring optimal performance across various systems and meeting diverse household requirements effectively.

Troubleshooting Common Issues

Most problems with the Honeywell Pro 4000 can be resolved quickly. Common issues include a blank display‚ which may require checking the circuit breaker and resetting it if necessary.

5.1 Blank Display

If the Honeywell Pro 4000 display is blank‚ it may indicate a power issue. Check the circuit breaker and ensure it is not tripped. Verify that the system switch is set correctly (Heat or Cool) and the furnace door is closed securely. If the issue persists‚ ensure the thermostat is properly connected to power. Refer to the manual for additional troubleshooting steps to resolve the issue quickly.

5.2 System Malfunction

If the system malfunctions‚ ensure the thermostat is properly configured. Check the system switch is set to the correct mode (Heat or Cool). Verify the compressor lockout feature‚ which prevents damage by delaying restarts. If issues persist‚ restart the system and ensure all connections are secure. Refer to the manual for detailed troubleshooting steps to identify and resolve the malfunction efficiently.

Maintenance and Care

Regular maintenance ensures optimal performance. Clean the display and ensure proper battery installation. Replace batteries annually or when low-battery warnings appear; Dust-free operation guarantees reliability.

6.1 Cleaning

To maintain your Honeywell Pro 4000 thermostat‚ clean the display and exterior regularly. Gently wipe with a soft cloth and avoid harsh chemicals. Ensure the thermostat is powered off before cleaning. Remove any dust or debris that may interfere with functionality. Regular cleaning prevents malfunctions and ensures accurate temperature readings. Handle with care to maintain its performance and longevity.

6.2 Battery Replacement

Replace the batteries when the display shows “Replace Batt” or the temperature isn’t responding. Switch off power to the thermostat before replacing. Use two AA alkaline batteries‚ ensuring correct polarity. Dispose of old batteries properly. After replacing‚ restore power and check functionality. This ensures reliable operation and maintains accurate temperature control. Regular battery checks prevent unexpected system issues‚ keeping your home comfortable year-round.

Understanding the User Interface

The Honeywell Pro 4000 features a clear display showing current and set temperatures‚ system status‚ and alerts. Buttons enable easy temperature adjustments and schedule navigation.

7.1 Display Elements

The Honeywell Pro 4000’s display offers clear visuals‚ including current and set temperatures‚ system status indicators‚ and low-battery alerts. The screen shows whether the heating or cooling system is active‚ ensuring users are informed about their home’s climate. Icons and text provide intuitive feedback‚ making it easy to adjust settings or troubleshoot issues. This design ensures a seamless user experience‚ catering to both simplicity and functionality.

7.2 Navigation

The Honeywell Pro 4000 features intuitive navigation with simple button controls. Press the buttons to set desired temperatures‚ access programming schedules‚ and view system status. The thermostat is pre-programmed‚ requiring only time and day setup. Use the system switch to select heating or cooling modes. Temporary overrides are easily accessible‚ allowing quick adjustments without altering the programmed schedule. A quick reference guide is also available for convenient operation and troubleshooting.

Warranty Information

The Honeywell Pro 4000 Series is backed by a 5-year limited warranty‚ covering defects in materials and workmanship‚ excluding the battery. Registration required for full coverage.

8.1 Coverage

The Honeywell Pro 4000 Series warranty provides 5-year protection against manufacturing defects and material issues. This coverage ensures reliable performance and peace of mind for users. The warranty excludes damages caused by improper installation or maintenance. Users must register their product to activate full coverage benefits. This comprehensive warranty underscores Honeywell’s commitment to quality and customer satisfaction‚ making the Pro 4000 Series a dependable choice for home climate control.

8.2 Registration

Registration is essential to activate the full warranty benefits for the Honeywell Pro 4000 Series. Users can register their product online through Honeywell’s official website or by contacting customer support. Visit yourhome.honeywell.com for detailed registration instructions. Proper registration ensures warranty validation and access to exclusive customer support resources. This simple process guarantees comprehensive coverage and enhances your product experience. For assistance‚ call Honeywell Customer Care toll-free at 1-800-468-1502.

Accessing the Manual Online

The Honeywell Pro 4000 manual can be downloaded from the official Honeywell website or trusted sources like ManualsLib. Visit yourhome.honeywell.com for direct access.

9.1 Download Options

The Honeywell Pro 4000 manual is available for free download as a PDF from Honeywell’s official website or trusted platforms like ManualsLib. Users can access operation and user guides‚ ensuring easy setup and troubleshooting. The manual is provided in multiple languages‚ including English‚ Spanish‚ and French‚ catering to a diverse audience. Simply visit yourhome.honeywell.com‚ navigate to the download section‚ and select the appropriate model (e.g.‚ TH4110D1007) to retrieve the document. This ensures you have all necessary instructions at your fingertips.

9.2 Additional Resources

For further assistance‚ Honeywell offers comprehensive online resources. Visit yourhome.honeywell.com for detailed guides‚ troubleshooting tips‚ and video tutorials. Additional support is available through Honeywell’s customer care hotline at 1-800-468-1502. ManualsLib and similar platforms also provide free access to PDF manuals and user guides. YouTube channels and HVAC forums often feature helpful tutorials and user experiences‚ ensuring you maximize your thermostat’s functionality and efficiency.

Frequently Asked Questions (FAQ)

This section addresses common inquiries about the Honeywell Pro 4000‚ such as troubleshooting tips‚ programming schedules‚ and energy-saving features.

10.1 General Inquiries

The Honeywell Pro 4000 Series is a programmable thermostat designed for ease of use and energy savings. It features 5-2 day scheduling and compatibility with various heating/cooling systems. Users often inquire about troubleshooting blank displays‚ system malfunctions‚ and programming overrides. The thermostat is pre-programmed‚ requiring only time and day setup. For assistance‚ visit yourhome.honeywell.com or contact Honeywell’s customer care at 1-800-468-1502. This model is Energy Star compliant‚ ensuring efficient energy use and cost savings.

10.2 Advanced Features

The Honeywell Pro 4000 Series offers advanced features like Adaptive Intelligent Recovery (AIR)‚ which learns your system’s response time to reach desired temperatures. It also includes temporary and permanent overrides for flexible temperature control. The thermostat supports 5-2 day programming‚ allowing different settings for weekdays and weekends. Energy-saving features and compatibility with various heating/cooling systems make it a versatile choice for modern homes. These features enhance comfort and efficiency‚ ensuring optimal performance year-round.

The Honeywell Pro 4000 Series thermostat is a reliable and efficient solution for home climate control. With its user-friendly interface‚ energy-saving features‚ and advanced programming options‚ it provides optimal comfort and convenience. Backed by Honeywell’s trusted quality‚ this thermostat is an excellent choice for homeowners seeking a balance of simplicity and functionality. Its adaptability and compatibility with various systems ensure long-term satisfaction and energy efficiency.

midland gxt1000 manual

The Midland GXT1000 Series offers reliable GMRS/FRS two-way radios with 50 channels, NOAA weather alerts, and durable waterproof design for outdoor enthusiasts and emergency communication.

1.1 Overview of the Midland GXT1000/1050 Series

The Midland GXT1000/1050 Series includes high-quality two-way radios designed for reliable communication in various conditions. These radios, including the GXT1000, GXT1050, GXT1030, and GXT3000, are ideal for outdoor enthusiasts, emergency preparedness, and professional use. They feature 50 GMRS/FRS channels, NOAA weather alerts, and a durable, water-resistant design. The series supports both individual and group communication, with options for voice encryption and silent operation. Powered by rechargeable NiMH batteries, these radios offer long-lasting performance. The GXT1000/1050 models are user-friendly, with clear LCD displays and intuitive controls, making them accessible for both beginners and experienced users. The official manual provides detailed guidance for setup, operation, and troubleshooting.

1.2 Key Features of the GXT1000/1050 Radios

The GXT1000/1050 radios boast a range of advanced features, including 50 GMRS/FRS channels, NOAA weather radio with emergency alerts, and a vibration alert mode. They feature a water-resistant design, meeting JIS4 standards for durability in wet conditions. The radios support both individual and group communication, with options for voice encryption to ensure secure conversations. Additional features include a silent operation mode, adjustable squelch levels, and a clear LCD display for easy navigation. The radios are powered by rechargeable NiMH batteries, providing extended use in the field. These features make the GXT1000/1050 series a versatile choice for outdoor adventures, emergency communication, and professional applications.

Setting Up and Operating the GXT1000

Install the battery, charge the radio, and attach the belt clip. Power on, select channels, and adjust volume. Use the LCD display to navigate settings easily.

2.1 Battery Installation and Charging

Install the 6V NiMH battery pack into the GXT1000 radio, ensuring correct polarity. Use the provided charger to recharge the battery, avoiding non-recommended batteries. Charge for 12-24 hours initially and store the radio properly when not in use. Avoid overcharging to extend battery life. Always use Midland-approved accessories for safety and performance.

2.2 Basic Controls and Functions

The GXT1000 features an LCD display for easy navigation. Use the power button to turn the radio on/off. Adjust volume with the up/down buttons. Select channels using the channel button or scan for activity with the scan button. The menu button accesses advanced settings like squelch, VOX, and emergency tones. Use the PTT (Push-to-Talk) button on the side for transmission. The keypad allows direct channel selection and programmable shortcuts. LED indicators show power, low battery, and signal strength. Familiarize yourself with these controls for seamless operation.

Advanced Features of the GXT1000/1050

The GXT1000/1050 Series includes NOAA Weather Radio for emergency alerts, multiple GMRS/FRS channels, and advanced functions like VOX for hands-free operation and a built-in flashlight for convenience.

3.1 Channels and Frequency Settings

The Midland GXT1000/1050 Series offers 50 GMRS/FRS channels, providing a wide range of communication options. Users can easily switch between channels using the radio’s intuitive controls. The channels are split into GMRS and FRS frequencies, allowing for both short-range and long-range communication. Channel scanning is also available, enabling users to quickly find active conversations or monitor multiple channels simultaneously. For added convenience, the radio supports channel monitoring, which helps users stay informed about important transmissions. The frequency settings are pre-programmed for seamless operation, and users can customize channel settings to suit their specific needs. This versatility makes the GXT1000/1050 ideal for outdoor activities, emergencies, and group communication. An FCC license is required for GMRS channel use. The radio also includes a belt clip for easy portability while navigating through channels and settings.

3.2 NOAA Weather Radio and Emergency Alerts

The Midland GXT1000/1050 Series features a built-in NOAA Weather Radio, providing real-time weather updates and emergency alerts. This function ensures users stay informed during severe weather conditions or natural disasters. The radio automatically scans NOAA frequencies, delivering crucial alerts such as tornado warnings, flood alerts, and other emergency notifications. The NOAA Weather Radio feature is especially vital for outdoor enthusiasts, campers, and those in areas prone to severe weather. Additionally, the radio includes an emergency alert system that sounds a tone during critical broadcasts, ensuring users never miss important updates. This feature enhances safety and preparedness, making the GXT1000/1050 an essential tool for both everyday use and emergency situations. The weather radio function operates independently of other channels, allowing continuous monitoring without interruption.

Troubleshooting Common Issues

Identify and resolve common problems like low battery life, charging issues, or poor signal strength. Refer to the manual for step-by-step solutions to ensure optimal performance.

4.1 Resolving Battery and Charging Problems

Common battery issues include short lifespan or failure to charge. Ensure the NiMH battery is properly installed and charged using the provided charger. Avoid using non-recommended batteries. Clean the contacts if corroded. If charging issues persist, check the charger’s functionality or try a different power source. Allow the battery to cool down if it overheats during charging. For prolonged storage, store the battery separately from the radio to prevent drain. Refer to the manual for detailed troubleshooting steps to restore optimal battery performance and ensure reliable operation of your Midland GXT1000/1050 radio.

4.2 Fixing Connectivity and Signal Strength Issues

Signal strength issues often arise due to physical obstructions or incorrect settings. Ensure both radios are on the same channel and frequency. Move to higher ground or open areas to improve reception. Check for interference from nearby electronic devices and switch to a less congested channel. Verify that the antenna is fully extended and free from damage. If issues persist, reset the radio by turning it off and on. Consult the manual for channel programming guidance. For severe connectivity problems, contact Midland support for further assistance or potential firmware updates to optimize performance and maintain clear communication.

Maintenance and Care

Regularly clean the radio with a soft cloth and avoid harsh chemicals. Store it in a dry place to prevent moisture damage. Update firmware periodically for optimal performance and reliability, ensuring all features function correctly and efficiently.

5.1 Cleaning and Storing the Radio

Use a soft, dry cloth to clean the radio regularly, avoiding harsh chemicals or abrasive materials. Store the device in a cool, dry place, away from direct sunlight and moisture. Ensure the battery is fully charged before long-term storage to prevent degradation. For extended periods, remove the battery and store it separately in a cool, dry location. Avoid exposing the radio to extreme temperatures, as this may affect performance. Always handle the antenna with care to prevent damage. Proper maintenance ensures optimal functionality and extends the lifespan of your Midland GXT1000 Series radio.

5.2 Updating Firmware and Software

Regular firmware and software updates are essential for optimal performance. Visit Midland’s official website to download the latest updates. Use a compatible USB cable to connect the radio to your computer. Follow the on-screen instructions carefully to avoid errors. Ensure the battery is fully charged before starting the update process. Incorrect updates may void the warranty or damage the device. After updating, restart the radio to apply changes. Updates often improve functionality, add features, or resolve bugs. Always use official Midland software to ensure compatibility and security. Keep your GXT1000 Series up-to-date for the best user experience and reliability.

Accessories and Compatibility

Enhance your GXT1000/1050 experience with Midland’s official accessories, including headsets, antennas, and chargers. Third-party options are available but ensure compatibility to maintain performance and warranty.

6.1 Official Midland Accessories for GXT1000/1050

Midland offers a range of official accessories designed specifically for the GXT1000/1050 series, ensuring optimal performance and compatibility; These include high-quality headsets, external antennas, chargers, and belt clips. The headsets provide clear audio in noisy environments, while external antennas boost signal range. Dual chargers allow simultaneous charging of two radios, ideal for heavy use. All official accessories are rigorously tested to meet Midland’s quality standards, ensuring durability and reliability. Using genuine Midland accessories guarantees compatibility and maintains the warranty of your GXT1000/1050 radio, ensuring uninterrupted communication in critical situations.

6.2 Third-Party Accessories and Compatibility

While official Midland accessories are recommended, compatible third-party options are available for the GXT1000/1050 series. These include aftermarket headsets, antennas, chargers, and speakers. Third-party accessories can enhance functionality but may vary in quality and compatibility. Always ensure that third-party products meet the radio’s specifications to avoid performance issues. Some users opt for universal chargers or extended-range antennas to improve usability. However, compatibility should be verified before purchase. Reading reviews and checking specifications can help ensure a seamless experience. While third-party accessories offer cost savings, they may not carry the same warranty or support as official Midland products.

Warranty and Support

The Midland GXT1000/1050 Series is backed by a limited warranty covering defects in materials and workmanship. For support, contact Midland’s customer service or visit their official website.

7.1 Warranty Overview for GXT1000/1050 Series

The GXT1000/1050 Series is protected by a limited warranty that covers defects in materials and workmanship for a specified period. This warranty ensures that any manufacturing issues are addressed, providing users with peace of mind. The warranty typically covers repairs or replacements at no additional cost, but it does not apply to damage caused by misuse or unauthorized modifications. For specific details, including the warranty duration and terms, refer to the official Midland documentation or contact their customer support team directly.

7.2 Contacting Midland Customer Support

For assistance with your GXT1000/1050 Series radio, Midland offers multiple ways to contact their customer support team. You can reach them via phone, email, or through the official Midland website. The support team is available to address questions, troubleshooting, and warranty-related inquiries. Additionally, Midland provides online resources, including FAQs and downloadable manuals, to help users resolve common issues independently. For more complex problems, users can submit a support ticket or visit authorized service centers. Midland’s customer support aims to ensure a positive experience with their products, offering timely and effective solutions to any concerns. Visit their official website for contact details and support options.