nj marriage license application form pdf

The New Jersey marriage license application process begins with obtaining and completing a fillable PDF form‚ followed by a 72-hour waiting period and mandatory in-person appearance․

Eligibility Criteria for Applying

Applicants must be at least 18 years old‚ not currently married‚ and provide required documents․ Both parties must consent to the marriage and meet residency requirements․

Age Requirements

In New Jersey‚ the minimum age to apply for a marriage license is 18 years old․ Both applicants must be legally adults‚ as the state does not permit underage marriages․ Emancipated minors may apply with proper court documentation‚ but this is rare․ The legal age ensures both parties can consent freely and independently․ There are no upper age limits‚ allowing seniors and older adults to marry without restrictions․ The age requirement is strictly enforced to protect the rights and autonomy of all individuals entering into marriage; Proper identification proving age is mandatory during the application process․ This ensures compliance with state laws and regulations․

Residency Requirements

In New Jersey‚ at least one applicant must be a resident of the municipality where the marriage license is applied for․ The license is valid statewide‚ allowing the ceremony to take place anywhere in New Jersey․ If neither applicant is a New Jersey resident‚ the application must be submitted in the municipality where the marriage ceremony will occur․ In such cases‚ the license is only valid in that specific municipality․ Proper identification and proof of residency are required during the application process to ensure compliance with state regulations․ This residency requirement helps maintain accurate records and simplifies the administrative process for both applicants and local authorities․

Previous Marriages or Civil Unions

Applicants must disclose any previous marriages or civil unions when applying for a New Jersey marriage license․ If a previous marriage or civil union ended in divorce or death‚ official documentation such as a divorce decree or death certificate must be provided․ This ensures there are no legal impediments to the new marriage․ Failure to disclose this information or provide required documents can delay the application process or result in legal consequences․ The New Jersey marriage license application form includes specific sections for detailing previous marriages or civil unions‚ ensuring transparency and compliance with state marriage laws․

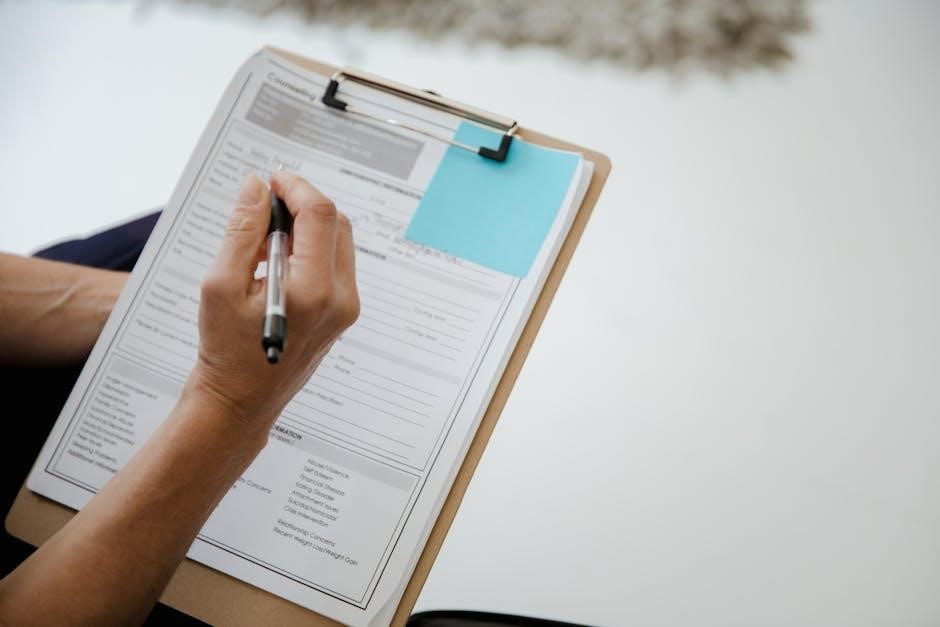
Downloading and Completing the Marriage License Application Form

Couples can download the New Jersey marriage license application as a fillable PDF online․ Complete page 1 only before your appointment; do not sign it beforehand․

Where to Find the Form

The New Jersey marriage license application form‚ titled REG-77A‚ is available as a fillable PDF on the official New Jersey Department of Health website․ Couples can easily download it from the Marriage and Civil Union section․ The form is provided in both English and Spanish to accommodate all applicants․ Additionally‚ some municipalities offer the form on their local government websites for convenience․ Once downloaded‚ applicants can fill in the required information electronically before printing it for submission․ Ensure the form is completed accurately‚ as incomplete or incorrect applications may delay the process․

Fillable PDF Features

The New Jersey marriage license application form is available as a fillable PDF‚ designed to simplify the process․ This interactive document allows applicants to type their information directly into the fields‚ reducing errors and improving readability․ The PDF is user-friendly‚ with clear sections and instructions to guide applicants through each step․ While the form can be completed electronically‚ it must be printed for submission‚ as electronic signatures are not accepted․ The fillable feature ensures that applicants can easily review and edit their information before finalizing the document․ This convenient format streamlines the initial steps of the application process‚ making it more efficient for couples preparing to marry;

Instructions for Completion

The New Jersey marriage license application form must be completed accurately and legibly․ Applicants should fill out the form electronically using the fillable PDF feature‚ but it must be printed for submission․ Do not sign the application prior to appearing before the Local Registrar‚ as signatures must be witnessed in person․ Ensure all required fields are filled‚ including personal details‚ residency information‚ and previous marriage or civil union data․ Errors or omissions may delay processing․ The completed form must be submitted in person‚ along with the required documents and fees‚ at the appropriate municipality․ Proper identification and witness signatures are mandatory for final approval․

Submitting the Application

Submit the completed application in person at the New Jersey municipality where either applicant resides or where the ceremony will occur‚ following a 72-hour waiting period after filing․

Where to Apply

The marriage license application must be submitted in person at the municipal clerk’s office in the New Jersey town where either applicant resides․ If neither applicant is a New Jersey resident‚ the application should be filed in the municipality where the marriage ceremony will take place․ Proper identification is required‚ and the application must be signed in the presence of the local registrar․ A fee is typically associated with the submission‚ and the license is usually issued after a mandatory waiting period․ Ensure the application is completed accurately to avoid delays in the process․ This step is crucial for obtaining a valid marriage license in New Jersey․

How to Apply

To apply for a marriage license in New Jersey‚ download and complete the fillable PDF application form‚ ensuring all fields are accurately filled․ Do not sign the form before appearing in person‚ as signatures must be witnessed by the registrar․ Gather required documents‚ such as valid photo identification and proof of residency․ Visit the municipal clerk’s office in the appropriate town‚ bringing all necessary paperwork․ Both applicants must appear together‚ unless otherwise exempted․ A fee is required‚ typically payable by money order or certified check․ After submitting the application‚ a 72-hour waiting period applies before the license is issued․ Proper preparation ensures a smooth process․

Required Documents and Fees

Applicants must provide valid photo ID‚ Social Security numbers‚ and divorce/death certificates if applicable․ A $28 fee applies‚ payable via money order or certified check․

Documents Needed

Applicants must provide valid photo identification‚ such as a driver’s license or passport‚ and Social Security numbers․ Divorce or death certificates are required if applicable․ The marriage license application form must be signed in the presence of the registrar‚ and proper identification should be presented at the time of submission․ Additional documentation may be requested to verify eligibility or previous marital status․ It is essential to ensure all documents are up-to-date and valid to avoid delays in the process․ Double-checking the requirements with the local registrar or official New Jersey resources is recommended to confirm the necessary paperwork․

Fees and Payment Methods

The application fee for a marriage license in New Jersey is currently $28‚ which must be paid at the time of submission․ Acceptable payment methods include money orders or certified bank checks․ Cash and personal checks are typically not accepted․ This fee covers the processing and issuance of the marriage license․ A waiver of the $28 fee was previously in effect from July 1‚ 2022‚ through June 30‚ 2023‚ but it has now expired․ Applicants should confirm payment methods with the local registrar‚ as requirements may vary slightly by municipality․ Ensure the fee is paid in the correct format to avoid delays in processing․

Waiting Period and License Validity

In New Jersey‚ there is a mandatory 72-hour waiting period after submitting the marriage license application before the license can be issued․ Once issued‚ the marriage license is valid for 30 days․ Couples must ensure the ceremony takes place within this timeframe to avoid reapplying․ The license is valid statewide‚ meaning it can be used in any New Jersey municipality‚ regardless of where it was issued․ If neither applicant is a New Jersey resident‚ the license is only valid in the municipality where it was issued․ Proper planning is essential to align the ceremony date with the license validity period․

Tips for a Smooth Application Process

To ensure a seamless marriage license application process in New Jersey‚ download and complete the fillable PDF form accurately beforehand․ Do not sign the application until instructed by the registrar‚ as signatures must be witnessed․ Gather all required documents‚ including valid identification and proof of residency‚ and verify the fees in advance․ Double-check the form for accuracy to avoid delays․ Arrive early at the registrar’s office and be prepared to provide detailed information about the ceremony․ Be aware of the 72-hour waiting period and plan accordingly․ Finally‚ ensure the license is valid for your ceremony date to avoid any last-minute issues․

Obtaining a marriage license in New Jersey is a structured process designed to ensure legality and clarity․ By carefully following the steps—from downloading the application form to completing the required documents and waiting period—couples can efficiently navigate the process․ Ensuring all information is accurate and adhering to the guidelines will help avoid delays․ The marriage license application form‚ available as a fillable PDF‚ streamlines the process when completed correctly․ Once all requirements are met‚ the license is issued‚ allowing the marriage to be legally recognized in New Jersey․ Proper preparation and attention to detail are key to a smooth and successful application experience for couples planning their wedding․

christmas workbook pdf

A Christmas Workbook PDF is a festive, educational resource offering engaging activities like coloring, puzzles, and exercises for kids of all ages. It’s free, printable, and perfect for blending learning with holiday fun!

What is a Christmas Workbook PDF?

A Christmas Workbook PDF is a digital resource designed to engage students with festive activities while promoting learning. It typically includes a variety of tasks such as coloring pages, word searches, puzzles, and educational exercises tailored for different age groups. These workbooks are often free to download, making them accessible for teachers, parents, and homeschoolers. They cover subjects like math, literacy, and creativity, all while incorporating holiday themes. The PDF format allows easy printing and sharing, making it a convenient tool for classrooms or home use. These workbooks are a great way to keep kids entertained and educated during the holiday season, fostering both fun and learning.

Why Use Christmas-Themed Workbooks?

Christmas-themed workbooks are an excellent way to keep children engaged and excited about learning during the holiday season. They combine festive fun with educational activities, making the learning process enjoyable and interactive. These workbooks often include a variety of tasks such as coloring pages, word searches, puzzles, and exercises that cater to different age groups and skill levels. By incorporating holiday themes, they capture children’s interest and make learning feel less like a chore. Additionally, Christmas workbooks are typically affordable or free, making them accessible to parents and educators. They provide a creative way to reinforce skills like math, literacy, and creativity while celebrating the spirit of Christmas.

Benefits of Christmas Workbook PDF

Christmas Workbook PDFs keep kids engaged, fostering skills like math, literacy, and creativity through festive activities. They blend learning with holiday fun, making education enjoyable and interactive.

Educational Benefits for Kids

Christmas Workbook PDFs provide numerous educational benefits for kids, enhancing skills in math, literacy, and problem-solving through festive activities. They offer engaging exercises like word searches, puzzles, and coloring pages that improve critical thinking and creativity. These workbooks cater to various age groups, from preschool to higher grades, ensuring age-appropriate challenges. Activities such as tracing, mazes, and matching games refine fine motor skills and hand-eye coordination. Math and literacy exercises, like number recognition and spelling, are seamlessly integrated into holiday-themed tasks, making learning fun and relevant. The combination of education and celebration keeps children motivated, fostering a love for learning while embracing the spirit of Christmas.

Festive and Engaging Learning

Festive and Enganging Learning

Christmas Workbook PDFs transform learning into a festive adventure, blending holiday cheer with educational activities. With colorful designs and seasonal themes, these workbooks captivate kids, making learning feel like play. Activities such as holiday-themed word searches, puzzles, and coloring pages create a joyful environment that sparks curiosity. Festive exercises like tracing Santa’s sleigh or counting snowflakes engage young minds, fostering creativity and excitement. These workbooks also incorporate cultural elements, introducing children to global traditions and languages. By combining fun with education, Christmas Workbook PDFs ensure that kids stay motivated and enthusiastic about learning during the holiday season, creating lasting memories and a positive association with education.

Popular Activities in Christmas Workbooks

Christmas workbooks feature festive activities like coloring pages, word searches, puzzles, and math exercises. These engaging tasks cater to various skill levels and interests, ensuring fun and learning.

Coloring Pages and Drawing

Coloring pages and drawing activities are staples in Christmas workbooks, offering a creative outlet for kids. These exercises help develop fine motor skills and hand-eye coordination while fostering imagination.

Christmas-themed designs, such as Santa Claus, snowmen, and reindeer, engage children and bring holiday cheer. Many workbooks include intricate patterns and scenes, encouraging attention to detail and artistic expression.

These activities are often paired with educational elements, like tracing lines or matching colors, making them both fun and developmental. Whether at home or in the classroom, coloring pages are a timeless favorite, blending art with festive spirit.

Word Searches and Puzzles

Word searches and puzzles are popular activities in Christmas workbooks, offering both fun and cognitive challenges. These exercises help improve vocabulary, spelling, and problem-solving skills while keeping kids engaged.

Holiday-themed word searches often feature festive terms like “reindeer,” “snowman,” or “ornament,” making them seasonal and entertaining. Puzzles, such as crosswords, mazes, or spot-the-difference games, enhance critical thinking and logical reasoning.

These activities are designed to be age-appropriate, catering to kids of all skill levels. They provide a break from traditional learning while still fostering intellectual growth. Word searches and puzzles are a delightful way to celebrate the holiday spirit and make learning feel like play.

Math and Literacy Exercises

Christmas workbooks often include math and literacy exercises tailored for various age groups, from preschool to higher grades. These exercises focus on developing foundational skills such as number recognition, addition, subtraction, and basic literacy.

Activities like counting ornaments, solving holiday-themed word problems, and spelling festive words help kids practice math and reading in a fun and engaging way.

These exercises are designed to be both educational and entertaining, capturing the spirit of the season while reinforcing essential academic skills. They provide a creative way to keep children learning during the holidays, blending tradition with education.

Age-Specific Christmas Workbooks

Christmas workbooks are designed for various age groups, including preschool, kindergarten, and elementary grades, offering activities tailored to developmental needs and learning levels for festive fun.

Preschool and Kindergarten Worksheets

Preschool and kindergarten Christmas worksheets are designed to promote early learning through fun, festive activities. These sheets often focus on basic skills such as tracing, coloring, and shape recognition, helping little ones develop fine motor skills and hand-eye coordination. Additionally, they introduce simple math concepts like counting and number recognition, using Christmas-themed elements like snowmen, reindeer, and trees to make learning engaging. Word searches and matching games are also included to enhance vocabulary and memory. These activities are crafted to be age-appropriate and visually appealing, ensuring that young children stay excited about learning during the holiday season.

Grade-Specific Worksheets (1st to 5th Grade)

Christmas workbooks tailored for grades 1st to 5th offer age-appropriate activities that align with curriculum goals. These worksheets feature festive themes while focusing on core subjects like math, reading, and writing. For instance, 1st graders might enjoy Christmas-themed addition problems, while 5th graders can tackle more complex puzzles or reading comprehension passages. Activities such as word searches, crossword puzzles, and holiday-themed writing prompts encourage critical thinking and creativity. These sheets are designed to keep older students engaged and excited about learning during the holiday season, blending fun with educational value to reinforce key skills in a playful way.

Customizing Your Christmas Workbook

Personalize your Christmas Workbook PDF with festive themes, puzzles, and coloring pages. Tailor activities to suit educational needs, making learning fun and engaging for all ages.

How to Create Your Own Christmas Workbook

Creating a custom Christmas Workbook PDF is an easy and fun process. Start by selecting a variety of engaging activities such as coloring pages, word searches, and puzzles. You can also include math and literacy exercises tailored to different age groups. Use online tools or design software to compile these elements into a single document. Add festive themes, holiday images, and personalized messages to make it unique. Finally, save and print the workbook, ensuring it’s ready for use at home, school, or during holiday gatherings. This personalized approach allows you to cater to individual learning needs while keeping the spirit of Christmas alive.

Adding Personalized Holiday Themes

Personalizing your Christmas Workbook PDF with holiday themes makes it more engaging and meaningful. Start by incorporating festive visuals like snowflakes, reindeer, and Christmas trees. Use red, green, and gold color schemes to evoke the holiday spirit. Add custom messages, such as the child’s name or a special holiday greeting, to make it unique. Include cultural or religious elements, like traditional symbols or stories, to reflect individual preferences. You can also add photos or illustrations of family traditions to make the workbook feel personal. Combining educational content with these festive touches ensures a fun and memorable learning experience for kids.

Cultural and Language Integration

Christmas Workbook PDFs often include cultural insights, showcasing global traditions and language-specific content, making them ideal for diverse classrooms and fostering cross-cultural understanding among students.

Christmas Traditions Around the World

Christmas Workbook PDFs often highlight diverse global traditions, such as Italy’s Feast of the Seven Fishes, Mexico’s Posadas, and Iceland’s Yule Lads. These cultural insights educate children about how Christmas is celebrated differently worldwide. From Germany’s Christmas markets to Japan’s festive illuminations, these traditions are presented through engaging stories, images, and fun facts. Activities may include mapping holiday practices, comparing customs, or crafting country-specific decorations. This integration fosters cultural awareness and appreciation, making the workbook a tool for global understanding. It also encourages children to explore their own heritage while learning about others, creating a meaningful connection to the holiday season.

ESL Christmas Worksheets

ESL Christmas worksheets are tailored for English language learners, blending festive themes with language practice. These resources include vocabulary exercises, grammar drills, and holiday-themed dialogues. Activities like word searches, crossword puzzles, and sentence matching help students build language skills in a fun, seasonal context. Many worksheets focus on Christmas traditions, allowing learners to explore cultural aspects while improving their English. They often feature festive visuals and engaging tasks, making language learning enjoyable. These worksheets are particularly useful for classrooms or homeschooling, offering a refreshing way to practice English during the holiday season. They cater to different proficiency levels, ensuring all learners can participate and benefit.

A Christmas Workbook PDF is a fantastic way to blend fun and learning during the holiday season. It offers festive activities, educational benefits, and creative exercises for all ages, making it a valuable resource for both entertainment and skill development.

Final Thoughts on Christmas Workbooks

Christmas workbooks are a delightful way to keep children engaged and excited about learning during the festive season. They combine fun activities like coloring, puzzles, and word searches with educational exercises in math, literacy, and critical thinking. These workbooks are available in various formats, including PDFs, making them easily accessible and printable for home or classroom use. Parents and teachers can customize them to suit different age groups, ensuring that every child can participate and benefit. By integrating cultural and language-based activities, Christmas workbooks also foster an appreciation for global traditions and holidays, making them a versatile and enriching resource for kids of all ages.

Resources for Downloading Christmas Workbooks

Find free Christmas workbook PDFs on websites like Super Teacher Worksheets, Planes & Balloons, and more. These platforms offer festive, educational activities for instant download and printing.

Top Websites for Free Christmas Worksheets

Discover a variety of free Christmas worksheet PDFs on popular websites like Super Teacher Worksheets, Planes & Balloons, and more. These platforms offer festive activities such as coloring pages, word searches, and math exercises. Many sites cater to different age groups, from preschool to grade 5, ensuring engaging learning for all. With instant downloads, you can easily access and print these resources for home or classroom use. These websites provide a wide range of themes and difficulty levels, making holiday learning fun and accessible for everyone. Explore these sites to find the perfect worksheets for your needs and keep kids entertained during the holiday season.

honeywell pro 6000 manual

Installation Instructions for Honeywell Pro 6000

Begin by turning off power to the HVAC system. Remove the wallplate and battery holder, then mount the thermostat. Follow the step-by-step guide for wiring and system testing to ensure proper functionality. Refer to the manual for detailed instructions and safety precautions.

  • Turn off power to the HVAC system.
  • Remove the wallplate and battery holder.
  • Mount the thermostat and connect wires according to the manual.
  • Reinstall the battery holder and wallplate.
  • Test the system to ensure proper operation.

Always follow safety guidelines and consult a professional if unsure.

1.1 Preparing for Installation

Before installing the Honeywell Pro 6000, ensure you have all necessary tools and materials. Read the manual thoroughly to understand the process. Turn off the power to your HVAC system at the circuit breaker. Remove the old thermostat and take photos of the wiring for reference. Gather a screwdriver, wires, and mounting hardware. Check compatibility with your system and ensure the thermostat is suitable for your heating/cooling setup. Familiarize yourself with the wallplate and battery holder. Insert the reference card into the wallplate for easy access to instructions. Set aside time for a smooth installation process, as rushing may lead to errors. Proper preparation ensures a safe and efficient installation experience.

1.2 Step-by-Step Installation Guide

Begin by removing the wallplate from the Honeywell Pro 6000 thermostat. Pull the wallplate away from the device to access the wiring. Next, remove the battery holder to prevent any accidental power activation during installation. Mount the wallplate to the wall using the provided screws, ensuring it is level and secure. Reinstall the battery holder once the wallplate is mounted. Connect the wires to the appropriate terminals, referencing the wiring diagram in the manual. After wiring, reinstall the thermostat onto the wallplate, ensuring it clicks securely into place. Finally, test the system by turning on the power and checking heating, cooling, and fan functions to ensure everything operates correctly.

1.3 System Testing After Installation

After installation, restore power to the HVAC system and test all functions. Press the SYSTEM button to select Heat, Cool, or Auto mode. Verify the thermostat’s response by checking if the heating or cooling system activates. Test the emergency heat function if applicable. Ensure the fan operates correctly by selecting the Fan-On mode. Check the digital display for accurate temperature readings and system status. Test programmable schedules to confirm they activate as set. Verify that overrides and manual adjustments work properly. If any issues arise, consult the troubleshooting section of the manual or contact a professional for assistance.

Operating Manual Overview

The manual provides detailed instructions for operating the Honeywell Pro 6000 thermostat, including programmable schedules, energy efficiency features, and digital display navigation.

2.1 Basic Operating Instructions

The Honeywell Pro 6000 thermostat is designed for easy operation. Start by setting the time and date, then use the temperature buttons to adjust settings. Press the SYSTEM button to switch between heating, cooling, or off modes. Use the HOLD button to override programmed schedules temporarily. The digital display provides clear feedback on current settings and active modes. Regularly check and replace batteries to ensure uninterrupted operation. For optimal performance, review the pre-programmed schedules and adjust as needed. The thermostat also features one-touch overrides for quick temperature changes. Refer to the manual for detailed steps on customizing settings and troubleshooting common issues.

  • Set time and date.
  • Adjust temperature using up/down buttons.
  • Use HOLD to override schedules.
  • Check battery levels regularly.

Follow these steps for smooth and efficient operation of your Honeywell Pro 6000 thermostat.

2.2 Programming the Thermostat

Programming the Honeywell Pro 6000 allows you to customize temperature settings for different times of the day. Start by pressing the MENU button and navigate to the scheduling option. Set your preferred temperatures for weekdays and weekends, adjusting for morning, afternoon, evening, and night periods. Use the up/down arrows to select temperatures and press HOLD to override the schedule temporarily. Energy-saving features let you reduce energy use during unused hours. Ensure to save your settings after programming. The thermostat also supports one-touch overrides for quick adjustments. Refer to the manual for advanced scheduling options and energy-efficient tips to optimize your settings further.

  • Press MENU to access scheduling.
  • Set temperatures for each period.
  • Use HOLD for temporary overrides.
  • Save changes after programming.

Customize your schedule to maximize comfort and energy efficiency with the Honeywell Pro 6000 thermostat.

2.3 Using the Digital Display

The Honeywell Pro 6000’s digital display provides clear, intuitive control over your heating and cooling system. The display shows current temperature, setpoint, and operating mode. Use the up/down arrows to adjust settings easily. Press SYSTEM to switch between Heat, Cool, or Auto modes. The display also indicates when the system is operating, such as “HEAT ON” or “COOL ON.” For quick adjustments, press HOLD to override the schedule temporarily. The digital interface is backlit for easy viewing in low light. Regularly update the time and date to ensure accurate scheduling. Refer to the manual for more details on display features and troubleshooting common issues.

  • Adjust temperature with up/down arrows.
  • Switch modes using the SYSTEM button.
  • Check status indicators for system operation.
  • Use HOLD for temporary overrides.

The digital display ensures user-friendly control and monitoring of your thermostat settings at a glance.

Features of the Honeywell Pro 6000

The Honeywell Pro 6000 offers advanced features like programmable scheduling, energy-saving modes, and smart home compatibility. It also includes a backlit digital display and touch-screen interface for easy navigation, ensuring optimal comfort and efficiency. Additional features like remote access via the Honeywell app, geofencing, and voice control through smart assistants enhance convenience. The thermostat also supports humidity control and advanced temperature sensors for precise climate management. Customizable settings allow users to tailor their experience, making it a versatile and modern solution for home comfort.

  • Programmable scheduling for energy efficiency.
  • Smart home integration with voice control.
  • Backlit digital display for easy navigation.
  • Remote access via Honeywell app.
  • Advanced humidity and temperature sensors.

These features ensure a seamless and energy-efficient heating and cooling experience.

3.1 Energy Efficiency Features

The Honeywell Pro 6000 incorporates innovative energy-saving technologies to reduce utility bills while maintaining comfort. It features programmable schedules, allowing users to customize temperature settings for different times of the day and week. The smart recovery feature ensures the system operates efficiently, reaching desired temperatures just before the scheduled time. Additionally, the thermostat offers energy usage reports, providing insights into consumption patterns and helping users optimize their settings. The energy-efficient design includes an automatic changeover between heating and cooling modes, reducing energy waste. Furthermore, the Pro 6000 is compatible with energy-saving programs, enabling remote updates and optimizing performance based on local energy demands. These features collectively contribute to significant energy savings and environmental benefits.

  • Programmable schedules for tailored temperature control.
  • Smart recovery feature for efficient operation.
  • Energy usage reports for consumption insights.
  • Automatic changeover between heating and cooling modes.
  • Compatibility with energy-saving programs.

By leveraging these features, users can achieve both cost savings and reduced environmental impact.

3.2 Programmable Schedules

The Honeywell Pro 6000 allows users to set programmable schedules for optimal temperature control. It offers separate settings for weekdays and weekends, enabling customized comfort. The thermostat includes a default program, but users can adjust it to suit their lifestyle. With the one-touch override feature, users can temporarily adjust temperatures without disrupting the programmed schedule. This flexibility ensures energy efficiency while maintaining comfort. The programmable schedules can be set up to 7 days in advance, providing consistent temperature management. Additionally, the thermostat’s memory retains programmed settings even during power outages, eliminating the need to reprogram after restoration. This feature-rich scheduling system helps users save energy and enjoy a comfortable home environment effortlessly.

  • Separate weekday and weekend scheduling options.
  • One-touch override for temporary adjustments.
  • 7-day programmable settings for flexibility.
  • Memory retention of programmed settings.

These programmable features make it easy to balance energy savings and personal comfort seamlessly.

3.4 Smart Home Integration

The Honeywell Pro 6000 thermostat seamlessly integrates with smart home systems, enhancing convenience and control. It is compatible with popular platforms like Apple HomeKit and Amazon Alexa, allowing voice command functionality. Users can also control the thermostat remotely using the Honeywell Home app, ensuring optimal temperature management from anywhere. This integration enables advanced features such as geofencing, which adjusts temperatures based on your location, and smart scheduling, which adapts to your daily routines. Additionally, the thermostat can connect with other smart devices, creating a cohesive home automation system. This smart home integration not only improves comfort but also enhances energy efficiency by optimizing heating and cooling usage based on your lifestyle and preferences.

  • Compatibility with Apple HomeKit and Amazon Alexa.
  • Remote control via the Honeywell Home app.
  • Geofencing and smart scheduling capabilities.
  • Integration with other smart home devices.

These features make the Honeywell Pro 6000 a versatile and modern addition to any smart home system.

Maintenance and Troubleshooting

Regularly replace batteries and clean the display. Test heating, cooling, and fan systems. Check wiring connections and refer to the manual for troubleshooting common issues.

4.1 Routine Maintenance Tips

Regular maintenance ensures optimal performance of your Honeywell Pro 6000 thermostat. Replace batteries annually to prevent power loss. Clean the digital display gently with a soft cloth to maintain visibility. Check and tighten all wiring connections to avoid system malfunctions. Schedule annual HVAC system checks by a professional to ensure compatibility and efficiency. Update software if available to access new features and improvements. Keep the thermostat away from direct sunlight and moisture to prevent damage. Refer to the manual for specific guidelines and recommendations tailored to your model.

  • Replace batteries yearly.
  • Wipe the display with a soft cloth.
  • Inspect wiring connections.
  • Schedule professional HVAC checks.
  • Update software as needed.
  • Protect from sunlight and moisture;

4.2 Common Issues and Solutions

Troubleshooting your Honeywell Pro 6000 thermostat can resolve common issues. If the display is unresponsive, reset it by removing the batteries for 10 seconds. Incorrect temperature readings may result from faulty sensors; ensure proper calibration. If the system doesn’t turn on, check wiring connections and circuit breakers. For issues with programmable schedules, verify the time and day settings. Address recurring problems by consulting the manual or contacting Honeywell support.

  • Unresponsive display: Reset by removing batteries for 10 seconds.
  • Incorrect temperature readings: Ensure proper sensor calibration.
  • System not turning on: Check wiring and circuit breakers.
  • Programmable schedule issues: Verify time and day settings.

Refer to the manual or contact Honeywell support for persistent problems.

lyman reloading manual pdf

The Lyman Reloading Manual is a comprehensive guide offering detailed load data, cartridge specifications, and expert advice for rifle and handgun reloaders. Available in PDF format, it provides essential information for both beginners and experienced enthusiasts, covering tools, techniques, and safety practices. This resource is indispensable for anyone seeking precise reloading instructions and troubleshooting tips.

1.1 Overview of the Lyman Reloading Handbook

The Lyman Reloading Handbook is a core resource for reloaders, offering comprehensive data for rifle and handgun cartridges. It includes detailed load specifications, powder charges, and bullet weights, along with illustrations for clarity. The manual covers both contemporary and historical cartridges, making it valuable for collectors and enthusiasts. It also provides guidance on using Lyman tools and equipment, ensuring safe and precise reloading processes for shooters of all skill levels.

1.2 Importance of Reloading Manuals for Firearms Enthusiasts

Reloading manuals are essential for firearms enthusiasts, providing critical data for safe and accurate ammunition assembly. They offer detailed load recipes, safety guidelines, and troubleshooting tips, ensuring reliability and performance; These manuals are invaluable for both beginners and experienced reloaders, serving as a cornerstone for understanding cartridge specifications, powder measurements, and best practices. They empower shooters to customize ammunition while maintaining safety and precision in their craft.

Historical Background of Lyman Reloading Manuals

Lyman reloading manuals have been a cornerstone for reloaders since 1878, offering trusted data and techniques. Over a century, they’ve evolved, providing comprehensive guidance and earning a reputation as indispensable resources for firearms enthusiasts.

2.1 Evolution of the Lyman Reloading Handbook

The Lyman Reloading Handbook has evolved significantly over the years, starting with its first edition in 1878. Each subsequent edition has incorporated new data, improved techniques, and expanded cartridge coverage. The 44th and 48th editions, for instance, introduced detailed illustrations and comprehensive load data. The handbook’s continuous updates ensure it remains a relevant and trusted resource for reloaders, reflecting advancements in technology and user needs; This evolution has solidified its reputation as a cornerstone in reloading literature.

2.2 Key Editions and Their Contributions to Reloading

Notable editions like the 44th (1967), 48th (2002), and 49th (2022) of the Lyman Reloading Handbook have significantly advanced reloading practices. The 44th introduced detailed load data and illustrations, while the 48th expanded coverage for modern rifle and handgun cartridges. The 49th added sections on getting started and updated components, making it a go-to resource for both beginners and experienced reloaders. These editions reflect Lyman’s commitment to innovation and comprehensive guidance.

Key Features of the Lyman Reloading Manual

The manual offers comprehensive load data for rifle and handgun cartridges, detailed illustrations, and guidance on Lyman tools, making it a versatile resource for reloaders of all levels.

3.1 Comprehensive Load Data for Rifle and Handgun Cartridges

The Lyman manual provides extensive load data for both rifle and handgun cartridges, including detailed tables and charts. It covers a wide range of calibers, from popular choices like the .223 Remington to classic options such as the .30-06 Springfield. Each entry includes recommended powder charges, bullet weights, and muzzle velocities, ensuring precise and safe reloading. This data is meticulously tested for accuracy and reliability, making it a trusted resource for reloaders. The manual also addresses both contemporary and historical cartridges, catering to collectors and enthusiasts of vintage firearms. By offering such comprehensive information, the Lyman manual helps users achieve optimal performance and consistency in their reloading projects.

3.2 Detailed Illustrations and Cartridge Specifications

The Lyman manual features detailed illustrations that visually guide reloaders through complex processes, such as tool assembly and cartridge preparation. These diagrams are complemented by precise cartridge specifications, including case dimensions, bullet seating depths, and chamber requirements; The manual’s clear visuals and technical details ensure accuracy and safety, making it an invaluable resource for both novice and experienced reloaders seeking to understand and master the reloading process.

3.3 Guidance on Lyman Tools and Equipment

The manual provides detailed guidance on using Lyman’s reloading tools, including presses, trimmers, and scales. It offers step-by-step instructions for setting up and maintaining equipment, ensuring optimal performance. Troubleshooting tips and parts diagrams are also included, making it easier for users to resolve issues. The manual emphasizes the compatibility of Lyman tools with various reloading processes, reinforcing their reliability and versatility for both beginners and experienced reloaders.

How to Obtain the Lyman Reloading Manual

The Lyman Reloading Manual is available as a free digital PDF download or can be purchased in physical form from retailers for easy access.

4.1 Availability in Digital PDF Format

The Lyman Reloading Manual is readily available in digital PDF format, offering convenient access to reloaders. Users can download free editions from websites like archive.org or purchase updated versions from Lyman’s official site. The PDF format ensures portability and easy reference, making it a popular choice for both beginners and experienced reloaders seeking detailed load data and instructions.

4.2 Purchasing Physical Copies

Physical copies of the Lyman Reloading Manual are available for purchase through various retailers, both online and in-store. Editions such as the 44th, 48th, and 49th can be found on platforms like Amazon or specialty shooting sports stores. Buyers can also purchase directly from Lyman’s official website. Physical copies are ideal for those who prefer a durable, easy-to-reference format, and they often include updated load data and techniques for modern reloaders.

Understanding Reloading Basics

Reloading involves assembling ammunition using components like primers, powder, and bullets. The Lyman manual provides step-by-step guidance, ensuring a safe and precise process for creating custom cartridges.

5.1 Getting Started with Reloading

Getting started with reloading requires understanding the basics of ammunition components, including primers, powders, and bullets. The Lyman manual provides a clear roadmap for beginners, explaining essential tools like presses, dies, and scales. It emphasizes safety, proper techniques, and the importance of following load data. With detailed instructions and illustrations, the manual ensures a smooth transition from novice to confident reloader, covering everything needed to begin crafting custom cartridges.

5.2 Essential Components of Reloading

Reloading requires key components, including brass cases, primers, bullets, and powder. Essential tools like presses, dies, scales, and powder measures are vital for precision. The Lyman manual details each part’s role and proper use, ensuring safety and consistency. Understanding these components is crucial for producing reliable, accurate ammunition, whether for rifles or handguns.

Load Data and Cartridge Information

The Lyman manual provides extensive load data for rifle, handgun, and shotgun cartridges, including powder charges, velocities, and pressures. Detailed cartridge specifications and illustrations ensure accuracy and safety.

6.1 Rifle Cartridges

The Lyman manual provides detailed load data for popular rifle cartridges, including .30-06 Springfield, .308 Winchester, and .300 Winchester Magnum. It offers powder charges, bullet weights, and velocities for accurate reloading. Historical data for vintage calibers and modern updates ensure versatility. The manual also includes comprehensive information on cast bullets, appealing to traditional shooters. This section is a vital resource for reloaders seeking precise and reliable data for their rifle cartridges.

6.2 Handgun Cartridges

The Lyman manual provides extensive load data for popular handgun cartridges, such as .357 Magnum, .45 ACP, and 9mm Luger. It includes detailed powder charges, bullet weights, and velocities for accurate reloading. Both modern and vintage calibers are covered, offering versatility for enthusiasts. The manual also features guidance on cast bullets for handgun cartridges, making it a valuable resource for those seeking reliable and precise reloading information for their favorite sidearms.

6.3 Shotgun Shell Reloading

The Lyman manual includes detailed information for shotgun shell reloading, covering wad selection, powder charges, and shot sizes. It provides load data for various gauges and hull types, ensuring versatility for target shooting, hunting, and home defense. The manual also offers guidance on selecting the right components and techniques for consistent, reliable results, making it a valuable resource for shotgun enthusiasts seeking precise reloading instructions.

Safety and Best Practices

The Lyman manual emphasizes safety as a priority, highlighting the importance of protective gear, proper equipment maintenance, and adherence to proven loading procedures. It underscores the need for precise measurements and careful handling of components to ensure reliability and safety in the reloading process.

7.1 Safety Guidelines for Reloading

The Lyman manual stresses the importance of wearing safety glasses and gloves. Ensure a clean, well-ventilated workspace and avoid distractions. Double-check load data and follow recommended procedures. Properly maintain equipment and handle powders and primers with care. Never exceed maximum loads, and keep components organized. Adherence to these guidelines minimizes risks, ensuring a safe and successful reloading experience for both novice and experienced reloaders.

7.2 Troubleshooting Common Reloading Issues

The Lyman manual addresses common reloading challenges, such as inconsistent powder measures, primer seating issues, and case neck concentricity problems. It provides solutions for identifying and correcting errors in load data, equipment malfunctions, and cartridge assembly. Detailed troubleshooting sections help diagnose issues like over-pressure signs or squib loads, ensuring safe and accurate reloading practices. This guide is essential for resolving problems and refining techniques.

Tips for Beginners

Start with basic loads, use quality components, and follow manual instructions closely. Prioritize safety, invest in proper tools, and practice consistency for reliable results.

8.1 Choosing the Right Reloading Equipment

Selecting the right reloading equipment is crucial for safety and efficiency. Start with a sturdy press, accurate scale, and appropriate dies. Lyman manuals recommend essential tools, ensuring compatibility with various cartridges. Consider accessories like tumblers and powder measures for consistency. Always prioritize quality and durability to avoid common reloading issues. The manual provides detailed guidance to help beginners make informed decisions for their setup.

8.2 Understanding Powder Measurements and Charges

Accurate powder measurement is vital for safe and effective reloading. The Lyman manual emphasizes using precise scales and following load data carefully. Start with minimum charges to ensure reliability and performance. Always cross-reference data from multiple sources to avoid errors. Understanding burn rates and pressure limits is key to optimizing loads. This section helps beginners master the critical skill of measuring and charging powders confidently and safely.

The Role of Lyman in the Reloading Community

Lyman has led the reloading community for over a century, providing innovative tools and authoritative manuals, ensuring excellence and safety for reloaders worldwide as the trusted guide for reloaders.

9.1 Lyman’s Impact on Reloading Technology

Lyman has revolutionized reloading technology through its innovative tools and comprehensive manuals. By providing precise load data and advancements in bullet casting and reloading equipment, Lyman has set industry standards. Their resources empower shooters to craft accurate, reliable ammunition, ensuring safety and efficiency. As a leader in reloading, Lyman continues to drive progress, offering solutions for contemporary and historical cartridges, making it an indispensable resource for reloaders.

9.2 Community Resources and Support

Lyman actively engages with the reloading community through forums, workshops, and downloadable PDF manuals. Their resources foster knowledge sharing and collaboration among enthusiasts. By providing detailed guides and troubleshooting tips, Lyman ensures reloaders have access to reliable information. This commitment to community support strengthens the reloading culture, making Lyman a trusted partner for both novice and experienced reloaders seeking guidance and expertise.

The Lyman Reloading Manual is an essential resource for reloaders, offering comprehensive data, detailed illustrations, and expert guidance. Its availability in PDF ensures accessibility, making it a must-have for enthusiasts seeking reliable reloading information and techniques.

10.1 Final Thoughts on the Lyman Reloading Manual

The Lyman Reloading Manual remains an indispensable resource for reloaders, offering unparalleled depth and accuracy. Its comprehensive load data, detailed illustrations, and practical advice cater to both newcomers and seasoned enthusiasts. Available in PDF, it ensures accessibility and convenience, solidifying its place as a cornerstone of reloading knowledge and a trusted guide for achieving precision and safety in handloading.

beats solo 3 instruction manual

Welcome to the Beats Solo 3 manual‚ your comprehensive guide to setting up and using your wireless headphones. This manual helps you understand features‚ troubleshooting‚ and optimal usage.

1.1 Purpose of the Manual

This manual is designed to help you get the most out of your Beats Solo 3 Wireless headphones. It provides detailed instructions for setup‚ pairing‚ and troubleshooting‚ ensuring a seamless user experience. From connecting your device to optimizing sound quality‚ this guide covers everything you need to know. Whether you’re a new user or looking to resolve an issue‚ this manual serves as your go-to resource for mastering the features of your Beats Solo 3 Wireless.

1.2 Target Audience

This manual is intended for users of the Beats Solo 3 Wireless headphones‚ including both new and experienced users. It is designed to assist individuals who want to understand the features‚ setup‚ and troubleshooting of their headphones. Whether you’re a tech-savvy individual or someone new to wireless audio‚ this guide provides clear instructions to help you make the most of your Beats Solo 3 Wireless experience. It is particularly useful for those looking to pair their headphones with Apple or non-Apple devices seamlessly.

Unboxing and Accessories

Inside the box‚ you’ll find your Beats Solo 3 Wireless headphones‚ a carrying case‚ a 3.5mm RemoteTalk cable‚ and a Quick Start Guide. These accessories ensure a seamless and enjoyable listening experience right out of the box.

2.1 What’s Included in the Box

The Beats Solo 3 Wireless box includes the headphones‚ a carrying case‚ a 3.5mm RemoteTalk cable‚ a USB charging cable‚ and a Quick Start Guide. These accessories‚ like the carrying case‚ help protect and transport your headphones‚ while the cables ensure easy charging and wired listening options. The Quick Start Guide provides step-by-step instructions to set up and use your headphones. Additional items may include warranty information and regulatory documents. Everything you need to start enjoying your Beats Solo 3 Wireless is included right out of the box.

Design and Components

The Beats Solo 3 Wireless features a sleek‚ foldable design with adjustable headband and cushioned ear cups for comfort. Built with premium materials‚ it includes on-ear controls for easy music and call management. The headphones are lightweight and durable‚ ensuring long-lasting use and portability. The design emphasizes both style and functionality‚ making it ideal for everyday wear.

3.1 Overview of Key Components

The Beats Solo 3 Wireless features a foldable headband with adjustable hinges for a secure fit and easy storage. The ear cups are cushioned for comfort‚ while the on-ear controls allow easy management of music and calls. A built-in battery provides up to 40 hours of playtime‚ and a 3.5mm remote talk cable is included for wired listening. The design emphasizes durability and style‚ with premium materials and a lightweight build for all-day wear.

Setting Up Your Beats Solo 3 Wireless

Start by turning on your Beats Solo 3 Wireless headphones and enabling Bluetooth on your device. Follow the pairing instructions to connect seamlessly.

4.1 Pairing with Apple Devices

To pair your Beats Solo 3 Wireless with an Apple device‚ ensure Bluetooth is enabled. Hold the headphones near your unlocked iPhone‚ then press the power button for 1 second. Follow the on-screen instructions to complete the pairing. If pairing doesn’t start automatically‚ press the power button for 5 seconds. Once connected‚ your Beats Solo 3 Wireless will automatically sync with other Apple devices signed into iCloud. This seamless integration ensures a hassle-free experience across your Apple ecosystem.

4.2 Pairing with Non-Apple Devices

To pair your Beats Solo 3 Wireless with non-Apple devices‚ enable Bluetooth on your device. Place the headphones in discoverable mode by pressing the power button for 5 seconds until the LED flashes. Select “Beats Solo3” from your device’s Bluetooth settings. If pairing doesn’t occur automatically‚ repeat the process. Note that functionality may vary on non-Apple devices‚ but the pairing process remains straightforward. Ensure your device is in range for a stable connection.

Charging Your Beats Solo 3 Wireless

Charge your Beats Solo 3 Wireless using the provided Micro-USB cable. Connect the cable to the charging port on the left ear cup.

5.1 Charging Methods

Charge your Beats Solo 3 Wireless using the provided Micro-USB cable. Insert the Micro-USB end into the charging port on the left ear cup and connect the other end to a power source. Use a compatible wall charger or USB port for optimal charging. The LED indicator will light up‚ showing the charging status. Allow 2-3 hours for a full charge. Avoid using damaged cables or chargers to ensure safety and maintain battery health. Always use genuine Beats accessories for reliable charging.

Wireless Connectivity and Bluetooth

Experience seamless wireless audio with Bluetooth 4.2 technology. The Beats Solo 3 supports AAC and SBC codecs‚ offering a 30-foot range. Connect to multiple devices effortlessly‚ with encrypted connection ensuring a secure and high-quality audio experience.

6.1 Bluetooth Pairing Process

Pairing your Beats Solo 3 Wireless is straightforward. For Apple devices‚ hold the headphones near your unlocked iPhone and press the power button for 1 second. Follow the on-screen instructions to complete the pairing. For non-Apple devices‚ enable Bluetooth in your device’s settings and select “Beats Solo3” from the available options. If pairing doesn’t start automatically‚ press and hold the power button for 5 seconds. Once connected‚ your headphones will automatically reconnect to paired devices within range‚ ensuring a seamless wireless experience.

6.2 Maintaining Connection Stability

To ensure a stable Bluetooth connection‚ keep your Beats Solo 3 Wireless within 30 feet of your paired device. Avoid physical obstructions and interference from other electronic devices. If the connection drops‚ reset your headphones by pressing the power button for 10 seconds. Ensure your device’s Bluetooth is up to date‚ as outdated firmware can cause instability. For optimal performance‚ avoid simultaneous connections to multiple devices and restart your headphones periodically to refresh the connection. This will help maintain a strong and reliable wireless link.

Controls and Features

The Beats Solo 3 Wireless features intuitive controls‚ including the multi-functional ‘b’ button for music playback and call management. Volume controls are located above and below the ‘b’ button for easy adjustment. The on-ear cup houses the LED light‚ indicating power‚ pairing‚ and charging status‚ ensuring seamless operation and quick access to essential functions.

7.1 Button Functions

The Beats Solo 3 Wireless features a multi-functional ‘b’ button for controlling music and calls. Press once to play/pause or answer/end calls. Press twice to skip tracks forward or press three times to go backward. The volume controls are located above and below the ‘b’ button. Press the upper button to increase volume and the lower to decrease it. These intuitive controls allow seamless music management and hands-free call handling‚ enhancing your listening experience with ease and convenience.

Troubleshooting Common Issues

This section addresses common problems like connectivity issues or sound problems. Reset your headphones by pressing the power button for 10 seconds to resolve many issues.

8.1 Connectivity Problems

If your Beats Solo 3 headphones are having connectivity issues‚ try resetting them by pressing the power button for 10 seconds. Ensure Bluetooth is enabled on your device and restart both the headphones and device. If connected to multiple devices‚ disconnect and pair again. Avoid physical obstructions and interference from other electronic devices. Check for firmware updates‚ as outdated software can cause connectivity problems. If issues persist‚ contact Beats support for further assistance.

8.2 Sound Issues

If you experience distorted audio or low volume‚ reset your Beats Solo 3 by pressing the power button for 10 seconds. Ensure proper fit and clean the ear cushions. Check volume levels on both the headphones and connected device. Avoid maximum volume to prevent sound distortion. If issues persist‚ update firmware or consult the manual for further guidance. Contact Beats support for unresolved problems.

This concludes the Beats Solo 3 manual. For further assistance‚ visit the official Beats website or contact support. Download the PDF manual for detailed guides.

9.1 Final Tips

To maximize your Beats Solo 3 experience‚ keep your headphones updated and clean. Charge them regularly to maintain battery health. For optimal sound‚ ensure proper fit and use noise cancellation when needed. Explore additional features like wireless pairing across Apple devices. Visit the official Beats support site for the latest PDF manual and troubleshooting guides. Regularly check for firmware updates to enhance performance and connectivity. Happy listening!

seca scales instruction manual

Welcome to the Seca Scales Instruction Manual, your guide to understanding and operating Seca scales. This manual provides essential information on safety, operation, and maintenance for optimal use.

Overview of Seca Scales and Their Importance

Seca scales are renowned for their precision, durability, and reliability, making them a cornerstone in healthcare and professional settings. With a wide range of models designed to meet diverse needs, Seca scales ensure accurate weight measurements, which are crucial for patient care and medical practices. Their adherence to stringent safety and quality standards, such as EC directives, has built trust among professionals worldwide. As a leader in medical weighing solutions since 1840, Seca continues to innovate, providing indispensable tools for healthcare providers.

Key Features of Seca Scales

Seca scales are equipped with advanced features such as high-precision load cells, large LCD displays, and robust platforms for stability. Many models offer wireless connectivity, enabling seamless data transfer to computers or printers. The 2-in-1 function allows measuring both weight and height, while some scales include baby-weighing modes. Durable construction ensures long-term reliability, and user-friendly interfaces make operation intuitive. Certain models also feature calibratable options, adhering to international standards like EC Directive 90/384/EEC, ensuring accuracy and compliance in medical settings. These features make Seca scales indispensable for healthcare professionals seeking reliable results.

Why Reading the Manual is Essential

Reading the Seca scales instruction manual is crucial for safe and accurate operation. It provides detailed guidance on setup, calibration, and maintenance, ensuring optimal performance. The manual outlines safety precautions to prevent damage and improper use. It also explains troubleshooting steps for common issues, helping you resolve problems efficiently. Understanding the manual ensures compliance with medical regulations and proper use of advanced features like wireless connectivity. By following the instructions, you can maximize the scale’s lifespan and accuracy, making it an indispensable tool for healthcare professionals and ensuring reliable results in critical settings.

Safety Precautions and Setup

Always handle Seca scales with care to avoid damage. Avoid dropping or exposing to violent shocks. Place on a stable surface and follow manual setup instructions carefully.

General Safety Instructions

Always read and follow the safety instructions provided in the Seca scales manual. Keep the scale on a stable, flat surface and avoid exposing it to violent shocks or drops. Never leave a baby unattended on the scale. Ensure the scale is calibrated correctly before use. Store the manual and declaration of conformity in a safe place for future reference. Regularly inspect the scale for damage and avoid using it if compromised. Follow all setup and usage guidelines to ensure accurate measurements and prevent potential hazards.

Preparing the Scale for First Use

Before using your Seca scale, ensure it is placed on a stable, flat surface. Turn on the scale and verify the display shows “0.00” to confirm it is ready for use. Select the appropriate unit of measurement (kg or lbs) using the control buttons. Allow the scale to stabilize for a few moments before weighing. If required, calibrate the scale according to the instructions provided in the manual. Ensure all packaging materials and transportation locks are removed. Proper preparation ensures accurate measurements and extends the lifespan of your Seca scale.

Understanding the Display and Controls

The Seca scale features a clear LCD display showing weight measurements, unit indicators, and status messages. The control panel includes buttons for zeroing, unit selection, tare, and print functions. The display may also show battery status, wireless connection indicators, and error messages. Familiarize yourself with the buttons: the zero button resets the scale to zero, the unit button switches between kg and lbs, and the tare button subtracts the weight of a container. Some models include a menu button for advanced settings like time, date, and calibration options.

Operating the Scale

To operate your Seca scale, turn it on, ensure it’s on a flat surface, press zero to reset, select units, weigh your subject, and turn it off after use.

Step-by-Step Weighing Process

Begin by turning on the Seca scale and ensuring it is placed on a stable, flat surface. Press the zero button to reset the scale to zero. Select the desired unit of measurement, such as kilograms or pounds, using the unit selection button. Stand or place the object on the scale platform gently. The scale will display the weight automatically. Once the weight stabilizes, record the measurement. For accurate results, avoid moving or touching the scale during measurement. After use, turn the scale off to conserve battery life.

Using Special Functions and Modes

Seca scales offer advanced functions to enhance weighing accuracy and convenience. For baby weighing, use the dedicated baby mode, which stabilizes measurements quickly. Animal scales feature hold functions to ensure steady readings. Activate these modes via the control panel or menu settings. Some models allow wireless connectivity for data transfer to PCs or printers. Special modes like tare and zero functions simplify weighing objects in containers. Refer to your specific manual for activation steps, as procedures may vary by model. These features ensure precise and efficient weighing for various applications, making Seca scales versatile for professional and personal use.

Connecting to Wireless Devices

Seca scales offer seamless wireless connectivity for efficient data management. To connect your scale to a wireless device, enable the wireless function via the menu. Select the desired network and ensure both the scale and device are connected to the same network. For troubleshooting, restart the scale or check network settings. Some models support Bluetooth or Wi-Fi for direct data transfer to PCs or printers. This feature enhances data accuracy and streamlines workflows, especially in healthcare settings. Refer to your manual for specific pairing instructions, as procedures may vary by model. Wireless connectivity ensures reliable and efficient data transmission for professional applications.

Calibration and Maintenance

Regular calibration ensures accuracy, while proper maintenance extends the lifespan of your Seca scale. Follow the manual’s guidelines for calibration steps and routine cleaning procedures.

Calibrating Your Seca Scale

Calibrating your Seca scale ensures accurate weight measurements. Start by turning on the scale and navigating to the calibration menu. Select the calibration option and follow on-screen instructions. The scale will prompt you to confirm the process. Once calibrated, the display will indicate completion. Regular calibration is essential for maintaining precision, especially in professional settings. Always use the calibration procedure outlined in the manual. If issues arise, reset the scale or consult troubleshooting guides. Proper calibration guarantees reliable results for healthcare and professional applications. Refer to the manual for specific calibration steps tailored to your Seca scale model.

Regular Maintenance Tips

Regular maintenance ensures your Seca scale performs optimally. Clean the scale with a soft cloth and mild detergent, avoiding harsh chemicals. Check and ensure the scale is level on a stable surface. Dust and moisture can affect accuracy, so inspect and clean these areas regularly. Store the scale in a dry place when not in use to prevent rust. Replace batteries promptly when low and use high-quality replacements. For professional settings, schedule periodic servicing by authorized technicians to maintain accuracy and compliance with regulations. Proper care extends the lifespan and reliability of your Seca scale.

Troubleshooting Common Issues

Addressing common issues ensures your Seca scale functions accurately. If the scale doesn’t turn on, check battery levels or power sources. Ensure the scale is placed on a level, stable surface. Reset the device by switching it off and on again. For inaccurate readings, recalibrate the scale following the manual’s instructions. Clean the platform regularly to avoid dust or debris interference. If issues persist, consult the user manual or contact Seca support for assistance. Regular troubleshooting helps maintain precision and extends the scale’s lifespan.

Professional Applications

Seca scales are widely used in healthcare for precise patient weighing and monitoring. They integrate seamlessly into medical practices, ensuring accuracy and compliance with regulations in clinical settings.

Using Seca Scales in Healthcare Settings

Seca scales are integral to healthcare, offering precise weight measurements in hospitals, clinics, and medical offices. Their durability and accuracy ensure reliable patient data, crucial for diagnosis and treatment plans. Many models feature antimicrobial surfaces, reducing infection risks. Additionally, some scales include height measurement capabilities, streamlining patient assessments. Integration with EMR systems allows seamless data transfer, enhancing efficiency. With models designed for specific needs, such as bariatric care or pediatrics, Seca scales adapt to various clinical environments, ensuring compliance with medical standards and providing consistent results.

Integrating Scales into Medical Practices

Seca scales seamlessly integrate into medical practices, enhancing workflow efficiency and patient care. Many models, like the Seca 704 and 703, offer wireless connectivity, enabling data transfer to EMR systems. This eliminates manual entry errors and saves time. Additionally, some scales feature height measurement capabilities, allowing for comprehensive patient assessments in one step. With durable designs and easy-to-clean surfaces, Seca scales are built to withstand busy clinical environments. Their compatibility with various software solutions ensures smooth integration into existing systems, making them a versatile choice for modern healthcare facilities, while maintaining compliance with medical regulations.

Compliance with Medical Regulations

Seca scales are designed to meet stringent medical regulations, ensuring accuracy and reliability in healthcare settings. Many models carry the CE marking, indicating compliance with EU directives, and are approved for medical use under EC Directive 90/384/EEC. Seca scales are calibrated to Precision Class III standards, guaranteeing precise measurements. Regular compliance checks and certifications ensure these scales adhere to global medical standards. By integrating Seca scales into medical practices, facilities can maintain regulatory compliance while delivering high-quality patient care. This ensures accurate data collection and reliable results, crucial for healthcare professionals.

For further assistance, refer to the Seca scales manual or visit Seca’s official website for troubleshooting guides, warranty details, and updated resources to enhance your experience.

Final Tips for Optimal Use

To ensure long-term accuracy and reliability, calibrate your Seca scale regularly and store it in a dry, stable environment. Keep the scale clean and avoid extreme temperatures. Always use the correct units and update software when prompted. For battery-operated models, replace batteries when power is low to prevent inaccurate readings. Refer to the manual for specific care instructions tailored to your model. By following these guidelines, you can extend the lifespan of your Seca scale and maintain precise measurements for years to come.

Accessing Warranty and Support

Seca offers comprehensive warranty and support services to ensure your scale performs optimally. Register your product on the Seca website to activate your warranty and receive exclusive updates. For assistance, visit www.seca.com or contact your local Seca distributor. Their global service network provides troubleshooting, repairs, and maintenance. Refer to your manual for warranty details and support contact information, ensuring you receive prompt help when needed. Seca’s dedicated team is committed to resolving issues efficiently, keeping your scale accurate and reliable for years to come.

Where to Find More Information

For additional details about Seca scales, visit the official Seca website at www.seca.com. Here, you can access product manuals, troubleshooting guides, and FAQs. Seca also provides a global service network, ensuring support is available worldwide. Download specific PDF manuals for your scale model or explore resources like user guides and technical specifications. Regularly updated, these resources ensure you stay informed about the latest features and maintenance tips. For further assistance, contact Seca’s customer support team directly through their website.

guided practice activities 4a 4 answers

Guided Practice Activities 4A provide structured exercises for Spanish learners, focusing on grammar, vocabulary, and reading comprehension. These activities strengthen language skills through practical application and review.

Overview of the Activities

Guided Practice Activities 4A offer a variety of exercises designed to reinforce Spanish language skills. They cover key grammar topics such as the verb “ir,” the imperfect tense, and indirect object pronouns. Additionally, activities focus on asking questions, vocabulary review, and reading comprehension through texts like “El Grillo y el Jaguar.” Each task is structured to help learners apply concepts learned in class, ensuring a comprehensive understanding of Spanish language fundamentals.

  • Grammar exercises
  • Vocabulary practice
  • Reading comprehension
  • Interactive tasks

Importance of Guided Practice in Learning

Guided practice is essential for reinforcing language concepts and building confidence in Spanish learners. It provides structured support, allowing students to apply grammar, vocabulary, and reading skills in meaningful contexts. By engaging in these activities, learners develop accuracy, fluency, and comprehension. Regular practice also helps bridge the gap between classroom instruction and real-life communication, ensuring a strong foundation for further language development.

  • Reinforces grammar and vocabulary
  • Builds confidence in language use
  • Enhances comprehension and fluency

Activity 4A-1: The Verb “Ir”

This activity focuses on mastering the Spanish verb “ir,” meaning “to go.” It covers conjugation, usage in sentences, and context-based exercises to enhance proficiency.

Understanding the Verb “Ir”

The verb “ir” is essential in Spanish, translating to “to go.” It is irregular and highly used in daily expressions. In the preterite tense, it becomes “fui,” “fuiste,” “fue,” “fuimos,” “fuisteis,” and “fueron.” For the imperfect tense, “iba,” “ibas,” “iba,” “íbamos,” “ibais,” and “iban” are used. “Ir” also forms the future tense with “iré,” “irás,” “irá,” “iremos,” “iréis,” and “irán.” Mastery of “ir” is crucial for constructing correct sentences and expressing plans or actions effectively in Spanish.

Using “Ir” in Context

The verb “ir” is used to express movement or intention. For example, “Voy al parque” (I’m going to the park) or “¿Adónde vas?” (Where are you going?). It is also used in expressions like “voy a” (I’m going to) for future actions, such as “Voy a comer” (I’m going to eat). Practicing “ir” in sentences helps learners build conversational skills and understand its role in Spanish communication, making it easier to describe daily routines and future plans effectively.

Activity 4A-2: The Imperfect Tense

The imperfect tense describes ongoing or repeated actions in the past. It is formed by adding specific endings to the stems of regular -er, -ir, and -ar verbs, helping learners master past narrative skills effectively.

Regular Verbs in the Imperfect Tense

Regular verbs in the imperfect tense follow predictable patterns. For -er verbs, add -ía, -ías, -íamos, -íais, -ían. For -ir verbs, use -ía, -ías, -íamos, -íais, -ían. Practice exercises focus on conjugating verbs like comer (to eat) and vivir (to live). These activities help learners understand how to form sentences describing repeated past actions, enhancing their ability to communicate effectively in Spanish.

Practicing with Exercises

Exercises in this section focus on conjugating regular verbs in the imperfect tense. Learners complete sentences using verbs like comer (to eat) and vivir (to live). Activities include filling in blanks and writing short paragraphs. These practices help reinforce the correct use of verb endings for -er and -ir verbs. By mastering these exercises, students build confidence in describing past routines and habits in Spanish, ensuring a strong foundation in the imperfect tense.

Activity 4A-3: Asking Questions

This activity focuses on forming questions using Spanish interrogatives like dónde, cuándo, and quién. Learners practice placing the verb before the subject in questions, enhancing their ability to inquire effectively.

Forming Questions with Interrogatives

Spanish interrogatives like dónde, cuándo, and quién are essential for asking questions. In this section, learners practice using these words to form questions correctly. For example, ¿Dónde vives? (Where do you live?) demonstrates proper placement of the interrogative at the beginning. Students also learn to place the verb before the subject, as in ¿Va al parque? (Are you going to the park?). This activity helps build confidence in forming clear and grammatically correct questions.

Placement and Order in Questions

In Spanish, questions with interrogatives follow a specific structure. The interrogative word (e.g., dónde, quién) typically comes first, followed by the verb and then the subject. For example, ¿Dónde va Juan? (Where is Juan going?) demonstrates this order. Unlike English, the verb precedes the subject in questions. This activity helps learners master the correct placement of words to form clear and grammatically accurate questions in Spanish, avoiding common mistakes in word order.

Activity 4A-4: Indirect Object Pronouns

Activity 4A-4 focuses on indirect object pronouns, teaching learners to use them correctly, ensuring proper placement and agreement with nouns in Spanish sentences for clarity.

Identifying and Using Indirect Object Pronouns

Indirect object pronouns (me, te, le, nos, os, les) are used to indicate the recipient or beneficiary of an action. They must agree with the noun they replace and precede the verb. For example, in “Ella le escribe una carta,” “le” refers to the person receiving the letter. Activities include completing sentences with the correct pronoun, identifying their placement, and choosing the right verb form. This practice ensures mastery of indirect object pronouns in Spanish sentence construction and clarity.

Completing Sentences with Pronouns

Completing sentences with indirect object pronouns involves identifying the correct pronoun and placing it appropriately. For example, in “Ella _______ una carta,” the pronoun “les” replaces “mis amigos” to create “Ella les escribe una carta.” Activities include fill-in-the-blank exercises where learners match pronouns to nouns and select the correct verb form. This practice reinforces understanding of indirect object pronouns and their role in sentence structure, ensuring proper use in various contexts and clear communication.

Activity 4A-5: Vocabulary Check

This activity involves reviewing and reinforcing key vocabulary through matching exercises, ensuring learners understand and can correctly use Spanish words in context.

Reviewing Key Vocabulary

Reviewing key vocabulary involves recalling and reinforcing essential Spanish words and phrases. Learners engage with exercises like matching words to definitions, fill-in-the-blanks, and sentence completion. These activities ensure proper understanding and usage of terms in context. By practicing vocabulary regularly, students build a solid foundation for effective communication in Spanish. This section focuses on repetition and application to enhance retention and fluency.

Matching Words to Definitions

Matching words to definitions is an interactive exercise that enhances vocabulary retention. Learners are provided with Spanish words and multiple-choice definitions. By correctly pairing each word with its meaning, students improve comprehension and usage. This activity reinforces key terms from previous lessons, ensuring a strong grasp of essential vocabulary. Regular practice through matching exercises aids in building a comprehensive Spanish vocabulary and improves overall communication skills effectively.

Activity 4A-6: Reading Comprehension

Activity 4A-6 focuses on reading comprehension through the story “El Grillo y el Jaguar.” Students analyze plot, characters, and vocabulary, enhancing their understanding of Spanish narratives.

Lectura: “El Grillo y el Jaguar”

The story “El Grillo y el Jaguar” engages students in Spanish reading comprehension. It focuses on understanding plot, characters, and cultural themes. Activities include answering questions based on the text, identifying key vocabulary, and analyzing the narrative’s moral lessons. This exercise enhances reading skills and reinforces vocabulary usage in context, helping learners improve their ability to interpret and discuss Spanish texts effectively.

Answering Questions Based on the Reading

Answering questions about “El Grillo y el Jaguar” tests comprehension and critical thinking. Students identify main events, character motivations, and the story’s moral. Questions range from simple recall to analytical interpretations, ensuring a deep understanding of the text. This exercise sharpens reading skills and vocabulary application, preparing learners for more complex literary analyses in Spanish.

Answer Key for Guided Practice Activities 4A

This section provides correct answers and detailed explanations for all activities, ensuring students can review and improve their Spanish language skills effectively.

Correct Answers and Explanations

Each activity in Guided Practice 4A includes a detailed answer key to help students verify their work. Explanations clarify common mistakes and reinforce correct grammar usage, such as proper verb conjugation and sentence structure. For example, in Activity 4A-1, the verb “ir” is practiced with phrases like “Voy al parque,” demonstrating correct usage. This resource ensures learners understand their errors and master the material effectively.

Guided Practice Activities 4A effectively reinforce Spanish language skills through structured exercises. These activities cover grammar, vocabulary, and reading comprehension, providing a comprehensive learning experience for students.

Guided Practice Activities 4A cover essential Spanish language skills, including verb conjugation, question formation, and reading comprehension. Activities like “The Verb ‘Ir'” and “Indirect Object Pronouns” reinforce grammar rules, while “Reading Comprehension” enhances understanding. Vocabulary checks and exercises on the imperfect tense ensure mastery of foundational concepts. These structured practices provide a comprehensive approach to learning, helping students build confidence and fluency in Spanish.

Encouragement for Further Practice

Consistent practice is key to mastering Spanish. Engage in daily speaking exercises, use online resources, and review grammar rules regularly. Set achievable goals and celebrate progress. Practice active listening and reading to build fluency. Collaborate with peers or language partners for interactive learning. Stay motivated and enjoy the journey of becoming proficient in Spanish!

lady bird deed florida pdf

The Florida Lady Bird Deed is a unique estate planning tool that allows property owners to transfer real estate to beneficiaries upon death while retaining control during their lifetime. It is also known as an enhanced life estate deed, providing flexibility and avoiding probate. This deed, named after Lady Bird Johnson, enables grantors to maintain rights to sell, mortgage, or use the property freely, ensuring a smooth transition of ownership. It is a popular option for those seeking to preserve asset control and simplify estate management.

1.1 Definition and Purpose

A Lady Bird Deed, also known as an enhanced life estate deed, is a legal document that allows property owners in Florida to transfer real estate to beneficiaries upon their death while retaining control during their lifetime. Its primary purpose is to avoid probate, ensuring a smooth transition of ownership. This deed enables grantors to maintain full rights to use, sell, or mortgage the property, providing flexibility and peace of mind for estate planning.

1;2 Historical Background and Naming

The Lady Bird Deed is named after Lady Bird Johnson, the wife of President Lyndon B. Johnson, due to its association with flexible property rights. Originating as an estate planning tool, it gained popularity for its ability to retain control while transferring ownership. This deed is recognized in Florida as an enhanced life estate deed, offering a unique solution for property owners seeking to bypass probate and maintain lifetime control over their assets.

Key Characteristics of a Lady Bird Deed

A Lady Bird Deed allows property owners to retain control and enjoy their property while designating beneficiaries for automatic ownership transfer upon death, avoiding probate.

2.1 Retention of Control by the Grantor

The Florida Lady Bird Deed allows the grantor to retain full control and use of the property during their lifetime. This includes the ability to sell, mortgage, or lease the property without requiring consent from the designated beneficiaries. The grantor maintains sole decision-making authority, ensuring flexibility and autonomy. Beneficiaries have no rights to the property until the grantor’s death, and the grantor can revoke the deed at any time. This unique feature ensures the grantor’s wishes are upheld while providing a seamless transfer process.

2.2 Ability to Sell or Mortgage the Property

The Florida Lady Bird Deed grants the grantor the unrestricted right to sell, mortgage, or lease the property during their lifetime. This flexibility allows the property to remain a liquid asset, enabling the grantor to secure loans or generate income. Beneficiaries have no claim to the property until the grantor’s death, ensuring the grantor’s control and financial freedom remain intact throughout their lifetime.

2.3 Automatic Transfer of Ownership Upon Death

The Florida Lady Bird Deed ensures that ownership of the property automatically transfers to the designated beneficiary upon the grantor’s death. This seamless process bypasses probate, eliminating the need for court intervention. The deed guarantees that the property passes directly to the beneficiary, providing a smooth and efficient transition of ownership. This feature offers peace of mind for grantors, knowing their wishes will be fulfilled without delays or legal complications.

Benefits of Using a Lady Bird Deed in Florida

The Florida Lady Bird Deed offers numerous advantages, including probate avoidance, retention of property control, tax benefits, and Medicaid eligibility protection. It ensures a seamless property transfer upon death while maintaining the grantor’s lifetime rights, providing peace of mind and financial security for both the owner and beneficiaries.

3.1 Avoidance of Probate

The Lady Bird Deed effectively bypasses the probate process, ensuring a seamless transfer of property upon the grantor’s death. By designating a remainder beneficiary, the property automatically passes to them without court involvement, eliminating delays and costs associated with probate. This streamlined process protects the estate from lengthy legal proceedings, ensuring the grantor’s wishes are fulfilled efficiently while maintaining the property’s value and integrity for future generations.

3.2 Retaining Lifetime Use and Enjoyment of the Property

The Lady Bird Deed allows the grantor to retain full control and enjoyment of the property during their lifetime. They can live in it, rent it, or use it as they wish without any restrictions. The grantor also maintains the authority to sell, mortgage, or lease the property, ensuring uninterrupted use and decision-making power. This feature provides peace of mind, as the grantor can continue to benefit from the property without involving the beneficiary until their death.

3.3 Tax Advantages

The Lady Bird Deed offers several tax benefits. By transferring property upon death, it avoids transfer taxes typically associated with sales or gifts. The property’s value is included in the grantor’s taxable estate, potentially qualifying for a step-up in basis, reducing capital gains taxes for beneficiaries. Additionally, it may help in Medicaid planning by preserving eligibility without penalizing the grantor for transferring assets, thus protecting their financial interests effectively.

3.4 Medicaid Eligibility Considerations

The Lady Bird Deed can provide significant benefits for Medicaid planning. By transferring property upon death, it avoids being classified as a gift, preventing transfer penalties that could affect Medicaid eligibility. The grantor retains control during their lifetime, ensuring the property isn’t counted as an asset. This makes it a valuable tool for those seeking to qualify for Medicaid while maintaining financial security and control over their estate.

Legal Requirements for a Lady Bird Deed

A Lady Bird Deed requires proper execution, witnessing, and recording in county records. Specific legal language must be included to ensure validity and enforceability under Florida law.

4.1 Proper Execution and Witnessing

A Lady Bird Deed must be properly executed and witnessed to ensure its validity. The grantor must sign the deed in the presence of two witnesses and a notary public. Witnesses must meet legal requirements, typically being disinterested parties with no conflict of interest. The notary public validates the signing process, ensuring the grantor’s identity and voluntary execution. Proper execution is critical to avoid legal challenges and ensure the deed’s enforceability under Florida law.

4.2 Recording the Deed in the County Records

Recording the Lady Bird Deed in the county records is essential for its effectiveness. The deed must be filed with the County Recorder’s Office where the property is located. This step ensures the deed becomes part of the public record, providing official notice of the transfer arrangement. Timely recording is critical to validate the deed and prevent future disputes over ownership or beneficiary rights. Proper documentation guarantees the deed’s legal recognition and enforceability.

4.3 Specific Language and Terms in the Deed

The Lady Bird Deed must include specific legal language to ensure its validity. It should clearly state the grantor’s reservation of a life estate and their retained rights to sell, mortgage, or dispose of the property. The deed must also explicitly name the beneficiary and describe the property. Legal phrases ensuring the grantor’s control and the automatic transfer of ownership upon death are essential. Proper terminology guarantees the deed’s enforceability and clarity in defining the grantor’s and beneficiary’s rights. Consulting a legal professional is crucial to include all necessary terms accurately.

How to Create a Florida Lady Bird Deed

Creating a Florida Lady Bird Deed involves drafting the document with specific legal language, ensuring proper execution, and recording it. Use an attorney-approved template to include necessary terms, accurately describe the property, and name beneficiaries. The deed must be signed, witnessed, and notarized, then filed in the county records to ensure validity and effectiveness in transferring ownership upon death.

5.1 Drafting the Deed

Drafting a Florida Lady Bird Deed requires precise legal language to establish an enhanced life estate. The deed must include a detailed property description, beneficiary designation, and terms retaining the grantor’s rights. Specific phrases ensure the grantor can sell, mortgage, or use the property freely during their lifetime. Using attorney-approved templates or legal professionals is recommended to avoid errors and ensure compliance with Florida law, guaranteeing the deed’s validity and effectiveness.

5.2 Legal Consultation

Consulting with a legal professional is essential when preparing a Florida Lady Bird Deed. An attorney ensures the deed complies with state laws and meets the grantor’s specific needs. Legal experts can guide through complex processes, such as beneficiary designation and property description, while addressing potential pitfalls. Their expertise helps customize the deed, ensuring proper execution and avoiding future disputes, making the transfer process seamless and legally sound.

5.3 Execution and Notarization

Proper execution is crucial for the validity of a Florida Lady Bird Deed. The grantor must sign the deed in the presence of two witnesses and a notary public, as required by Florida law. The notary will acknowledge the signature, ensuring the document is legally binding. Failure to follow these steps can render the deed ineffective. Once executed, the deed must be recorded in the county records to ensure its enforceability and proper transfer of ownership upon the grantor’s death.

Common Mistakes to Avoid When Completing a Lady Bird Deed

Incorrect property descriptions, ambiguous beneficiary designations, omitting necessary legal phrases, and failing to record the deed are common errors that can invalidate the document or cause legal disputes.

6.1 Incorrect Property Description

One common mistake is using an inaccurate or incomplete property description. The legal description, not just the address, must be precise to avoid invalidation of the deed or ownership disputes. Errors in the property’s legal description can lead to confusion about the boundaries or identity of the property, potentially causing legal challenges or delays in transferring ownership. Ensure the description matches the one on the current deed or county records to maintain clarity and validity.

6.2 Ambiguity in Beneficiary Designation

Ambiguity in beneficiary designation is a critical error that can lead to legal disputes. The deed must clearly name beneficiaries and their relationship to the grantor to prevent confusion. Vague terms or multiple beneficiaries without clear instructions can result in contested ownership. Ensuring precise beneficiary details is essential to avoid potential legal challenges and guarantee the property transfers as intended. Clarity in designation is crucial for a seamless transition. Proper legal review can help prevent such issues and ensure the deed’s effectiveness.

6.3 Omission of Necessary Legal Phrases

Omission of essential legal phrases can render a Lady Bird Deed ineffective. Specific language is required to establish the enhanced life estate, granting the grantor control and the right to revoke the deed. Without these phrases, the deed may fail to achieve its intended purpose, leading to unintended probate or legal disputes; Consulting a legal professional ensures all necessary terms are included, safeguarding the deed’s validity and the grantor’s intentions;

6.4 Failure to Record the Deed

Failure to record the Lady Bird Deed in the county records is a critical error that undermines its effectiveness. Until recorded, the deed remains invalid, and the property may not transfer as intended. This oversight can lead to probate or legal disputes, defeating the purpose of avoiding probate. Recording ensures the deed is recognized by legal authorities, making it essential to complete this step promptly and correctly to safeguard the grantor’s wishes.

Where to Find a Lady Bird Deed Form in Florida

Florida Lady Bird Deed forms are available online through legal document providers, attorney-approved templates, or county clerk resources. These sources ensure accurate and compliant documents for property transfers.

7.1 Online Legal Document Providers

Online legal document providers offer convenient access to Florida Lady Bird Deed forms. Websites like usalawdocs.com provide free or attorney-approved templates tailored to Florida laws. These platforms allow users to download PDF versions, ensuring accuracy and compliance. They often include step-by-step instructions, making it easier for individuals to complete the deed without extensive legal knowledge. However, consulting a legal professional is recommended to ensure proper execution and adherence to state requirements.

7.2 Attorney-Approved Templates

Attorney-approved templates for the Florida Lady Bird Deed ensure legal accuracy and compliance with state laws. These templates, often available on legal websites, are reviewed by professionals to guarantee correctness. They include detailed instructions and necessary legal language, reducing errors. While DIY options exist, using an attorney-approved template is recommended for complex cases, ensuring the deed meets all requirements and protects the grantor’s interests effectively.

7.3 County Clerk’s Office Resources

The County Clerk’s office in Florida often provides resources and guidance for completing a Lady Bird Deed. They may offer pre-drafted forms or detailed instructions to help individuals understand the process. Additionally, the Clerk’s office can assist with recording the deed, ensuring it is properly filed in county records. While they may not provide legal advice, their resources can be invaluable for those seeking to navigate the process efficiently and accurately.

sibley guide app

The Sibley Guide App is a digital version of David Allen Sibley’s renowned field guide, offering comprehensive bird identification tools, detailed images, and audio recordings for birders.

Overview of the App and Its Importance

The Sibley Guide App is a groundbreaking digital resource for bird enthusiasts, transforming the classic field guide into a portable, interactive tool. It combines David Allen Sibley’s meticulous artwork and authoritative text with advanced features like audio recordings and detailed maps. This app is indispensable for birders, offering unparalleled depth and accessibility. Its comprehensive coverage of over 930 North American species, including images, calls, and range data, makes it a vital companion for identifying birds in the field. The app’s portability and ease of use have revolutionized birdwatching, providing a wealth of information at your fingertips.

Key Features of the Sibley Guide App

The app features a vast image library, detailed distribution maps, audio recordings of bird calls, advanced search functionality, and a species comparison tool, enhancing bird identification.

Comprehensive Image Library

The Sibley Guide App boasts an extensive image library with over 6,600 high-quality visuals, showcasing each species in various plumages, flight patterns, and seasonal changes. This detailed collection, adapted from David Sibley’s original artwork, ensures that users can identify birds accurately by comparing images side-by-side. The app’s zoom feature allows for a closer look at key field marks, while the grid view provides a quick overview of multiple species. This visual richness makes the app an invaluable resource for birders of all levels, from hobbyists to experts, aiding in precise identification and enhancing field experiences.

Detailed Distribution Maps

The Sibley Guide App includes detailed distribution maps for over 930 North American bird species, illustrating their range, migration patterns, and rare occurrences. These maps are color-coded to show winter, summer, and migration areas, providing precise location data. Users can filter species by state or province, making it easier to identify birds in their region. The maps are a crucial tool for birders, offering insights into habitat preferences and seasonal movements. This feature enhances field identification by narrowing down potential species based on geography, making the app indispensable for both casual and serious birdwatchers.

Audio Recordings of Bird Calls and Songs

The Sibley Guide App features over 2,300 high-quality audio recordings, capturing the diverse vocalizations of North American birds. Each species is represented with multiple examples, showcasing variations in songs and calls across different regions and behaviors. These recordings are essential for identifying birds by their sounds, a critical skill in birding. Users can compare audio clips side-by-side, aiding in distinguishing similar species. The app’s audio library is a valuable resource for both novice and experienced birders, enhancing their ability to recognize and understand bird vocalizations in the field.

Advanced Search and Filter Functionality

The Sibley Guide App offers robust search and filter tools, enabling users to quickly narrow down species based on specific criteria. Filters include size, plumage color, habitat, and behavioral traits, while location-based filtering allows users to view birds relevant to their region. The app also supports advanced searches by scientific or common names. These features make identification more efficient, especially for birders in the field. The ability to refine results by state or province further enhances the app’s utility, ensuring users only see species likely present in their area, making it an indispensable tool for bird enthusiasts of all levels.

Species Comparison Tool

The Sibley Guide App’s Species Comparison Tool allows users to view multiple bird species side by side. This feature is particularly useful for distinguishing between similar species, as it enables direct comparison of images, range maps, and audio recordings. Users can easily contrast plumage details, size differences, and vocalizations, aiding in accurate identification. The tool’s intuitive design supports both visual and auditory comparisons, making it a powerful resource for birders seeking to resolve ID challenges efficiently. This functionality enhances the app’s effectiveness in the field, where quick and precise identification is crucial.

User Experience and Navigation

The Sibley Guide App features an intuitive, user-friendly interface with smooth navigation. Zoom and swipe functions enhance image viewing, while state/province filtering simplifies species exploration, ensuring seamless usability for birders of all levels.

Easy-to-Use Interface Design

The Sibley Guide App boasts an intuitive design, making it accessible to both novice and experienced birders. The interface is clean and organized, with clear menus and logical navigation. Users can easily swipe through species, enlarge images, and access detailed information without unnecessary complexity. The app’s structure ensures that all features, from searching to comparing species, are readily available, reducing the learning curve. This user-centric approach enhances the overall birding experience, allowing enthusiasts to focus on identification and exploration rather than navigating the app itself.

Zoom and Swipe Features

The Sibley Guide App offers seamless zoom and swipe functionalities, enhancing user interaction. With a single tap, images can be enlarged for detailed viewing, while the zoom feature provides crisp clarity. Users can effortlessly swipe left or right to navigate between species, streamlining the identification process. This intuitive design allows birders to quickly explore and compare species without interruption. The app’s responsive controls ensure a smooth experience, whether browsing through species or examining high-quality images and maps. These features make the app an indispensable tool for bird enthusiasts in the field.

State/Province Filtering for Local Species

The Sibley Guide App includes a state/province filtering feature, enabling users to view species specific to their location. This tool narrows down the extensive database to display only birds likely to occur in the selected region, simplifying identification. Users can easily toggle between locations, making it ideal for travelers or those exploring different areas. The app further refines results by highlighting common species, reducing the list to the most probable birds. This feature enhances the app’s practicality, ensuring users focus on relevant information without unnecessary clutter, making it a valuable asset for birders of all levels. The app’s adaptability to local species is a standout feature.

Comparison with the Physical Sibley Guide

The Sibley Guide App mirrors the physical guide’s detailed content but enhances portability, offering zoom, search, and audio features that complement the original book’s comprehensive birding information.

Advantages of the Digital Version

The digital Sibley Guide App offers unparalleled convenience, fitting the entire field guide into a mobile device. It enhances the birding experience with features like zoom, swipe navigation, and advanced search functionality. Audio recordings of calls and songs provide an auditory dimension for identification. The app also includes regular updates, ensuring the most accurate and up-to-date information. Unlike the physical book, it eliminates the need to carry bulky materials, making it ideal for field use. Additionally, the app’s portability and interactive features make it a versatile tool for birders of all levels, while maintaining the same comprehensive content as the original guide.

Differences in Content and Portability

While the digital Sibley Guide App mirrors the physical book’s content, it excels in portability, offering the same 6,600 images, detailed maps, and species descriptions in a lightweight format. The app enhances convenience with features like state/province filtering, species comparison, and audio playback, which are absent in the physical version. Its compact design allows birders to carry extensive information without the bulk, making it ideal for field trips. However, some users prefer the tactile experience of the book, while others appreciate the app’s interactive advantages, creating a choice based on personal preference and birding needs.

Additional Features and Updates

The app includes a personal species list with backup options and regular software updates, ensuring users have the latest birding information and enhanced functionality.

Personal Species List and Backup Options

The Sibley Guide App offers a personal species list feature, allowing users to track and organize their bird sightings effectively. This list is stored directly on the device, ensuring accessibility without internet. The app provides backup and restore functionality, safeguarding valuable sighting data. Users can easily manage their lists, creating a personalized record of birding experiences. This feature is particularly useful for birders who want to monitor their progress and reflect on past encounters. The backup option adds security, preventing data loss, and ensures that users can maintain their records seamlessly across device changes or updates.

Regular Software Updates and Improvements

The Sibley Guide App is regularly updated to enhance performance and user experience. These updates often include bug fixes, new features, and expanded content. For instance, version 1.7.1 focused on improving compatibility with Android 6 and updating permissions. The app’s developers prioritize user feedback, ensuring updates address common issues and requests. Recent improvements have introduced a new grid view with larger thumbnails and an enhanced menu system for easier navigation. Such updates ensure the app remains a reliable and comprehensive tool for birders, keeping it up-to-date with the latest information and technological advancements.

Customer Reviews and Ratings

Customers praise the app’s comprehensive content and ease of use, with high ratings for image and audio quality. Some note storage and interface issues as drawbacks.

Overall Satisfaction and Feedback

Users are highly satisfied with the Sibley Guide App, praising its portability and comprehensive features. Many appreciate the detailed images, audio recordings, and ease of use, making it a must-have for serious birders. However, some users criticize the high storage requirements and occasional interface issues. The app’s ability to filter species by location and compare images side-by-side is particularly praised. While the price is a concern for a few, most agree it’s a valuable investment for birdwatching enthusiasts, offering unparalleled depth and convenience in the field.

Common Praise and Criticisms

The Sibley Guide App is widely praised for its comprehensive database, including over 6,600 images, detailed distribution maps, and audio recordings of bird calls. Users appreciate its portability and advanced features like species filtering and comparison. However, some critics mention the app’s high storage requirements and occasional interface issues. While the detailed artwork is commended, a few users prefer photographic images over sketches. The app’s cost is also a point of debate, with some finding it pricey compared to alternatives. Despite these criticisms, the app remains a favorite among serious birders for its depth and convenience.

uniden 6.0 manual

Welcome to the Uniden DECT 6.0 Manual, your comprehensive guide to understanding and utilizing your cordless phone system. This manual covers setup, features, and troubleshooting, ensuring optimal performance.

1.1 Overview of the Uniden DECT 6.0 Technology

The Uniden DECT 6.0 Technology is a advanced digital communication platform designed for cordless phones, ensuring crystal-clear audio and minimized interference. It operates on the 1.9 GHz frequency band, providing a secure and stable connection. This technology is known for its superior sound quality, long range, and resistance to interference from other devices. The DECT 6.0 standard is widely adopted for residential and office use, offering features like voice encryption and low power consumption. It is compatible with multiple handsets and accessories, making it a versatile solution for communication needs.

1.2 Importance of the User Manual for DECT 6.0 Cordless Phones

The Uniden DECT 6.0 User Manual is essential for maximizing the functionality of your cordless phone. It provides step-by-step guidance for setup, feature activation, and troubleshooting. The manual helps users understand advanced features like crystal-clear audio technology and compatibility with accessories. It also includes detailed specifications and maintenance tips, ensuring optimal performance. Referencing the manual resolves common issues and enhances user experience. It serves as a vital resource for both initial setup and ongoing use of the phone system.

Key Features of the Uniden DECT 6.0 Cordless Phones

The Uniden DECT 6.0 Cordless Phones feature crystal-clear audio, compact ergonomic designs, long battery life, and compatibility with multiple handsets for enhanced convenience and reliability.

2.1 Crystal-Clear Audio and DECT 6.0 Technology

The Uniden DECT 6.0 Cordless Phones deliver exceptional audio quality with DECT 6.0 technology, minimizing interference and ensuring crisp, natural conversations. This advanced technology provides reliable connections and reduces background noise, offering clear communication even in challenging environments. The phones are designed to optimize sound clarity, making them ideal for both residential and small office settings. With DECT 6.0, users experience consistent performance and superior voice quality, enhancing their overall communication experience.

2.2 Compact and Ergonomic Design

The Uniden DECT 6.0 Cordless Phones feature a sleek, compact design that combines style and functionality. The ergonomic shape ensures a comfortable fit in your hand, reducing fatigue during extended conversations. Lightweight and easy to handle, these phones are designed for user convenience. The intuitive layout of buttons and controls allows for seamless navigation, while the compact size makes them easy to place or carry around. This thoughtful design enhances usability without compromising on advanced features, ensuring a perfect balance of form and function.

2.3 Long Battery Life and Charging Options

The Uniden DECT 6.0 Cordless Phones are designed with extended battery life, offering up to 10 hours of talk time and 100 hours of standby time. The phones support convenient charging options, including AC charging and USB charging, ensuring flexibility. The rechargeable batteries provide reliable performance, and the system alerts you when the battery is low. This combination of long-lasting battery life and versatile charging solutions makes these phones ideal for daily use, minimizing downtime and keeping you connected effortlessly.

Downloading and Accessing the Uniden DECT 6.0 Manual

Access the Uniden DECT 6.0 Manual directly from the official Uniden website or authorized sources. Simply visit the support section, enter your model number, and download the PDF guide instantly.

3.1 Official Sources for the Manual

The Uniden DECT 6.0 Manual is available for download from the official Uniden website. Visit the support section, enter your product model number, and access the PDF guide. Ensure authenticity by downloading only from trusted sources like the Uniden site or authorized retailers. This guarantees you receive the most accurate and up-to-date instructions tailored to your DECT 6.0 model. For additional assistance, contact Uniden customer care or refer to their official support channels for reliable information.

3.2 How to Download the Manual from the Uniden Website

To download the Uniden DECT 6.0 Manual, visit the official Uniden website. Navigate to the “Support” section, where you can search for your specific model. Enter your phone’s model number, such as DECT 1735 or D1484, and select the appropriate product. Click on the “Manuals & Guides” tab to access the downloadable PDF. Ensure you select the correct version for your device. This method guarantees an authentic and up-to-date guide tailored to your cordless phone system.

Product Specifications and Compatibility

The Uniden DECT 6.0 cordless phones feature digital technology for clear communication, compact designs, and compatibility with handsets like DCX150, DCX200, and DCX300, ensuring versatility.

4.1 Detailed Specifications of the Uniden DECT 1735 Model

The Uniden DECT 1735 model operates on DECT 6.0 digital technology, ensuring clear and interference-free communication. It features a compact, ergonomic design for easy handling and includes a long-lasting battery. The phone supports multiple handsets and is compatible with accessories like the DCX150, DCX200, and DCX300. Designed for residential use, it offers caller ID, call waiting, and a built-in answering system. The DECT 1735 model is known for its reliability and seamless integration with other DECT 6.0 devices, making it a versatile choice for home communication needs.

4.2 Compatible Handsets and Accessories

The Uniden DECT 6.0 system supports a range of compatible handsets, including the DCX150, DCX200, and DCX300 models. These handsets are designed to integrate seamlessly with the base unit, ensuring reliable performance. Additionally, the system is compatible with various accessories such as headsets, charging cradles, and belt clips, enhancing convenience and usability. For the most up-to-date list of compatible devices, visit the Uniden website or refer to the product manual for detailed information on accessory compatibility and installation.

Troubleshooting and Common Issues

Address common issues like audio interference, connectivity problems, and battery performance. Follow diagnostic steps to resolve issues quickly and maintain optimal functionality of your Uniden DECT 6.0 system.

  • Check for physical obstructions causing signal loss.
  • Restart the base station and handsets to reset connections.
  • Ensure proper charging and battery maintenance;

5.1 Resolving Audio Interference and Connectivity Problems

Experiencing audio interference or connectivity issues with your Uniden DECT 6.0 phone? Start by checking for physical obstructions between the base and handset. Ensure the base station is placed in an open area, away from walls or metal objects. Restart both the base and handset to reset the connection. If interference persists, move other electronic devices away, as they may cause signal disruption. For persistent issues, refer to the manual or contact Uniden support for further assistance.

  • Check for nearby devices emitting radio frequencies.
  • Update your phone’s firmware if available.
  • Test the phone in different locations to identify interference sources.

5.2 Battery and Charging Troubleshooting Tips

If your Uniden DECT 6.0 phone’s battery life is short or not holding a charge, ensure the charging contacts on both the handset and base are clean. Dirt or corrosion can disrupt charging. Use only the original charger to avoid compatibility issues. Allow the battery to charge for at least 12 hours initially. If the battery still doesn’t perform well, try resetting it by leaving it unplugged for 30 minutes. For persistent problems, contact Uniden support or replace the battery if necessary.

  • Clean charging contacts regularly.
  • Avoid overcharging to prolong battery life.
  • Check for damaged charging cables or ports.

Customer Support and Contact Information

For assistance, contact Uniden Customer Care at 817-858-2929 or 800-297-1023. Visit their website at www.uniden.com for support, parts, and accessibility options.

6.1 Uniden Customer Care Contact Details

For any inquiries or issues, contact Uniden Customer Care at 817-858-2929 or 800-297-1023. The Parts Department is available at 800-554-3988, while the Accessibility Help Line can be reached at 800-874-9314 (voice or TTY). Visit www.uniden.com for 24/7 support, including manuals, FAQs, and troubleshooting guides. This ensures convenient access to assistance for your DECT 6.0 cordless phone system. Uniden’s dedicated team is ready to address your questions and provide solutions promptly.

6.2 Accessibility and Special Assistance Options

Uniden offers dedicated support for users with disabilities through their Accessibility Help Line at 800-874-9314 (voice or TTY). This service ensures equal access to product information and assistance. Additionally, the Uniden website provides resources for compatible accessibility devices, such as TTY machines and hearing aid-compatible handsets. For further support, visit www.uniden.com to explore accessibility features and download relevant guides. Uniden is committed to inclusivity, ensuring all users can enjoy seamless communication with ease.

Additional Resources and Guides

Explore additional resources and guides for your Uniden DECT 6.0 phone, including compatible models, extended product lines, and supplementary guides available on the Uniden website.

7.1 FAQs and User Guides for DECT 6.0 Models

Find answers to common questions about your Uniden DECT 6.0 phone in the official FAQ section. Download detailed user guides for models like the DECT1080, D1484, and D1680. These resources cover setup, troubleshooting, and advanced features. Visit the Uniden website for comprehensive support. Address issues like audio interference, battery life, and compatibility with ease. Explore the extensive library of guides tailored to your specific DECT 6.0 model for optimal performance and functionality.

7.2 Compatible Models and Extended Product Line

The Uniden DECT 6.0 series offers a range of compatible models, including the DECT1080, D1484, and D1680. These handsets and accessories, like the DCX150 and DCX200, ensure seamless integration. The extended product line includes systems with 2, 3, or 4 handsets, as well as models with built-in headsets. Visit the Uniden website for the latest updates on compatible devices and to explore the full DECT 6.0 portfolio, designed to meet diverse communication needs.