ao smith tankless water heater manual

Welcome to the AO Smith tankless water heater manual, your comprehensive guide to installation, operation, and maintenance. This manual ensures safe and efficient use of your unit.

1.1 Understanding the Benefits of AO Smith Tankless Water Heaters

AO Smith tankless water heaters offer continuous hot water supply, high energy efficiency, and space-saving design. They provide consistent temperatures, reduce energy bills, and last longer than traditional tank models. With advanced technology, these heaters ensure reliable performance and minimal maintenance, making them a smart choice for modern homes and businesses. Their compact size and eco-friendly operation further enhance their appeal, delivering long-term savings and convenience.

1.2 Importance of the Manual for Installation and Operation

This manual is essential for the safe and efficient installation, operation, and maintenance of your AO Smith tankless water heater. It provides detailed instructions, safety precautions, and troubleshooting tips to ensure optimal performance. By following the guidelines, users can avoid common issues and extend the lifespan of the heater. The manual also includes technical specifications and compatibility information, helping you understand your unit’s capabilities and requirements. Refer to it regularly to maintain safety, efficiency, and reliability in your water heating system.

User Interface and Digital Display

The AO Smith tankless water heater features a user-friendly digital display for easy navigation, temperature adjustment, and performance monitoring, ensuring a seamless and intuitive user experience.

2.1 Navigating the Digital Display Features

The AO Smith tankless water heater’s digital display provides an intuitive interface for users to navigate through various settings and features. The display allows users to easily adjust water temperature, monitor operational status, and access diagnostic information. Key features include a temperature control interface, real-time performance tracking, and error code displays for troubleshooting. The interface is designed with navigation buttons for seamless menu browsing, ensuring users can efficiently manage their water heater’s settings. The digital display also includes a home screen that provides quick access to essential functions, enhancing overall user experience.

2.2 Adjusting Water Temperature and Monitoring Performance

Adjusting the water temperature on your AO Smith tankless water heater is straightforward using the digital display. Users can set their desired temperature between 100°F and 140°F with precise increments. The display also monitors performance metrics, such as flow rate and energy consumption, ensuring optimal operation. Real-time diagnostics provide insights into system efficiency, while temperature lock functionality prevents accidental changes. Regular monitoring through the display helps maintain peak performance and ensures consistent hot water delivery tailored to your needs.

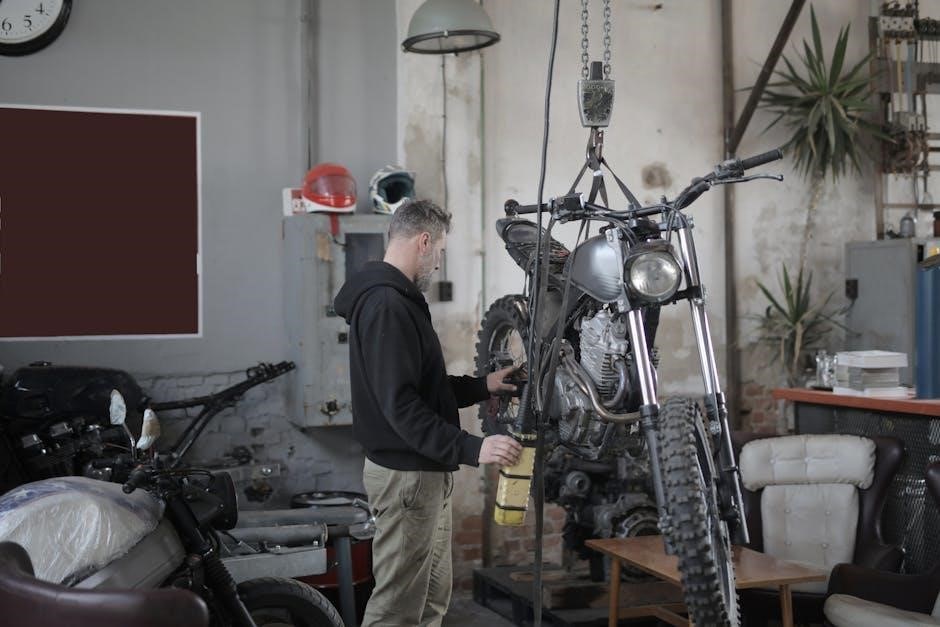
Installation Requirements

Proper installation ensures safe and efficient operation. Measure inlet gas pressure, install condensate drain, and ensure adequate ventilation. Follow local codes and manufacturer guidelines for a successful setup.

3.1 Measuring Inlet Gas Pressure for Proper Functioning

To ensure proper functioning, measure inlet gas pressure by turning off the unit’s power and gas supply. Use a manometer to check pressure, ensuring it meets specifications. Proper pressure prevents issues like inefficient combustion or shutdown. Always follow safety guidelines and manufacturer instructions for accurate measurement. Improper pressure can lead to performance problems or safety hazards, so verify readings carefully before operation. This step is crucial for maintaining efficiency and safety in your AO Smith tankless water heater.

3.2 Condensate Drain Installation Guidelines

Proper condensate drain installation is essential for your AO Smith tankless water heater. Use approved materials like PVC or ABS for the drain line, ensuring it’s sloped correctly to prevent blockages. Regularly inspect the drain for condensation buildup and clean as needed. Install a trap to prevent gas leakage and ensure the drain is accessible for maintenance. Follow local plumbing codes and manufacturer recommendations to avoid issues like water damage or corrosion. Proper drainage ensures efficient operation and longevity of your water heater.

3.3 Gas Supply and Ventilation Considerations

Ensure the gas supply line is correctly sized to meet the heater’s input requirements. Use UL-listed components and follow local codes for installation. Proper ventilation is crucial for safe operation; install a venting system that meets the manufacturer’s specifications. The vent pipe must be securely connected to the heater and terminate outside. Provide adequate combustion air by ensuring openings meet minimum free area requirements. Regularly inspect the gas supply and ventilation system for leaks or blockages to maintain efficiency and safety. Always follow the manual’s guidelines for optimal performance.

Safety Precautions and Warnings

Ensure safety by following all precautions in this manual. Read and understand safety messages to prevent accidents. Proper ventilation and gas line installation are crucial. Regularly inspect for leaks and ensure all components function correctly. Always follow manufacturer guidelines for safe and efficient operation.

4.1 Understanding Safety Messages and Instructions

Understanding safety messages is crucial for safe operation. This manual provides clear warnings and guidelines to prevent accidents. Always read instructions carefully before installation or maintenance. Ensure all users comprehend safety symbols and precautions. Regular inspections and adherence to manufacturer guidelines help prevent gas leaks and ensure proper ventilation. Never ignore safety alerts, as they are designed to protect both the user and the unit. By following these instructions, you can maintain a safe and efficient water heating system.

4.2 Preventing Gas Leaks and Ensuring Proper Ventilation

Preventing gas leaks is essential for safety. Always turn off power and gas supply before servicing. Inspect connections regularly for tightness and signs of wear. Use approved sealants and materials to prevent leaks. Proper ventilation is critical; ensure vent pipes are installed according to manufacturer guidelines. Use U.L.-listed venting materials and avoid obstructions. Regular inspections and maintenance can prevent issues. Follow local codes and recommendations for combustion air supply. Ensure the unit is installed in a well-ventilated area to avoid gas accumulation and potential hazards.

Operating the AO Smith Tankless Water Heater

Ensure smooth operation by turning on power, checking gas supply, and verifying water flow. Monitor performance regularly for optimal efficiency and safety.

5.1 Initial Startup and Temperature Adjustment

For initial startup, ensure the power is on and the gas supply is connected. Open a hot water tap to purge air from the lines. Check for leaks and proper gas flow. Adjust the temperature using the digital display, typically between 100°F to 120°F. Refer to the manual for precise instructions to avoid overheating or insufficient heating. Ensure all safety precautions are followed during the first operation.

5.2 Monitoring Performance and Troubleshooting Basic Issues

Monitor the unit’s performance by checking error codes on the digital display. Address issues like temperature fluctuations or low water flow promptly. Ensure proper gas supply and ventilation to prevent ignition problems. Regularly inspect for leaks and condensation. If the heater shuts off unexpectedly, check for blockages in the venting system. Refer to the manual for specific error code solutions and restart procedures. Always follow safety guidelines when troubleshooting to avoid further issues.

Maintenance and Routine Care

Regular maintenance ensures optimal performance. Schedule annual professional inspections and clean the heat exchanger. Check for leaks and ensure proper ventilation. Drain during freezing temperatures.

6.1 Draining the Water Heater During Freezing Temperatures

Draining your AO Smith tankless water heater is crucial during freezing temperatures to prevent damage. First, turn off the gas supply at the manual shut-off valve. Next, close the cold water inlet valve and open the drain valve to release water. Disconnect power to the unit and allow all water to drain completely. This process ensures no water remains to freeze and cause damage. Regular draining during cold periods maintains efficiency and longevity.

6.2 Checking for Leaks and Ensuring Proper Functioning

Regularly inspect the AO Smith tankless water heater for leaks to maintain efficiency and safety. Turn off power and gas supply before checking connections and valves for moisture. Inspect pipes and joints for visible damage or corrosion. Address any leaks promptly by tightening connections or replacing worn components. Ensure proper functioning by verifying gas supply, water flow, and drainage. Check for unusual noises or temperature fluctuations. Perform these checks seasonally to prevent issues and extend the lifespan of your water heater.

Technical Specifications and Compatibility

AO Smith tankless water heaters offer varying gas input levels and compatibility with different water systems, ensuring versatile installation options and compliance with industry standards.

7.1 Understanding Gas Input Requirements

AO Smith tankless water heaters require specific gas input levels to function efficiently. The gas input rating is listed on the unit’s data plate and must match your gas supply. Proper gas pressure ensures optimal performance and safety. Incorrect gas input can lead to reduced efficiency or potential hazards. Always verify the gas type (natural or propane) and ensure it aligns with the heater’s specifications. Compliance with local gas codes and manufacturer guidelines is essential for safe operation. Refer to the manual or contact AO Smith support for detailed assistance.

7.2 Compatibility with Various Water Systems

AO Smith tankless water heaters are designed to work with various water systems, including closed systems, which require an expansion tank to manage thermal expansion. They are compatible with piping materials like copper, CPVC, and PEX, ensuring durability and flexibility. However, they should not be installed with iron or PVC piping due to potential corrosion and compatibility issues. Always follow the manufacturer’s guidelines for specific water system requirements to ensure optimal performance and prevent leaks or damage. Consult the manual for detailed compatibility recommendations tailored to your setup.

Troubleshooting Common Issues

Troubleshoot common issues like error codes, ignition problems, or inconsistent water temperature. Refer to the manual for solutions or contact technical support for assistance.

  • Check for error codes on the digital display.
  • Ensure proper gas supply and ventilation.
  • Verify water flow rates and temperature settings.

8.1 Identifying Error Codes and Solutions

The AO Smith tankless water heater displays error codes to indicate specific issues. These codes help diagnose problems quickly. Common codes include E1 (temperature sensor issues), E3 (low water flow), and E5 (gas supply problems). Always refer to the manual for detailed solutions. For example, E1 may require checking sensor connections, while E3 involves ensuring adequate water flow rates. Addressing these issues promptly ensures optimal performance and prevents further complications. If unresolved, contact certified technicians for professional assistance.

  • E1: Check temperature sensor connections and ensure proper function.
  • E3: Verify water flow rate meets minimum requirements.
  • E5: Ensure gas supply is stable and unrestricted.

8.2 Addressing Ignition and Flame Issues

Ignition and flame issues in AO Smith tankless water heaters can disrupt operation. Common problems include the unit not igniting or an unstable flame. Check the gas supply, ensuring it is turned on and unobstructed. Verify proper ventilation and ensure no blockages in the venting system. If issues persist, inspect the igniter and flame sensor for cleanliness or damage. Refer to the error codes in the manual for specific guidance, such as E1 or E5, which may indicate ignition-related faults. Always follow safety precautions when troubleshooting.

  • Ensure gas supply is stable and unobstructed.
  • Check venting system for blockages or damage.
  • Inspect and clean the igniter and flame sensor as needed.

The AO Smith tankless water heater manual provides essential guidance for optimal performance. Follow safety, installation, and maintenance tips to ensure longevity and efficiency of your unit.

9.1 Summary of Key Features and Benefits

The AO Smith tankless water heater manual highlights key features such as energy efficiency, space-saving design, and continuous hot water supply. It also emphasizes benefits like reduced energy bills, longer lifespan compared to traditional heaters, and eco-friendly operation. The manual underscores advanced safety features, including precise temperature control and leak detection. These elements ensure a reliable, modern, and cost-effective solution for homeowners seeking consistent hot water delivery with minimal maintenance and environmental impact.

9.2 Final Tips for Optimal Performance

To ensure optimal performance of your AO Smith tankless water heater, regular maintenance is essential. Always check for leaks, ensure proper gas supply, and maintain ventilation. Drain the unit during freezing temperatures to prevent damage. Additionally, inspect the anode rod annually and ensure water pressure is within recommended levels. For complex issues, consult the manual or contact a professional. These steps will maximize efficiency, extend lifespan, and maintain reliable operation of your tankless water heater.

late night salivary cortisol test instructions

The late-night salivary cortisol test measures cortisol levels in saliva‚ helping diagnose conditions like Cushing’s syndrome. It’s a non-invasive method to assess hormonal balance and adrenal function.

Overview of the Test

The late-night salivary cortisol test is a diagnostic tool used to measure cortisol levels in saliva‚ typically collected between 11 p.m. and midnight. This timing is chosen because cortisol levels naturally follow a circadian rhythm‚ peaking in the morning and reaching their lowest point at night. The test is particularly useful for screening and monitoring conditions like Cushing’s syndrome‚ where cortisol levels remain elevated even at night. Saliva sampling is non-invasive and allows patients to collect the specimen at home‚ making it a convenient alternative to blood or urine tests. Accurate results depend on proper sample collection and adherence to pre-test instructions. This method helps healthcare providers assess adrenal function and hormonal balance effectively.

Importance of Cortisol Measurement

Cortisol is a vital hormone produced by the adrenal glands‚ playing a central role in stress response‚ metabolism‚ and maintaining blood sugar levels. Measuring cortisol levels is crucial for diagnosing hormonal imbalances‚ particularly Cushing’s syndrome‚ where cortisol levels remain elevated. High cortisol levels can lead to symptoms like weight gain‚ hypertension‚ and mood changes‚ while abnormally low levels may indicate adrenal insufficiency‚ causing fatigue and low blood pressure. The late-night salivary cortisol test captures cortisol levels when they should naturally be at their lowest‚ providing insights into adrenal function and hormonal balance. Accurate measurement aids in early detection and monitoring‚ ensuring timely interventions and personalized treatment plans.

Preparation for the Test

Proper preparation ensures accurate results. Avoid food‚ drink‚ and brushing teeth for 30 minutes before collection. Refrain from steroids and relax for 1 hour beforehand.

Relaxation and Rest

Relaxation is crucial before the late-night salivary cortisol test to ensure accurate results. Stress and physical activity can elevate cortisol levels‚ potentially leading to misleading outcomes. Patients should avoid strenuous activities and stressful situations for at least 1 hour prior to sample collection. It is recommended to engage in calming activities‚ such as reading or meditating‚ to maintain a relaxed state. A restful environment helps stabilize cortisol levels‚ reflecting the body’s natural hormonal state. Proper rest ensures the test accurately measures cortisol without external influences‚ providing reliable data for diagnosis and further evaluation. Adhering to these guidelines is essential for obtaining precise results.

Dietary Restrictions

Adhering to dietary restrictions is essential to ensure accurate results in the late-night salivary cortisol test. Patients should avoid eating or drinking for at least 30 minutes before collecting the saliva sample. This includes refraining from brushing teeth‚ using mouthwash‚ or chewing gum‚ as these activities may contaminate the sample or alter cortisol levels. Additionally‚ consuming black liquorice for two weeks prior to the test should be avoided‚ as it can interfere with cortisol measurements. It is also important to avoid any substances that may influence cortisol levels‚ such as steroid creams or inhalers‚ for at least 24 hours before the test. Following these dietary guidelines helps ensure the saliva sample reflects the body’s natural cortisol levels‚ providing reliable results for accurate diagnosis and assessment.

Oral Hygiene Instructions

Proper oral hygiene is crucial before collecting a saliva sample for the late-night cortisol test. Avoid brushing your teeth‚ flossing‚ or using mouthwash for at least 30 minutes prior to sample collection‚ as these activities may alter cortisol levels or contaminate the sample. Additionally‚ refrain from chewing gum or eating any food 30 minutes before the test. Patients should also avoid smoking for at least two hours before collecting the sample. It is important to ensure the mouth is free of any substances that could interfere with the test results. Following these oral hygiene guidelines helps maintain the integrity of the saliva sample‚ ensuring accurate and reliable cortisol measurements for proper diagnosis and assessment.

Collection of Saliva Sample

Saliva collection involves using a swab between 11 pm and midnight. Avoid touching the swab with fingers. Relax beforehand to ensure accurate cortisol measurement.

Timing of Sample Collection

The saliva sample must be collected between 11:00 p.m. and midnight‚ as cortisol levels are typically lowest during this time. Accurate timing ensures reliable test results. Multiple tests over several nights may be required for confirmation. Avoid collecting the sample earlier or later than specified‚ as this could lead to inaccurate measurements. Proper timing aligns with the body’s natural circadian rhythm‚ ensuring the test reflects true cortisol levels. Adhering to the recommended timeframe is crucial for diagnosing conditions like Cushing’s syndrome. If the timing is not followed‚ the test may need to be repeated to obtain valid results.

Handling the Collection Device

Proper handling of the collection device is essential for accurate test results. Begin by washing your hands thoroughly with soap and water. Open the Salivette tube and place the cylindrical cotton pad in your mouth. Roll the swab gently for at least 90 seconds to saturate it with saliva. Avoid touching the swab with your fingers to prevent contamination. Once saturated‚ remove the swab and place it back into the collection tube. Ensure the tube is closed tightly to secure the sample. Do not separate the inner tube from the outer tube‚ as this could cause leakage. Follow all provided instructions carefully to ensure the sample is collected correctly and safely for analysis.

Additional Tips for Patients

To ensure accurate results‚ avoid stress and strenuous activities before the test. Relax for at least an hour prior to sample collection. Refrain from smoking for two hours and avoid eating or drinking for 30 minutes before collecting saliva. Do not use steroid inhalers or creams for 24 hours before the test. Remove any lipstick or lip balm‚ as these can interfere with the sample. If you use dental appliances or have oral sores‚ inform your healthcare provider. Store the collection device in a cool‚ dry place until ready to use. After collecting the sample‚ label the tube with your name‚ date‚ and time. Double-check that the tube is sealed tightly to prevent leakage during transport. Following these tips will help ensure reliable and accurate test outcomes.

Post-Collection Procedures

Store the saliva sample in a cool‚ dry place until transport. Ensure the tube is tightly sealed to prevent leakage. Label the tube with your name‚ date‚ and collection time for accurate identification. Transport the sample to the laboratory as soon as possible‚ ideally within 24 hours of collection. Proper handling and timely submission are crucial for obtaining reliable test results.

Storage of the Sample

After collecting the saliva sample‚ store it in a cool‚ dry place away from direct sunlight and extreme temperatures. Avoid exposing the sample to heat sources or humidity‚ as this may degrade the cortisol levels. If the sample cannot be transported to the laboratory immediately‚ refrigerate it at a temperature between 2°C and 8°C to preserve the integrity of the specimen. Do not freeze the sample unless instructed by your healthcare provider. Ensure the collection tube is tightly sealed to prevent leakage or contamination. Proper storage is essential to maintain the accuracy of the test results. Label the tube with your name‚ date‚ and collection time for clear identification.

Transportation to the Lab

After collecting and storing the saliva sample‚ transport it to the laboratory as soon as possible to ensure timely analysis. If refrigeration is available‚ keep the sample cool during transport using an ice pack in an insulated bag. Avoid exposing the sample to extreme temperatures or direct sunlight‚ as this may alter cortisol levels. Handle the sample gently to prevent agitation or leakage. Ensure the collection tube is securely sealed and placed in a protective container to avoid breakage. Deliver the sample to the lab within 24 hours of collection‚ preferably the next morning. If transporting via mail‚ use a prepaid overnight shipping service with ice packs. Always check with the lab for specific transportation instructions to guarantee accurate test results.

Documentation Requirements

Accurate documentation is essential for reliable test results. Record the exact date and time of saliva collection on the provided form‚ as cortisol levels vary throughout the day. Include your full name‚ date of birth‚ and medical record number on the sample tube and request form. Ensure all information is legible and matches the test requisition form. If multiple samples are collected‚ label each with the corresponding date and time. Document any medications or substances that may interfere with cortisol levels‚ such as steroid inhalers or creams‚ as instructed by your healthcare provider. Report any issues during collection‚ such as contamination or spills‚ to avoid inaccurate results. Proper documentation ensures your sample is processed correctly and results are interpreted accurately.

Interpreting Test Results

High cortisol levels in late-night saliva may indicate Cushing’s syndrome. Normal levels are typically low at night‚ reflecting the natural circadian rhythm. Results guide further diagnostic or treatment steps.

Understanding Cortisol Levels

Cortisol is a hormone produced by the adrenal glands‚ following a circadian rhythm—highest in the morning and lowest at night. In healthy individuals‚ late-night cortisol levels are typically very low. Elevated levels at this time may indicate conditions like Cushing’s syndrome. The test measures cortisol in saliva‚ reflecting blood levels. Normal ranges vary by lab‚ but consistently high results suggest hormonal imbalance. Healthcare providers compare your levels to reference ranges and clinical symptoms. Accurate interpretation requires proper sample collection timing and handling. Multiple tests may be needed for confirmation. Understanding your cortisol levels helps diagnose or rule out conditions‚ guiding further treatment or monitoring.

Follow-Up Actions Based on Results

Based on late-night salivary cortisol test results‚ your healthcare provider will determine the next steps. If levels are normal‚ no further action may be needed. Elevated levels may indicate Cushing’s syndrome or other hormonal imbalances‚ requiring additional testing‚ such as blood or urine cortisol tests‚ imaging‚ or a referral to an endocrinologist. If results are inconclusive‚ repeat testing over multiple nights may be recommended. Lifestyle adjustments‚ such as stress management or dietary changes‚ could be suggested. In cases of confirmed hormonal issues‚ treatment plans may include medication‚ surgery‚ or other therapies. Monitoring cortisol levels over time is crucial to assess treatment effectiveness or disease recurrence. Accurate results guide personalized care and ensure proper management of any underlying conditions.

The late-night salivary cortisol test is a valuable diagnostic tool for assessing adrenal function and detecting hormonal imbalances. By following proper preparation and collection procedures‚ individuals can ensure accurate results. This non-invasive test provides critical insights into cortisol levels‚ aiding in the diagnosis of conditions like Cushing’s syndrome. Its convenience and reliability make it a preferred method for both patients and healthcare providers. After receiving results‚ further testing or treatment may be necessary‚ depending on the findings. Overall‚ the late-night salivary cortisol test is an essential step in maintaining hormonal health and guiding appropriate medical interventions when needed.

greedy granny instructions

Greedy Granny is a family-friendly board game where players take turns stealing treats from Granny’s tray without waking her․ The game features a spinning wheel, suspenseful gameplay, and a unique mechanic where Granny might suddenly wake up, adding excitement and laughter․ Designed for kids aged 4 and up, it promotes healthy competition and is easy to set up, making it a perfect choice for family game nights․

Overview of the Game

Greedy Granny is a suspenseful, interactive board game where players take turns stealing treats from Granny’s tray․ The game features a spinning wheel that dictates actions, adding excitement and risk․ Designed for young kids, it combines colorful visuals, surprise elements, and strategic thinking․ Players must avoid waking Granny, whose sudden movements add humor and unpredictability, making it a fun, family-friendly experience with no batteries required․

Objective and Main Theme

The main objective of Greedy Granny is to collect one of each type of treat without waking Granny․ Players must balance stealth and strategy while spinning the wheel to determine their actions․ The game’s theme revolves around sneaking treats quietly, emphasizing patience and quick thinking to avoid triggering Granny’s wake-up, which resets progress․ It’s a test of skill and luck, ideal for family fun․

Setting Up the Game

Assemble Granny and her chair, ensuring all pieces snap together securely․ Place the treats on the tray and prepare for a fun, suspenseful experience․

Assembling Granny and Her Chair

Start by snapping the top and bottom parts of Granny together until secure․ Next, insert her teeth into the mouth area․ Gently pull the chair back until it clicks, ensuring Granny is ready for the game․ This setup ensures smooth gameplay and prepares everyone for the fun ahead․

Placing Treats on the Tray

Arrange all 12 treats, consisting of four different types, neatly on Granny’s tray․ Ensure they are properly placed before starting the game․ This step is essential for gameplay, as players aim to collect one of each treat type․ The treats must be clearly visible and accessible for players to steal them quietly without disturbing Granny․

Game Components

Granny’s armchair, her teeth, a tray for treats, and a spinner wheel are the core components, ensuring interactive and suspenseful gameplay for all players․

Granny’s Armchair and Teeth

Granny’s armchair is a central piece, requiring assembly by snapping the top and bottom parts together until secure․ Her teeth are placed in her mouth, completing her setup․ When her chair is pulled back and clicked, she is ready․ Pressing her button may wake her, causing her teeth to fly out, adding surprise and excitement to the game․ Proper assembly ensures smooth gameplay․

The Treats and Tray

The treats are colorful, varied, and placed on Granny’s tray before the game begins․ Players aim to collect one of each type without waking Granny․ The tray holds all the treats, and any that fly off when Granny wakes up must be returned․ This setup ensures fun and challenge, making the game engaging for kids and families alike․ Proper arrangement is key to starting the game․

The Spinner Wheel

The spinner wheel is central to gameplay, dictating actions like taking or returning treats․ It features color-coded sections with specific instructions, adding unpredictability and excitement․ Players spin to determine their next move, ensuring each turn is unique and full of suspense, keeping everyone engaged and eager to see what happens next․ This element adds a thrilling layer of chance to the game․

Understanding the Rules

The game revolves around collecting treats without waking Granny․ Players spin a wheel to determine actions, aiming to gather one of each treat type quietly․ Success requires stealth․

Objective: Collecting Treats

Greedy Granny’s main goal is to collect one of each type of treat from Granny’s tray․ Players must spin the wheel, follow its instructions, and carefully take treats without waking Granny․ The first player to gather one of every treat wins, ensuring quick, suspenseful gameplay suitable for families and young children; Strategy and stealth are key to success․

Spinner Instructions and Actions

The spinner dictates players’ actions, with sections like “Take a Treat,” “Return a Treat,” or “Steal a Treat․” Each spin adds unpredictability, as players must follow the wheel’s instructions․ Color-coded sections guide actions, ensuring dynamic gameplay․ Landing on “Skip” passes the turn, while “Steal” lets players take another’s treat․ The spinner’s randomness keeps the game exciting and challenging, requiring strategic thinking and quick reflexes to succeed․

How to Play

Players spin the wheel, follow its instructions, and carefully take or return treats․ Pressing Granny’s button risks waking her, adding suspense to the gameplay experience․

Spinning the Wheel

Spinning the wheel is a key part of the game, dictating players’ actions․ The wheel features color-coded sections with instructions like “Take a Treat,” “Return a Treat,” or “Press Granny’s Button․” Each spin adds suspense, as players never know when Granny might wake up․ The wheel’s randomness keeps the game exciting and unpredictable, ensuring a thrilling experience for all players involved in the treat-snatching fun․

Taking or Returning Treats

Players take turns stealing treats from Granny’s tray based on the spinner’s instructions․ If the wheel lands on “Take a Treat,” they carefully pick one․ If it lands on “Return a Treat,” they must put one back․ This balance of risk and reward adds strategy to the game, making players decide when to be bold and when to play safe to avoid waking Granny and losing their collected treats․

Pressing Granny’s Button

Pressing Granny’s button is a thrilling yet risky move․ When a player lands on the “Press Button” section of the spinner, they must press the button on Granny’s armchair․ This action might wake Granny, causing her teeth to fly out and startling everyone․ If Granny wakes up, the player who pressed the button must return all their collected treats to the tray, adding an element of suspense and unpredictability to the game․

Handling Granny’s Wake-Up

Granny’s wake-up is a critical moment․ The player who wakes her must return all collected treats to her tray․ Resetting the game allows continued play․

Consequences of Waking Granny

When Granny wakes up, the player who triggered her awakening must return all collected treats to her tray, including the last treat they took․ This resets their progress, and the game continues․ The surprise element adds excitement, as no one knows when Granny will wake up, keeping players on edge throughout the game․

Resetting the Game

To reset the game after Granny wakes up, pull the back of her chair until it clicks, returning her to a sleeping position․ This action allows the game to resume normally, ensuring continuous play․ Resetting is straightforward and quick, keeping the game flowing smoothly for all players․

Winning the Game

The first player to collect one of each type of treat wins․ Collect all four treats without waking Granny to claim victory and reset for another round․

Collecting One of Each Treat

Players must collect one of each type of treat (four in total) to win․ Spin the wheel to determine actions: take, return, or press Granny’s button․ Successfully gathering all treats without waking Granny secures victory․ If Granny wakes, return all collected treats and reset․ The game resets after a winner is declared, allowing for multiple plays․

Resetting for Multiple Plays

To reset Greedy Granny for another round, press the button on her chair to return her to a sleeping position․ Clear the tray of treats and redistribute them evenly among players or place them back on the tray for a fresh start․ This allows the game to be replayed multiple times, keeping the fun and excitement alive for everyone involved․

Safety Considerations

Greedy Granny is designed for ages 4 and up, with small parts requiring caution․ Adult supervision is recommended to ensure children handle components safely and appropriately․

Age Recommendations

Greedy Granny is recommended for children aged 4 and above due to small parts․ Adult supervision is advised to ensure safe play and proper handling of components․

Small Parts Precautions

Greedy Granny contains small parts, posing a choking hazard for children under 3 years․ Keep the game out of reach of young children․ Adult supervision is recommended to ensure safe play․ Players should handle all components carefully, especially Granny’s teeth and small treats, to avoid accidents․ Ensure all pieces are securely attached before gameplay to prevent loss or damage․

Pros and Cons

Greedy Granny is an entertaining, easy-to-understand game with colorful design and interactive gameplay․ It encourages family bonding and is suitable for young children․ However, it relies heavily on luck, and some players may find the repetitive nature of waking Granny frustrating, limiting strategic depth for older audiences․

Advantages of the Game

Greedy Granny offers an engaging and family-friendly experience with its colorful design and interactive gameplay․ It promotes bonding through shared laughter and excitement, making it ideal for young children․ The simple setup and clear instructions ensure accessibility for kids, while the suspense of waking Granny adds a thrilling element that keeps players entertained and eager to play again․

Drawbacks and Limitations

While Greedy Granny is enjoyable, it has some limitations․ The game is largely based on luck, reducing strategic depth․ The reliance on spinning a wheel may frustrate older players seeking more complexity․ Additionally, the small parts pose a choking hazard, requiring careful supervision for young children․ The game’s simple nature also limits its appeal for teenagers and adults seeking more challenging experiences․

History and Popularity

Greedy Granny, released in 2018 by Goliath Games, quickly gained popularity for its unique blend of suspense and humor․ Its colorful design and interactive gameplay made it a family favorite, appealing to children and adults alike with its simple yet engaging mechanics․

Release and Reception

Greedy Granny was released in 2018 by Goliath Games, quickly becoming a hit due to its unique design and suspenseful gameplay․ Similar to Buckaroo, it gained popularity for its interactive and humorous mechanics, making it a family favorite․ The game’s colorful design and easy-to-understand rules contributed to its widespread appeal, attracting both children and adults with its fun and engaging nature․

Comparisons to Other Games

Greedy Granny is often compared to classic games like Buckaroo and Battleship due to its suspenseful, interactive nature․ Unlike Monopoly, it emphasizes quick, thrilling rounds rather than long strategic gameplay, making it ideal for younger players․ The game’s unique blend of luck and physical interaction sets it apart, offering a fresh twist on traditional family board games with its humorous and unpredictable mechanics․

Tips for Playing

Master Greedy Granny by understanding the spinner sections and playing stealthily․ Aim to collect treats quietly to avoid waking Granny, ensuring a smoother path to victory․

  • Focus on understanding spinner sections to anticipate moves․
  • Play with precision to avoid triggering Granny’s wake-up․

Strategy and Stealth

Success in Greedy Granny requires a mix of strategy and stealth․ Players must carefully plan their moves based on the spinner’s instructions, aiming to collect treats quietly․ Being cautious when pressing Granny’s button is key, as her wake-up is unpredictable․ Organize your treats to keep track and avoid mistakes․ Stealthy play increases your chances of winning without triggering Granny’s surprise․

  • Plan moves strategically based on spinner outcomes․
  • Be cautious to avoid waking Granny unexpectedly․

Understanding Spinner Sections

The spinner in Greedy Granny features color-coded sections, each with specific actions․ Green and Purple sections instruct taking or returning treats, while “Steal A Treat” and “Skip” add excitement․ Players must adhere strictly to the spinner’s instructions to avoid penalties or losing their turn․ Understanding these sections is crucial for maximizing treats and minimizing risks during gameplay․

Greedy Granny is a delightful blend of suspense and laughter, perfect for family game nights․ Its colorful design and interactive gameplay ensure fun for all ages․ Try it for a memorable experience!

Final Thoughts

Greedy Granny is a suspenseful and hilariously engaging game perfect for families․ Players take turns stealing treats, navigating the spinning wheel, and risking Granny’s wake-up․ Suitable for ages 4 and up, it encourages social interaction, laughter, and light competition․ With its colorful design and simple setup, it’s a must-have for any family game collection, offering endless fun and memorable moments for all ages․

Encouragement to Play

Don’t miss out on the fun—Greedy Granny is a must-try for families and friends! Its unique blend of suspense, strategy, and laughter makes it perfect for game nights․ Easy to learn and engaging for all ages, it fosters bonding and healthy competition․ Gather your loved ones, give it a try, and enjoy the thrilling experience of outsmarting Granny together!

o-ring design guide

O-Rings are versatile, circular seals made from elastomeric materials, widely used in mechanical applications to prevent leakage, valued for their reliability and cost-effectiveness across various industries.

1.1 What Are O-Rings?

O-Rings are circular, doughnut-shaped seals made from elastomeric materials like nitrile rubber, silicone, or fluorocarbon. They are designed to seal gaps between two surfaces, preventing the passage of liquids or gases. Their simplicity and effectiveness make them a cornerstone in various industries, from automotive to aerospace. O-Rings function by deforming under compression to create a tight barrier, ensuring leak-proof connections in both static and dynamic applications. Their versatility, durability, and ease of installation have solidified their role as a critical component in modern engineering.

1.2 Importance of O-Rings in Sealing Applications

O-Rings are indispensable in sealing applications due to their ability to prevent leakage of fluids and gases in both static and dynamic environments. Their reliability, cost-effectiveness, and versatility make them a critical component across industries like automotive, aerospace, and industrial manufacturing. By ensuring tight seals, O-Rings protect equipment from contamination, maintain performance, and prevent costly downtime. Their adaptability to various pressures, temperatures, and chemical exposures underscores their essential role in modern engineering and technology.

Materials Used for O-Rings

O-Rings are typically made from elastomers like nitrile, silicone, and Viton, each offering unique properties for different applications. Material selection is crucial for optimal sealing performance.

2.1 Common Elastomers and Their Properties

Nitrile (NBR) is widely used for its excellent resistance to oils and fuels, making it ideal for automotive applications. Silicone (VMQ) offers superior temperature resistance, suitable for high-heat environments. Fluorocarbon (Viton) excels in chemical resistance, often used in harsh industrial settings. Ethylene Propylene Diene Monomer (EPDM) is durable against water and steam, commonly applied in plumbing systems. Each elastomer has unique properties, making them suitable for specific sealing requirements, ensuring optimal performance in diverse operating conditions.

2.2 Chemical Compatibility and Material Selection

Material selection for O-rings hinges on chemical compatibility with the operating environment. Nitrile (NBR) resists oils and fuels, while Viton excels in harsh chemicals. Silicone (VMQ) is ideal for extreme temperatures. EPDM is suitable for water and steam. Understanding the chemical environment ensures optimal performance. Always consult compatibility charts to match materials with specific chemicals. Proper selection prevents degradation and ensures long-term sealing efficiency. This step is critical for reliability in industrial and hydraulic systems. Material choice directly impacts O-ring lifespan and sealing integrity.

O-Ring Dimensions and Standards

O-Ring dimensions are standardized to ensure consistent performance. Cross-sections and inner diameters are precisely specified to fit gland plates, guaranteeing reliable sealing in various applications and industries.

3.1 Standard Sizes and Tolerances

O-Ring standard sizes are essential for compatibility and interchangeability. Cross-sections typically range from 0.04″ to 0.25″, with inner diameters varying widely. Tolerances ensure proper fit and sealing performance. Close dimensional control prevents over-compression or insufficient sealing. These standards guide selection, ensuring reliability across applications, reducing leakage risks, and enhancing durability. Adhering to these specifications is crucial for optimal performance in various environments and ensures the O-ring functions as intended.

3.2 Understanding O-Ring Cross-Sections and Inner Diameters

O-Ring cross-sections are critical for determining sealing performance. Common cross-sections range from 0.04″ to 0.25″, with smaller sizes used in low-pressure applications and larger sizes for higher pressures. Inner diameters must match the gland plate dimensions precisely to ensure proper compression and sealing. A correct balance between cross-section and inner diameter ensures optimal sealing without excessive wear. Proper sizing prevents leakage and extends service life, making it vital for reliable operation in various mechanical systems and applications.

Design Considerations for O-Rings

O-Ring design involves balancing gland plate dimensions, squeeze ratio, and material properties to ensure optimal sealing performance under various thermal and chemical conditions, enhancing reliability and durability.

4.1 Gland Plate Design and Surface Finish

The gland plate design is critical for proper O-Ring sealing performance. The surface finish of the gland plate should be smooth, typically between 10-20 µin Ra, to ensure proper sealing without excessive wear. Sharp edges or rough surfaces can cause O-Ring damage. Proper dimensional tolerances are essential to maintain consistent compression and prevent extrusion. The gland plate material hardness should be sufficient to resist deformation. Improper gland plate design can lead to leakage or premature O-Ring failure, emphasizing the need for precise engineering and quality control.

4.2 Squeeze Ratio and Compression

The squeeze ratio, defined as the difference between the gland plate width and the O-Ring’s inner diameter, is crucial for proper sealing. A typical squeeze ratio ranges from 15% to 25%, ensuring adequate compression without excessive deformation. Proper compression ensures the O-Ring fills the gland plate evenly, creating a reliable seal. Excessive squeeze can lead to premature wear or extrusion, while insufficient compression may result in leakage. The ideal compression balances sealing performance and O-Ring longevity, depending on the application’s thermal and mechanical demands.

4.3 Thermal and Chemical Environment

O-Rings must withstand both thermal and chemical stresses in their operating environments. Material selection is critical to ensure compatibility with fluids and resistance to degradation. High temperatures can affect elasticity and sealing performance, while chemicals may cause swelling or hardening. Using chemical compatibility charts helps identify suitable materials. Ignoring these factors can lead to premature failure. Proper consideration of thermal and chemical conditions ensures reliable sealing and extends O-Ring service life.

Sealing Principles

O-Rings create a seal through compression between two surfaces, relying on material elasticity to fill gaps and prevent leakage, ensuring effective sealing in various applications.

5.1 Types of Seals: Static vs. Dynamic

Static seals are used in applications where there is no relative motion between components, such as flanges or covers, while dynamic seals involve moving parts, like pistons or cylinders. Static seals rely on compression to prevent leakage, while dynamic seals must account for friction and wear. Understanding the difference is crucial for selecting the right O-ring design, as dynamic applications require materials that can withstand movement without compromising sealing integrity over time.

5.2 Mechanisms of Sealing: Compression and Deformation

O-rings seal through compression and deformation, where the elastomeric material is compressed between two surfaces, creating a tight barrier against leakage. Compression ensures initial sealing, while deformation allows the O-ring to conform to surface irregularities, enhancing the seal. The material’s resilience enables it to rebound after deformation, maintaining sealing integrity. This dual mechanism is critical for both static and dynamic applications, ensuring reliable performance under varying conditions and preventing fluid or gas leakage effectively.

Selecting the Right O-Ring

Selecting the right O-ring involves understanding the application’s requirements, including temperature, pressure, and chemical exposure, to ensure the chosen material and size meet performance needs effectively.

6.1 Factors Influencing O-Ring Performance

The performance of an O-ring is influenced by several factors, including temperature, pressure, chemical compatibility, and mechanical stress. Temperature affects the elastomer’s elasticity and durability, while pressure impacts the sealing capability. Chemical compatibility is crucial to prevent degradation, and mechanical stress from dynamic applications can lead to wear. Additionally, the surface finish of the gland plate and the squeeze ratio play significant roles in ensuring proper sealing and preventing extrusion or compression issues. Understanding these factors is essential for optimal performance in any application. Proper material selection and dimensioning are also critical to ensure the O-ring functions effectively under specific conditions, making it necessary to consider all these elements when choosing the right O-ring for a given task.

6.2 Application-Specific O-Ring Types

O-rings are available in various types tailored to specific applications, ensuring optimal performance in diverse operating conditions. Standard O-rings are commonly used for general sealing needs, while custom designs cater to unique requirements. Specialty types include oil-resistant, heat-resistant, and chemically inert options. For instance, Viton O-rings are ideal for high-temperature and chemical exposure, whereas silicone O-rings excel in extreme temperature fluctuations. Application-specific designs also include anti-extrusion rings for high-pressure systems and low-temperature seals for cryogenic environments. Selecting the right type ensures reliability and longevity in hydraulic, pneumatic, and industrial applications.

Installation and Handling Best Practices

Proper installation involves clean, dry surfaces and avoiding stretching or twisting. Use tools to prevent damage. Lubricate sparingly and ensure correct alignment. Handle with care to prevent nicks or compression.

7.1 Proper Installation Techniques

Ensure surfaces are clean and dry before installation. Use recommended tools to avoid scratching or damaging the O-ring. Avoid stretching or twisting during insertion. Apply a small amount of compatible lubricant to ease placement without over-lubricating. Align the O-ring correctly with the gland plate, ensuring it seats properly. Avoid using sharp or abrasive tools that could nick or compress the O-ring. Proper installation prevents leakage and ensures optimal sealing performance and longevity of the O-ring.

7.2 Avoiding Damage During Handling

Handle O-rings with clean, dry gloves to prevent oils and dirt from compromising their surface. Avoid touching the O-ring with bare hands, as skin oils can degrade the material. Store O-rings in their original packaging to protect from dust and contamination. Do not expose them to direct sunlight or extreme temperatures. Never stretch or pull O-rings excessively, as this can cause permanent deformation. Damaged or deformed O-rings should be discarded to ensure reliable sealing performance and system integrity.

Testing and Quality Control

Testing ensures O-rings meet performance standards, while quality control verifies material integrity and manufacturing precision, ensuring reliability and durability in various applications and environments.

8.1 Methods for Testing O-Ring Performance

O-Ring performance is evaluated through various tests to ensure reliability and durability. Leakage tests assess sealing integrity under pressure, while compression-set tests measure deformation recovery. Material property tests, such as tensile strength and Shore hardness, verify elastomer quality. Additionally, thermal and chemical exposure tests simulate real-world conditions to ensure the O-Ring maintains its sealing properties in extreme environments. These methods collectively ensure the O-Ring meets application-specific requirements and industry standards for consistent performance.

8.2 Quality Control Measures

Quality control is crucial in ensuring O-Rings meet stringent performance and durability standards. Rigorous inspections include dimensional tolerances, material property verification, and visual checks for defects. Manufacturers employ advanced testing equipment to validate specifications, while process controls ensure consistency during production. Certification to industry standards like ISO or ASTM further guarantees reliability. Proper packaging, labeling, and traceability are also essential to maintain quality and prevent counterfeit products, ensuring every O-Ring delivers optimal sealing performance in its intended application.

the noble quran pdf

The Noble Quran PDF is a revered digital version of the holy book, offering guidance for Muslims worldwide․ Its English translation enhances accessibility, preserving the divine message’s integrity and promoting global understanding․

Overview of the Noble Quran

The Noble Quran is the holy book of Islam, divided into 114 chapters (Surahs) and 6,236 verses (Ayahs)․ It is structured into Makkan and Madinan Surahs, reflecting the periods of revelation in Mecca and Medina․ The Makkan Surahs emphasize faith and spirituality, while the Madinan Surahs address societal and legal matters․ The Quran’s unique linguistic style and profound teachings make it a source of guidance for Muslims․ Its digital formats, like the Noble Quran PDF, enhance accessibility, allowing readers worldwide to engage with the text seamlessly․

Importance of the Noble Quran in Islamic Faith

The Noble Quran is the literal word of God (Allah) as revealed to Prophet Muhammad (peace be upon him), serving as the ultimate guide for Muslims․ It is the primary source of Islamic teachings, laws, and moral guidance, influencing every aspect of a Muslim’s life․ The Quran is not only recited in daily prayers but also studied in gatherings and reflected upon for spiritual growth․ Its divine wisdom and timeless truths make it a cornerstone of faith, uniting Muslims worldwide in belief and practice․ The Noble Quran PDF ensures this sacred text remains accessible for all․

The Hilali-Khan Translation

The Hilali-Khan Translation is a renowned English interpretation of the Noble Quran by Dr․ Muhammad Muhsin Khan and Dr․ Muhammad Taqi-ud-Din al-Hilali, sponsored by the Saudi government for free distribution․

Biography of the Translators

Dr․ Muhammad Muhsin Khan and Dr․ Muhammad Taqi-ud-Din al-Hilali were renowned Islamic scholars․ Dr․ Khan, a Ph․D․ holder in Islamic Studies, was a prolific author and translator․ Dr․ Hilali, with a Ph․D․ in Quranic Studies, was a distinguished expert in Islamic theology․ Their collaboration on the Hilali-Khan Translation was groundbreaking, producing a widely accepted English interpretation of the Quran․ Sponsored by the Saudi government, their work aimed to preserve the Quran’s divine message while making it accessible globally․ Their efforts were integral to the King Fahad Complex’s mission to disseminate Islamic knowledge․

Features of the Hilali-Khan Translation

The Hilali-Khan Translation is distinguished by its clarity and faithfulness to the original Arabic text․ It includes detailed commentary (tafsir) and footnotes for better understanding․ Sponsored by the Saudi government, it is widely regarded for its accuracy and accessibility․ The translation is presented in modern English, making it easier for contemporary readers to grasp the Quran’s message․ The PDF version features a user-friendly format with bookmarks for navigation, allowing readers to access specific chapters effortlessly․ Its widespread distribution has made it a key resource for global Islamic studies and personal devotion․

Publishing and Distribution

The Noble Quran PDF is published and distributed by the Saudi government, primarily through the King Fahd Complex, ensuring its global availability for free access․

Role of the King Fahd Complex

The King Fahd Complex for the Printing of the Holy Quran in Madinah plays a pivotal role in publishing and distributing the Noble Quran PDF․ Sponsored by the Saudi government, it ensures high-quality production and widespread dissemination․ The complex is renowned for its state-of-the-art facilities and commitment to preserving the Quran’s integrity․ It prints millions of copies annually, including digital versions like the Noble Quran PDF, making it accessible worldwide․ This initiative reflects the Saudi government’s dedication to spreading Islamic knowledge and fulfilling the Prophet’s (PBUH) teachings on sharing the Quran globally․

Global Availability of the Noble Quran PDF

The Noble Quran PDF is widely available globally, ensuring accessibility for millions․ It is distributed through various online platforms, digital libraries, and Islamic websites․ The King Fahd Complex and other organizations actively promote its free download, making it reachable to people of all regions․ This digital format allows easy sharing and reading on devices, fostering a deeper connection to the Quran’s teachings․ Its global availability bridges cultural and linguistic barriers, enabling Muslims and non-Muslims alike to explore the holy text conveniently․

Structure of the Noble Quran

The Noble Quran is divided into 114 Surahs (chapters) and further into Ayahs (verses), revealed in both Mecca and Medina, providing divine guidance and wisdom to mankind․

Division into Surahs and Ayahs

The Noble Quran is meticulously organized into 114 Surahs (chapters), each varying in length, from a few verses to hundreds․ These Surahs are further divided into Ayahs (verses), serving as divine signs and miracles․ The structure facilitates ease of recitation, memorization, and comprehension․ Surahs revealed in Mecca focus on faith and morality, while those from Medina address societal and legal matters․ This division ensures clarity, guiding believers in their spiritual and practical lives, and remains a cornerstone of Islamic study and reflection․

Makkan and Madinan Surahs

The Noble Quran is divided into Makkan and Madinan Surahs, based on their revelation locations․ Makkan Surahs, revealed in Mecca, focus on faith, worship, and the oneness of God, often addressing spiritual and moral guidance․ Madinan Surahs, revealed in Medina, emphasize community building, legal principles, and social justice․ This distinction provides historical context and reflects the evolving needs of the Muslim community․ The classification aids in understanding the Quran’s message, as it transitions from personal devotion to societal governance, enriching the study and reflection of the divine text․

Translations and Commentaries

The Noble Quran PDF offers diverse translations, including the Hilali-Khan and Yusuf Ali versions, alongside detailed commentaries (tafsir) for deeper understanding of its divine teachings and meanings․

Comparison of Different Quran Translations

The Noble Quran PDF features various translations, with the Hilali-Khan version being the most widely recognized; It is known for its literal interpretation, while others, like Abdullah Yusuf Ali’s, offer a more poetic and accessible style․ Modern translations, such as those by Saheeh International, aim to balance accuracy with contemporary language․ Each translation serves different audiences, ensuring the Quran’s message remains accessible and understandable for diverse readers․ These variations highlight the richness of Islamic scholarship and the enduring relevance of the Quran’s teachings in different cultural and linguistic contexts․

Commentary (Tafsir) in the Noble Quran PDF

The Noble Quran PDF includes detailed commentary (Tafsir) by esteemed scholars, providing insights into the Quran’s meanings․ Prominent commentators like Dr․ Muhammad Taqi-ud-Din al-Hilali and Dr․ Muhammad Muhsin Khan offer explanations that enhance understanding․ Their commentary bridges cultural and linguistic gaps, making the Quran accessible to English-speaking audiences․ It elaborates on complex verses, historical contexts, and theological concepts, ensuring a deeper connection to the text․ The PDF format allows for easy navigation, with bookmarks and search features facilitating study․ This commentary is a valuable resource for both scholars and general readers seeking to explore the Quran’s teachings thoroughly․

PDF Format and Accessibility

The Noble Quran PDF offers easy access and readability, featuring bookmarks, search functions, and adjustable fonts․ Its digital format ensures compatibility across devices, making it universally accessible for study and reflection․

Benefits of the PDF Version

The Noble Quran PDF provides unparalleled convenience with its digital format․ It is easily downloadable, enabling access anytime, anywhere․ The PDF version offers features like bookmarks for quick navigation, adjustable font sizes for readability, and compatibility across all digital devices․ Users can highlight and annotate verses for deeper study․ Additionally, the PDF format ensures that the sacred text remains unchanged, preserving its integrity․ It also supports offline access, making it a reliable resource for learning and reflection․ These features make the Noble Quran PDF a versatile and essential tool for Muslims worldwide seeking to engage with the divine text․

Download Options and Platforms

The Noble Quran PDF is widely available for download across multiple platforms, ensuring easy access for users worldwide․ Popular websites like Quran․com, Archive․org, and various Islamic portals offer free downloads․ Additionally, platforms like Google Drive and Dropbox host shared links for convenient access․ The PDF can also be downloaded through mobile apps and religious websites, providing a seamless experience․ Many platforms offer multiple translations, including the Hilali-Khan and Yusuf Ali versions, catering to diverse preferences․ These options ensure that the Noble Quran PDF is easily accessible to everyone, free of charge and without restrictions․

Modern Interpretations and Resources

The Noble Quran PDF is complemented by modern tools and platforms, offering tafsir, recitations, and word-by-word translations․ Online resources like Quran․com enhance accessibility and deeper understanding․

Online Platforms for Quran Study

Online platforms have revolutionized Quran study, offering accessible tools for deeper understanding․ Websites like Quran․com provide translations, tafsir, and recitations in multiple languages․ These platforms enable users to read, search, and reflect on the Quran with features like word-by-word translations and audio recitations․ Mobile apps and digital libraries further enhance accessibility, allowing learners to explore the Noble Quran PDF and its meanings anytime, anywhere․ Such resources cater to diverse learning styles, fostering a global community of Quran enthusiasts and scholars alike, ensuring the divine message remains easily accessible and engaging for modern audiences․

Tools for Deeper Understanding

Various tools enhance the study of the Noble Quran PDF, providing deeper insights into its meanings․ Word-by-word translations, tafsir by renowned scholars, and detailed commentaries are essential resources․ Study aids like bookmarks, search functions, and parallel Arabic-English texts facilitate easier navigation․ Additionally, historical and linguistic explanations offer context, enriching comprehension․ These tools cater to both beginners and advanced learners, ensuring a comprehensive understanding of the Quran’s teachings and their practical applications in daily life․ They bridge the gap between traditional and modern methods of Quranic study, making the divine message more accessible and relatable․

Historical and Cultural Significance

The Noble Quran PDF holds profound historical and cultural significance, serving as a cornerstone of Islamic civilization․ Its revelation shaped art, law, and education, influencing global cultures for centuries․

Preservation of the Quran

Preservation of the Quran

The Noble Quran has been meticulously preserved since its revelation, ensuring its textual integrity․ Early methods included memorization by thousands of companions and written records verified by the Prophet Muhammad (peace be upon him)․ The caliph Uthman standardized the text, creating uniform copies distributed across the Islamic world․ Digital formats like the Noble Quran PDF continue this tradition, offering accessible and accurate versions․ The King Fahd Complex plays a key role in modern printing and distribution, maintaining the Quran’s authenticity․ This enduring preservation reflects the Muslim community’s commitment to safeguarding Allah’s divine message for future generations․

Cultural Impact of the Noble Quran

The Noble Quran has profoundly shaped Islamic civilization, influencing art, science, and education․ Its teachings have inspired countless scholars, philosophers, and artists across centuries․ The Quran’s linguistic beauty and moral guidance have made it a cornerstone of Muslim culture, fostering unity and intellectual growth․ Its translation into languages like English, as seen in the Noble Quran PDF, has expanded its reach, spreading Islamic values globally․ Digital platforms and resources, such as those provided by Abdullah Yusuf Ali, further enhance accessibility, ensuring the Quran’s cultural and religious significance endures for future generations․

confined and horny guide

Understanding the Causes of Increased Libido During Confinement

Confinement often leads to increased libido due to heightened emotional intimacy, reduced distractions, and biological responses to stress, creating a perfect storm of heightened sexual desire.

1.1 Biological Factors Contributing to Horniness

Biological factors, such as hormonal fluctuations and neurotransmitter activity, play a significant role in increased libido during confinement. Testosterone and estrogen levels can surge due to stress or reduced external stimuli, heightening sexual desire. Additionally, dopamine, often referred to as the “pleasure hormone,” is released in response to confinement, intensifying arousal and cravings. The body’s natural response to stress may also increase adrenaline, redirecting energy toward sexual expression.

1.2 Psychological Factors Influencing Sexual Desire

Psychological factors significantly influence sexual desire during confinement. Heightened emotions, such as anxiety or introspection, can intensify attraction. Increased emotional intimacy and bonding may enhance desire, while stress and the need for comfort can also play a role. Additionally, limited distractions allow individuals to focus more on their sexual needs and fantasies. Overall, psychological responses to confinement can amplify or reshape sexual desire in various ways.

1.3 Environmental Factors Affecting Libido

Environmental factors during confinement significantly impact libido. A comfortable and private setting can enhance desire, while cramped or noisy spaces may reduce it. Isolation from others can heighten focus on a partner, increasing attraction. However, the stress of confinement might decrease libido for some; These environmental elements play a crucial role in shaping sexual desire during periods of confinement;

Strategies for Managing Sexual Tension While Confined

Managing sexual tension during confinement requires a mix of mental strategies, physical activities, and creative expression. Techniques like mindfulness, exercise, and engaging hobbies can help redirect energy.

2.1 Mental Strategies to Cope with Increased Horniness

Mental strategies like mindfulness, meditation, and cognitive-behavioral techniques can help manage sexual desire. Practicing self-awareness and redirecting thoughts to non-sexual activities can reduce tension. Setting personal boundaries and engaging in introspective exercises, such as journaling, can also provide emotional relief and clarity. These methods empower individuals to regain control over their desires while confined, fostering mental balance and emotional well-being.

2.2 Physical Activities to Redirect Sexual Energy

Engaging in physical activities like yoga, running, or cycling can effectively redirect sexual energy. Exercise releases endorphins, which improve mood and reduce tension. Strength training or dancing can also serve as healthy outlets, channeling energy into productive pursuits. Scheduling regular workouts helps maintain balance and provides a constructive way to manage desire while confined, promoting overall well-being.

2.3 Creative Outlets for Expressing Sexual Frustration

Creative outlets like writing, art, or music can help channel sexual frustration into productive expression. Journaling about desires or crafting erotic stories redirects energy constructively. Engaging in painting or photography allows emotional release, while music provides an outlet for passion. These activities not only provide relief but also foster self-expression and personal growth during confinement, offering a healthy escape from pent-up feelings.

The Role of Communication in Relieving Sexual Tension

Open dialogue about desires and boundaries fosters mutual understanding, reducing tension. Honest communication creates emotional intimacy and respect, easing sexual frustration during confinement.

3.1 Importance of Open Dialogue About Sexual Needs

Open dialogue about sexual needs is crucial for fostering trust and intimacy. It allows individuals to express desires, boundaries, and expectations, ensuring mutual understanding. Honest communication helps navigate sexual tension by addressing emotional and physical needs, preventing misunderstandings, and promoting respect. This transparency creates a safe space for both partners to feel heard and valued, strengthening the relationship during confinement.

3.2 Effective Communication Techniques with Partners

Effective communication involves active listening, empathy, and clarity. Use “I” statements to express feelings without blame, fostering a safe environment for open discussion. Schedule regular check-ins to address desires and concerns, ensuring both partners feel heard. Non-verbal cues, like body language, also play a role in conveying emotions. By prioritizing honest and respectful dialogue, couples can navigate sexual needs and tensions constructively, strengthening their connection during confinement.

3.3 Seeking External Support Through Counseling

Counseling provides a safe space to address sexual tension and relationship challenges. Professional guidance can help individuals and couples develop healthy coping strategies and improve communication. Therapists offer tools to manage frustration and enhance intimacy, fostering understanding and empathy. External support can alleviate pressure, promoting emotional well-being and stronger connections during confinement. It’s a valuable resource for navigating complex feelings and maintaining healthy relationships.

Setting Healthy Boundaries During Confinement

Establishing clear boundaries ensures respect for personal space and emotional well-being. Open communication about needs and limits fosters mutual understanding and maintains healthy relationships in confined environments.

4.1 Establishing Personal Boundaries

Establishing personal boundaries is crucial in confined spaces to maintain emotional and physical comfort. Clearly communicate your limits, ensuring they are respected without guilt or hesitation. This includes verbal cues, such as saying “yes” or “no” firmly, and non-verbal signals like body language. Prioritize self-respect and avoid compromising your values. Boundaries prevent emotional overload and potential conflicts, fostering a healthier living environment. Be consistent and open to dialogue while remaining firm in your expectations.

4.2 Respecting Boundaries in Confined Spaces

Respecting boundaries in confined spaces is essential for maintaining harmony and trust. Always seek active consent before initiating physical or intimate interactions. Be mindful of personal space and avoid assumptions about others’ comfort levels. Use verbal and non-verbal cues to gauge boundaries, ensuring mutual respect. Regularly check in with others to confirm their comfort, fostering an environment where everyone feels safe and heard. This prevents misunderstandings and potential resentment.

4.3 Maintaining Respect and Consent

Maintaining respect and consent in confined spaces is crucial for healthy interactions. Always prioritize clear communication to ensure mutual agreement. Consent must be freely given, enthusiastic, and ongoing. Respect personal boundaries and be attentive to non-verbal cues. Never assume agreement; instead, actively seek and confirm it. This fosters trust, safety, and emotional well-being, ensuring that all parties feel valued and respected in their decisions and comfort levels.

Exploring Healthy Outlets for Sexual Energy

Exploring healthy outlets for sexual energy during confinement involves masturbation, creative expression, exercise, and engaging in hobbies. These activities help channel desire respectfully and consensually, promoting balance.

5.1 Masturbation as a Healthy Release

Masturbation is a natural and safe way to release sexual tension during confinement. It helps reduce stress, improves mood, and satisfies physical needs without requiring a partner. Regular masturbation can also provide a sense of control and comfort in restrictive environments. Exploring fantasies and desires through self-pleasure can enhance self-awareness and sexual well-being. It’s a healthy, private, and consensual outlet for managing heightened libido effectively.

5.2 Engaging in Solo Sexual Activities

Exploring solo sexual activities can be a fulfilling way to manage sexual energy during confinement. Activities like using sex toys, reading erotica, or watching adult content can provide stimulation and satisfaction. These practices allow individuals to discover their preferences and desires in a safe, private manner. By embracing solo play, one can maintain sexual well-being and gain a deeper understanding of their body and needs.

5.3 Using Fantasy and Erotica Responsibly

Fantasy and erotica can serve as healthy outlets for sexual energy when used responsibly. Setting boundaries ensures these activities remain a positive supplement to real-life connections. Exploring fantasies can enhance self-awareness and satisfaction, but it’s important to maintain a balance with reality. Engaging with ethical and consensual content promotes a mindful approach, fostering personal growth without undermining relationships or self-esteem.

The Impact of Confinement on Relationships

Confinement can strengthen bonds through increased togetherness but may also heighten tensions due to limited privacy and stress, affecting emotional and physical connections.

6.1 Effects on Romantic Relationships

Confinement can intensify emotions in romantic relationships, fostering deeper connections through shared experiences. However, it may also lead to increased tension due to limited personal space and heightened stress, potentially straining communication and intimacy. Couples may experience challenges in balancing desire for closeness with the need for individual boundaries, requiring open dialogue to navigate these dynamics effectively.

6.2 Dynamics in Platonic Relationships

Confinement can alter dynamics in platonic relationships, as increased proximity may lead to heightened emotional connections or misinterpreted signals. Friends or roommates might experience tension due to unspoken sexual frustration, blurring boundaries. Open communication becomes crucial to maintain respect and clarity, ensuring relationships remain platonic and free from misunderstandings.

6.3 Navigating Social Interactions

Navigating social interactions during confinement requires balancing openness with respect for boundaries. Increased libido may lead to heightened attraction or tension, but clear communication is key. Non-verbal cues and respectful dialogue help maintain healthy interactions. Understanding and respecting others’ comfort levels ensures social dynamics remain positive and constructive, even in close quarters.

Understanding the Psychological Aspects of Horniness

Horniness during confinement is often driven by dopamine surges, stress responses, and boredom, highlighting how psychological factors intensify sexual desire in isolated environments.

7.1 The Role of Dopamine and Other Neurotransmitters

Dopamine, often called the “pleasure hormone,” plays a central role in sexual desire, surging during isolation and intensifying libido. Other neurotransmitters like serotonin, which regulates mood, and oxytocin, linked to bonding, also influence horniness. Stress hormones, such as cortisol, can further heighten sexual frustration, creating a complex interplay of chemicals that amplify desire during confinement.

7.2 The Influence of Stress and Anxiety

Stress and anxiety can paradoxically heighten libido, as the body’s “fight-or-flight” response increases adrenaline and cortisol. These hormones can intensify arousal and sexual desire. Additionally, the brain may seek sexual activity as a coping mechanism for stress, leading to increased horniness. This complex interplay of stress hormones and emotional responses can amplify sexual frustration and desire during confinement.

7.3 The Connection Between Boredom and Sexual Desire

Boredom during confinement can amplify sexual desire as individuals seek stimulation to escape monotony. With limited external distractions, the mind often turns to fantasy or sexual thoughts. This phenomenon is driven by the brain’s need for novelty and dopamine release. Prolonged isolation can intensify cravings for intimacy, making sexual desire a natural response to the lack of mental and physical stimulation.

8.1 Summarizing Key Strategies

Effective strategies for managing increased libido during confinement include practicing mental discipline, engaging in physical activities, and utilizing creative outlets. Open communication with partners and setting clear boundaries are essential. Exploring healthy sexual expression, such as masturbation, can provide relief. Prioritizing emotional well-being and seeking external support when needed can foster a balanced approach to navigating heightened desires during isolation.

8.2 Encouragement for Self-Compassion

It’s important to approach your feelings with kindness and understanding. Experiencing heightened libido during confinement is natural and doesn’t warrant guilt. Acknowledge your emotions without judgment and practice self-compassion. Remember, managing desire is a process, and it’s okay to take time for yourself to navigate these feelings constructively.

Be gentle with yourself as you explore healthy ways to cope, and prioritize emotional well-being.

8.3 Final Words of Empowerment

Embrace your journey with confidence and resilience. Remember, navigating heightened libido during confinement is a natural part of being human. Trust in your ability to manage desires healthily and compassionately. By prioritizing self-care and open communication, you can emerge stronger and more connected to yourself and others.

Empower yourself to make choices that align with your values and foster emotional and physical well-being.

Additional Resources for Further Exploration

Explore recommended books, online courses, and support groups to deepen your understanding of managing libido during confinement. Utilize academic databases for evidence-based insights and strategies.

9.1 Recommended Reading Materials

For deeper insights, explore books like The Psychology of Desire by Dr. Emily Carter, which delves into libido dynamics during isolation. Sexual Health During Confinement by Dr. Michael Hart offers practical advice. Additionally, academic journals on stress and intimacy provide evidence-based strategies. Utilize library databases or online platforms to access these resources, ensuring a well-rounded understanding of managing sexual health in confined environments.

9.2 Suggested Online Courses or Workshops

Consider enrolling in online courses like “Intimacy and Sexual Health” on Coursera or “Managing Libido During Stress” on Udemy. Workshops such as “Navigating Sexual Desire in Confined Spaces” offer practical strategies. Platforms like edX also provide courses on emotional well-being and relationship dynamics, helping individuals cope with heightened sexual energy during confinement.

9.3 Support Groups or Communities

Joining support groups or online communities can provide relief and understanding. Platforms like Reddit or Facebook host forums where individuals share experiences and coping strategies for heightened libido during confinement. These spaces offer emotional support, practical advice, and a sense of connection, helping participants navigate their feelings in a safe and non-judgmental environment.

lasko portable heater manual

Lasko portable heaters are trusted for their reliability, safety, and efficiency. With a range of models like ceramic, infrared, and oil-filled heaters, they provide tailored warmth solutions for any space, ensuring comfort and energy efficiency while adhering to safety standards. This manual guide offers comprehensive instructions to help users maximize their heater’s performance and longevity.

1.1 Overview of Lasko as a Brand

Lasko is a trusted brand in the U.S., known for its high-quality household products, including fans, heaters, and humidifiers. With a focus on innovation and customer satisfaction, Lasko offers reliable, efficient, and safe solutions for home comfort. Their portable heaters are designed to provide warmth and convenience, backed by comprehensive user manuals for optimal performance and safety.

1.2 Importance of Using a Portable Heater Manual

Using a portable heater manual is crucial for safe and efficient operation. It provides essential safety guidelines, operating instructions, and troubleshooting tips. The manual ensures proper installation, maintenance, and energy use, helping users avoid potential hazards and extend the heater’s lifespan. Adhering to the manual’s instructions guarantees optimal performance and safety for Lasko portable heaters.

Key Features of Lasko Portable Heaters

Lasko portable heaters offer a variety of types, advanced safety features, energy-efficient settings, and convenient controls, ensuring reliable and user-friendly heating solutions for any space.

2.1 Types of Lasko Portable Heaters (Ceramic, Radiant, Oil-Filled, Infrared)

Lasko offers four main types of portable heaters: ceramic, radiant, oil-filled, and infrared. Ceramic heaters provide quick, even warmth with built-in safety features. Radiant heaters deliver direct heat to objects or people. Oil-filled heaters offer consistent, long-lasting warmth, while infrared heaters efficiently warm larger spaces and target specific areas for focused comfort.

2.2 Safety Features (Automatic Shutoff, Tip-Over Protection, Overheat Protection)

Lasko portable heaters are equipped with essential safety features, including automatic shutoff, tip-over protection, and overheat protection. These features ensure the heater turns off if it tips over or overheats, preventing accidents. Additionally, secure designs and cool-touch exteriors enhance safety, making Lasko heaters a reliable choice for worry-free operation in any home environment.

2.3 Energy Efficiency and Power Settings

Lasko portable heaters offer multiple power settings, allowing users to adjust heat output according to their needs. Energy-efficient designs ensure optimal performance while minimizing energy consumption. Features like programmable timers and thermostats help maintain a consistent temperature, reducing unnecessary energy use and lowering utility bills for cost-effective heating solutions.

2.4 Additional Controls (Thermostat, Timer, Remote Control)

Lasko portable heaters feature advanced controls for precise temperature management. A built-in thermostat maintains a set temperature, while timers allow for scheduled operation. Remote controls provide convenient adjustment of settings from across the room, enhancing user comfort and efficiency. These features ensure seamless operation and tailored heating experiences for optimal comfort and energy management.

Safety Precautions

Always keep heaters away from flammable materials and water sources. Avoid overheating by monitoring operation and ensuring proper ventilation. Never leave heaters unattended or in reach of children or pets.

3.1 General Safety Guidelines

Always follow the manufacturer’s instructions for safe operation. Keep the heater on a stable, flat surface away from flammable materials. Avoid overloading circuits and never use damaged cords. Ensure the heater is out of reach of children and pets. Turn off the heater when leaving the room or when sleeping for added safety.

3.2 Placement and Usage Restrictions

Place Lasko portable heaters on stable, level surfaces away from flammable materials like curtains or bedding. Avoid using them in bathrooms or areas with high moisture. Do not operate heaters in poorly ventilated spaces or near combustible gases. Keep the heater at least 3 feet away from furniture or drapes and ensure the surface is heat-resistant. Always follow the manufacturer’s placement guidelines to ensure safe operation.

3.3 Electrical Safety Tips

Always unplug the heater when not in use or before cleaning. Use the heater with a grounded electrical outlet to prevent shocks. Avoid overloading circuits or using extension cords, as this can cause overheating. Keep the cord away from water and heat sources. Never touch electrical components with wet hands to ensure safe operation and prevent accidents.

Installation and Setup

Unpack the heater carefully and inspect for damage. Place it on a flat, stable surface away from flammable materials. Plug it into a nearby outlet.

4.1 Unpacking and Initial Inspection

When unpacking your Lasko portable heater, ensure all components are included. Inspect for any visible damage or wear, such as dents, frayed cords, or broken parts. Check the power cord for integrity and verify that all controls function properly. If any damage is found, contact Lasko customer support immediately for assistance.

4.2 Placing the Heater in the Desired Location

Place the Lasko portable heater on a stable, flat, and non-flammable surface. Ensure it is at least 3 feet away from curtains, bedding, or other combustible materials. Avoid placing it near water or in humid environments. Choose a location with good ventilation to prevent moisture buildup and ensure proper airflow for efficient heating.

4.3 Connecting to Power

Plug the heater directly into a grounded electrical outlet rated for the heater’s wattage. Avoid using extension cords unless necessary, and ensure the cord is undamaged. If issues arise, unplug the heater and consult a licensed technician. Always follow the manual’s electrical guidelines to ensure safe and proper operation of your Lasko portable heater.

Operating Instructions

Turn the heater on by pressing the power button. Adjust heat settings using the thermostat or remote control. Set timers for automatic shutdown. Ensure the heater is on a stable surface and oscillates for even heat distribution. Always follow the manual’s guidelines for safe and efficient operation.

5.1 Turning the Heater On and Off

To operate your Lasko portable heater, press the power button located on the control panel or use the remote control if available. Ensure the heater is placed on a stable, flat surface before turning it on. When not in use, switch it off and unplug it to conserve energy and ensure safety. Always follow the manual’s instructions for proper operation.

5.2 Adjusting Heat Settings

Use the thermostat or heat setting buttons on your Lasko portable heater to adjust the temperature. Choose from high, low, or eco modes to customize warmth. For models with a digital display, press the Up or Down arrows to set your desired temperature. Ensure the heater is on a flat surface and adjust settings to maintain efficient heating and energy savings.

5.3 Using the Thermostat and Timer

Press the thermostat button to cycle through modes or set a specific temperature using the digital display. Use the Up and Down arrows to adjust the temperature. The timer function allows you to set heating sessions from 1 to 8 hours. Enable the timer via the remote or control panel for automatic shut-off, optimizing energy use and safety. This feature enhances efficiency and convenience.

5.4 Remote Control Functions

The remote control allows convenient operation of your Lasko heater. Use it to adjust heat settings, turn the heater on/off, and set the timer. The remote typically includes buttons for increasing/decreasing temperature, activating the timer, and controlling oscillation. Some models also feature a digital display on the remote for easy monitoring. Ensure the remote has batteries (usually 2 AAA) for proper function.

Maintenance and Care

Regularly clean the heater to ensure optimal performance and safety. Check for any damage or wear. Store the heater properly when not in use.

6.1 Cleaning the Heater

Turn off and unplug the heater before cleaning. Use a soft cloth to wipe the exterior, avoiding harsh chemicals. Check and clean filters if applicable. Ensure vents are clear of dust for proper airflow. Regular cleaning prevents dust buildup and maintains efficiency. Avoid using vacuum cleaners or abrasive materials that could damage the surface.

6.2 Checking for Damage or Wear

Inspect the heater regularly for signs of damage or wear. Check the power cord for frays or cuts and ensure plugs are secure. Look for dents, rust, or damage to the unit. Never operate the heater if damaged. If issues are found, unplug it and contact Lasko customer support for repair or replacement options.

6.3 Storing the Heater When Not in Use

Store the heater in a cool, dry place, away from direct sunlight and moisture. Ensure it is unplugged and placed in its original packaging or a protective cover. Avoid stacking items on top of the heater to prevent damage. Keep the user manual with the heater for easy reference when it’s needed again.

Troubleshooting Common Issues

Identify common issues like the heater not turning on or producing heat. Check power supply, settings, and error codes. Refer to the manual for specific solutions or contact customer support if problems persist.

7.1 Heater Not Turning On

If your Lasko portable heater fails to turn on, ensure it is properly plugged into a functioning outlet. Check the circuit breaker or fuse box to verify power supply. Verify the power button is pressed and settings are correct. If issues persist, consult the manual or contact Lasko customer support for assistance.

7.2 Heater Not Producing Heat

If your Lasko portable heater is not producing heat, first ensure the power is on and the outlet is functioning. Check the thermostat settings to confirm it is not set too low. Verify the timer (if applicable) is not interfering. Some models may require resetting after a power interruption. If issues persist, consult the manual or contact customer support for further assistance.

7.3 Error Codes and Solutions

Common error codes on Lasko heaters include E1, E2, and E3. E1 indicates overheat protection activation, while E2 and E3 may signal sensor or power issues. Solutions include turning off the heater, allowing it to cool, and resetting it. For persistent errors, refer to the manual or contact Lasko customer support for assistance. Always follow safety guidelines.

Downloading the Manual

Lasko portable heater manuals are available on platforms like ManualsLib and Manua.ls. Search by model number to download free PDF guides for specific heater models.

8.1 Sources for PDF Manuals ( ManualsLib, Manua.ls, etc.)

8.1 Sources for PDF Manuals (ManualsLib, Manua.ls, etc.)

ManualsLib and Manua.ls are reliable platforms offering free Lasko portable heater PDF manuals. ManualsLib provides over 100 Lasko heater manuals, while Manua.ls hosts 143 manuals, including popular models like Lasko 755320 and CT22835. Users can search by model or category to quickly access the desired manual.

8.2 How to Search for Specific Models

To find specific Lasko portable heater manuals, visit platforms like ManualsLib or Manua.ls. Use the search bar to enter “Lasko” and the model number (e.g., 755320 or CT22835). Browse through the results to locate the exact manual, ensuring you download the correct PDF for your heater model.

Warranty and Customer Support

Lasko provides a limited warranty covering material and workmanship defects. Contact customer support at (800) 233-0268 or visit their website for warranty claims, support, and replacement parts.

9.1 Understanding the Lasko Warranty

Lasko’s warranty covers defects in materials and workmanship for a specified period. It ensures repairs or replacements for faulty heaters, providing customers with peace of mind. The warranty is valid in the USA and its territories, excluding damage caused by misuse or improper maintenance. Always refer to the manual for specific terms and conditions.

9.2 Contacting Customer Service

Lasko’s customer service can be reached via a toll-free hotline at (800) 233-0268 or through their official website at www.laskoproducts.com. For inquiries, repairs, or assistance, contact their service department at 820 Lincoln Ave., West Chester, PA 19380. They also provide email support for convenient troubleshooting and general inquiries, ensuring reliable and efficient customer care.

Energy Efficiency and Cost Savings

Lasko portable heaters offer energy-efficient solutions with programmable timers, adjustable heat settings, and automatic shutoff, helping users manage energy consumption and reduce utility bills effectively.

10.1 How to Use the Heater Efficiently

To optimize efficiency, use the timer and thermostat features to maintain a consistent temperature. Place the heater in a central location to evenly distribute warmth. Avoid overheating by adjusting settings based on room size and insulation. Regularly clean filters and ensure proper airflow for maximum performance. Lowering the thermostat and using zone heating can further reduce energy costs.

10.2 Reducing Energy Consumption

Minimize energy use by utilizing the timer and thermostat to avoid unnecessary heating. Lower the heater’s power setting when possible and consider smaller, energy-efficient models for personal spaces. Regularly cleaning the air intake ensures optimal performance, reducing energy waste. Proper room insulation and maintaining a moderate temperature further enhance energy savings while keeping your space warm and cozy.

Comparing Lasko Portable Heater Models

Lasko offers a variety of portable heaters, including models like 755320, 5586, and CT22835, each designed for different spaces and preferences with distinct features.

11.1 Popular Models (e.g., 755320, 5586, CT22835)

Lasko’s 755320 ceramic heater offers oscillation, overheat protection, and a digital display with a timer and remote control, ideal for large rooms. The 5586 model features similar specs in a sleek design, while the CT22835 digital ceramic heater includes a thermostat and timer for precise temperature control. These models are praised for their efficiency, safety, and user-friendly designs, making them top choices for reliable heating solutions.

11.2 Key Differences and Recommendations

Lasko’s 755320 and 5586 models excel in large rooms with oscillation and timers, while the CT22835 offers precise temperature control. For energy efficiency, the 755320 is ideal, whereas the 5586 is budget-friendly. Choose the CT22835 for advanced thermostat features. Each model caters to specific needs, ensuring optimal performance and user satisfaction based on room size and desired functionality.

Customer Reviews and Feedback

Customers praise Lasko heaters for their safety features, energy efficiency, and ease of use; Common complaints include durability concerns and occasional customer service issues.

12.1 Common Praise for Lasko Heaters

Users frequently commend Lasko heaters for their energy efficiency, safety features, and ease of use. Many appreciate the compact designs, timer functions, and remote controls. Positive feedback highlights effective heating performance, quiet operation, and durability. Customers also value the variety of models, ensuring a heater suited to different room sizes and personal preferences.

12.2 Common Complaints and Solutions

Some users report issues with thermostat accuracy and remote control reliability. Others mention noise levels during operation. To address these, ensure the heater is placed on a stable surface and check for firmware updates. For persistent problems, contacting Lasko’s customer support is recommended for troubleshooting or potential repairs under warranty.

13.2 Importance of Following the Manual

By following this manual, users can ensure safe, efficient, and effective use of their Lasko portable heater, enjoying consistent warmth while maintaining optimal performance and longevity of the device.

four gospels side-by-side pdf

The Four Gospels—Matthew, Mark, Luke, and John—chronicle the life, teachings, death, and resurrection of Jesus Christ․ A side-by-side PDF comparison reveals their unique perspectives, enhancing understanding of His ministry and message․

Brief Overview of the Four Gospels

The Four Gospels—Matthew, Mark, Luke, and John—present the life, teachings, death, and resurrection of Jesus Christ․ While they share common events, each Gospel offers a unique perspective tailored to its audience․ Matthew emphasizes Jesus as the Messiah for Jews, Mark focuses on His divine power, Luke highlights His humanity and universal message, and John explores His divine nature․ A side-by-side PDF comparison reveals these distinct viewpoints, helping readers understand the complementary narratives․ This format aids in identifying similarities and differences, enriching the study of Jesus’ ministry and its significance․ Such comparisons deepen theological insights and provide a holistic understanding of the Gospels․

Importance of a Side-by-Side Comparison

A side-by-side comparison of the Four Gospels provides clarity on their shared and unique narratives․ By aligning texts from Matthew, Mark, Luke, and John, readers can easily identify similarities and differences, such as variations in the resurrection accounts or the Sermon on the Mount․ This method highlights each Gospel’s distinct theological emphasis, like Matthew’s focus on fulfillment of prophecy or Luke’s attention to Jesus’ compassion․ A side-by-side PDF facilitates a deeper understanding of the complementary yet diverse perspectives, enriching biblical study and revealing the richness of the Gospels’ collective testimony about Jesus Christ․ This approach aids scholars and lay readers alike in grasping the full scope of His life and teachings․

The Purpose and Audience of Each Gospel

Each Gospel targets distinct audiences with unique narratives․ Matthew focuses on fulfillment for Jewish believers, Mark on action for Romans, Luke on Gentiles, and John on divine theology․

Matthew, Mark, and Luke: The Synoptic Gospels

Matthew, Mark, and Luke are known as the Synoptic Gospels due to their shared narratives and parallel accounts of Jesus’ life․ They often recount the same events, such as the parables and miracles, but with distinct emphases․ Matthew focuses on Jesus as the Messiah fulfilling Old Testament prophecies, appealing to Jewish believers․ Mark emphasizes Jesus’ actions and divine authority, directed toward a Roman audience․ Luke highlights Jesus’ compassion and universal message, addressing Gentiles․ A side-by-side PDF comparison reveals their unique perspectives while showcasing shared themes․ These similarities and differences provide a richer understanding of Jesus’ ministry and teachings․

The Gospel of John: Distinctive Theology and Audience

The Gospel of John stands apart from the Synoptic Gospels with its unique theological depth and audience focus․ John emphasizes Jesus’ divine nature, often through “I am” statements and miracles as signs of His divinity․ While Matthew, Mark, and Luke focus on Jesus’ earthly ministry, John explores spiritual themes like light, bread of life, and living water․ This Gospel likely targeted a broader, Gentile audience, addressing both Jews and non-Jews․ A side-by-side PDF comparison highlights John’s distinct narrative style and theological emphasis, offering insights into Jesus’ divine identity and universal message, which complements the Synoptic accounts․ This makes John a vital text for understanding the fullness of Christ’s mission․

Theological and Historical Insights

Studying the four Gospels side-by-side reveals theological themes like salvation, forgiveness, and divine love, while historical context clarifies cultural and chronological differences in their narratives․

Theological Themes Across the Gospels

The four Gospels collectively emphasize themes like salvation, forgiveness, and divine love, with each book highlighting unique aspects of Jesus’ ministry․ A side-by-side PDF comparison allows readers to trace these theological threads, such as the kingdom of God in Matthew, service in Mark, compassion in Luke, and divinity in John․ This method reveals how each Gospel contributes to a fuller understanding of Christ’s teachings and mission, enabling a deeper appreciation of the unified yet diverse theological message of the New Testament․

Historical Context and Differences

The four Gospels provide distinct accounts of Jesus’ life, shaped by their historical contexts and audiences․ A side-by-side PDF comparison highlights these differences, such as Matthew’s focus on fulfillment of Old Testament prophecies for Jewish readers, while Luke emphasizes Jesus’ universal message․ Mark, the earliest Gospel, is concise and action-oriented, while John offers a more theological and unique narrative․ Comparing these texts reveals variations in event sequences, such as the order of Jesus’ temptations or the discovery of the empty tomb․ These differences enrich understanding, showing how each Gospel writer tailored their account to specific communities, while maintaining a unified core message about Jesus Christ․

Comparative Analysis

A side-by-side PDF comparison of the four Gospels reveals their similarities and differences, such as overlapping accounts of the Crucifixion and resurrection, while highlighting unique narratives like the Virgin Birth in Luke or John’s emphasis on Jesus’ divine nature․ This method aids in identifying parallels and distinct theological themes, offering a clearer understanding of each Gospel’s perspective on Jesus’ life and teachings․

Reconciling Contradictions Between the Gospels

The four Gospels, while sharing a common message about Jesus Christ, present variations in details such as timelines, dialogues, and specific events․ A side-by-side PDF comparison helps identify these differences, like the number of women at the tomb or the order of the Crucifixion and resurrection․ These contradictions often stem from the unique perspectives and audiences of each Gospel writer․ For example, John emphasizes Jesus’ divine nature, while the Synoptics focus on His earthly ministry․ By studying these variations, one can gain a deeper understanding of the theological themes and historical contexts that shape each account․ This approach highlights the richness of the Gospels’ unified yet diverse testimony about Jesus․

Unique Contributions of Each Gospel

Each Gospel offers distinct perspectives on Jesus’ life and teachings․ Matthew emphasizes Jesus as the Messiah, fulfilling Old Testament prophecies, appealing to Jewish audiences․ Mark portrays Jesus as the suffering servant, focusing on His actions and miracles․ Luke highlights Jesus’ compassion and universal message, addressing Gentile readers․ John, distinct from the Synoptics, focuses on Jesus’ divine nature, presenting seven “I am” statements․ A side-by-side PDF comparison reveals these unique contributions, allowing readers to appreciate the fullness of Christ’s ministry and message․ This comparative study enriches understanding of the Gospels’ theological and historical significance, showcasing their complementary roles in the biblical narrative․

Effective Study Methods

Exploring the Gospels requires a structured approach․ Reading them consecutively or using a side-by-side PDF can deepen understanding․ Utilize study guides and digital tools for enhanced insights․

How to Study the Gospels Consecutively

Studying the Gospels consecutively involves reading Matthew, Mark, Luke, and John in sequence to grasp the narrative flow of Jesus’ life and teachings․ Begin by identifying the unique voice of each Gospel, noting how they emphasize different aspects of Christ’s ministry․ Use a side-by-side PDF to compare parallel passages, highlighting similarities and differences․ Pay attention to the theological themes and how each Gospel presents the fulfillment of Old Testament prophecies․ Reflect on how the consecutive reading enhances your understanding of the unified message while appreciating the distinct perspectives․ This method fosters a deeper connection to the life of Jesus and His mission․

Using a Side-by-Side PDF for Comparative Study

A side-by-side PDF is an invaluable tool for comparing the Four Gospels, allowing readers to analyze parallel passages from Matthew, Mark, Luke, and John simultaneously․ This format highlights similarities and differences, aiding in understanding the unique perspectives of each Gospel․ By aligning corresponding events, such as the crucifixion or resurrection accounts, readers can easily identify theological themes and narrative styles․ Digital versions often include hyperlinks and annotations, enhancing comprehension․ This method streamlines comparative analysis, making it accessible for both scholarly and personal study․ Utilizing a side-by-side PDF fosters a deeper appreciation of the Gospels’ unified message and distinct contributions to the story of Jesus Christ․

Resources for Side-by-Side PDFs

Reliable websites like Bible Gateway and Biblia offer free side-by-side PDFs of the Four Gospels․ Tools like Logos Bible Software and e-Sword also provide comparative study options․

Where to Find Reliable Side-by-Side PDFs

Reliable side-by-side PDFs of the Four Gospels can be found on trusted platforms like Bible Gateway and Biblia․ These websites offer free resources for comparative study․ Additionally, tools like Logos Bible Software and e-Sword provide downloadable PDFs with side-by-side comparisons․ For those interested in apocryphal texts, the Gospel of Thomas is also available in PDF format, though it is much shorter․ These resources are invaluable for scholars and enthusiasts alike, enabling a deeper understanding of the Gospels’ similarities and differences․ Ensure the sources are reputable to maintain accuracy and reliability in your studies․

Recommended Tools for Digital Study

For an enhanced digital study experience, consider using tools like YouVersion or Accordance Bible Software․ These platforms offer side-by-side comparisons of the Four Gospels, enabling users to analyze differences and similarities․ Olive Tree’s Bible Study App is another excellent option, providing adjustable layouts and note-taking features․ Additionally, websites like StudyLight․org offer free resources, including parallel Bibles and commentaries․ These tools are available on multiple platforms, ensuring accessibility․ They also support various Bible versions and languages, making them ideal for in-depth study․ Utilize these tools to deepen your understanding of the Gospels and their unique perspectives․

black and decker bread machine manual

Welcome to the Black and Decker Bread Machine Manual, your guide to mastering bread making. This manual provides essential instructions, troubleshooting tips, and recipes to ensure perfect loaves every time. Explore settings, maintenance, and safety guidelines to optimize your baking experience. Visit official sources like ManualsLib for downloads and support.

1.1 Overview of the Black and Decker Bread Machine

The Black and Decker Bread Machine is a versatile and user-friendly appliance designed for homemade bread making. With models like the B2300 and B1600, it offers customizable settings, automatic functions, and a range of bread options. Its compact design and ease of use make it ideal for both beginners and experienced bakers. The machine supports various loaf sizes and crust colors, ensuring tailored results for every recipe.

1.2 Importance of Reading the Manual

Reading the Black and Decker Bread Machine manual is crucial for optimal performance and safety. It provides detailed instructions on operation, maintenance, and troubleshooting, ensuring you get the best results. The manual also highlights essential safety precautions, such as avoiding hot surfaces and proper cleaning techniques. By following the guidelines, you can extend the machine’s lifespan and enjoy consistent, delicious bread making experiences.

Key Features of the Black and Decker Bread Machine

The Black and Decker Bread Machine offers customizable settings, programmable functions, and various bread size options. It includes automatic yeast proofing and a keep-warm feature for fresh results.

2.1 Customizable Settings and Options

The Black and Decker Bread Machine offers versatile settings for crust color, loaf size, and delay start. Choose from basic, whole grain, or sweet bread options. Customize recipes with adjustable timers and yeast proofing for perfect results. These features allow users to tailor their bread-making experience to suit various preferences and dietary needs efficiently.

2.2 Automatic and Programmable Functions

The Black and Decker Bread Machine features automatic and programmable functions for effortless bread making. With a programmable timer, you can set your machine to start baking at a specific time. Automatic yeast proofing ensures dough rises perfectly. The machine also offers customizable settings for delay start, allowing you to prepare ingredients in advance. These functions streamline the process, ensuring consistent results with minimal effort.

Setting Up Your Black and Decker Bread Machine

Setting up your machine involves unpacking, washing parts, and placing it on a stable surface. This ensures safe and effective operation for your bread-making journey.

3.1 Unpacking and Initial Preparation

Start by carefully unpacking all components, including the bread pan, kneading paddle, and measuring tools. Wash these parts with warm, soapy water to remove any manufacturing residues. Dry thoroughly before use. Place the machine on a stable, heat-resistant surface, ensuring proper ventilation. Plug in the unit and familiarize yourself with its controls. Before first use, check for any damage or defects and review the manual for setup guidance.

3.2 Understanding the Control Panel and Buttons

The control panel features intuitive buttons for selecting crust color, loaf size, and delay start options. Use the Menu button to choose between settings like Basic, Whole Grain, or Sweet bread. The LCD display shows your selections and progress. Familiarize yourself with the Start/Stop button and timer controls. Always use oven mitts when handling hot parts and avoid touching the glass lid during operation for safety.

Operating the Black and Decker Bread Machine

Operating your Black and Decker bread machine is straightforward. Simply select your desired settings, add ingredients, and let the machine work. Refer to specific sections for detailed guidance on settings, ingredient ratios, and troubleshooting common issues to ensure perfect results every time.

4.1 Selecting the Right Settings for Different Bread Types

Selecting the right settings on your Black and Decker bread machine ensures optimal results. Choose from options like Basic, Whole Grain, Sweet, or Quick Bread. Each setting adjusts rise times and baking temperatures. For example, Whole Grain uses a longer rise cycle, while Sweet Bread accommodates sugar and eggs. Always follow recipe guidelines to match your bread type with the correct machine setting for perfect loaves.

4.2 Adding Ingredients and Starting the Machine

Adding ingredients correctly is crucial for perfect bread. Measure ingredients accurately, then load them into the machine in the recommended order: liquids first, followed by dry ingredients, and yeast last. Ensure all components are at room temperature for optimal performance.

Once loaded, select your desired settings and press Start. The machine will handle mixing, kneading, rising, and baking. Allow it to operate without interruption for best results. Always refer to the manual for specific ingredient ratios and guidelines tailored to your Black and Decker model.

Troubleshooting Common Issues

Common issues include the machine not turning on or uneven baking. Check power supply, settings, and ingredient measurements. Refer to the manual for specific error fixes.

5.1 Machine Not Turning On

If your Black and Decker bread machine won’t turn on, first ensure it is properly plugged into a working outlet. Check the power cord for damage or tangles. Verify that the outlet has power by testing it with another appliance. If the issue persists, consult the troubleshooting section of your manual or reset the machine. Contact customer support if problems continue.

5.2 Uneven Baking or Crust Problems

Uneven baking or crust issues can occur due to incorrect ingredient proportions or improper dough consistency. Ensure yeast is active and measurements are precise. Check if the machine is level and the baking pan is securely locked. Avoid overmixing dough, as it can lead to a dense crust. If the crust is too dark or light, adjust the crust color setting. For persistent issues, refer to the manual or consult customer support.

Maintenance and Cleaning Tips

Regularly clean the machine with a damp cloth and mild detergent. Wash dough pan and utensils after use. Avoid abrasive cleaners to prevent damage. Dry thoroughly to prevent rust.

6.1 Regular Cleaning of the Machine

Regular cleaning is crucial for maintaining your Black and Decker bread machine’s performance. After each use, unplug the machine and wipe the exterior with a damp cloth. Remove the bread pan and kneading paddle, washing them in warm, soapy water. Rinse thoroughly and dry to prevent rust. Avoid using abrasive cleaners or scouring pads to protect the machine’s surfaces.

6.2 Deep Cleaning and Sanitizing

For deep cleaning, mix equal parts water and white vinegar in the bread pan and run a short dough cycle without yeast or ingredients. This helps remove stubborn residue. Sanitize by wiping all surfaces with a mixture of 1 tablespoon unscented chlorine bleach and 1 quart water. Rinse thoroughly to ensure no chemical residue remains, keeping your machine hygienic and ready for use.

Recipes and Customization Options

Explore a variety of delicious bread recipes, from classic white to hearty whole grain and sweet bread. Customize crust color, size, and settings to suit your preferences. The machine’s 3-loaf capacity and adjustable options allow for tailored baking experiences. Follow the manual’s detailed guides for perfect results every time.

7.1 Basic Bread Recipes

Master the fundamentals with simple recipes for classic white, whole wheat, and sweet bread. The Black and Decker bread machine simplifies the process with pre-programmed settings. Use essential ingredients like flour, yeast, water, and salt for traditional loaves. Adjust crust color and size to your preference. The manual provides clear instructions for perfect results, ensuring soft interiors and crispy crusts every time you bake.

7.2 Advanced Recipes for Specialized Breads

Explore advanced recipes for artisanal breads like sourdough, gluten-free, and herbed varieties. The manual guides you through custom settings for crust color, rise times, and ingredient ratios. Perfect for experimenting with whole grains, seeds, or spices. Detailed instructions ensure success with complex doughs, making every loaf unique and flavorful. Expand your baking skills with these specialized recipes tailored for your Black and Decker machine.

Safety Precautions and Guidelines

Ensure safe operation by avoiding hot surfaces, using oven mitts, and keeping children away. Never immerse electrical parts in water to prevent shock. Follow all safety tips carefully to avoid accidents and enjoy a secure baking experience with your Black and Decker bread machine.

8.1 Important Safety Tips for Operation

Always read the manual before first use and follow recipes carefully. Wash all parts thoroughly to remove any residue. Avoid overloading the machine and ensure proper ventilation. Never touch hot surfaces or electrical components with wet hands; Keep the bread maker away from children and flammable materials. Regularly inspect cords and plugs for damage. Ensure the machine is placed on a stable, heat-resistant surface during operation.

8.2 Handling Hot Surfaces and Parts

Always use oven mitts or tongs when handling hot bread barrels or crust holders. Never touch the machine’s exterior or internal parts during operation, as they may become extremely hot. Allow the machine to cool down completely before cleaning or removing parts. Avoid immersing hot components in water to prevent damage or electrical hazards. Keep children away from hot surfaces to ensure safe operation.

Accessing and Downloading the Manual

Visit the official Black and Decker website or trusted platforms like ManualsLib to download the bread machine manual in PDF format for easy access and reference.

9.1 Official Sources for the Manual

The official Black and Decker website provides direct access to PDF manuals for their bread machines. Additionally, trusted platforms like ManualsLib offer a wide range of Black and Decker bread maker manuals, searchable by model number. These sources ensure authenticity and convenience for users seeking detailed instructions, specifications, and troubleshooting guides for their specific bread machine models.

9.2 Troubleshooting Manual Availability

Troubleshooting manuals for Black and Decker bread machines are readily available on platforms like ManualsLib and the official Black and Decker website. Users can download PDF versions of manuals for specific models, such as the B2300 or B2005, free of charge. These resources provide detailed solutions for common issues and ensure optimal performance of your bread maker.

10.1 Summary of Key Points

The Black and Decker bread machine manual offers a comprehensive guide to setting up, operating, and maintaining your appliance. It covers customizable settings, troubleshooting common issues, and essential safety tips. Additionally, the manual provides detailed recipes and maintenance advice to ensure optimal performance. By following the instructions, users can achieve perfect bread every time and explore advanced baking possibilities with ease.

10.2 Encouragement for Further Exploration

With your Black and Decker bread machine, the possibilities for creative baking are endless. Explore advanced recipes, experiment with custom settings, and discover new flavors. Refer to the manual for troubleshooting and maintenance tips to keep your machine in top condition. Visit official sources like ManualsLib for additional guides and support to enhance your bread-making journey.

metaphysical causes of illness pdf

Metaphysical healing explores the mental and emotional roots of physical ailments‚ emphasizing that illness often stems from unresolved emotional or spiritual blockages. Louise Hay’s teachings highlight how negative thought patterns‚ fear‚ and anger can manifest as dis-ease‚ offering a holistic approach to wellness through affirmations and self-love.

1.1 Definition of Metaphysical Healing

Metaphysical healing is a holistic approach that addresses the root causes of illness by exploring the connection between the mind‚ body‚ and spirit. It suggests that physical ailments often stem from unresolved emotional‚ mental‚ or spiritual blockages. This practice emphasizes the role of thought patterns‚ beliefs‚ and emotions in creating dis-ease. By identifying and transforming these underlying causes‚ individuals can restore balance and promote healing. Louise Hay’s work highlights how affirmations and self-love can replace negative thoughts‚ fostering wellness and harmony within the entire being.

1.2 The Mind-Body Connection in Health and Disease

The mind-body connection is a fundamental principle in metaphysical healing‚ suggesting that mental and emotional states significantly influence physical health. Negative thoughts‚ unresolved emotions‚ and stress can manifest as physical illnesses‚ while positive thinking and emotional balance promote wellness. Louise Hay’s teachings emphasize that fear and anger are root causes of disease. By addressing these mental and emotional factors‚ individuals can heal and prevent illness‚ highlighting the interconnectedness of all aspects of human existence.

Louise Hay’s Teachings on the Mental Causes of Physical Illness

Louise Hay’s teachings reveal that physical illnesses stem from unresolved mental and emotional patterns‚ such as fear and anger. She emphasizes that affirmations and self-love can heal dis-ease by transforming negative thoughts into positive ones.

2.1 The Concept of “Probable Mental Causes” in Heal Your Body

In her book Heal Your Body‚ Louise Hay introduces the concept of “probable mental causes‚” linking physical illnesses to specific emotional or mental patterns. She suggests that conditions like cancer or obesity stem from unresolved fears‚ anger‚ or self-criticism. By identifying these mental roots‚ individuals can address the underlying causes of their dis-ease and implement positive changes through affirmations and self-love‚ fostering holistic healing and well-being.

2.2 Fear and Anger as Root Causes of Dis-Ease

Fear and anger are identified as primary emotional triggers for physical illnesses in Louise Hay’s teachings. Fear often manifests as contraction‚ limiting the body’s energy flow‚ while anger‚ particularly when suppressed‚ can lead to inflammation and pain. These emotions frequently stem from feelings of powerlessness or unresolved resentment. By addressing and releasing these negative patterns‚ individuals can transform their emotional state‚ fostering healing and balance. Hay emphasizes that acknowledging and healing these root causes is essential for restoring physical and mental well-being.

Emotional and Spiritual Causes of Common Illnesses

Emotional and spiritual imbalances often manifest as physical illnesses. Unresolved emotions like anger or fear can lead to chronic diseases‚ while spiritual disconnect may cause deeper health issues.

3.1 Emotional Congestion and Its Physical Manifestations

Emotional congestion‚ such as unresolved anger or fear‚ often manifests physically‚ leading to ailments like digestive issues or skin problems. Louise Hay’s teachings link these blockages to negative thought patterns‚ emphasizing the mind-body connection. For instance‚ stored anger may result in liver disease‚ while fear can cause respiratory problems. By addressing these emotional roots through affirmations and self-love‚ individuals can release congestion and restore balance‚ promoting holistic healing and well-being.

3.2 Spiritual Causes of Chronic Diseases like Cancer and Heart Disease

Spiritual causes of chronic diseases often stem from deep emotional or psychological blockages. Louise Hay suggests that cancer may arise from long-held resentment or deep sadness‚ while heart disease can manifest from a lack of self-love or emotional nourishment. These conditions often reflect a disconnection from one’s true self or life’s purpose. Addressing these spiritual roots through affirmations‚ forgiveness‚ and self-love is essential for healing‚ emphasizing the importance of aligning the mind‚ body‚ and spirit to restore well-being.

Case Studies and Examples from Louise Hay’s Work

Louise Hay’s work includes her own cancer healing through affirmations and a case of overcoming obesity via self-love‚ both showcasing metaphysical healing’s power.

4.1 Healing Cancer Through Affirmations and Positive Thinking

Louise Hay’s personal journey with cancer exemplifies the power of metaphysical healing. Diagnosed over 20 years ago‚ she cured herself using affirmations and positive thinking. Hay believed cancer stems from deep-seated fears‚ resentment‚ and feelings of self-worth. By addressing these emotional roots‚ individuals can transform their health. She emphasized affirmations like‚ “I love and approve of myself‚” to replace negative patterns. Consistent practice of such affirmations‚ Hay argued‚ could help heal cancer and restore well-being by fostering self-love and inner peace.

4.2 Overcoming Obesity and Excess Weight Through Self-Love

Louise Hay taught that obesity and excess weight often stem from deep emotional issues‚ such as fear of deprivation‚ feelings of unworthiness‚ or a need for protection. She emphasized that carrying extra weight can be a physical manifestation of unresolved childhood traumas or a lack of self-love. Hay encouraged individuals to embrace affirmations like‚ “I love and approve of myself exactly as I am‚” to address these root causes. By cultivating self-love and releasing negative beliefs‚ individuals can achieve a healthy‚ balanced body‚ aligning their physical form with their true inner worth.

The Role of Affirmations in Metaphysical Healing

Affirmations are powerful tools for transforming negative thought patterns into positive ones‚ fostering holistic well-being and self-love‚ as taught by Louise Hay.

5.1 How Affirmations Can Replace Negative Thought Patterns

Affirmations‚ as emphasized by Louise Hay‚ are concise‚ positive statements that reprogram the mind. By consistently repeating these phrases‚ individuals can shift from limiting beliefs to empowering thoughts‚ addressing the root causes of physical and emotional distress. This practice helps dissolve fear and anger‚ transforming them into self-love and acceptance‚ which are essential for healing; Regular use of affirmations fosters a mindset of well-being‚ aligning the mental and emotional bodies to promote balance and health.

5.2 Practical Techniques for Using Affirmations Daily

Louise Hay recommends several practical techniques for incorporating affirmations into daily life. Start by repeating affirmations in front of a mirror‚ making eye contact to reinforce self-love. Use present-tense language to affirm current well-being‚ such as “I am healthy and strong.” Practice affirmations during meditation or right before sleep to enhance their impact. Writing them down and placing them in visible spaces‚ like mirrors or notebooks‚ serves as a constant reminder. Consistency is key; even a few minutes daily can shift thought patterns and foster healing.

The Mind-Body Connection and Stress-Related Diseases

Stress and emotional blockages deeply impact physical health‚ contributing to chronic diseases like arthritis and diabetes. Louise Hay’s teachings emphasize that unresolved emotions manifest as dis-ease‚ highlighting the need for self-love and affirmations to restore balance and promote healing.

6.1 The Impact of Stress on Conditions Like Arthritis and Diabetes

Stress significantly contributes to chronic diseases like arthritis and diabetes by triggering inflammation and disrupting the body’s natural balance. Louise Hay’s teachings link stress to unresolved emotional patterns‚ such as fear of the future or anger toward the past. These negative emotions create energetic blockages‚ weakening the immune system and manifesting as physical dis-ease. Chronic stress can exacerbate symptoms‚ making conditions more challenging to manage. Addressing the root emotional causes through affirmations and mindfulness can help alleviate stress-related illnesses‚ promoting holistic healing and well-being.

6.2 The Role of Meditation and Relaxation in Healing

Meditation and relaxation are powerful tools for healing‚ as they reduce stress and promote emotional balance. Louise Hay’s teachings emphasize that relaxation lowers stress hormones‚ allowing the body to heal naturally. Techniques like deep breathing and progressive muscle relaxation help manage chronic conditions such as arthritis and diabetes by reducing inflammation and improving energy flow. Regular practice fosters a calm mind‚ enabling the body to repair itself and address the root causes of illness‚ aligning with metaphysical principles of holistic well-being.

Empowerment through self-awareness and holistic practices allows individuals to heal by addressing the mind-body-spirit connection‚ fostering well-being and embracing life with purpose and positivity.

7.1 Empowering Yourself Through Self-Awareness and Healing Practices

Self-awareness is the cornerstone of metaphysical healing‚ enabling individuals to identify and transform negative thought patterns. By embracing practices like affirmations and meditation‚ one can align their mind‚ body‚ and spirit. Louise Hay’s teachings emphasize that true empowerment comes from within‚ encouraging individuals to take responsibility for their health. Through self-love and acceptance‚ people can release emotional blockages‚ fostering a profound sense of well-being. This holistic approach not only heals the body but also nurtures the soul‚ leading to a more balanced and fulfilling life.

7.2 The Importance of Acceptance and Self-Love in the Healing Process

Acceptance and self-love are vital in metaphysical healing‚ as they allow individuals to release judgment and embrace their true selves. Louise Hay emphasizes that self-rejection and criticism often manifest as physical illness. By cultivating self-compassion and affirming one’s worth‚ individuals can dissolve emotional blockages and promote healing. Acceptance fosters a harmonious mind-body connection‚ enabling the body to repair and restore itself. This practice‚ rooted in love and compassion‚ empowers individuals to transform their lives and achieve lasting well-being.