All the Light We Cannot See: A Comprehensive Reading Guide
This guide delves into Anthony Doerr’s Pulitzer Prize-winning novel, exploring its intricate plot, compelling characters, and profound themes․
It examines the significance of radio, blindness, and the enduring human spirit amidst the devastation of World War II․
The narrative intertwines the fates of Marie-Laure and Werner, highlighting how seemingly disparate lives converge during wartime․
The story’s power lies in its exploration of moral ambiguity and the search for hope in the darkest of times․
Discussions will center on the symbolism embedded within the text, such as the model of Saint-Malo and the mysterious numbers broadcasted over the airwaves․
This guide aims to enhance your understanding and appreciation of this remarkable literary work․
Anthony Doerr’s All the Light We Cannot See, published in 2014, is a beautifully rendered and deeply moving historical novel that won the 2015 Pulitzer Prize for Fiction․ The story masterfully weaves together the lives of Marie-Laure LeBlanc, a blind French girl, and Werner Pfennig, a German orphan with a talent for radio technology, during the tumultuous years of World War II․
The novel’s structure is non-linear, shifting between timelines and perspectives, creating a rich tapestry of experiences and emotions․ Doerr’s prose is lyrical and evocative, painting vivid pictures of both the beauty and brutality of war-torn Europe․ The narrative unfolds against the backdrop of the siege of Saint-Malo, a pivotal moment in the war, and explores themes of resilience, hope, and the enduring power of human connection․
At its heart, All the Light We Cannot See is a story about finding light in the darkness, both literally and figuratively․ It examines how individuals navigate moral complexities and maintain their humanity in the face of unimaginable hardship․ The novel’s enduring appeal lies in its ability to resonate with readers on a deeply emotional level, prompting reflection on the nature of war, loss, and the importance of empathy․
II․ Historical Context: World War II in Europe
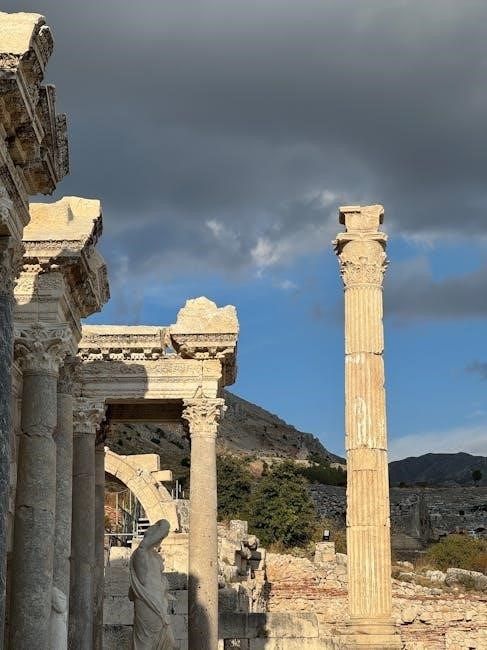
All the Light We Cannot See is firmly rooted in the historical realities of World War II, specifically the period between 1942 and 1944․ The novel vividly portrays life under Nazi occupation in France, including the pervasive fear, rationing, and the constant threat of denunciation․ The story’s setting, Saint-Malo, a walled port city in Brittany, was strategically important to the Germans and suffered extensive damage during the Allied siege․
The war’s impact on communication technology is central to the narrative, with Werner’s expertise in radio playing a crucial role․ During WWII, radio served as a vital tool for propaganda, intelligence gathering, and resistance movements․ The German military heavily relied on radio signals for coordinating troop movements and intercepting enemy communications․
Furthermore, the novel touches upon the brutal realities faced by civilians, including the displacement of populations and the atrocities committed against those deemed undesirable by the Nazi regime․ Understanding this historical context is essential for appreciating the depth and complexity of Doerr’s portrayal of wartime Europe and the challenges faced by its inhabitants․
The novel’s strength lies in its richly developed characters, each grappling with their own moral dilemmas amidst the chaos of war․ Marie-Laure LeBlanc, a blind French girl, is introduced as she and her father flee Paris with a potentially cursed diamond, seeking refuge with her great-uncle Etienne in Saint-Malo․ Her resilience and resourcefulness define her journey․
Werner Pfennig, a German orphan with a talent for radio repair, is presented as a promising student at Schulpforta, a harsh and disciplined boarding school․ His technical skills are quickly recognized by the Nazi regime, leading him down a path fraught with ethical compromises․
Etienne LeBlanc, Marie-Laure’s reclusive great-uncle, provides a safe haven and a connection to the French Resistance through his clandestine radio broadcasts․ Reinhold von Rumpel, a ruthless German officer obsessed with finding the Sea of Flames diamond, serves as the primary antagonist, driven by greed and a desperate search for immortality․ These characters, and their initial introductions, set the stage for a compelling and emotionally resonant narrative․
A; Marie-Laure LeBlanc

Marie-Laure’s blindness is not a limitation, but a catalyst for heightened senses and inner strength․ Forced to flee Paris with her father, carrying the legendary Sea of Flames diamond, she embodies courage and adaptability․ Her father meticulously crafts a wooden model of Saint-Malo, enabling her to navigate the city and fostering a deep connection to her surroundings․
Throughout the novel, Marie-Laure demonstrates remarkable resilience, learning to rely on her other senses and developing a profound understanding of the world around her․ Her connection with her great-uncle Etienne and his network of Resistance members provides her with purpose and a sense of belonging․
The model of Saint-Malo becomes a symbol of guidance and connection, ultimately linking her fate with Werner Pfennig’s․ Marie-Laure’s character arc showcases the power of the human spirit to overcome adversity and find hope even in the darkest of times, making her a truly unforgettable protagonist․
B․ Werner Pfennig
Werner is a brilliant young man with a natural aptitude for radio technology, initially captivated by the power of the medium for innocent exploration․ However, his skills are exploited by the Nazi regime, leading him down a path of moral compromise and internal conflict․ His time at Schulpforta shapes him, instilling both discipline and a growing awareness of the brutality surrounding him․
Throughout his journey, Werner grapples with the ethical implications of his work, tasked with tracking Resistance activity using his radio expertise․ He experiences firsthand the horrors of war and the suffering it inflicts on innocent civilians․ His internal struggle is central to the novel’s exploration of moral ambiguity․
Ultimately, Werner’s fate becomes intertwined with Marie-Laure’s, leading to a pivotal moment of redemption․ His decision to discard the Sea of Flames symbolizes his rejection of the destructive forces he has been complicit in, showcasing a yearning for a different future․
C․ Etienne LeBlanc
Etienne LeBlanc, Marie-Laure’s great-uncle, is a reclusive and complex character, deeply scarred by his experiences in the First World War and haunted by survivor’s guilt․ He provides a safe haven for Marie-Laure and her father in Saint-Malo, becoming a crucial figure in their survival during the Nazi occupation․
Initially appearing gruff and withdrawn, Etienne gradually reveals a hidden depth of kindness and courage, actively participating in the Resistance movement through subtle acts of defiance․ He utilizes his knowledge of Saint-Malo and his network of contacts to aid Allied forces, demonstrating a quiet heroism․
Etienne’s connection to the past, particularly his wartime trauma, shapes his present actions and his protective instincts towards Marie-Laure․ He embodies resilience and the enduring power of human connection in the face of adversity, offering a beacon of hope amidst the darkness․
D․ Reinhold von Rumpel
Reinhold von Rumpel is the primary antagonist of the novel, a ruthless and determined German gemologist obsessed with finding the “Sea of Flames” diamond․ His relentless pursuit drives much of the plot’s tension and embodies the destructive nature of greed and obsession during wartime․
Von Rumpel’s character is defined by his deteriorating health and his belief that the diamond possesses mystical properties capable of curing his illness․ This desperation fuels his cruelty and willingness to exploit others, including Marie-Laure, in his quest for the gem․
He represents the moral corruption at the heart of the Nazi regime, prioritizing personal gain above all else and demonstrating a complete disregard for human life․ His single-minded focus on the diamond ultimately leads to his downfall, highlighting the futility of material desires in the face of true human connection and resilience․
IV․ Major Themes Explored
“All the Light We Cannot See” masterfully explores several profound themes, most notably the power of human connection amidst the brutality of war․ The novel demonstrates how even in the darkest times, empathy, kindness, and shared experiences can offer solace and hope․
The significance of radio and communication is central, serving as a lifeline for characters like Marie-Laure and Werner, connecting them across geographical and ideological divides․ Radio symbolizes both the potential for propaganda and the possibility of resistance and shared humanity․
Blindness, both literal and metaphorical, is a recurring motif, challenging perceptions of sight and insight․ Marie-Laure’s blindness allows her to perceive the world in unique ways, while other characters are “blinded” by ideology or self-interest․ The novel also grapples with the moral ambiguities of war, presenting a nuanced portrayal of individuals caught in complex circumstances․
A․ The Power of Radio & Communication
Radio serves as a pivotal force throughout “All the Light We Cannot See,” transcending its function as mere technology to become a symbol of connection, resistance, and hope․ For Werner, radio represents an escape from his circumstances and a pathway to intellectual fulfillment, while for Marie-Laure, it provides a vital link to the outside world․

The broadcasts themselves carry significant weight, delivering both propaganda and clandestine messages of defiance․ The Frenchman’s transmissions, in particular, offer a beacon of hope and subtly guide Marie-Laure, demonstrating the power of information and coded communication․
Interestingly, the novel highlights the ironic role of radio in both uniting and dividing characters; Marie-Laure unknowingly aids Werner through her father’s broadcasts, while Werner’s skills are exploited by the Nazi regime․ The numbers transmitted over the airwaves, potentially coordinates for military installations, underscore the dual nature of this technology․
B․ Blindness as a Metaphor
Marie-Laure’s blindness is far more than a physical condition; it functions as a powerful metaphor for perception, understanding, and the limitations of sight in a world shrouded in darkness․ She “sees” the world through touch, sound, and memory, developing a heightened awareness that surpasses conventional vision․
Doerr skillfully uses Marie-Laure’s experience to challenge the reader’s own assumptions about how we perceive reality․ Her reliance on the model of Saint-Malo, for instance, demonstrates how spatial understanding can be constructed through tactile exploration and mental mapping․
Furthermore, blindness can be interpreted as a metaphor for the moral blindness of those who willingly participate in war and oppression․ Many characters, despite possessing physical sight, are unable to “see” the humanity of others or the consequences of their actions․ Marie-Laure’s inner vision ultimately allows her to navigate both the physical and moral complexities of her world․
C․ The Moral Ambiguity of War
“All the Light We Cannot See” avoids simplistic portrayals of good versus evil, instead presenting a nuanced exploration of moral ambiguity within the context of World War II․ Characters are forced to make difficult choices, often with devastating consequences, blurring the lines between right and wrong․
Werner Pfennig’s journey exemplifies this ambiguity․ Initially driven by a desire to escape poverty and utilize his technical skills, he becomes entangled in the Nazi regime’s machinery of war․ His internal conflict highlights the pressures and compromises individuals face during times of conflict․
Even Von Rumpel, the antagonist, is presented with a degree of complexity, driven by a desperate obsession rather than pure malice․ The novel acknowledges the suffering inflicted on all sides, including the civilian population, and the brutal realities faced by women during wartime, as tragically illustrated by the fate of those encountered by the caretaker․
D․ Resilience and Hope in Dark Times
Despite the pervasive darkness of war, “All the Light We Cannot See” powerfully demonstrates the enduring capacity for resilience and hope․ Marie-Laure’s blindness, rather than defining her limitations, becomes a source of strength and adaptability, allowing her to navigate a world thrown into chaos․
The novel showcases how small acts of kindness and connection can sustain the human spirit․ Etienne LeBlanc’s quiet resistance and unwavering support for Marie-Laure exemplify this, offering a beacon of light amidst the destruction․ Jutta’s unwavering belief in her brother, Werner, also embodies this theme․
The symbolic act of Werner ultimately discarding the diamond, returning it to the sea, represents a rejection of greed and a restoration of balance․ The connection forged between Marie-Laure and Jutta through the model of Saint-Malo signifies the enduring power of human connection, even across vast distances and profound loss, offering a glimmer of hope for the future․
V․ Plot Summary & Key Events
The narrative unfolds across occupied France and Germany, centering on two protagonists: Marie-Laure, a blind French girl, and Werner, a German orphan with a talent for radio technology․ The story begins with Marie-Laure and her father fleeing Paris with a potentially cursed diamond, “The Sea of Flames,” sought by the ruthless Sergeant-Major Reinhold von Rumpel․
Key events include Marie-Laure’s refuge in Saint-Malo with her great-uncle Etienne, and Werner’s rigorous training at the brutal Schulpforta academy․ His skills lead him to a unit tasked with locating illegal radio transmissions, unknowingly bringing him closer to Marie-Laure․
The climax occurs during the siege of Saint-Malo, where Marie-Laure’s broadcasts inadvertently aid the Allied forces․ Werner, grappling with his conscience, ultimately chooses to protect Marie-Laure, leading to a poignant and ambiguous resolution․ The diamond’s fate, returned to the sea, symbolizes a release from its destructive power․
A․ The Diamond – The Sea of Flames
“The Sea of Flames” is far more than a mere jewel; it’s a catalyst driving much of the novel’s plot and embodying a potent myth․ Legend dictates the diamond brings misfortune to its owner, a curse repeatedly demonstrated throughout the story, fueling von Rumpel’s obsessive pursuit․
The diamond’s history is shrouded in mystery, passed down through generations and believed to grant immortality – a belief that consumes von Rumpel․ However, the narrative suggests its true power lies in its ability to reveal and exacerbate existing flaws within individuals․
Werner’s ultimate act of discarding the diamond back into the ocean isn’t about its monetary value, but a deliberate attempt to break the cycle of misfortune․ He returns it to its origin, preventing further harm, and demonstrating a moral choice over personal gain․ Its inconspicuousness in the water contrasts with the prominent model house․
B․ Marie-Laure’s Escape from Paris

Marie-Laure’s hurried departure from Paris with her father is a pivotal moment, triggered by the escalating Nazi occupation and the looming threat to their safety․ This escape isn’t simply a physical relocation; it represents a loss of innocence and a forced adaptation to a world consumed by war․
Her father, a master locksmith at the Museum of Natural History, carries with him a significant responsibility – safeguarding the Sea of Flames diamond․ This adds another layer of urgency and danger to their journey, making them targets for those seeking the jewel’s power․
The escape to Saint-Malo, the walled port city, is fraught with peril, requiring careful planning and reliance on the kindness of strangers․ This journey establishes Marie-Laure’s resilience and resourcefulness, qualities she will need to survive the coming years․ The model of Saint-Malo becomes crucial for her navigation․
C․ Werner’s Training at Schulpforta
Werner Pfennig’s acceptance into Schulpforta, an elite Nazi training school, marks a turning point in his life, offering an escape from the coal mines but at a significant moral cost․ The school’s rigorous curriculum focuses on technical skills, particularly radio technology, shaping him into a valuable asset for the German military․
Schulpforta represents the indoctrination of youth, showcasing the Nazi regime’s efforts to mold a generation loyal to its ideology․ Werner’s initial idealism clashes with the brutality and ruthlessness he witnesses, creating internal conflict and foreshadowing his later struggles․
His exceptional talent for radio repair and direction finding quickly sets him apart, attracting the attention of superiors and propelling him towards a dangerous path․ The training emphasizes obedience and suppression of individuality, testing Werner’s conscience and ultimately influencing his decisions throughout the war․

D․ The Siege of Saint-Malo
The siege of Saint-Malo forms the climactic backdrop for the novel’s convergence of fates, transforming the walled city into a brutal battleground․ The German forces, under the command of Von Rumpel, desperately attempt to hold the city against the advancing Allied troops, resulting in widespread destruction and civilian suffering․
Marie-Laure and Etienne find themselves trapped within the city, relying on their resourcefulness and the intricate knowledge of Saint-Malo’s hidden passages to survive․ The model of the city, painstakingly crafted by Marie-Laure’s father, becomes a vital tool for navigation and resistance․
Werner’s role during the siege is pivotal, tasked with locating and eliminating a crucial radio transmitter․ His internal conflict intensifies as he grapples with the consequences of his actions and the moral implications of serving the Nazi regime․ The siege ultimately leads to a fateful encounter with Marie-Laure, altering both their lives forever․
VI․ Symbolism in the Novel
Doerr masterfully employs symbolism throughout All the Light We Cannot See, enriching the narrative with layers of meaning․ The model of Saint-Malo represents not only physical space but also memory, connection, and the preservation of a lost world, linking Marie-Laure to her father’s legacy and ultimately, to Jutta․
The numbers and radio transmissions symbolize both the destructive power of war and the potential for communication and connection․ They initially serve as tools for German military strategy, but ironically, facilitate Marie-Laure and Werner’s eventual meeting, becoming a beacon of hope amidst chaos․
The sea and water imagery recurs throughout the novel, representing both danger and renewal․ The Sea of Flames diamond embodies obsession and destruction, while the ocean itself symbolizes the vastness of fate and the possibility of release, as Werner ultimately returns the jewel to its source․
A․ The Model of Saint-Malo
The intricately crafted model of Saint-Malo serves as a potent symbol throughout Anthony Doerr’s novel, extending far beyond a simple representation of the walled city․ Created by Marie-Laure’s father, Daniel LeBlanc, it embodies his love, ingenuity, and dedication to his daughter’s education and independence, especially given her blindness․
For Marie-Laure, the model is a tactile map, a means of navigating and understanding the world around her, offering a sense of control and familiarity․ It becomes a crucial tool for survival during the siege of Saint-Malo, allowing her to evade capture and maintain a connection to her home․
Significantly, the model also acts as a bridge connecting Marie-Laure and Werner Pfennig, ultimately facilitating their encounter; It represents a shared humanity and a poignant link to the past, becoming one of Marie-Laure’s last tangible connections to her father’s memory and a symbol of enduring hope․
B․ The Numbers & Radio Transmissions
The recurring motif of numbers and radio transmissions is central to the narrative’s structure and thematic concerns in “All the Light We Cannot See․” The numbers, initially appearing as seemingly random sequences, are revealed to be coordinates – specifically, those of German anti-aircraft gun placements, including one atop a motel where Werner is stationed․
These transmissions, delivered by a mysterious Frenchman on the radio, represent a clandestine resistance effort, subtly undermining the German war machine․ Marie-Laure unknowingly plays a pivotal role in this resistance, as she is the runner delivering the coded messages, effectively trapping Werner within the range of the broadcast․
The poetic irony lies in Marie-Laure’s unintentional contribution to Werner’s eventual ability to hear the transmissions that ultimately lead him to save her life․ The numbers and radio waves symbolize both the destructive power of war and the potential for connection and salvation amidst chaos, highlighting the novel’s exploration of fate and unintended consequences․
C․ The Sea & Water Imagery
Throughout “All the Light We Cannot See,” the sea and water imagery functions as a powerful and multifaceted symbol, representing both destruction and renewal, loss and liberation․ The ocean’s vastness mirrors the immensity of the war and the characters’ feelings of isolation and vulnerability․
The Sea of Flames diamond itself originates from the ocean, carrying with it a myth of misfortune, suggesting the destructive potential of obsession and greed․ Werner’s ultimate act of discarding the diamond back into the sea symbolizes a rejection of this destructive force and a return to a natural order․
Water also represents escape and the possibility of a new beginning, as seen in Marie-Laure’s journey and the eventual safety she finds․ The constant presence of the sea serves as a reminder of the cyclical nature of life, death, and rebirth, offering a glimmer of hope amidst the darkness of war and the enduring power of nature․
VII․ Character Analysis: Motivations & Development
A central aspect of the novel lies in the complex motivations driving its characters and their subsequent development throughout the narrative․ Werner Pfennig’s journey is marked by a profound internal conflict, torn between his technical brilliance and the moral compromises demanded by the Nazi regime․ His initial desire for escape through knowledge gradually evolves into a struggle for redemption․
Reinhold von Rumpel’s obsession with the Sea of Flames reveals a desperate attempt to cheat death, fueled by fear and a decaying sense of self․ This obsession consumes him, leading to increasingly ruthless actions and ultimately, his downfall․ His character embodies the destructive power of unchecked ambition․
Both characters undergo significant transformations, shaped by the horrors of war and their individual choices․ Analyzing their motivations provides a deeper understanding of the novel’s exploration of morality, guilt, and the enduring search for meaning in a world consumed by conflict․
A․ Werner’s Internal Conflict
Werner Pfennig’s character is defined by a persistent internal conflict, stemming from his exceptional technical aptitude and the morally compromised world he inhabits․ Initially, his fascination with radio represents an escape from the bleakness of his mining town, a path towards a brighter future․ However, this talent quickly becomes entangled with the Nazi regime’s war machine․
His training at Schulpforta exposes him to the ideology of superiority, yet his inherent decency clashes with the brutality he witnesses․ He grapples with the ethical implications of using his skills to track resistance fighters, particularly when his work inadvertently endangers others․
This internal struggle intensifies as he encounters Marie-Laure, recognizing a shared humanity that transcends national boundaries․ Werner’s conflict culminates in a pivotal decision to defy orders, ultimately choosing compassion over obedience, demonstrating a powerful arc of moral awakening․
B․ Von Rumpel’s Obsession
Reinhold von Rumpel’s relentless pursuit of the “Sea of Flames” diamond embodies a desperate, consuming obsession, fueled by a belief in its power to grant immortality․ A former gemologist, ravaged by cancer, he views the diamond not as a treasure, but as a potential cure, a last-ditch effort to cheat death․
This obsession blinds him to all moral considerations, driving him to ruthless acts and a willingness to endanger innocent lives, including Marie-Laure․ His single-minded focus transforms him into a predatory figure, willing to exploit and destroy anything standing between him and his goal․
Von Rumpel’s character serves as a chilling representation of the destructive nature of unchecked desire, and the lengths to which individuals will go when confronted with their own mortality․ His pursuit ultimately proves futile, highlighting the emptiness of seeking salvation through material possessions․
VIII․ Discussion Questions & Further Exploration
Consider the ethical implications of Werner’s choices within the Nazi regime․ To what extent is he complicit in the atrocities, and can his actions be justified by circumstance? Explore the novel’s portrayal of trauma and its lasting effects on individuals and communities․
Discuss the significance of the radio as a symbol of connection and resistance․ How does it facilitate communication and offer a glimmer of hope amidst the darkness of war? Analyze the role of fate and coincidence in shaping the characters’ destinies․
Further research could delve into the historical accuracy of the novel’s depiction of World War II, particularly the siege of Saint-Malo and the experiences of civilians․ Investigate the real-life stories of resistance movements and the impact of radio technology during the conflict․