poor economics pdf

“Poor Economics” by Abhijit Banerjee and Esther Duflo offers a groundbreaking perspective on global poverty, blending rigorous research with real-world insights to challenge stereotypes and propose innovative solutions.

1.1 Overview of the Book

Poor Economics challenges traditional views on poverty by examining the daily decisions and behaviors of the poor. Through rigorous research and real-world examples, the authors reveal the complexities of poverty, offering insights into why poverty persists and how effective solutions can be designed. The book emphasizes evidence-based approaches to poverty alleviation.

1.2 Authors and Their Contributions

Abhijit Banerjee and Esther Duflo, both MIT professors and Nobel laureates, bring extensive expertise in development economics. Their work challenges traditional poverty narratives, emphasizing evidence-based solutions through randomized trials. Their contributions have reshaped global poverty research, offering practical insights and innovative strategies to address economic disparities effectively.

1.3 Key Themes and Objectives

“Poor Economics” focuses on understanding the economic decisions of the poor, challenging stereotypes, and identifying effective solutions. It emphasizes evidence-based policies, leveraging randomized trials to test interventions. The book aims to redefine poverty alleviation strategies, moving beyond simplistic aid approaches to empower the poor through informed decision-making and sustainable opportunities.

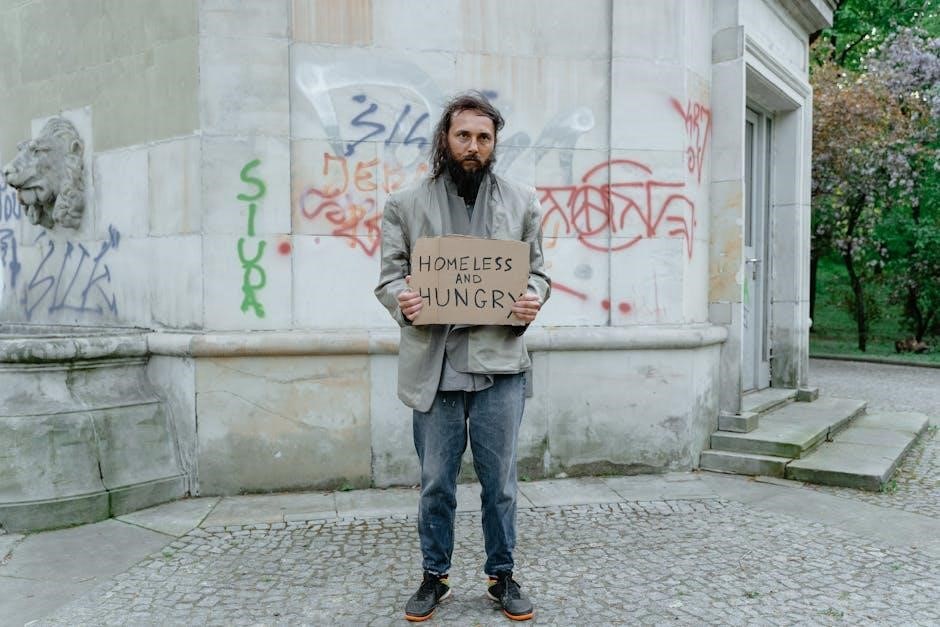
Understanding Poverty Through “Poor Economics”

Exploring the daily decisions of the poor, why poverty persists, and the role of research in uncovering effective solutions to global poverty challenges.

2.1 The Daily Decisions of the Poor

The book highlights how the poor make surprising choices, such as buying TVs or spending on sugar, revealing complex priorities shaped by scarcity and aspiration, not just financial constraints.

2.2 Why Poverty Persists Despite Global Efforts

Poverty persists due to ineffective aid strategies, cultural barriers, and the failure to address the complex daily challenges of the poor. Traditional approaches often overlook the nuanced realities of poverty, emphasizing quick fixes over sustainable solutions, as highlighted in “Poor Economics,” which advocates for evidence-based policies rooted in understanding the poor’s lived experiences.

2.3 The Role of Randomized Control Trials in Research

Randomized control trials (RCTs) are a cornerstone of “Poor Economics,” enabling researchers to rigorously test anti-poverty interventions. By comparing outcomes between treatment and control groups, RCTs provide empirical evidence on what works, ensuring policies are grounded in actual results rather than assumptions, and helping to scale effective solutions for global poverty reduction.

Key Concepts in “Poor Economics”

Poor Economics explores the economic lives of the poor, offering theories that explain their achievements and the need for evidence-based interventions to alleviate poverty effectively through targeted strategies.

3.1 The Poverty Trap: A Cycle of Scarcity

The poverty trap describes how scarcity creates a cycle of deprivation, where limited resources prevent investment in opportunities that could improve living conditions, trapping individuals in a vicious cycle of economic stagnation and vulnerability.

3.2 Behavioral Economics and the Poor

Behavioral economics reveals how psychological biases influence the poor’s financial decisions, such as present bias and mental accounting. These insights explain why low-income individuals often prioritize immediate gratification over long-term benefits, highlighting the need for policies that account for these behavioral patterns to effectively address poverty and improve decision-making.

3.3 The Importance of Empirical Evidence

Empirical evidence is crucial in “Poor Economics” as it relies on data from randomized trials to understand poverty. This approach ensures policies are grounded in real-world outcomes, making them more effective. Banerjee and Duflo emphasize that without solid evidence, strategies remain ineffective and often fail to address actual needs.

Case Studies and Examples

The book highlights real-life examples, such as the Moroccan man who bought a TV despite hunger, revealing how poverty’s complexities challenge traditional economic assumptions.

4.1 The Moroccan Man Who Bought a Television

The Moroccan man’s decision to buy a TV despite struggling with hunger highlights the complexities of poverty. It challenges traditional views, showing how the poor prioritize dignity and hope over immediate needs, revealing deeper psychological and social drivers of economic decisions.

4.2 Why Poor Families in Maharashtra Spend on Sugar

Poor families in Maharashtra spend on sugar due to cultural practices, social status, and immediate energy needs. Sugar is used in religious rituals and celebrations, and its high calorie content provides quick energy for laborers. Despite financial struggles, these factors make sugar a perceived necessity, reflecting complex spending priorities influenced by culture and survival needs.

4.3 Education and Learning in Poor Areas

Educating children in poor areas is challenging due to inadequate resources, poorly trained teachers, and low parental involvement. Despite attending school, learning outcomes remain low, as highlighted in “Poor Economics.” The book emphasizes the need to address these systemic issues through targeted interventions and improved access to quality education to break the poverty cycle effectively.

Policy Implications and Innovations

“Poor Economics” highlights innovative policy solutions, emphasizing evidence-based approaches like microfinance and randomized trials to address poverty effectively, challenging traditional aid strategies and fostering sustainable development.

5.1 Rethinking Traditional Aid Strategies

Rethinking traditional aid strategies, “Poor Economics” emphasizes the need to move beyond merely providing resources; The authors argue that understanding the daily decisions of the poor and tailoring aid to their specific needs leads to more effective and sustainable solutions. This approach challenges conventional methods and promotes evidence-based interventions for poverty alleviation.

5.2 Microfinance and Its Impact

Microfinance, as discussed in “Poor Economics,” offers small loans to entrepreneurs, empowering them to invest in businesses. While it provides access to capital, its impact varies. Banerjee and Duflo highlight cases where microfinance lifts incomes, but also note its limitations in transforming lives. Context matters, and its effectiveness depends on implementation and local conditions.

5.3 Innovations in Poverty Alleviation

Innovations like mobile banking and digital payment systems are transforming poverty alleviation by increasing access to financial services. Conditional cash transfers and targeted subsidies also show promise in improving health and education outcomes. These tools address specific barriers, offering efficient and impactful solutions to break the cycle of poverty. Technology-driven approaches are reshaping traditional aid strategies.

Criticisms and Controversies

Critics argue that “Poor Economics” oversimplifies poverty solutions and relies heavily on randomized trials, potentially ignoring broader structural issues like inequality and systemic oppression.

6.1 Debates on the Effectiveness of Aid

“Poor Economics” sparks debates on aid effectiveness, questioning whether resources reach intended targets. Critics argue that traditional aid strategies often fail to address root causes, while others highlight successes in specific contexts. The book challenges assumptions, urging a more nuanced approach to aid distribution and impact measurement.

6.2 Criticisms of Randomized Control Trials

Some critics argue that randomized control trials (RCTs), while useful, have limitations in capturing complex social dynamics. They may oversimplify poverty issues, focus on short-term outcomes, or fail to generalize across diverse contexts, sparking debates about their role in shaping effective poverty alleviation strategies and policies.

6.3 Cultural and Contextual Limitations

The book highlights that poverty solutions must account for cultural and contextual differences. Local norms, social structures, and individual priorities often influence economic decisions, making universal approaches ineffective. Understanding these nuances is crucial for designing policies that resonate with diverse communities and address their unique challenges effectively.

Availability and Access to “Poor Economics” PDF

“Poor Economics” is widely available in PDF format through various online platforms, including academic databases and eBook stores, ensuring easy access for readers worldwide.

7.1 Sources for Downloading the PDF

The PDF of “Poor Economics” can be downloaded from platforms like ResearchGate, Google Scholar, and eBook stores. Specific links, such as those from paxmongolica.org, offer free access. Additionally, official publisher sites like PublicAffairs and academic databases provide legitimate downloads, ensuring accessibility for readers worldwide, including print-disabled individuals through specialized services.

7.2 Legal and Ethical Considerations

Downloading “Poor Economics” PDF requires respecting copyright laws. Piracy is illegal and unethical. Accessing the book through legitimate sources like publisher websites, academic databases, or authorized eBook platforms ensures compliance with legal standards. Print-disabled readers can use specialized services, balancing accessibility with ethical considerations and copyright respect.

7.3 Accessibility for Print-Disabled Readers

The “Poor Economics” PDF is accessible to print-disabled readers through specialized services like Bookshare, ensuring equal access to knowledge. These platforms provide screen-reader compatibility and customizable text, adhering to legal standards while promoting inclusivity for individuals with visual or reading disabilities.

“Poor Economics” by Abhijit Banerjee and Esther Duflo is a transformative read, offering insights into poverty’s complexities and practical solutions, making it essential for global dialogue on poverty alleviation.

8.1 The Significance of “Poor Economics” in Global Dialogue

“Poor Economics” reshapes global dialogue on poverty by challenging traditional views and offering evidence-based solutions. Its use of randomized control trials provides actionable insights, influencing policymakers and researchers alike. The book’s empirical approach has made it a cornerstone in contemporary discussions on poverty alleviation and development economics.

8.2 The Way Forward in Fighting Poverty

“Poor Economics” advocates for evidence-based solutions, emphasizing the need for targeted interventions and innovative strategies. By understanding the daily decisions of the poor, policymakers can design effective programs. Microfinance, education, and healthcare initiatives are highlighted as key areas for progress, encouraging a multidisciplinary approach to break the cycle of poverty sustainably.

8.3 Encouraging Further Research and Action

“Poor Economics” underscores the importance of continued research and collaborative efforts to address poverty. By leveraging empirical evidence and innovative strategies, policymakers and researchers can develop targeted solutions. Encouraging a culture of experimentation and learning ensures sustainable progress in reducing global poverty effectively.

Future Directions in Poverty Research

Future research should focus on leveraging technology, refining randomized trials, and fostering collaboration between policymakers and researchers to create sustainable solutions for global poverty alleviation.

9.1 Leveraging Technology for Poverty Alleviation

Technology offers transformative potential in poverty alleviation by enabling mobile banking, digital platforms for economic opportunities, and data-driven decision-making. Innovations like AI and machine learning can optimize resource allocation and target interventions more effectively, ensuring sustainable development and enhancing the impact of anti-poverty programs globally.

9.2 Expanding the Scope of Randomized Trials

Randomized control trials (RCTs) have proven vital in evaluating poverty interventions. Expanding their scope ensures broader applicability, enabling researchers to test diverse programs across varied contexts. This approach reduces guesswork in policymaking, fostering evidence-based solutions. By scaling RCTs, we can better understand what works, optimizing aid strategies and enhancing global poverty alleviation efforts effectively.

9.3 Collaborative Efforts Between Policymakers and Researchers

Collaborative efforts between policymakers and researchers are crucial for designing effective poverty solutions. By integrating evidence-based research into policy design, interventions become more impactful and sustainable. This synergy ensures that programs are tailored to real needs, fostering innovation and accountability. Ongoing dialogue between these groups is essential for creating adaptable and responsive policies that address evolving challenges effectively.

honeywell pro 4000 manual

The Honeywell Pro 4000 Series is a programmable digital thermostat designed for energy efficiency and ease of use. It offers 5-2 day scheduling‚ an easy-to-read display‚ and compatibility with various heating/cooling systems. Perfect for homeowners seeking reliable climate control with minimal effort‚ this thermostat is backed by Honeywell’s trusted reputation for quality and performance.

1.1 Overview

The Honeywell Pro 4000 Series is a programmable digital thermostat designed for simplicity and efficiency. It features a 5-2 day scheduling option‚ allowing users to set different temperatures for weekdays and weekends. With an easy-to-read display and basic programming‚ this thermostat is ideal for homeowners seeking energy savings without complex features. Its compatibility with heating and cooling systems ensures reliable performance‚ making it a practical choice for everyday use.

1.2 Design and Build Quality

The Honeywell Pro 4000 Series boasts a sleek and durable design‚ featuring a clear digital display for easy readability. Its compact build ensures seamless integration with any home decor‚ while the robust construction guarantees long-lasting performance. The thermostat is designed with user-friendly controls‚ offering a straightforward interface for temperature adjustments and programming. Backlit display options are also available for enhanced visibility in low-light conditions‚ ensuring convenience and accessibility.

1.3 Key Features

The Honeywell Pro 4000 Series offers a range of features designed for energy efficiency and convenience. Key features include 5-2 day programmability‚ allowing users to set different schedules for weekdays and weekends. The thermostat also includes temporary and permanent overrides‚ enabling quick adjustments without altering the programmed schedule. Adaptive Intelligent Recovery (AIR) ensures the system reaches the desired temperature by the scheduled time‚ optimizing performance and energy savings. This makes it an ideal choice for homeowners seeking a balance between comfort and efficiency.

Installation and Setup

The Honeywell Pro 4000 thermostat is pre-programmed for easy setup. Simply set the time and day‚ and refer to the quick reference guide or online manual for assistance.

2.1 Physical Installation

The Honeywell Pro 4000 thermostat’s physical installation is straightforward. Ensure the system switch is set to Heat or Cool based on your HVAC setup. Turn off power at the circuit breaker before mounting the thermostat. Align the thermostat with the wall plate‚ ensuring secure fastening. Reconnect wires carefully to avoid damage. After installation‚ restore power and test the thermostat by adjusting the temperature to confirm proper function. Refer to the manual or online guide for detailed wiring instructions and safety precautions. Always follow manufacturer guidelines to ensure a successful installation.

2.2 Initial Configuration

After installation‚ configure the Honeywell Pro 4000 by setting the time and day. The thermostat is pre-programmed‚ so simply adjust these settings. Use the SYSTEM switch to select Heat or Cool based on your HVAC system. Press Hold to temporarily override the program schedule‚ maintaining the new temperature until the next scheduled period. Ensure the display shows the correct time and mode to activate your preferred settings. Refer to the manual for additional customization options.

Programming the Thermostat

The Honeywell Pro 4000 allows you to set four time periods daily with separate settings for weekdays and weekends. Use Adaptive Intelligent Recovery to optimize temperature adjustments‚ ensuring your home reaches the desired temperature at scheduled times. Temporary overrides are also available for quick adjustments.

3.1 Setting Up Schedules

Setting up schedules on the Honeywell Pro 4000 is straightforward. The thermostat allows you to program four time periods each day‚ with different settings for weekdays and weekends. To save energy‚ set the temperature lower when you’re asleep or away and higher when you’re home. Use the Wake and Sleep settings to automate your comfort. The Adaptive Intelligent Recovery feature learns your system’s response time‚ ensuring the temperature is reached by the scheduled time. Temporary overrides are also available for quick adjustments without disrupting the overall program. This flexibility helps you maintain comfort while optimizing energy savings.

3.2 Temporary and Permanent Overrides

The Honeywell Pro 4000 allows for both temporary and permanent overrides. A Temporary Override adjusts the temperature until the next scheduled period‚ providing flexibility without altering the overall program. Press the Temporary Set T o button to activate this feature. For a Permanent Override‚ use the Hold function‚ which disables the programmed schedule and maintains the selected temperature indefinitely. This feature is ideal for extended periods when the usual schedule isn’t needed.

Features and Benefits

The Honeywell Pro 4000 Series offers a range of features designed to enhance comfort and efficiency. Key benefits include 5-2 day programming‚ energy-saving capabilities‚ and an easy-to-read display. It also provides temporary and permanent overrides‚ adaptive recovery‚ and compatibility with various HVAC systems. These features make it an excellent choice for homeowners seeking a balance between simplicity and advanced functionality.

4.1 Energy Efficiency

The Honeywell Pro 4000 Series is designed to optimize energy savings‚ helping reduce heating and cooling costs. With 5-2 day programming‚ users can set specific temperatures for weekdays and weekends. This thermostat is Energy Star certified‚ ensuring it meets energy efficiency standards. By programming schedules and using features like adaptive recovery‚ homeowners can achieve up to 33% savings on annual energy bills. Its energy-efficient design makes it a smart choice for eco-conscious users.

4.2 User-Friendly Interface

The Honeywell Pro 4000 Series features an intuitive‚ easy-to-read display with a backlit option for visibility in low-light conditions. Its straightforward navigation and simple controls make it easy for users to set temperatures‚ adjust schedules‚ and access basic functions. The interface is designed to minimize complexity‚ ensuring even first-time users can operate the thermostat with ease. This user-friendly design enhances the overall experience‚ making it a practical choice for homeowners seeking convenience and simplicity.

4.3 Compatibility with Other Systems

The Honeywell Pro 4000 Series is designed to work seamlessly with a variety of heating and cooling systems‚ including conventional forced air‚ heat pumps‚ and dual-fuel setups. Its universal compatibility ensures easy integration with most HVAC configurations‚ making it a versatile choice for different home environments. The thermostat also features a system switch‚ allowing users to toggle between heating and cooling modes effortlessly‚ ensuring optimal performance across various systems and meeting diverse household requirements effectively.

Troubleshooting Common Issues

Most problems with the Honeywell Pro 4000 can be resolved quickly. Common issues include a blank display‚ which may require checking the circuit breaker and resetting it if necessary.

5.1 Blank Display

If the Honeywell Pro 4000 display is blank‚ it may indicate a power issue. Check the circuit breaker and ensure it is not tripped. Verify that the system switch is set correctly (Heat or Cool) and the furnace door is closed securely. If the issue persists‚ ensure the thermostat is properly connected to power. Refer to the manual for additional troubleshooting steps to resolve the issue quickly.

5.2 System Malfunction

If the system malfunctions‚ ensure the thermostat is properly configured. Check the system switch is set to the correct mode (Heat or Cool). Verify the compressor lockout feature‚ which prevents damage by delaying restarts. If issues persist‚ restart the system and ensure all connections are secure. Refer to the manual for detailed troubleshooting steps to identify and resolve the malfunction efficiently.

Maintenance and Care

Regular maintenance ensures optimal performance. Clean the display and ensure proper battery installation. Replace batteries annually or when low-battery warnings appear; Dust-free operation guarantees reliability.

6.1 Cleaning

To maintain your Honeywell Pro 4000 thermostat‚ clean the display and exterior regularly. Gently wipe with a soft cloth and avoid harsh chemicals. Ensure the thermostat is powered off before cleaning. Remove any dust or debris that may interfere with functionality. Regular cleaning prevents malfunctions and ensures accurate temperature readings. Handle with care to maintain its performance and longevity.

6.2 Battery Replacement

Replace the batteries when the display shows “Replace Batt” or the temperature isn’t responding. Switch off power to the thermostat before replacing. Use two AA alkaline batteries‚ ensuring correct polarity. Dispose of old batteries properly. After replacing‚ restore power and check functionality. This ensures reliable operation and maintains accurate temperature control. Regular battery checks prevent unexpected system issues‚ keeping your home comfortable year-round.

Understanding the User Interface

The Honeywell Pro 4000 features a clear display showing current and set temperatures‚ system status‚ and alerts. Buttons enable easy temperature adjustments and schedule navigation.

7.1 Display Elements

The Honeywell Pro 4000’s display offers clear visuals‚ including current and set temperatures‚ system status indicators‚ and low-battery alerts. The screen shows whether the heating or cooling system is active‚ ensuring users are informed about their home’s climate. Icons and text provide intuitive feedback‚ making it easy to adjust settings or troubleshoot issues. This design ensures a seamless user experience‚ catering to both simplicity and functionality.

7.2 Navigation

The Honeywell Pro 4000 features intuitive navigation with simple button controls. Press the buttons to set desired temperatures‚ access programming schedules‚ and view system status. The thermostat is pre-programmed‚ requiring only time and day setup. Use the system switch to select heating or cooling modes. Temporary overrides are easily accessible‚ allowing quick adjustments without altering the programmed schedule. A quick reference guide is also available for convenient operation and troubleshooting.

Warranty Information

The Honeywell Pro 4000 Series is backed by a 5-year limited warranty‚ covering defects in materials and workmanship‚ excluding the battery. Registration required for full coverage.

8.1 Coverage

The Honeywell Pro 4000 Series warranty provides 5-year protection against manufacturing defects and material issues. This coverage ensures reliable performance and peace of mind for users. The warranty excludes damages caused by improper installation or maintenance. Users must register their product to activate full coverage benefits. This comprehensive warranty underscores Honeywell’s commitment to quality and customer satisfaction‚ making the Pro 4000 Series a dependable choice for home climate control.

8.2 Registration

Registration is essential to activate the full warranty benefits for the Honeywell Pro 4000 Series. Users can register their product online through Honeywell’s official website or by contacting customer support. Visit yourhome.honeywell.com for detailed registration instructions. Proper registration ensures warranty validation and access to exclusive customer support resources. This simple process guarantees comprehensive coverage and enhances your product experience. For assistance‚ call Honeywell Customer Care toll-free at 1-800-468-1502.

Accessing the Manual Online

The Honeywell Pro 4000 manual can be downloaded from the official Honeywell website or trusted sources like ManualsLib. Visit yourhome.honeywell.com for direct access.

9.1 Download Options

The Honeywell Pro 4000 manual is available for free download as a PDF from Honeywell’s official website or trusted platforms like ManualsLib. Users can access operation and user guides‚ ensuring easy setup and troubleshooting. The manual is provided in multiple languages‚ including English‚ Spanish‚ and French‚ catering to a diverse audience. Simply visit yourhome.honeywell.com‚ navigate to the download section‚ and select the appropriate model (e.g.‚ TH4110D1007) to retrieve the document. This ensures you have all necessary instructions at your fingertips.

9.2 Additional Resources

For further assistance‚ Honeywell offers comprehensive online resources. Visit yourhome.honeywell.com for detailed guides‚ troubleshooting tips‚ and video tutorials. Additional support is available through Honeywell’s customer care hotline at 1-800-468-1502. ManualsLib and similar platforms also provide free access to PDF manuals and user guides. YouTube channels and HVAC forums often feature helpful tutorials and user experiences‚ ensuring you maximize your thermostat’s functionality and efficiency.

Frequently Asked Questions (FAQ)

This section addresses common inquiries about the Honeywell Pro 4000‚ such as troubleshooting tips‚ programming schedules‚ and energy-saving features.

10.1 General Inquiries

The Honeywell Pro 4000 Series is a programmable thermostat designed for ease of use and energy savings. It features 5-2 day scheduling and compatibility with various heating/cooling systems. Users often inquire about troubleshooting blank displays‚ system malfunctions‚ and programming overrides. The thermostat is pre-programmed‚ requiring only time and day setup. For assistance‚ visit yourhome.honeywell.com or contact Honeywell’s customer care at 1-800-468-1502. This model is Energy Star compliant‚ ensuring efficient energy use and cost savings.

10.2 Advanced Features

The Honeywell Pro 4000 Series offers advanced features like Adaptive Intelligent Recovery (AIR)‚ which learns your system’s response time to reach desired temperatures. It also includes temporary and permanent overrides for flexible temperature control. The thermostat supports 5-2 day programming‚ allowing different settings for weekdays and weekends. Energy-saving features and compatibility with various heating/cooling systems make it a versatile choice for modern homes. These features enhance comfort and efficiency‚ ensuring optimal performance year-round.

The Honeywell Pro 4000 Series thermostat is a reliable and efficient solution for home climate control. With its user-friendly interface‚ energy-saving features‚ and advanced programming options‚ it provides optimal comfort and convenience. Backed by Honeywell’s trusted quality‚ this thermostat is an excellent choice for homeowners seeking a balance of simplicity and functionality. Its adaptability and compatibility with various systems ensure long-term satisfaction and energy efficiency.

midland gxt1000 manual

The Midland GXT1000 Series offers reliable GMRS/FRS two-way radios with 50 channels, NOAA weather alerts, and durable waterproof design for outdoor enthusiasts and emergency communication.

1.1 Overview of the Midland GXT1000/1050 Series

The Midland GXT1000/1050 Series includes high-quality two-way radios designed for reliable communication in various conditions. These radios, including the GXT1000, GXT1050, GXT1030, and GXT3000, are ideal for outdoor enthusiasts, emergency preparedness, and professional use. They feature 50 GMRS/FRS channels, NOAA weather alerts, and a durable, water-resistant design. The series supports both individual and group communication, with options for voice encryption and silent operation. Powered by rechargeable NiMH batteries, these radios offer long-lasting performance. The GXT1000/1050 models are user-friendly, with clear LCD displays and intuitive controls, making them accessible for both beginners and experienced users. The official manual provides detailed guidance for setup, operation, and troubleshooting.

1.2 Key Features of the GXT1000/1050 Radios

The GXT1000/1050 radios boast a range of advanced features, including 50 GMRS/FRS channels, NOAA weather radio with emergency alerts, and a vibration alert mode. They feature a water-resistant design, meeting JIS4 standards for durability in wet conditions. The radios support both individual and group communication, with options for voice encryption to ensure secure conversations. Additional features include a silent operation mode, adjustable squelch levels, and a clear LCD display for easy navigation. The radios are powered by rechargeable NiMH batteries, providing extended use in the field. These features make the GXT1000/1050 series a versatile choice for outdoor adventures, emergency communication, and professional applications.

Setting Up and Operating the GXT1000

Install the battery, charge the radio, and attach the belt clip. Power on, select channels, and adjust volume. Use the LCD display to navigate settings easily.

2.1 Battery Installation and Charging

Install the 6V NiMH battery pack into the GXT1000 radio, ensuring correct polarity. Use the provided charger to recharge the battery, avoiding non-recommended batteries. Charge for 12-24 hours initially and store the radio properly when not in use. Avoid overcharging to extend battery life. Always use Midland-approved accessories for safety and performance.

2.2 Basic Controls and Functions

The GXT1000 features an LCD display for easy navigation. Use the power button to turn the radio on/off. Adjust volume with the up/down buttons. Select channels using the channel button or scan for activity with the scan button. The menu button accesses advanced settings like squelch, VOX, and emergency tones. Use the PTT (Push-to-Talk) button on the side for transmission. The keypad allows direct channel selection and programmable shortcuts. LED indicators show power, low battery, and signal strength. Familiarize yourself with these controls for seamless operation.

Advanced Features of the GXT1000/1050

The GXT1000/1050 Series includes NOAA Weather Radio for emergency alerts, multiple GMRS/FRS channels, and advanced functions like VOX for hands-free operation and a built-in flashlight for convenience.

3.1 Channels and Frequency Settings

The Midland GXT1000/1050 Series offers 50 GMRS/FRS channels, providing a wide range of communication options. Users can easily switch between channels using the radio’s intuitive controls. The channels are split into GMRS and FRS frequencies, allowing for both short-range and long-range communication. Channel scanning is also available, enabling users to quickly find active conversations or monitor multiple channels simultaneously. For added convenience, the radio supports channel monitoring, which helps users stay informed about important transmissions. The frequency settings are pre-programmed for seamless operation, and users can customize channel settings to suit their specific needs. This versatility makes the GXT1000/1050 ideal for outdoor activities, emergencies, and group communication. An FCC license is required for GMRS channel use. The radio also includes a belt clip for easy portability while navigating through channels and settings.

3.2 NOAA Weather Radio and Emergency Alerts

The Midland GXT1000/1050 Series features a built-in NOAA Weather Radio, providing real-time weather updates and emergency alerts. This function ensures users stay informed during severe weather conditions or natural disasters. The radio automatically scans NOAA frequencies, delivering crucial alerts such as tornado warnings, flood alerts, and other emergency notifications. The NOAA Weather Radio feature is especially vital for outdoor enthusiasts, campers, and those in areas prone to severe weather. Additionally, the radio includes an emergency alert system that sounds a tone during critical broadcasts, ensuring users never miss important updates. This feature enhances safety and preparedness, making the GXT1000/1050 an essential tool for both everyday use and emergency situations. The weather radio function operates independently of other channels, allowing continuous monitoring without interruption.

Troubleshooting Common Issues

Identify and resolve common problems like low battery life, charging issues, or poor signal strength. Refer to the manual for step-by-step solutions to ensure optimal performance.

4.1 Resolving Battery and Charging Problems

Common battery issues include short lifespan or failure to charge. Ensure the NiMH battery is properly installed and charged using the provided charger. Avoid using non-recommended batteries. Clean the contacts if corroded. If charging issues persist, check the charger’s functionality or try a different power source. Allow the battery to cool down if it overheats during charging. For prolonged storage, store the battery separately from the radio to prevent drain. Refer to the manual for detailed troubleshooting steps to restore optimal battery performance and ensure reliable operation of your Midland GXT1000/1050 radio.

4.2 Fixing Connectivity and Signal Strength Issues

Signal strength issues often arise due to physical obstructions or incorrect settings. Ensure both radios are on the same channel and frequency. Move to higher ground or open areas to improve reception. Check for interference from nearby electronic devices and switch to a less congested channel. Verify that the antenna is fully extended and free from damage. If issues persist, reset the radio by turning it off and on. Consult the manual for channel programming guidance. For severe connectivity problems, contact Midland support for further assistance or potential firmware updates to optimize performance and maintain clear communication.

Maintenance and Care

Regularly clean the radio with a soft cloth and avoid harsh chemicals. Store it in a dry place to prevent moisture damage. Update firmware periodically for optimal performance and reliability, ensuring all features function correctly and efficiently.

5.1 Cleaning and Storing the Radio

Use a soft, dry cloth to clean the radio regularly, avoiding harsh chemicals or abrasive materials. Store the device in a cool, dry place, away from direct sunlight and moisture. Ensure the battery is fully charged before long-term storage to prevent degradation. For extended periods, remove the battery and store it separately in a cool, dry location. Avoid exposing the radio to extreme temperatures, as this may affect performance. Always handle the antenna with care to prevent damage. Proper maintenance ensures optimal functionality and extends the lifespan of your Midland GXT1000 Series radio.

5.2 Updating Firmware and Software

Regular firmware and software updates are essential for optimal performance. Visit Midland’s official website to download the latest updates. Use a compatible USB cable to connect the radio to your computer. Follow the on-screen instructions carefully to avoid errors. Ensure the battery is fully charged before starting the update process. Incorrect updates may void the warranty or damage the device. After updating, restart the radio to apply changes. Updates often improve functionality, add features, or resolve bugs. Always use official Midland software to ensure compatibility and security. Keep your GXT1000 Series up-to-date for the best user experience and reliability.

Accessories and Compatibility

Enhance your GXT1000/1050 experience with Midland’s official accessories, including headsets, antennas, and chargers. Third-party options are available but ensure compatibility to maintain performance and warranty.

6.1 Official Midland Accessories for GXT1000/1050

Midland offers a range of official accessories designed specifically for the GXT1000/1050 series, ensuring optimal performance and compatibility; These include high-quality headsets, external antennas, chargers, and belt clips. The headsets provide clear audio in noisy environments, while external antennas boost signal range. Dual chargers allow simultaneous charging of two radios, ideal for heavy use. All official accessories are rigorously tested to meet Midland’s quality standards, ensuring durability and reliability. Using genuine Midland accessories guarantees compatibility and maintains the warranty of your GXT1000/1050 radio, ensuring uninterrupted communication in critical situations.

6.2 Third-Party Accessories and Compatibility

While official Midland accessories are recommended, compatible third-party options are available for the GXT1000/1050 series. These include aftermarket headsets, antennas, chargers, and speakers. Third-party accessories can enhance functionality but may vary in quality and compatibility. Always ensure that third-party products meet the radio’s specifications to avoid performance issues. Some users opt for universal chargers or extended-range antennas to improve usability. However, compatibility should be verified before purchase. Reading reviews and checking specifications can help ensure a seamless experience. While third-party accessories offer cost savings, they may not carry the same warranty or support as official Midland products.

Warranty and Support

The Midland GXT1000/1050 Series is backed by a limited warranty covering defects in materials and workmanship. For support, contact Midland’s customer service or visit their official website.

7.1 Warranty Overview for GXT1000/1050 Series

The GXT1000/1050 Series is protected by a limited warranty that covers defects in materials and workmanship for a specified period. This warranty ensures that any manufacturing issues are addressed, providing users with peace of mind. The warranty typically covers repairs or replacements at no additional cost, but it does not apply to damage caused by misuse or unauthorized modifications. For specific details, including the warranty duration and terms, refer to the official Midland documentation or contact their customer support team directly.

7.2 Contacting Midland Customer Support

For assistance with your GXT1000/1050 Series radio, Midland offers multiple ways to contact their customer support team. You can reach them via phone, email, or through the official Midland website. The support team is available to address questions, troubleshooting, and warranty-related inquiries. Additionally, Midland provides online resources, including FAQs and downloadable manuals, to help users resolve common issues independently. For more complex problems, users can submit a support ticket or visit authorized service centers. Midland’s customer support aims to ensure a positive experience with their products, offering timely and effective solutions to any concerns. Visit their official website for contact details and support options.

alberta dental fee guide 2023 pdf

The Alberta Dental Fee Guide 2023, published by the Alberta Dental Association, provides a comprehensive reference for dental service fees in Alberta․ It ensures transparency and consistency, helping patients and dentists understand typical costs for various procedures, from routine check-ups to complex treatments․ Updated annually, the guide reflects current dental care standards and economic factors, fostering trust and informed decision-making in dental care․

Overview of the Guide

The Alberta Dental Fee Guide 2023 is a detailed document outlining suggested fees for various dental services in Alberta․ It provides transparency by listing costs for procedures, from routine check-ups to complex treatments, ensuring patients and dentists have a clear reference․ The guide is updated annually to reflect current standards and economic changes․ While it serves as a benchmark, dentists are not obligated to follow the suggested fees․ This resource helps patients understand dental costs and supports informed decision-making, fostering trust between patients and dental professionals․

Importance of the Fee Guide for Patients and Dentists

The Alberta Dental Fee Guide 2023 is crucial for both patients and dentists as it promotes transparency and understanding of dental service costs․ Patients benefit from knowing typical fees, enabling them to budget and make informed decisions․ Dentists use the guide to align their pricing with industry standards, ensuring consistency and fairness․ It also aids in communication between patients and providers, reducing misunderstandings․ By providing a clear reference, the guide fosters trust and helps maintain affordable, high-quality dental care across Alberta․

Structure of the Alberta Dental Fee Guide 2023

The guide is organized by dental procedure categories, detailing service descriptions, codes, and suggested fees․ It provides a clear, user-friendly layout for easy reference․

Organization of Dental Procedures and Services

The Alberta Dental Fee Guide 2023 is structured into distinct categories of dental procedures, such as diagnostic, preventive, restorative, and surgical services․ Each category lists specific procedures with corresponding codes and suggested fees, making it easy for dentists and patients to reference․ The guide also includes detailed descriptions for clarity, ensuring transparency in billing and treatment planning․ This organized format helps users quickly locate information, facilitating informed decisions and streamlined dental care processes․

Key Updates in the 2023 Edition

The 2023 Alberta Dental Fee Guide introduces a 6% increase in fees compared to the 2022 edition, reflecting rising operational costs and inflation․ It includes updated codes for new dental procedures and technologies, ensuring alignment with modern practices; The guide also enhances transparency by providing detailed descriptions of services, helping patients understand their treatment costs․ Additionally, the 2023 edition emphasizes preventive care, highlighting its importance in reducing long-term dental expenses․ These updates aim to balance affordability for patients while supporting dental practitioners in maintaining quality care․

Understanding Dental Fees in Alberta

The Alberta Dental Fee Guide 2023 ensures transparency and consistency in dental pricing, providing patients with clear expectations for procedure costs․ The guide reflects a 6% increase from 2022, aligning with inflation and operational costs, while emphasizing preventive care to reduce long-term expenses․

Basic Dental Procedures and Their Costs

The 2023 Alberta Dental Fee Guide outlines costs for essential dental services․ Routine check-ups and cleanings typically range from $90 to $150, while basic X-rays cost around $80 to $150․ Fillings, depending on material and complexity, are priced between $120 and $300․ These procedures are covered under most dental plans, emphasizing preventive care to avoid more costly treatments․ The guide reflects a 6% increase from 2022, ensuring fees align with current standards and inflation․ Patients can use this guide to plan their dental budget effectively․

Major Dental Procedures and Their Costs

The 2023 Alberta Dental Fee Guide details costs for complex dental treatments․ Crowns range from $900 to $2,000, while dental implants can cost between $1,500 and $3,000 per tooth․ Root canal treatments vary from $500 to $1,200, depending on tooth complexity․ Bridges are priced between $800 and $2,500 per unit, and dentures range from $600 to $2,000․ These fees reflect a 6% increase from 2022, ensuring alignment with current dental standards and inflation․ The guide helps patients and insurers plan budgets for major procedures effectively․

Preventative Dental Care Costs

Preventative care costs include routine check-ups ($40-$150) and cleanings, with fluoride treatments ($30-$60)․ These services aim to prevent issues, reducing long-term dental expenses․

Costs Associated with Routine Check-ups and Cleanings

In Alberta, routine dental check-ups typically range from $40 to $150, while cleanings cost between $30 and $60․ These services are essential for maintaining oral health and detecting early signs of issues․ Regular cleanings help remove plaque and tartar, preventing gum disease․ Fluoride treatments, often included, strengthen tooth enamel․ Investing in these routine services can prevent more costly procedures down the line, ensuring long-term dental well-being․

Preventative Treatments and Their Benefits

Preventative treatments, such as fluoride applications and sealants, are cost-effective ways to maintain oral health․ Fluoride treatments strengthen tooth enamel, reducing decay risk, while sealants protect molars from cavities․ These procedures, costing between $20 and $50, are often covered by insurance․ Regular applications can prevent more invasive and costly treatments later․ By investing in preventative care, patients can avoid complications and ensure long-term dental health, aligning with the Alberta Dental Fee Guide’s focus on transparency and affordability․

How Dental Fees Are Established

Dental fees are established by the Alberta Dental Association, considering factors like operational costs, market conditions, and professional standards․ The guide reflects these calculations annually․

Factors Influencing Dental Fee Increases

The 2023 Alberta Dental Fee Guide reflects a 6% increase from 2022, influenced by rising operational costs, inflation, and market conditions․
These factors include equipment expenses, staff wages, and material costs, which impact dental practices․
Additionally, economic trends and patient demand play a role in fee adjustments․
The guide ensures transparency, helping patients understand the rationale behind fee changes․
Regular updates keep the guide aligned with current dental care standards and economic realities․

Transparency in Dental Fee Guides

The Alberta Dental Fee Guide 2023 promotes transparency by detailing suggested fees for various dental services․
It provides clear descriptions of procedures, ensuring patients understand what they are being charged for․
By publishing the guide, the Alberta Dental Association fosters trust between dentists and patients․
This transparency also helps patients make informed decisions about their care;
The guide is available as a downloadable PDF, making it easily accessible to the public․
Such openness ensures accountability and fair pricing in dental services across Alberta․

Downloading the Alberta Dental Fee Guide 2023 PDF

The Alberta Dental Fee Guide 2023 PDF is available for free download from the Alberta Dental Association’s website․ It provides a detailed summary of dental service fees․

Steps to Access the Guide Online

To access the Alberta Dental Fee Guide 2023 PDF, visit the Alberta Dental Association’s official website․ Navigate to the “Resources” or “Publications” section․ Locate the “Alberta Dental Fee Guide 2023” link and click to download the PDF․ Ensure you have a PDF viewer installed to open the file․ The guide is free and provides detailed information on dental service fees, helping patients and professionals stay informed about costs and procedures․

The Alberta Dental Fee Guide 2023 PDF outlines suggested fees for dental services, ensuring transparency for patients and providers․ It includes costs for basic procedures like exams and cleanings, as well as major treatments such as crowns and implants․ The guide reflects a 6% increase from 2022, aligning with industry standards․ It serves as a reference for insurers and helps patients budget for care․ The PDF is downloadable from the Alberta Dental Association’s website, offering a clear and concise breakdown of dental service fees across the province․

Impact of the Fee Guide on Dental Practices

The Alberta Dental Fee Guide 2023 standardizes fees, ensuring consistency across practices and aiding in financial planning and transparency for both dentists and patients․

How Dentists Use the Guide in Their Practices

Dentists use the Alberta Dental Fee Guide 2023 to standardize fees, ensuring consistency and transparency in billing․ It aids in financial planning and helps communicate treatment costs clearly to patients․ By aligning with the guide, practices can ensure they are within industry standards, fostering trust and accountability․ The guide also assists in verifying insurance coverage and negotiating payments, making it an essential tool for efficient and patient-centric dental care delivery․

Aligning Services with the Fee Guide

Dentists align their services with the Alberta Dental Fee Guide 2023 to ensure consistency in pricing and care standards․ This alignment helps practices update treatment costs annually, reflecting current dental care standards and economic changes․ By adhering to the guide, dentists ensure transparency and fairness, making it easier for patients to understand and budget for their care․ This alignment also aids in verifying insurance coverage and streamlining billing processes, fostering trust and efficiency in dental care delivery across Alberta․

The Alberta Dental Fee Guide 2023 enhances transparency and trust in dental care, providing clear insights into treatment costs and promoting affordable, high-quality dental services for Albertans․

Final Thoughts on the Alberta Dental Fee Guide 2023

The Alberta Dental Fee Guide 2023 is a vital resource for both patients and dental professionals, ensuring transparency and consistency in dental care costs․ By providing detailed fee information, it empowers patients to make informed decisions about their oral health while allowing dentists to align their services with industry standards․ The guide’s annual updates reflect the evolving dental landscape, making it an essential tool for maintaining affordable and high-quality dental care across Alberta․ Its impact extends beyond cost management, fostering trust and collaboration within the dental community․

vex high stakes game manual

VEX High Stakes is a robotics competition designed to teach teamwork, perseverance, and problem-solving through strategic gameplay and robot design․ The game manual outlines rules, objectives, and guidelines for participants, emphasizing innovation and collaboration․ It serves as a comprehensive resource for teams to understand the competition’s structure and requirements, ensuring a fair and engaging experience for all involved․

Background of the Game

VEX High Stakes is a competitive robotics program designed to inspire STEM learning through hands-on challenges․ The game emphasizes teamwork, problem-solving, and strategic thinking․ The game manual provides detailed rules and objectives, ensuring fairness and clarity for participants․ It has become a cornerstone of robotics education, fostering innovation and collaboration among students worldwide․ The manual’s guidelines ensure a consistent and engaging experience, making it a vital resource for teams preparing for competition․

Importance of the Game Manual

The game manual is a critical resource for VEX High Stakes, outlining rules, objectives, and guidelines; It ensures fairness and consistency across competitions, providing clarity on legal actions and prohibited conduct․ Teams rely on it to design and build robots, understand scoring mechanisms, and prepare for tournaments․ The manual also serves as a learning tool, fostering strategic thinking and problem-solving skills․ Adherence to its guidelines is essential for a successful and enjoyable competition experience for all participants․

Game Overview

VEX High Stakes is a competitive robotics game where two alliances of two robots each score points by throwing balls into goals․ The match includes a 15-second autonomous period and a 1-minute 45-second driver-controlled period, emphasizing strategy, teamwork, and precise robot functionality to achieve high scores․

Field Layout and Components

The VEX High Stakes field is a 12×12 square layout featuring mobile goals, wall goals, and a central fence dividing the field․ There are 48 rings positioned in double and minus corners, with colored and neutral zones for scoring․ The field includes alliance zones for robot starting positions and neutral zones for shared access․ The fence acts as a barrier, separating the two sides of the field, and is a critical component for gameplay and strategy execution during matches․

General Definitions and Terminology

Key terms in VEX High Stakes include Autonomous Period (robot actions without driver input), Driver-Controlled Period (manual operation), and Scoring Zones (areas for earning points)․ Mobile Goals and Wall Goals are objectives for scoring, while Neutral Zones are shared spaces․ Match Affecting Violations impact game outcomes, differing from minor or major penalties․ Understanding these definitions is essential for navigating the game rules and strategies effectively during competition․

Robot Specifications

Robots must adhere to size and weight limits, use approved components, and pass inspections to ensure safety and fairness․ Compliance with these rules is mandatory․

Inspection Rules and Requirements

Robots must undergo pre-match inspections to ensure compliance with size, weight, and component regulations․ Inspectors verify that all parts are approved and meet safety standards․ Teams must present their robots for inspection before participating in matches․ Failure to pass inspection may result in penalties or disqualification․ The inspection process ensures fair competition and adherence to the game’s rules, maintaining a safe and competitive environment for all teams involved․

Tournament Structure

The tournament features qualification rounds, elimination rounds, and finals․ Teams compete in head-to-head matches, with rankings determining seeding․ Alliances form in the finals to determine the champion․

Match Types and Formats

Matches in VEX High Stakes are conducted in a head-to-head format, with alliances competing to score points․ Each match lasts 2 minutes, divided into a 15-second autonomous period and a 1-minute 45-second driver-controlled period․ Teams earn points by completing objectives like scoring rings, climbing, and activating switches․ Alliances work together to maximize their score, with penalties for violations․ The tournament structure includes qualification rounds, elimination rounds, and finals, ensuring a competitive and dynamic environment for all participants․

Safety Rules and Violations

Safety is paramount in VEX High Stakes․ Teams must ensure their robots do not pose risks to participants or equipment․ Violations are categorized into Minor, Major, and Match Affecting․ Minor violations result in verbal warnings, while Major violations can lead to disqualification after three instances․ Match Affecting violations are reviewed post-match and may alter results․ Adherence to these rules ensures a secure environment for all participants, maintaining the integrity and fairness of the competition․

Scoring System

The scoring system in VEX High Stakes includes points from mobile goals, wall goals, rings, and climbing․ Maximum points total 328, combining doubled stakes, top rings, auton bonuses, and climbs․

Scoring Mechanisms

Points are earned through mobile goals, wall goals, rings, and climbing․ Mobile goals score based on positioning, with doubled stakes offering higher points․ Wall goals include colored and neutral targets, with rings contributing additional points when scored․ Climbing bonuses reward robots for reaching higher levels․ Autonomous actions and strategic gameplay enhance scoring potential, while penalties for violations deduct points․ The system encourages precision, strategy, and efficient teamwork to maximize scores within the match timeframe․

Violation Types and Penalties

VEX High Stakes outlines three violation types: Minor, Major, and Match-Affecting․ Minor violations result in verbal warnings, while Major violations can lead to disqualification after three instances․ Match-Affecting penalties are reviewed post-match, potentially altering results․ Safety violations, such as robot contact with field elements or unsafe actions, may lead to immediate disqualification․ Penalties aim to ensure fair play and participant safety, emphasizing adherence to rules for a competitive and respectful environment․

Robot Skills Challenge

The Robot Skills Challenge tests individual robot performance, emphasizing speed, precision, and autonomous capabilities․ Teams showcase engineering skills and creativity in this competitive, timed event․

Skills Challenge Rules

The Robot Skills Challenge is a timed event where teams demonstrate their robot’s capabilities in driver-operated and autonomous modes․ The challenge tests speed, precision, and programming skills․ Points are awarded based on successful completion of tasks, such as scoring rings, climbing, and manipulating game elements․ Penalties apply for violations like exceeding time limits or unsafe operations․ Teams must adhere to the official game manual rules, and the Q&A system is available for clarifications․ The challenge highlights innovation and teamwork in robot design and performance․

VEX U Robotics Competition

VEX U integrates seamlessly with High Stakes, allowing university-level teams to compete using the same field and rules․ The game manual serves as the primary resource for competition guidelines, ensuring consistency and fairness across all events․ Teams can utilize their High Stakes experience to excel in VEX U, fostering advanced robotics education and innovation․

Integration with VEX U Events

VEX U events are fully compatible with the High Stakes game, enabling seamless transition for teams․ The game manual provides specific guidelines for university-level competitions, ensuring consistency․ Teams can use their existing High Stakes robots with minimal modifications, fostering continuity and advanced learning․ This integration promotes a smooth progression from high school to university-level robotics, maintaining the core gameplay while introducing higher-level challenges and innovations․ The shared field and ruleset enhance collaboration and competition across educational levels․

VEX AI Robotics Competition

The VEX AI Robotics Competition introduces artificial intelligence integration into High Stakes, enhancing gameplay with autonomous decisions and adaptive strategies․ Teams can optionally incorporate AI elements, guided by the game manual, to create more dynamic and innovative solutions, while maintaining the core focus on teamwork and robotics education․

AI Integration in High Stakes

The 2024-2025 season introduces AI integration into VEX High Stakes, allowing teams to incorporate artificial intelligence into their robots for enhanced gameplay․ The game manual provides specific rules and guidelines for AI usage, ensuring fair competition․ Teams can leverage AI for autonomous decisions and adaptive strategies, creating a more dynamic and innovative experience․ This integration challenges teams to balance traditional robotics skills with cutting-edge technology, while maintaining the core focus on teamwork and problem-solving․

VEX Worlds 2025 Update

The 2025 VEX Worlds will feature updated rules and enhancements for High Stakes, ensuring a competitive and innovative championship․ Teams should review the latest manual updates to prepare effectively for the global event, focusing on new rule implementations and field configurations to maximize their performance and strategy․

World Championship Rules

The 2025 VEX Worlds will adhere to the official High Stakes game manual, with specific rules for the global event․ Teams must comply with all updates, including field configurations, match formats, and scoring adjustments․ Penalties for rule violations will be strictly enforced to maintain fair competition․ The manual provides detailed guidelines for robot inspections, match conduct, and tournament structure․ Teams are encouraged to review the latest updates to ensure compliance and optimal performance at the championship level․

Field Overview

The VEX High Stakes field is a 12×12-foot area featuring mobile goals, wall goals, and 48 rings (colored and neutral)․ The setup is detailed in the game manual figures․

Field Setup and Configuration

The VEX High Stakes field is a 12×12-foot area designed for head-to-head competition․ It features 5 mobile goals, 4 wall goals (2 colored, 2 neutral), and 48 rings (half colored)․ The field is divided into two alliances, with each side containing specific goal types․ The setup is detailed in the game manual, ensuring consistent configuration across events․ Teams must familiarize themselves with the layout to strategize effectively during matches․

Appendices

The appendices provide supplementary materials, including a glossary of terms and references, ensuring clarity and accessibility for teams navigating the VEX High Stakes competition․

Glossary of Terms

The glossary defines essential terminology used in the VEX High Stakes competition, such as Mobile Goals, Wall Goals, and Ring, ensuring consistent understanding among participants․ It clarifies terms like Autonomous Period and Driver Period, providing clear explanations to avoid confusion․ This section is crucial for new teams and veterans alike, offering a quick reference for key concepts within the game manual․ It supports effective communication and adherence to competition rules․

References and Resources

Additional resources, including the official VEX High Stakes game manual, Q&A system, and updates, are available on the VEX Robotics website․ Teams can access the game manual in 25 languages for global participation․ The Q&A system provides official rule clarifications, while community forums like Reddit and RobotEvents․com offer discussions and tips․ For technical support, contact support@vex․com or sales@vex․com․ Always refer to the latest manual version for the most accurate information․

Q&A System

The Q&A system provides official rule clarifications for VEX High Stakes, operated by the Game Design Committee (GDC)․ Teams can submit questions for official interpretations, ensuring fair play and rule adherence across competitions․ It is not a replacement for the game manual but offers additional guidance for specific scenarios․

Role of the Q&A System

The Q&A system serves as the official channel for clarifying VEX High Stakes rules and resolving disputes․ It ensures consistent interpretation of the game manual across all competitions, providing teams with clear guidance․ By submitting questions, teams receive authoritative answers from the GDC, helping to maintain fairness and transparency․ This system is essential for addressing ambiguities and ensuring all participants adhere to the same standards, fostering a level playing field․

The VEX High Stakes game manual is the ultimate guide for teams, providing clear rules and strategies․ Use it to prepare effectively and embrace the competition with confidence!

Final Thoughts and Preparation

The VEX High Stakes game manual is a vital resource for success, offering detailed rules and strategies․ Teams should thoroughly review the manual to understand gameplay mechanics, scoring systems, and safety protocols․ Preparation involves designing robots, practicing teamwork, and mastering autonomous functions․ Encourage innovation and critical thinking while adhering to guidelines․ Utilize the Q&A system for clarifications and stay updated on rule changes․ Dedication and collaboration will be key to excelling in this dynamic and challenging competition․ Embrace the opportunity to learn and grow as a team!

10k running plan for beginners pdf

Welcome to our 10K Running Plan for Beginners, designed to guide first-time runners from their initial steps to completing a 6.2-mile race. This structured, progressive plan requires a 30-minute continuous running ability and combines endurance, speed, and recovery to build stamina and confidence effectively.

Overview of the Training Plan

This 10K running plan is designed for new runners aiming to complete their first 10K race. It combines endurance, speed, and recovery workouts over 8–12 weeks. The plan assumes you can run continuously for 30 minutes and builds progressively to race day. Each week includes structured runs, cross-training, and rest days to ensure safe and effective progression toward your goal.

Importance of Consistency and Gradual Progress

Consistency and gradual progress are key to safely building endurance and stamina in a 10K training plan. By following a structured schedule, runners avoid injury and mental burnout. Incremental increases in distance and intensity allow the body to adapt, ensuring steady improvement and confidence. This approach transforms beginners into capable runners, ready to achieve their 10K goal effectively and enjoyably.

Understanding the 10k Training Plan Structure

This 10K training plan is structured to guide beginners through a balanced mix of endurance, speed, and recovery, with a weekly schedule that progressively builds stamina and confidence.

Weekly Schedule Breakdown

The weekly schedule alternates between running, cross-training, and rest days. It includes interval runs, tempo runs, and long runs, with gradual increases in distance and intensity. Each week builds on the previous one, ensuring a steady progression towards the 10K goal while allowing for proper recovery and adaptation. This balanced approach helps prevent injuries and enhances overall performance.

Key Components: Endurance, Speed, and Recovery

The 10K plan focuses on building endurance through longer runs, improving speed with interval training, and ensuring proper recovery to avoid injuries. Each component is balanced to progressively enhance fitness levels, allowing beginners to adapt and strengthen their running abilities safely and effectively over time. This holistic approach ensures a well-rounded preparation for the 10K race.

Prerequisites for Starting the Plan

To begin this 10K training plan, you should be able to run continuously for 30 minutes. Assess your current running ability and ensure you meet the minimum fitness level required for safe progression.

Minimum Fitness Level Required

To safely begin this 10K training plan, you should already be able to run continuously for 30 minutes. While prior running experience isn’t necessary, a basic level of cardiovascular fitness is essential. This plan assumes you can handle regular physical activity and are comfortable with light exercise, such as brisk walking or cross-training. If you’re new to running, ensure you’ve built up to this baseline before starting. Always consult a healthcare professional if you have any concerns or underlying health conditions.

Assessment of Current Running Ability

Before starting the 10K training plan, assess your current running ability to ensure you’re prepared. If you’ve completed a 5K or can run for 30 minutes continuously, you’re ready to begin. Evaluate your endurance, speed, and recovery capabilities. Consider a 1-mile test to gauge your fitness level. Be honest about your abilities to tailor the plan effectively and avoid injury. This self-assessment ensures a safe and successful training journey.

Week-by-Week Training Breakdown

This structured 10K plan progresses gradually, starting with foundational runs and walk-run intervals in weeks 1-2, then increasing distance and intensity in weeks 3-4. Weeks 5-6 introduce interval and tempo runs, while weeks 7-8 focus on final prep and tapering to ensure race readiness. Each phase builds confidence and endurance step-by-step.

Week 1-2: Building a Foundation

These initial weeks focus on establishing a consistent running routine. Start with 30-minute sessions, alternating between 5 minutes of running and walking. Gradually increase running time while incorporating rest and cross-training days to build endurance. Strength training is introduced to enhance running efficiency. This phase ensures a solid foundation for progression, with rest days prioritized for recovery and adaptation.

Week 3-4: Increasing Distance and Intensity

During weeks 3 and 4, the plan introduces interval and tempo runs to boost speed and stamina. Running distances are extended, with a focus on maintaining consistent pacing. Cross-training continues to support recovery and overall fitness. These weeks lay the groundwork for more challenging workouts ahead, ensuring a balanced approach to progress without overexertion.

Week 5-6: Incorporating Interval and Tempo Runs

Weeks 5 and 6 focus on enhancing speed and stamina through interval and tempo runs. Interval runs involve alternating between high-intensity bursts and recovery periods, while tempo runs emphasize maintaining a steady, challenging pace. These workouts are designed to improve cardiovascular fitness and mental resilience, preparing you for the demands of the 10K race while still prioritizing rest and recovery.

Week 7-8: Final Prep and Taper

The final two weeks focus on reducing intensity to allow your body to recover and adapt. This period includes shorter runs, cross-training, and rest days to ensure peak performance on race day. The taper phase helps prevent injury and builds mental readiness, ensuring you’re fully prepared to confidently complete your first 10K.

Types of Runs in the Plan

The plan incorporates interval runs for speed, tempo runs for stamina, and long runs for distance adaptation, ensuring a balanced approach to building endurance and strength.

Interval Runs for Speed and Endurance

Interval runs involve alternating between high-intensity bursts of running and recovery periods of walking or jogging. This method boosts speed, endurance, and muscle power, making it more effective than steady-paced runs. For example, 8 x 2:30 runs with 1-minute walks enhance performance and prepare runners for race-day demands.

Tempo Runs for Building Stamina

Tempo runs are sustained efforts at a moderate pace, designed to build stamina and mental toughness. These runs help improve lactate threshold, allowing runners to maintain a steady speed over longer distances. Incorporating tempo runs, such as a 10-minute hard run, into the training plan enhances endurance and prepares beginners for the demands of a 10K race.

Long Runs for Distance Adaptation

Long runs are essential for building endurance and adapting to greater distances. Gradually increasing weekly long runs helps the body adjust to the demands of running farther. These runs teach mental resilience and physical stamina, preparing beginners for the full 10K distance. Consistency in long runs ensures confidence and readiness for race day.

Rest, Recovery, and Cross-Training

Rest and recovery are crucial for allowing the body to heal and adapt. Incorporating cross-training, like cycling or swimming, enhances overall fitness without excessive impact, supporting the training plan.

Importance of Rest Days

Rest days are essential for allowing the body to heal and rebuild, preventing injuries, and improving overall performance. They enable muscles to recover, boosting stamina and reducing fatigue, ensuring consistent progress in the training plan.

Benefits of Cross-Training

Cross-training enhances overall fitness by incorporating activities like cycling or swimming, reducing the risk of overuse injuries. It improves muscle balance, boosts cardiovascular health, and prevents mental burnout. By diversifying workouts, cross-training keeps the routine engaging while supporting running progress, ensuring a well-rounded approach to preparing for the 10K race.

Nutrition and Hydration Strategies

Proper fueling and hydration are essential for optimal performance. Focus on a balanced diet rich in complex carbs, lean proteins, and healthy fats. Stay hydrated with water or electrolyte-rich drinks, especially during and after runs, to maintain energy levels and support recovery. Avoid heavy meals close to workout times.

Fueling for Workouts

Proper fueling is crucial for energy and recovery. Focus on a balanced diet rich in complex carbs, lean proteins, and healthy fats. Consume meals high in carbs 1-3 hours before running, such as whole grains, fruits, or lean meats. Stay hydrated with water or electrolyte-rich drinks to prevent dehydration. Avoid heavy or high-fiber meals close to workout times to minimize digestive discomfort. Post-run, refuel with a mix of carbs and protein within 30-60 minutes to aid recovery.

Hydration Tips for Optimal Performance

Staying hydrated is essential for performance and recovery. Drink 16-20 ounces of water 1-2 hours before running and 7-10 ounces every 10-15 minutes during workouts lasting over 60 minutes. Incorporate electrolyte-rich drinks for long runs to prevent cramps. Monitor urine color—pale yellow indicates proper hydration. Avoid overhydration and adjust intake based on weather and sweat rate for optimal balance.

Mental Preparation and Motivation

Mental preparation is crucial for a successful 10K. Set realistic goals, practice positive affirmations, and visualize success. Stay motivated by tracking progress and celebrating small achievements daily.

Setting Realistic Goals

Setting realistic goals is essential for staying motivated. Aim to complete the 10K without focusing solely on speed. Break your journey into smaller milestones, like increasing weekly mileage or completing longer runs. Celebrate each achievement to build confidence. Create a timeline that aligns with your progress, ensuring goals are achievable and adaptable. This structured approach will keep you focused and motivated throughout your training.

Staying Motivated Throughout the Plan

Maintaining motivation is crucial for success. Track your progress by logging runs and celebrating small victories. Find a running buddy or join a group for accountability and support. Reward yourself after reaching milestones, and remind yourself of your “why” to stay focused. Consistency and positive reinforcement will keep you motivated throughout your 10K training journey.

Race Day Tips and Preparation

Arrive early, wear proper attire, and stay hydrated. Avoid new gear or foods. Mentally prepare with positive affirmations and visualize success to ensure a confident start.

Final Week Taper and Rest

Reduce mileage by 50-70% in the final week to allow muscles to recover. Focus on short, easy runs to maintain rhythm without fatigue. Incorporate rest days to ensure peak performance on race day. Avoid new activities or intense workouts to prevent injury. Proper rest is crucial for optimal energy and stamina during the race.

What to Expect on Race Day

Arrive early to account for parking, bib pickup, and pre-race prep. Expect excitement and crowds at the starting line. The course will be marked with mile signs, water stations, and cheering supporters. Stay hydrated and pace yourself to maintain energy. The finish line will be exhilarating, with medals and refreshments waiting. Enjoy the achievement of completing your first 10K!

Downloading the 10k Training Plan PDF

Easily download our 10K Training Plan PDF for free, designed for beginners aiming to run their first 10K. Accessible online, it includes a structured schedule with detailed workouts and tips. Print it to track your progress and stay motivated throughout your journey to race day.

Free Resources Available Online

Access a variety of free resources online, including downloadable 10K training plans tailored for beginners. Websites offer printable PDF schedules, detailed workout guides, and expert tips to enhance your training. Utilize these tools to stay organized, track progress, and prepare effectively for your first 10K race.

Printing and Tracking Progress

Printing your 10K training plan allows you to easily track workouts, set goals, and monitor progress. Use the PDF to create a physical copy, complete with charts for logging runs, cross-training, and rest days; Tracking progress helps maintain motivation and ensures consistency, making it easier to stay on course throughout your 10-week journey.

Maintaining Motivation and Overcoming Challenges

Stay motivated by setting realistic goals and celebrating small achievements. Overcome challenges by staying consistent, focusing on progress, and embracing rest days to avoid burnout.

Common Mistakes to Avoid

Beginners often overtrain, leading to injuries. Avoid increasing mileage too quickly and neglecting rest days. Poor pacing and improper nutrition can hinder progress. Stay hydrated, listen to your body, and avoid skipping warm-ups. Consistency is key, but so is recovery. Balancing effort with rest ensures steady improvement and prevents burnout.

Staying Consistent and Positive

Consistency is crucial for progress. Track your workouts and celebrate small milestones to stay motivated. Surround yourself with supportive runners and focus on effort, not perfection. Positive mindset helps overcome challenges, while setting realistic goals keeps you driven. Remember, every step forward is a victory on your journey to completing a 10K.

jensen rv tv manual

Jensen RV TVs are designed for durability and lightweight construction, making them ideal for recreational vehicles. They feature jCOM protocol, HDMI inputs, and USB ports for enhanced connectivity, ensuring a seamless entertainment experience on the go.

1.1 Overview of Jensen RV TV Models

Jensen RV TVs offer a range of models, including the JE4023 and JE4015, designed with lightweight, durable construction. These LED TVs feature jCOM protocol for HDMI connectivity, USB ports, and VGA inputs, ensuring compatibility with various devices for an enhanced entertainment experience in recreational vehicles.

1.2 Importance of the Jensen RV TV Manual

The Jensen RV TV manual provides essential instructions for safe installation, operation, and troubleshooting. It details safety precautions, wiring guidelines, and optimal usage tips, ensuring users maximize their TV’s performance while adhering to critical safety standards for reliable entertainment in their recreational vehicles.

Safety Precautions

Adhering to safety guidelines is crucial to prevent electrical hazards. Ensure proper grounding, avoid overloading power sources, and handle the TV carefully to prevent physical damage. Professional installation is recommended.

2.1 Handling and Installation Safety

Always handle the TV with care to avoid damage. Install on stable surfaces to prevent tipping. Ensure proper grounding and avoid overloading power sources. Use a soft, dry cloth for cleaning. Professional installation is recommended to ensure safety and compliance with manufacturer guidelines.

2.2 Power Sources and Grounding

Connect the TV to a 12V DC power source or 110V AC as specified; Ensure proper grounding to prevent electrical shock. Avoid overloading circuits and use surge protectors. Regularly inspect power cords for damage and replace if necessary to maintain safety and optimal performance.

2.3 Electrical Warnings and Precautions

Avoid exposing the TV to moisture or rain to prevent electric shock. Do not open the unit unless qualified, as internal components pose a risk. Ensure proper grounding and use approved power cords. Disconnect power before cleaning to maintain safety and prevent electrical hazards.

Installation and Mounting

Proper installation ensures optimal performance and safety. Plan the location carefully, considering viewing angles and accessibility. Use VESA-compatible mounts and ensure the surface is stable and secure for your Jensen RV TV.

3.1 Preparing for Installation

Before installing your Jensen RV TV, read the manual thoroughly and ensure all components are included. Handle the TV by the edges to avoid damage. Disconnect power sources and ensure proper grounding. Verify compatibility with VESA mounts and prepare the mounting surface for secure installation, following all safety guidelines provided in the manual.

3.2 Mounting the TV in Your RV

Select a stable location for your Jensen RV TV, ensuring proper ventilation and visibility. Use the provided VESA-compatible mounting hardware to secure the TV firmly. Align the TV with the mounting bracket, ensuring it is level and evenly spaced. Double-check all connections and tighten screws securely to prevent movement during travel.

3.3 VESA Mounting Standards and Compatibility

Jensen RV TVs are designed to meet VESA mounting standards, ensuring compatibility with a wide range of brackets. The VESA 200mm x 200mm pattern allows for secure installation in your RV, providing stability and proper alignment. This standard ensures easy compatibility with most wall and ceiling mounts, simplifying the installation process.

Operating the TV

Press the POWER button to turn the TV on. Use the remote to navigate menus, adjust settings, and control channels. Ensure proper antenna or cable connections for optimal reception.

4.1 Basic Controls and Functions

Press the POWER button to turn the TV on. Use the remote control to navigate menus, adjust volume, and change channels. The MENU button accesses settings, while INPUT allows switching between connected devices. Basic functions include channel selection, volume control, and power management. Refer to the manual for detailed guidance on remote operations.

4.2 Navigating the On-Screen Menu

Access the menu by pressing the MENU button on the remote. Use the arrow buttons to navigate through options like Picture Settings, Sound Settings, and Input Selection. Highlight desired options and press OK to select. The menu provides easy access to customize viewing preferences and device settings for an optimal experience.

4.3 Power Management and Energy Efficiency

Your Jensen RV TV features an Energy Saving mode to reduce power consumption. Enable this mode in the settings menu to optimize energy use. The TV also automatically switches to standby when inactive, ensuring efficient energy management while maintaining performance for your RV adventures.

Connecting External Devices

Jensen RV TVs offer multiple ports for easy connection of DVD players, gaming consoles, and sound systems. HDMI, VGA, USB, and RCA inputs ensure compatibility with various devices, enhancing your RV entertainment experience.

5.1 Connecting DVD Players and Gaming Consoles

Connect your DVD player or gaming console to your Jensen RV TV using HDMI for high-definition video and audio. Use RCA ports for older devices. Ensure the TV is set to the correct input. Refer to your Jensen TV manual for specific jCOM protocol instructions to enable seamless device communication and control using the dual-function remote.

5.2 Setting Up Sound Systems and Speakers

To enhance your audio experience with your Jensen RV TV, connect external sound systems using RCA line outputs or digital SPDIF for higher quality. Ensure the TV is set to output audio to external speakers via the on-screen menu. Adjust audio synchronization settings to match video for optimal sound quality and verify power requirements to prevent overloading.

5.3 Using HDMI and Other Input Connections

Connect external devices like DVD players or gaming consoles using HDMI ports for high-definition video and audio. Utilize VGA and USB ports for additional connectivity options. Ensure proper input selection via the on-screen menu. The jCOM protocol enables seamless communication with HDMI-equipped Jensen devices for enhanced functionality and control.

Picture and Sound Settings

Adjust picture settings like brightness, contrast, and color balance for optimal viewing. Customize sound settings to enhance audio quality. Utilize preset modes for tailored experiences, ensuring clarity and immersion in various environments.

6.1 Customizing Picture Settings

Access the picture settings menu to adjust brightness, contrast, and color balance. Fine-tune sharpness and saturation for clarity. Select preset modes like “Movie” or “Sports” for optimized viewing. Adjust backlight and color temperature for personalized preferences, ensuring vibrant and clear visuals in your RV environment.

6.2 Adjusting Sound Settings for Optimal Quality

Use the TV menu to adjust audio settings for clarity and balance. Enable equalizer modes to customize sound frequencies. Select surround sound or stereo options for immersive audio. Adjust volume levels and bass/treble settings to enhance your RV’s acoustic environment, ensuring crisp and clear sound output for an optimal viewing experience.

6.3 Using Preset Modes for Different Viewing Scenarios

Utilize preset modes like Movie, Sports, or Gaming for optimized viewing. These modes adjust color, contrast, and clarity for specific content. Select the appropriate mode to enhance your experience, ensuring vibrant visuals and clear details tailored to your entertainment needs in various settings like movies, sports, or gaming sessions.

Troubleshooting Common Issues

Identify symptoms, check connections, and consult the manual for solutions. Common issues include power problems, connectivity loss, or distorted visuals. Resetting or updating firmware may resolve many concerns.

7.1 Diagnosing Power Issues

Check the power cord and connections for damage or loose links. Ensure the TV is properly grounded and the power source is stable. Verify that the outlet or circuit breaker hasn’t tripped. If issues persist, consult the manual or contact customer support for further assistance.

7.2 Resolving Connectivity Problems

Ensure all cables are securely connected to the correct ports. Restart the TV and external devices. Check the input selection matches the connected device. If issues persist, refer to the manual or contact Jensen customer support for troubleshooting assistance and potential firmware updates.

7.3 Addressing Picture and Sound Distortion

Check all connections for tightness and proper alignment. Restart the TV and connected devices. Ensure the correct input is selected. If distortion persists, adjust picture and sound settings in the on-screen menu or reset to factory defaults for optimal performance.

Maintenance and Care Tips

Regularly clean the screen with a soft, dry cloth to avoid dust buildup. Avoid harsh chemicals and ensure proper ventilation to prevent overheating. Check for firmware updates to maintain optimal performance and functionality.

8.1 Cleaning the TV Screen and Exterior

Use a soft, dry cloth to gently wipe the screen and exterior. Avoid harsh chemicals, abrasive materials, or excessive moisture, which can damage the display or harm the finish. For stubborn spots, lightly dampen the cloth with distilled water, but ensure it’s thoroughly dry before wiping the TV. Regular cleaning prevents dust buildup and maintains clarity. For best results, use a microfiber cloth to avoid streaks or scratches. Always unplug the TV before cleaning to prevent any electrical issues. Never spray liquids directly on the screen or frame, as this could cause internal damage. Cleaning should be done gently to preserve the TV’s functionality and appearance.

8.2 Updating Firmware and Software

Regularly update your Jensen RV TV’s firmware and software to ensure optimal performance and access to new features. Check for updates in the TV’s menu under the settings or support section; Updates can typically be installed via a USB drive or directly through an internet connection. After updating, restart the TV to apply changes. Always follow the instructions provided in the manual or on-screen prompts to avoid errors. If issues arise, contact Jensen customer support for assistance. Keeping your TV updated ensures compatibility with external devices and enhances overall functionality. Use only authorized update sources to maintain system security and stability.

8.3 Storing the TV During Off-Season

When storing your Jensen RV TV during the off-season, clean the screen and exterior with a dry cloth to prevent dust buildup. Disconnect all cables and power cords to protect against electrical damage. Use a protective cover to shield the TV from moisture and dust. Store the TV in a cool, dry place, away from direct sunlight. Avoid extreme temperatures to maintain optimal performance. For added protection, place silica gel packets in the storage area to absorb moisture. Before storing, ensure the TV is completely powered off. Check the TV’s functionality before reinstalling it for the next season. Proper storage ensures longevity and prevents potential damage. Always follow the manufacturer’s guidelines for storage to maintain warranty validity and performance quality.

Remote Control Functions

The remote control offers essential buttons like POWER, CH, VOL, RETURN, and MUTE for easy navigation and operation of your Jensen RV TV.

9.1 Understanding Remote Control Buttons

The Jensen RV TV remote control is designed for user-friendly operation. Essential buttons include POWER for turning the TV on/off, CH for channel navigation, VOL for volume adjustment, RETURN to revert to previous screens, and MUTE to silence audio.

The MENU button provides access to settings, while arrow keys enable easy navigation and selection of options. This intuitive design ensures easy control over your viewing experience.

9.2 Programming the Remote for Multiple Devices

The Jensen RV TV remote can be programmed to control multiple devices, such as DVD players and sound systems, using specific codes found in the manual. This eliminates the need for multiple remotes and streamlines your entertainment setup.

Programming involves entering device codes, ensuring seamless operation of all connected components. This feature enhances convenience and simplifies control, making it easier to manage your RV’s entertainment system.

9.3 Troubleshooting Remote Control Issues

If the remote isn’t functioning, check the batteries and ensure the IR sensor is clear. Verify power issues by testing the TV manually. If problems persist, consult the manual for firmware updates or reset the remote to factory settings. Contact Jensen support if issues remain unresolved.

Advanced Features

Jensen RV TVs offer advanced features like jCOM protocol for HDMI device control, smart TV capabilities for streaming, and versatile USB and VGA ports for connectivity.

10.1 Using the jCOM Protocol

The jCOM protocol enables direct communication between Jensen RV TVs and HDMI-equipped devices like stereos and DVD players, allowing synchronized playback control and streamlined entertainment system management.

10.2 Accessing Smart TV Features

Access Smart TV features by connecting your Jensen RV TV to Wi-Fi. Use the remote to navigate to the Smart TV section in the menu, where you can access streaming apps, browse content, and update firmware for enhanced functionality.

  • Connect to Wi-Fi for internet access.
  • Use the remote to navigate Smart TV options.
  • Enjoy streaming services and app downloads.
  • Regularly update firmware for new features.

Refer to the manual for troubleshooting guidance.

10.3 Utilizing USB and VGA Ports

Connect external devices via USB for media playback or VGA for PC connections. Ensure compatible cables are used and devices are properly configured. Refer to the manual for specific instructions and supported formats to optimize functionality and avoid connectivity issues.

  • USB supports media playback from storage devices.
  • VGA enables connection to computers or laptops.
  • Use high-quality cables for reliable connections.

Warranty and Customer Support

Your Jensen RV TV is backed by a comprehensive warranty. Contact customer support for assistance, and locate authorized service centers for professional repairs and maintenance.

11.1 Understanding Your Warranty Coverage

Review your Jensen RV TV warranty to ensure coverage for parts and labor. Typically, warranties cover manufacturing defects for a specified period. Register your product and retain proof of purchase for warranty validation. Understand exclusions, such as damage from misuse or improper installation, to maintain coverage effectively.

11.2 Contacting Jensen Customer Support

For assistance with your Jensen RV TV, contact customer support via phone, email, or through their official website. Ensure you have your product model number and purchase details ready.Visit the Jensen support page for contact options and to access resources like manuals and FAQs for prompt resolution of your inquiries.

11.3 Finding Authorized Service Centers

To locate authorized Jensen RV TV service centers, visit the Jensen website or contact customer support for a list of approved centers. These centers provide expert repairs and maintenance, ensuring your TV is serviced by trained professionals using genuine parts for optimal performance and warranty compliance.

Jensen RV TVs offer durability, connectivity, and advanced features for a premium RV entertainment experience. Refer to the manual for setup, troubleshooting, and maintenance to ensure optimal performance and longevity.

12.1 Summary of Key Points

Jensen RV TVs are built for durability and lightweight use, featuring jCOM protocol for HDMI connectivity and USB ports. Manuals provide essential setup, troubleshooting, and maintenance tips, ensuring optimal performance and longevity. Proper installation, power management, and safety precautions are emphasized to enhance your RV entertainment experience.

12.2 Final Tips for Optimal Use

Regularly clean the screen and update firmware for optimal performance. Ensure proper installation and grounding to avoid electrical issues. Use the remote control effectively and refer to the manual for troubleshooting. Store the TV securely during off-season to maintain longevity and functionality.

graco 5 in 1 crib instructions

The Graco 5-in-1 crib offers versatility, safety, and convenience, converting from a crib to a toddler bed, daybed, and full-size bed with optional storage solutions.

Overview of the Graco 5-in-1 Convertible Crib

The Graco 5-in-1 Convertible Crib is a versatile and adaptive furniture solution designed to grow with your child. Available in multiple non-toxic finishes, it offers a seamless transition from a crib to a toddler bed, daybed, and full-size bed. Additionally, it features a spacious drawer for storage, making it a practical and stylish choice for nurseries. Its reversible headboard and customizable artwork panel add personalization options, ensuring it fits any nursery decor.

Key Features and Benefits

The Graco 5-in-1 crib combines durability and style, adapting to your child’s growth. Made from high-quality materials, it ensures long-lasting use. The crib features a sleek design and a spacious drawer for storage. Its neutral color options blend seamlessly with any nursery decor, making it a practical and elegant choice for parents seeking a versatile furniture solution.

Safety Features of the Graco 5-in-1 Crib

The Graco 5-in-1 crib prioritizes child safety with GREENGUARD Gold Certification, ensuring non-toxic finishes and compliance with JPMA standards for a secure environment.

GREENGUARD Gold Certification

The Graco 5-in-1 crib holds GREENGUARD Gold Certification, ensuring its materials meet rigorous emissions standards for chemical exposure and volatile organic compounds (VOCs). This certification guarantees a safer indoor air quality for your baby, aligning with global health standards and providing peace of mind for parents seeking non-toxic nursery solutions.

Non-Toxic Finishes and Materials

The Graco 5-in-1 crib features non-toxic finishes and materials, ensuring a safe environment for your baby. Constructed from high-quality, durable woods like solid reclaimed New Zealand Pine, the crib undergoes rigorous testing to meet or exceed global safety standards. The non-toxic finishes are baby-safe and available in multiple styles to complement any nursery decor, providing both functionality and aesthetic appeal.

Compliance with JPMA Standards

The Graco 5-in-1 crib adheres to JPMA (Juvenile Products Manufacturers Association) standards, ensuring it meets rigorous safety and quality requirements. This certification guarantees that the crib passes tests for structural integrity, mattress support, and hazard prevention, providing parents with confidence in its reliability and safety for their child’s well-being and development.

Assembly Instructions for the Graco 5-in-1 Crib

The Graco 5-in-1 crib includes detailed instructions for easy assembly. A QR code links to the BILT app for 3D interactive guidance, ensuring a smooth setup process with all necessary tools and hardware provided.

Step-by-Step Assembly Process

Begin by carefully unpacking and organizing all components. Read the instruction manual thoroughly. Identify and sort hardware by type. Use the BILT app via the QR code for 3D guidance. Start with the crib frame, attaching legs and side rails securely. Next, assemble the drawer and attach it to the base. Finally, place the mattress support and ensure all connections are tight. Double-check for stability and safety compliance before use.

Required Tools and Hardware

The Graco 5-in-1 crib requires an Allen wrench (provided) and a screwdriver for assembly. Ensure all bolts, screws, and cam locks are included in the hardware package. Additional tools like a rubber mallet may aid in tightening without stripping screws. The BILT app, accessible via the QR code, offers 3D interactive guidance to simplify the process. Organize all parts before starting to ensure efficiency and accuracy.

QR Code and BILT App for 3D Interactive Instructions

The Graco 5-in-1 crib includes a QR code linking to the BILT app, providing 3D interactive assembly guidance. This feature allows users to visualize each step, ensuring accurate and efficient installation. The app is free, user-friendly, and accessible via smartphone or tablet, making complex instructions straightforward and reducing assembly time significantly for a stress-free experience.

Choosing the Right Mattress for the Graco 5-in-1 Crib

Ensure a safe and comfortable sleep environment by selecting a mattress that fits snugly, is breathable, and meets safety standards for your baby’s well-being.

Recommended Mattress Size and Thickness

A mattress measuring 52″ x 27.95″ and 5-6 inches thick is ideal for the Graco 5-in-1 crib, ensuring a snug fit. This size accommodates all configurations, from crib to full-size bed, while maintaining safety and comfort. The thickness provides adequate firmness and support, crucial for a baby’s growing needs. Always check manufacturer guidelines for specific recommendations.

Breathable and Safe Mattress Options

Choose a breathable mattress with non-toxic materials and moisture-wicking fabrics to ensure airflow and temperature regulation. Opt for GREENGUARD Gold Certified mattresses, which meet strict emissions standards. A firm, snug-fitting mattress is essential for safety, preventing gaps that could trap your baby. Look for eco-friendly options made from organic cotton or plant-based foam for a healthier sleep environment.

Converting the Crib to Different Configurations

The Graco 5-in-1 crib adapts to your child’s growth, converting seamlessly from a crib to a toddler bed, daybed, and full-size bed.

Transitioning to a Toddler Bed

Transitioning the Graco 5-in-1 crib to a toddler bed is straightforward. Remove one side panel and attach the toddler rail, ensuring safety and accessibility. This conversion allows your child to climb in and out independently, making it a smooth transition to toddlerhood while maintaining the crib’s sturdy design and non-toxic finishes.

Converting to a Daybed

Converting the Graco 5-in-1 crib to a daybed involves removing the front rail and replacing it with the daybed conversion panel. This creates a comfortable seating option for lounging or napping while maintaining the crib’s original stability and style. The process is simple, requiring minimal tools, and ensures a seamless transition to meet your child’s growing needs.

Setting Up a Full-Size Bed

Converting the Graco 5-in-1 crib to a full-size bed involves attaching the headboard and footboard using conversion rails. Ensure all bolts are securely tightened for stability. The mattress should fit snugly within the frame. Follow the provided instructions for precise assembly, and double-check all connections to ensure safety and durability for long-term use.

Storage Solutions with the Graco 5-in-1 Crib

The Graco 5-in-1 crib offers ample storage with a spacious drawer, perfect for nursery essentials like diapers, clothes, and toys, keeping everything organized and within reach.

Spacious Drawer for Nursery Essentials

The Graco 5-in-1 crib features a generously sized drawer, ideal for storing diapers, baby clothes, and nursery supplies. Its smooth-gliding mechanism ensures easy access, while the large capacity keeps essentials organized and within reach. This convenient storage solution helps maintain a clutter-free nursery, making daily tasks more efficient for parents. The drawer is designed to complement the crib’s overall style and functionality, ensuring a seamless integration into any nursery decor.

Additional Storage Ideas

Beyond the built-in drawer, consider adding storage bins, baskets, or shelves nearby to keep toys, clothes, and accessories organized. Utilize wall-mounted storage units or under-bed containers to maximize space. These additions complement the crib’s functionality, ensuring a clutter-free nursery while maintaining a stylish and efficient environment for your baby’s essentials.

Maintenance and Cleaning Tips

Regularly clean the crib with a mild detergent and soft cloth. Avoid harsh chemicals to preserve the finish. Inspect hardware and tighten loose parts as needed.

Cleaning the Crib and Drawer

Use a mild detergent and soft cloth to clean the crib and drawer. Avoid harsh chemicals to maintain the non-toxic finish. Wipe down all surfaces gently, ensuring no moisture seeps into gaps. For stubborn stains, lightly scrub with a damp cloth. Allow the crib to air dry thoroughly before reuse. Regular cleaning ensures a safe and hygienic environment for your baby.

Maintaining the Finish and Hardware

Regularly inspect the crib’s hardware for tightness and lubricate moving parts with silicone spray. Dust with a soft cloth and avoid abrasive cleaners or polishes. For the finish, gently wipe with a damp cloth and dry immediately. Avoid exposure to direct sunlight to prevent fading. Follow manufacturer guidelines for maintaining the non-toxic, GREENGUARD Gold Certified finish, ensuring durability and safety for years.

Customization Options

Personalize your Graco 5-in-1 crib with a reversible headboard and customizable artwork panel, allowing you to match it with other nursery furniture for a cohesive look.

Reversible Headboard and Customizable Artwork Panel

The Graco 5-in-1 crib features a reversible headboard, offering two distinct styles in one design, and a customizable artwork panel. This allows parents to personalize the crib’s appearance, creating a unique and cohesive nursery theme. The reversible headboard provides flexibility for changing decor preferences, while the artwork panel adds a personal touch without additional costs or complexity.

Matching with Other Nursery Furniture

The Graco 5-in-1 crib seamlessly integrates with other nursery furniture, offering a cohesive look. It pairs perfectly with the Graco Story Changing Table and customizable chest, creating a harmonious design. Available in multiple finishes, it matches various nursery styles, ensuring a unified aesthetic. This compatibility allows parents to build a coordinated nursery, enhancing both functionality and visual appeal effortlessly.

Troubleshooting Common Issues

The Graco 5-in-1 crib may face assembly or hardware issues. Refer to the manual or BILT app for guidance. Contact customer support if issues remain unresolved.

Addressing Assembly Challenges

Common assembly issues include hardware misalignment or missing parts. Use the QR code and BILT app for 3D guidance. Ensure all pieces are identified before starting. If stuck, refer to the downloadable manual or contact Graco support for assistance. Double-check instructions to avoid errors and ensure a secure, stable structure for your child’s safety.

Resolving Hardware or Part Issues

If hardware or parts are missing or damaged, refer to the model number on the product sticker to identify and order replacements. Use the BILT app or downloadable manual for part identification. Contact Graco customer support for assistance with faulty components. Ensure all parts are correctly matched to avoid assembly errors and maintain safety standards for your child’s crib.

The Graco 5-in-1 crib stands out for its safety, versatility, and durability, offering a reliable solution for parents seeking a long-lasting, adaptable crib for their child’s growth.

Final Thoughts on the Graco 5-in-1 Crib

The Graco 5-in-1 crib is a standout choice for parents, offering unmatched versatility, safety, and style. Its ability to adapt to different growth stages ensures long-term value, while its non-toxic finishes and GREENGUARD certification provide peace of mind. With customizable options and ample storage, it seamlessly integrates into any nursery, making it a practical and elegant investment for years to come.

Customer Satisfaction and Recommendations

Customers praise the Graco 5-in-1 crib for its durability, easy assembly, and stylish design. Many recommend it for its versatility and value, noting it grows seamlessly with their child. The spacious drawer and customizable features are particularly highlighted, making it a top choice for nurseries. Parents appreciate the clear instructions and eco-friendly materials, ensuring safety and satisfaction.

Additional Resources

Find downloadable manuals, assembly videos, and interactive guides for the Graco 5-in-1 crib, ensuring a smooth setup and optimal use of its features and configurations.

Downloadable Instruction Manuals

Graco provides comprehensive downloadable manuals for the 5-in-1 crib, offering detailed step-by-step assembly guides, safety tips, and configuration instructions. Visit the official Graco website or scan the QR code in the product packaging to access these resources. The manuals are available in PDF format, ensuring easy access and printing for convenient reference during setup and use.

Assembly Videos and Tutorials

Graco offers assembly videos and tutorials to guide you through the setup process of the 5-in-1 crib. These resources are available on platforms like YouTube and the official Graco website. Additionally, the BILT app provides 3D interactive instructions for a more immersive assembly experience. These tools ensure clarity and confidence when assembling your crib, making the process straightforward and stress-free.

safety first car seat instruction manual

Welcome to the Safety 1st Car Seat Instruction Manual, your comprehensive guide to ensuring your child’s safety and comfort while traveling. This manual provides detailed instructions for proper installation, usage, and maintenance of your car seat, helping you make informed decisions to protect your child. By following these guidelines, you can ensure a safe and secure travel experience for your little one.

Why Car Seat Safety Matters

Car seat safety is critical to protecting children during travel. According to experts, a properly installed and correctly used car seat can reduce the risk of fatal injury by up to 71%. A car seat acts as a protective barrier, ensuring your child is secured in the event of sudden stops or accidents. It also helps prevent ejection from the vehicle, which is a leading cause of severe injuries. Remember, a car seat is not just a legal requirement but a moral responsibility to safeguard your child’s life on the road.

Overview of the Safety 1st Brand

Safety 1st is a trusted brand dedicated to providing innovative and reliable safety solutions for children. Founded with a mission to protect kids, the brand offers a wide range of products, including car seats, strollers, and baby monitors. Known for their commitment to safety and comfort, Safety 1st car seats are designed with advanced features like side-impact protection, adjustable harnesses, and easy-installation systems. Their products are rigorously tested to meet or exceed global safety standards, ensuring parents can trust the brand to safeguard their children. With a focus on innovation and durability, Safety 1st remains a top choice for families worldwide.

Understanding the Components of the Safety 1st Car Seat

The Safety 1st Car Seat features a base, shell, harness, and canopy. The base secures to the vehicle, while the shell protects your child. The harness ensures proper restraint, and the canopy provides shade. The LATCH system simplifies installation, and adjustable features accommodate growth. Each component is designed for safety, comfort, and ease of use.

Key Features of the Safety 1st Car Seat

The Safety 1st Car Seat is designed with innovative features to ensure maximum safety and comfort. It includes a LATCH system for secure installation, an adjustable harness to accommodate growth, and side impact protection for enhanced security. The seat also features a recline function for optimal positioning and washable fabrics for easy maintenance. With a 10-year lifespan, it offers long-term reliability. These features combine to provide a safe, comfortable, and convenient solution for your child’s travel needs.

The car seat is built to grow with your child, offering versatility and durability. Its user-friendly design ensures easy adjustments and installations, while the integrated canopy provides shade and protection. Safety 1st prioritizes your child’s safety with rigorous testing and compliance with safety standards. This car seat is a reliable choice for parents seeking a combination of quality, functionality, and peace of mind.

Parts of the Car Seat and Their Functions

The Safety 1st Car Seat is comprised of essential components designed for safety and convenience. The base provides stability and is secured to the vehicle using the LATCH system or a seatbelt. The harness ensures your child is snugly and safely restrained, while the chest clip keeps the harness properly positioned. The canopy offers shade and protection from the elements. The recline adjustment allows for optimal positioning, and the washable cover simplifies maintenance. Each part works together to provide a secure and comfortable environment for your child.

Understanding these components is crucial for proper installation and use, ensuring your child’s safety on every journey.

Choosing the Right Car Seat for Your Child

Selecting the right car seat involves considering your child’s age, weight, and height. Ensure the seat fits your vehicle and meets safety regulations. Proper fit and correct usage are essential for maximum protection; Always refer to the manual for guidance on selecting the appropriate model for your child’s needs.

Types of Car Seats Offered by Safety 1st

Safety 1st offers a variety of car seats designed to meet the needs of children at different stages. Their lineup includes all-in-one, convertible, infant, booster, and combination car seats. Each type is tailored to specific age groups and weight ranges, ensuring proper fit and safety. For instance, the Grow and Go model adapts from rear-facing to forward-facing and eventually to a booster seat, accommodating children from 5 to 100 pounds. Safety 1st also emphasizes innovative features like side-impact protection and easy installation systems. Their seats are built with durable materials and are designed to provide long-lasting safety and comfort for your child.

How to Select the Correct Car Seat Based on Age and Weight

Choosing the right car seat involves considering your child’s age, weight, and height. Rear-facing seats are for newborns up to 2 years or until they reach the seat’s weight limit. Forward-facing seats are suitable for toddlers who outgrow rear-facing seats, typically from 2 to 7 years. Booster seats are for older children until they can safely use a vehicle seatbelt, usually from 4 to 12 years. Always check the car seat manual and your vehicle manual for specific guidelines to ensure proper fit and safety for your child.

Installation Guidelines

Ensure proper installation by consulting both the car seat manual and your vehicle’s manual. Follow step-by-step instructions to secure the seat tightly and verify its correct positioning for maximum safety.

Preparation for Car Seat Installation

Before installing your Safety 1st car seat, ensure you’ve read both the car seat manual and your vehicle’s manual. Check the car seat for any damage or expiration dates. Clean the seat to ensure a secure fit and prepare your vehicle by adjusting seats and belts. Familiarize yourself with LATCH anchors or seatbelt installation methods. Gather all necessary tools and accessories, such as the base or tether, to streamline the process. Proper preparation ensures a safe and correct installation, protecting your child during travel.

Step-by-Step Installation Process

Begin by reading both the car seat and vehicle manuals. Position the car seat in the backseat, ensuring it’s rear-facing for infants or forward-facing for older children. Secure the seat using LATCH anchors or a seatbelt, tightening until firm. For rear-facing, the base should be at a 30-45° angle. Use the tether strap for forward-facing seats to prevent excessive movement. Check the seat’s fit by shaking it gently—it should not move more than 1 inch side-to-side. Finally, test the seat with your child to ensure proper fit and safety.

Proper Use and Maintenance

Ensure your child is securely buckled with the harness snug and chest clip at armpit level. Regularly clean the seat with mild soap and water, avoiding harsh chemicals. Store the manual for future reference and check for wear and tear to maintain safety and functionality over time.

Securing Your Child in the Car Seat

Properly securing your child in the car seat is critical for their safety. Ensure the harness straps are snug, with no excess material, and the chest clip is at armpit level. Always fasten the seatbelt or LATCH system correctly and verify the seat is tightly installed. Use the pinch test to check harness tightness—no fabric should bunch. Regularly inspect the seat for wear and tear. Never leave the child unattended and ensure the car seat expires only after its recommended lifespan. Always follow the manual’s guidance for secure and safe usage.

Cleaning and Maintaining the Car Seat

Regular cleaning and maintenance ensure your car seat remains safe and hygienic. Use mild soap and water to wipe down surfaces, avoiding harsh chemicals that could damage materials. Never soak or submerge the seat, as this may harm its integrity. Inspect straps and buckles for wear and tear, replacing any damaged parts immediately. Check for stains or odors and address them promptly. Always refer to the manual for specific cleaning instructions. Proper maintenance ensures the car seat remains reliable and comfortable for your child.

Safety Guidelines and Best Practices

Adhere to safety guidelines for optimal protection. Properly install the car seat using your vehicle’s seatbelt or LATCH system. Always check the manual for specific instructions to ensure a secure fit.

Correct Positioning of the Car Seat

Proper positioning is crucial for your child’s safety. The rear middle seat is the safest option, as it minimizes side-impact risks. If unavailable, place the car seat in the outboard passenger side rear position. Ensure the car seat is securely installed and aligned with the vehicle’s seatbelt or LATCH system. Use the 5-step test to check if your child has outgrown their seat. Shoulder markers should align with your child’s shoulders, and the harness should fit snugly. Always refer to the manual for specific positioning guidelines.

Common Mistakes to Avoid

Avoid common errors that compromise safety. Not reading the manual is a major oversight, as it contains vital installation and usage details. Incorrect installation using both seatbelt and LATCH can lead to improper securing. Loose car seats are dangerous, so ensure a snug fit. Improper harness fit can leave your child vulnerable; always check tightness. Using expired seats risks safety, as materials degrade over time. Wrong positioning (e.g., switching to a booster too early) can reduce protection. Correcting these mistakes ensures maximal safety for your child.

Expiry and Replacement of the Car Seat

Car seats have an expiry date, typically 6-10 years from manufacture. Replace the seat if it’s expired, damaged, or involved in a crash. Always check the manual for specific guidelines to ensure your child’s safety.

Understanding the Expiry Date of the Car Seat

Car seats, including those from Safety 1st, have an expiry date, typically ranging from 6 to 10 years after manufacture. This date ensures the seat meets current safety standards and material durability. The expiry date is usually found on a sticker under the seat or in the manual. Factors like crashes, damage, or outdated safety features can also necessitate replacement. Always check the manual for specific guidelines, as using an expired or compromised car seat can risk your child’s safety. Replace the seat promptly if it exceeds its expiry date.

When and How to Replace the Car Seat

Replace your Safety 1st car seat if it is expired, damaged, or involved in a crash. Check the expiry date on the seat or in the manual. If the seat exceeds its lifespan or shows signs of wear, replace it immediately. After a crash, follow the manufacturer’s guidelines for replacement, even if no visible damage occurs. Always dispose of an old car seat responsibly and purchase a new one that meets current safety standards. Refer to the manual for specific instructions on replacement and disposal.

Troubleshooting Common Issues

Address common problems like loose installation or harness tightness by referring to the manual. Ensure proper fit and adjust as needed for a secure, safe fit.

Addressing Installation Problems

Common installation issues include loose fit, incorrect angle, or improper use of LATCH or seatbelt. Always refer to the vehicle and car seat manuals for guidance. Ensure the base is snug and level, using a car seat level if needed. Tighten straps firmly and check for no slack. If issues persist, consult a certified technician or contact customer support for assistance. Proper installation is critical for your child’s safety, so never skip verification steps.

Solving Common Usage-Related Concerns

Common issues like improper harness tightness or belt positioning can compromise safety. Always ensure the harness straps are snug and the chest clip is at armpit level. If the seatbelt or LATCH feels loose, adjust the tightening straps according to the manual. Regularly check for proper fit as your child grows. For persistent concerns, refer to the manual or consult a certified technician for guidance. Addressing these issues ensures your child’s safety and comfort during travel.

Additional Resources and Support

Visit the Safety 1st website for detailed guides, FAQs, and customer support contact information. Additional resources, such as instructional videos and user forums, are also available online.

Where to Find Additional Information

For further guidance, visit the Safety 1st website, which offers detailed instructional guides, FAQs, and customer support contact information. Additionally, you can access instructional videos and user forums for troubleshooting and tips. The NHTSA website also provides resources on car seat safety and installation. Downloadable checklists and charts are available to help with installation and selection. For more in-depth advice, consult child passenger safety organizations or certified technicians. These resources ensure you have all the tools needed to keep your child safe.

Customer Support and FAQs

For any questions or concerns, Safety 1st Customer Support is available to assist. Visit their official website for contact information, including phone numbers and email. The FAQs section addresses common inquiries about installation, maintenance, and product compatibility. Troubleshooting guides are also available to resolve installation or usage issues. If you need personalized help, certified technicians can provide expert advice. Additionally, live chat and community forums offer further support and shared experiences from other parents.

digital design and computer architecture pdf

Digital design and computer architecture form the backbone of modern computing, blending logic gates, microprocessors, and memory systems to create efficient and scalable digital solutions.

Overview of Digital Design

Digital design encompasses the creation of digital systems using logic gates, circuits, and advanced architectural techniques. It begins with fundamental concepts like logic gates and progresses to combinational and sequential circuits, forming the basis for modern computing. By integrating these components, digital design enables the development of microprocessors, memory systems, and communication architectures. The field emphasizes practical applications, such as embedded systems and high-performance computing, ensuring efficient and scalable solutions. This foundation is crucial for understanding computer architecture, as it bridges the gap between hardware and software, driving innovation in technology.

Importance of Computer Architecture

Computer architecture is fundamental to understanding how digital systems operate, bridging hardware and software to optimize performance and efficiency. It dictates how data is processed, stored, and transferred within a system, ensuring scalability and adaptability for evolving technologies. A well-designed architecture enables high-performance computing, artificial intelligence, and real-time applications, making it crucial for modern computing needs. By defining the interaction between hardware components, computer architecture supports advancements in fields like embedded systems and superscalar designs. Its importance lies in its ability to balance power consumption, speed, and cost, driving innovation and shaping the future of technology.

Digital Design Fundamentals

Digital design fundamentals involve logic gates, combinational circuits, and sequential systems, forming the basis for creating complex digital systems and microprocessors.

Logic Gates and Circuits

Logic gates are the fundamental components of digital systems, enabling basic operations like AND, OR, and NOT. These gates form the building blocks for constructing more complex digital circuits.

Combinational logic circuits combine multiple gates to perform specific functions, while sequential logic introduces memory elements, allowing systems to maintain state over time. Together, they form the backbone of modern computing.

Understanding logic gates and circuits is crucial for designing microprocessors and embedded systems, making them a cornerstone of digital design education and real-world applications in computer architecture.

Combinational and Sequential Logic

Combinational logic circuits produce outputs based solely on current input values, with no dependence on previous states. These circuits are designed using logic gates and are essential for tasks requiring direct input-to-output transformations, such as arithmetic operations.

Sequential logic, in contrast, incorporates memory elements like flip-flops, allowing outputs to depend on both current inputs and past states. This enables the creation of systems that maintain state, such as counters and finite state machines.

Understanding both combinational and sequential logic is fundamental to designing complex digital systems, as they form the basis for microprocessors and other advanced computer architectures. These concepts bridge the gap between basic logic gates and sophisticated computing systems.

A microprocessor is the core component of modern computers, executing instructions and managing data processing. It integrates the central processing unit (CPU), memory management, and input/output controls onto a single chip.

Microprocessors operate by fetching, decoding, and executing instructions, leveraging combinational and sequential logic to perform tasks efficiently. Their architecture includes registers, arithmetic logic units (ALUs), and control units, enabling complex computations.

Advancements in microprocessor design, such as superscalar architectures and pipelining, enhance performance, allowing multiple instructions to be processed simultaneously. These innovations are crucial for meeting the demands of high-performance computing in today’s digital landscape.

Computer Architecture Basics

Computer architecture involves the design and organization of a computer’s internal components, ensuring efficient data processing, memory management, and communication between hardware and software systems.

Memory Architectures

Memory architectures are fundamental to computer design, organizing how data is stored and accessed. A hierarchical structure optimizes performance and power, with faster, smaller memory closer to the CPU. Modern systems integrate advanced technologies like SRAM and DRAM, enhancing speed and efficiency. Emerging memories such as PCM and STT-MRAM promise further improvements. Effective memory management, including virtual memory techniques, is crucial for system performance, enabling efficient data retrieval and multitasking. Advances in memory architectures are vital for meeting the demands of high-performance computing, cloud systems, and next-generation applications, ensuring scalability and reliability in an evolving digital landscape.

Modern Architectures and Superscalar Design

Modern architectures emphasize high-performance computing through superscalar design, enabling processors to execute multiple instructions per clock cycle. Superscalar architectures decode, dispatch, and execute instructions in parallel, significantly boosting instruction-level parallelism (ILP). Techniques like out-of-order execution and speculative execution enhance efficiency by reducing pipeline stalls. These designs are crucial for meeting the demands of modern applications, including AI, scientific simulations, and real-time systems. Advanced memory and networking strategies further optimize performance, ensuring data is accessible when needed. Superscalar architectures are a cornerstone of contemporary computing, driving innovation in processor design and enabling faster, more efficient systems to tackle complex tasks.

Advanced Topics in Digital Design

Advanced topics in digital design explore cutting-edge methodologies, including high-performance memory strategies and networking designs, to optimize system efficiency and scalability.

Designing a MIPS Processor

Designing a MIPS processor involves understanding its architecture and instruction set. Starting from basic logic gates, combinational circuits, and sequential logic, the MIPS processor is built to demonstrate fundamental computer architecture principles. The MIPS architecture is widely used in educational settings to teach pipelining, hazard handling, and performance optimization. By constructing a MIPS processor, students gain hands-on experience with microarchitecture design, including instruction decoding, execution, and memory management. This process also introduces concepts like superscalar design, where multiple instructions are processed simultaneously, enhancing performance. The MIPS processor design serves as a practical example of translating theoretical digital design concepts into a functional computing system, bridging the gap between logic circuits and high-level computing.

High-Performance Memory and Networking Strategies

High-performance memory and networking strategies are critical for optimizing computing systems. Modern architectures employ advanced memory hierarchies, such as multi-level caches and non-uniform memory access (NUMA) designs, to minimize latency and maximize throughput. Networking strategies focus on high-speed interconnects, like InfiniBand or Ethernet, enabling efficient data transfer between nodes. These strategies ensure scalability and performance in distributed systems. By leveraging these techniques, digital systems achieve superior computational efficiency and responsiveness, making them suitable for demanding applications in fields like scientific computing, data centers, and real-time processing. These advancements are essential for meeting the growing demands of high-performance computing and data-intensive tasks.

C Programming for Digital Design

C programming is essential for embedded systems and low-level hardware interactions, making it a foundational skill in digital design and computer architecture applications.

Role of C in Embedded Systems and Simulation

C programming plays a pivotal role in embedded systems, enabling direct hardware manipulation and efficient resource utilization. Its low-level capabilities make it ideal for microcontrollers and real-time systems. In simulation, C is used to model digital circuits and systems, allowing designers to test and verify algorithms before physical implementation. This dual utility ensures C remains a cornerstone in both embedded systems development and simulation environments, providing a robust framework for innovation and problem-solving in digital design and computer architecture.

Visual and Interaction Design in Modern Systems

Visual and interaction design enhances user experience through intuitive interfaces, blending aesthetics with functionality to create seamless interactions across digital platforms and devices.

Role of Visual Designers in User Interaction

Visual designers play a crucial role in shaping user interaction by creating intuitive and aesthetically pleasing interfaces. They focus on UX/UI design, ensuring seamless user experiences across platforms. By crafting visual elements like typography, color schemes, and layouts, they guide users through digital products effortlessly. Their work emphasizes accessibility, making interfaces usable for all, including those with disabilities. Collaborating with developers and stakeholders, visual designers transform concepts into functional designs, balancing creativity with technical constraints. Their attention to detail ensures consistency and coherence, enhancing overall user satisfaction and brand identity. Ultimately, they bridge the gap between functionality and visual appeal, making digital systems both efficient and enjoyable to use.

The future of digital design and computer architecture lies in advancing high-performance memory systems, superscalar processor designs, and integrating efficient software solutions for enhanced computing experiences and innovation.

Evolution of Digital Design and Computer Architecture

Digital design and computer architecture have evolved significantly, from basic logic gates to complex microprocessors. Early developments focused on fundamental logic circuits, while modern advancements emphasize superscalar designs and high-performance memory systems. The integration of C programming has enhanced embedded systems and simulations, driving innovation. Visual design now plays a crucial role in user interaction, shaping how systems are experienced. As technology advances, future trends will likely include advanced memory architectures and efficient networking strategies, ensuring continued growth in digital solutions and computing capabilities. This progression underscores the importance of staying informed about the latest developments in the field.